

Introduction
Dust control in finish coats means keeping dust out of the final sanding layer so the surface stays smooth and clean. Use a vacuum with a dust extractor, seal doors and vents, and wear a mask to keep the work area breathable. Before you sand, clear the floor, cover gaps, and plan how you’ll handle edge areas.
Plan edge sanding and perimeter treatment so dust doesn’t land on fresh flooring, and seal off the room to protect the edges. Use a sensible grit progression and test on a small area to get a feel for where you’ll stop. Always check the manufacturer instructions and local rules for any guidelines on grit steps, dust control equipment, and safety.
Key takeaways
- Plan dust barriers per room and seal doorways before sanding to contain debris.
- Use a progressive sanding sequence: start coarse, then fine grits with clean dust-free pads.
- Edge sanding requires low-angle strokes and masking to protect adjacent finishes.
- Vacuum between coats and wipe surfaces to minimize grit transfer.
- Inspect floor prep: remove high spots and clean before you sand to prevent telegraphing.
- Wear proper PPE and follow local rules; dust masks and ventilation are essential.
Table of Contents
- Introduction
- Key takeaways
- Why Nibs and Dust Ruin Finishes (and How to Think Like a Pro)
- Dust-Control Workflow — a Room-by-Room Step-by-Step Process
- Sanding Sequence and Grit Progression — Principles for Avoiding Dust Contamination
- Edges, Corners, Stairs and Tricky Profiles — Targeted Techniques
- Cleaning, Vacuuming and Between-Coat Etiquette
- Dust Collection Strategies and Clean-Room Tools for Diyers
- Finishing Systems, Application Methods and Denibbing Best Practice
- Planning, Safety, Cost Comparison and When to Get a Professional Quote
- Conclusion
- FAQ
Why Nibs and Dust Ruin Finishes (and How to Think Like a Pro)
Nibs are tiny raised specks left from imperfect leveling or tackiness that appear in the finish coat. They form when the coating drags over a surface, or when airborne dust settles before the film cures. Either way, airborne and settled dust becomes nibs that ruin a smooth finish.
Nibs and dust create pinholes, fisheyes, and orange-peel texture, and they weaken adhesion and abrasion resistance as the film cures. You’ll see uneven gloss, visible texture, and color variation after the coat hardens, and contaminants can speed moisture ingress. Prevention—dust containment, clean zones, proper masking, and tool care—saves time and yields a better, longer-lasting result than chasing fixes later.
What causes nibs at each stage
Nibs are tiny raised specks that form during the finish coat application. They’re caused by a few common sources:
Sanding fines: These are microscopic particles left behind after sanding. If not properly cleaned, they can stick to the wet surface and create nibs.
Debris from adjacent rooms: Construction or renovation work in nearby areas can kick up dust that settles on your fresh coat.
Airborne particles: Even outdoor air contains tiny particles that can settle on your finish. And tool contamination: Tools like trowels or rollers can pick up debris and transfer it onto the surface.
The cost of ignoring dust
Skipping dust-control steps might seem like a quick fix, but it comes at a price:
Time: You’ll spend more time fixing defects than if you’d prevented them in the first place. Re-sanding, spot repairs, or recoating all take time.
Rework: Ignoring dust can lead to pinholes, fisheyes, and other defects that require rework. This means applying new coats, sanding again, and repeating steps you could have avoided.
Finish-quality trade-offs: A contaminated coat might look okay at first, but it won’t cure properly. This leads to reduced film integrity, uneven gloss, and poor durability. In the long run, you’ll spend more time maintaining or repairing your finish than if you’d done it right the first time.
Dust-Control Workflow — a Room-by-Room Step-by-Step Process
This workflow walks you room by room from a quick survey to identify dust sources, access points, and ventilation, then loops back into containment and protection before any extraction starts. The core loop is survey → protect → extract → clean → coat, repeated as you move from space to space. Keep doors sealed, designate clean and dirty zones, and set up temporary negative pressure if you can.
Use the right tools like a HEPA vac or air scrubbers if available, place wheel/barrel strategically, and follow a reproducible extraction order to minimize re-suspension. A steady clean-and-verify routine helps you catch dust before it moves to the next room, and you can protect finished areas during coats and do a quick post-coat clean and air purge before tackling the next space.
Step-by-Step Process
This section outlines a clear, practical sequence for dust-control workflow room by room. It starts with preparation and safety checks, then does the main work, and finishes with cleanup or final checks.
- Survey each room: Identify dust sources, access points, and ventilation.
- Protect rooms: Seal doors with plastic, create temporary negative-pressure zones if possible, and designate clean/dirty transitions.
- Extract dust: Select the right tools (HEPA vac, air scrubbers), place wheels/barrels, and extract in a reproducible order to reduce re-suspension.
- Clean and verify: Perform daily housekeeping (wet wipe, vacuum, misting or air purge if applicable), interim checks between coats, and use a simple checklist to confirm dust levels are acceptable before moving to the next room.
- Coat with control: Protect already finished areas, use targeted dust-control methods during each coating, perform post-coat cleaning and air clearance before tackling the next area.
Pre-job containment and protection
Before starting any work, create a temporary room enclosure using plastic sheets to contain dust. Seal vents with tape or specialized vent covers to prevent dust from escaping into other parts of the home.
Protect openings like doors and windows by sealing them with plastic sheeting. This helps maintain negative pressure in the work area and prevents dust from migrating into clean spaces.
Designate a ‘clean zone’ for your finishing tools and materials. Keep this area separate from the work area to minimize cross-contamination. Use a dedicated set of tools and supplies for this zone, and always enter it after completing tasks in the work area.
On-the-job extraction and housekeeping
Attach an extraction system to your sanders to remove dust at the source. This helps prevent dust from becoming airborne and settling on surfaces.
Use point vacuums for spot work, such as cleaning out corners or along baseboards. These tools help target specific areas where dust may accumulate.
Establish a routine vacuum/tack-cloth cycle between passes and coats. This helps remove any residual dust that may have settled on the surface during sanding or coating. Use a tack cloth dampened with mineral spirits to pick up fine dust particles.
Final clean-down and quality check before topcoat
Before applying the final finish, perform a repeatable clean checklist to reduce the risk of nibs. Start by vacuuming the surface with a HEPA vac to remove any loose dust particles.
Use a tack cloth dampened with mineral spirits to pick up any remaining fine dust. Wipe profiles and corners carefully to ensure no dust is left behind.
Inspect the surface under directional light to identify any missed spots or hidden dust. This helps catch potential issues before they become permanent in the final finish.
Sanding Sequence and Grit Progression — Principles for Avoiding Dust Contamination
The core idea here is to move from rough to finer abrasives in a logical sequence so each step cleanly reduces the scratches left by the previous one, while the dust sizes get finer as you go. Don’t lock yourself to fixed grit numbers—check the abrasive type and the machine guidance, and adjust based on what you’re seeing. When in doubt, follow the label or manufacturer instructions and tailor the progression to your surface and dust control setup.
This matters because finish quality and dust containment come from how you handle each transition: edges first, then field, and between grits with vacuum downtime or dust checks. You’ll learn to recognize when scratches are no longer visible and use quick go/no-go tests to decide when to move on, while avoiding traps like skipping a stage or piling up coarse dust. A repeatable, safe workflow keeps recontamination down and makes the DIY job clearer and cleaner.
Start coarse enough, then step up steadily
Begin with a coarse grit to remove the old finish and any unevenness. This initial pass is crucial as it sets the foundation for your final result.
Why start coarse? It’s like clearing a field before planting. You need to remove the old growth, weeds, and rocks (nibs) before you can create a smooth surface.
After the initial pass, step up steadily with progressively finer grits. Each finer grit refines the scratches left by the previous one, reducing dust particle size as you go.
Skipping steps generates coarse dust that causes visible nibs in your final finish. So, be patient and methodical – it’s worth the time to do it right.
Match edger grit to the field and blend transitions
The floor edger is your tool for tackling corners, edges, and hard-to-reach spots. But it’s not just about getting into those tight spaces – it’s about matching the work you do with the edger to what you’re doing in the open field.
Why match grits? If you use a coarser grit on the edges than in the field, you’ll create a visible line where the two meet. This is because the coarse grit leaves deeper scratches that the finer grit can’t fully refine.
To avoid this, start your edger work with the same grit as your first field pass. Then, step up together – if you’re moving to 80-grit in the field, move to 80 on the edges too. This way, you’ll blend the transitions smoothly.
Remember, dust control is key here too. Make sure to vacuum or wipe down edges between grits just like you would in the field. It’s the only way to keep that dust from causing problems later on.
Edges, Corners, Stairs and Tricky Profiles — Targeted Techniques
Edges, corners, stairs and tricky profiles demand disciplined perimeter work that keeps dust contained rather than spread across the room. Rely on hand-scraping for precise edge lines, careful edger use to avoid gouges or blowout, and small extraction tools that pull dust from tight radii without dragging it into ready-to-finish surfaces.
On stairs, gravity drives dust downhill, so design a step-by-step containment routine that starts where dust accumulates the most and uses per-step extraction, bottom-up or top-down flow as fits the space while keeping doorways sealed. For profiles and tricky shapes—radiuses, cornices, spindle-like posts, parquet edges—switch to handwork or tiny machines only when a full sweep would spread dust, and map a practical grit sequence that preserves clean edges between passes. Set up the job with masking, sealing off adjacent areas, suction-assisted edgers, and small vacuums; run a deliberate workflow that moves from rough to fine, then pause to check for gouges, missed spots, and dust leaks before proceeding.
Denibbing and hand-detailing around profiles
For tight spots and tricky profiles, hand-scrapers or fine sanding are your best bet. Start with a cabinet scraper to remove nibs without over-sanding the surrounding area.
Tip: Work in small sections, using long strokes along the grain. Be gentle; you can always take more off but you can’t put it back on.
For fine-tuning, switch to a fine-grit sandpaper (120 or 150) and sand lightly by hand. Use a sanding block for flat surfaces and wrap the paper around a dowel for curves.
Stairs and multi-level rooms
Staircases are dust magnets. Here’s how to keep them contained:
Isolate: Seal off the area below with plastic sheeting or a dust barrier. This stops dust from falling onto freshly cleaned surfaces.
Point-extraction: Use a small vacuum or a brush attachment to suck up dust as you go. Start at the top and work your way down, or vice versa – but keep it consistent to avoid cross-contamination.
Sequence: Sand one step at a time, then extract dust before moving on. This minimizes spread and keeps each step clean until you’re ready to tackle it with your final grit.
Cleaning, Vacuuming and Between-Coat Etiquette
The core idea is a repeatable between-grit and between-coat cleaning routine that minimizes fines by moving in a clear, repeatable sequence: vacuum thoroughly with the right filtration, follow with a tack or lint-free wipe, and then inspect every inch under strong, raking light to catch the last dust specks. Do not chase dryness assumptions—check the product cure windows and verify readiness before the next coat, because surfaces can feel dry while fines still cling to edges, corners, and texture features. Build in time for each step so you don’t rush and recontaminate the surface as you move from dusting to wiping to inspection.
This matters on the job because recontamination often hides in footwear tracks, inconsistent tack cloth pressure, or overlooked edge and breakout areas, and those lapses lead to fines that ruin the finish. A practical on-site routine includes a simple, repeatable checklist and a quick-reference workflow you can follow with your gloves on and the light on high enough to reveal the last specks, plus variations you can use for rough textures or different coatings. Document what you see and use clear criteria for “clean enough” and when to postpone the next coat; if in doubt, re-clean rather than risk blemishes or compromised cure windows.
Effective vacuuming techniques
Start by choosing the right nozzle for your vacuum. A wide, flat nozzle works best on walls and ceilings, while a narrow one is ideal for edges and tight spaces.
Work in overlapping, criss-cross patterns to ensure you cover every inch. Spend at least 30 seconds on each section to give the vacuum time to pick up all the dust.
For grooves and around nosings, use a crevice tool or even an old paintbrush to dislodge trapped debris before vacuuming. Remember, a thorough vacuum is your first line of defense against dust.
Tack-wiping, air flushing and final inspection
Use this checklist after vacuuming to ensure a thorough clean before the next coat. Start when the surface is just tacky enough to leave an imprint, but not yet dry.
- Tack-wipe with a clean, lint-free cloth. Use even pressure and work in one direction to avoid redistributing dust.
- Air-flush settled fines using a filtered air source. Hold it about 6 inches from the surface and move slowly to dislodge any remaining dust.
- Inspect under strong, raking light. Look for any missed spots or recontamination. If you see anything, clean it again.
- Check edges and breakout areas. These are common trouble spots. Make sure they’re as clean as the rest of the surface.
- Verify product cure window. Don’t assume dryness; check the manufacturer’s guidelines to ensure you’re not rushing the process.
- Inspect for signs of recontamination. This could be anything from footprints to new dust. If you see any, clean again before proceeding.
- Document your inspection. Note any issues found and how they were addressed. This helps maintain quality control.
- Check for ‘orange peel’ or other defects. These can indicate missed dust or other problems that need to be addressed.
Quick rule: If you’re unsure about any part of the process, clean it again. It’s always better to be safe than sorry.
Dust Collection Strategies and Clean-Room Tools for Diyers
Dust collection strategies for a DIY finish coat rely on a practical mix of extractor-equipped sanders, portable HEPA vacuums, temporary enclosures, and room air cleaners to cut sanding dust and ambient particles at the source. Each tool fits a stage in the workflow and helps keep surfaces cleaner as you work, while you verify filtration ratings and unit specs on the label or datasheet. Expect noticeable reduction but not zero dust; containment and airflow discipline matter as much as the tools you pick.
This matters because a well-planned setup lets you work more confidently in small-to-medium rooms without sealing off every area. Plan edge-to-edge containment, manage intake versus exhaust, and sequence tasks by grit to minimize cross-dust contamination. Use observable checks—dust on surfaces, filters loading—as practical cues to adjust the setup, and document when to swap filters or bags so you stay ahead of performance dips.
Room enclosures, door seals and airflow control
Create a controlled environment to minimize dust migration. Seal off adjacent spaces using plastic sheets and tape.
Negative air pressure: Set up an exhaust fan in the room’s doorway or window. This pulls dust out, preventing it from spreading into other areas.
Use a HEPA vacuum at the same time to capture fine particles. Keep doors closed and ensure all gaps are sealed for best results.
Air filtration and particulate control
Portable HEPA air purifiers help capture airborne fines during sanding and between-coat curing. Place them strategically to maximize their effectiveness.
Placement: Position the unit near the work area, with intake facing towards the dust source. Exhaust should be directed away from you and other workers.
For fan/filtration setup, consider using a box fan with a HEPA filter attached. This creates a simple yet effective air filtration system for small spaces.
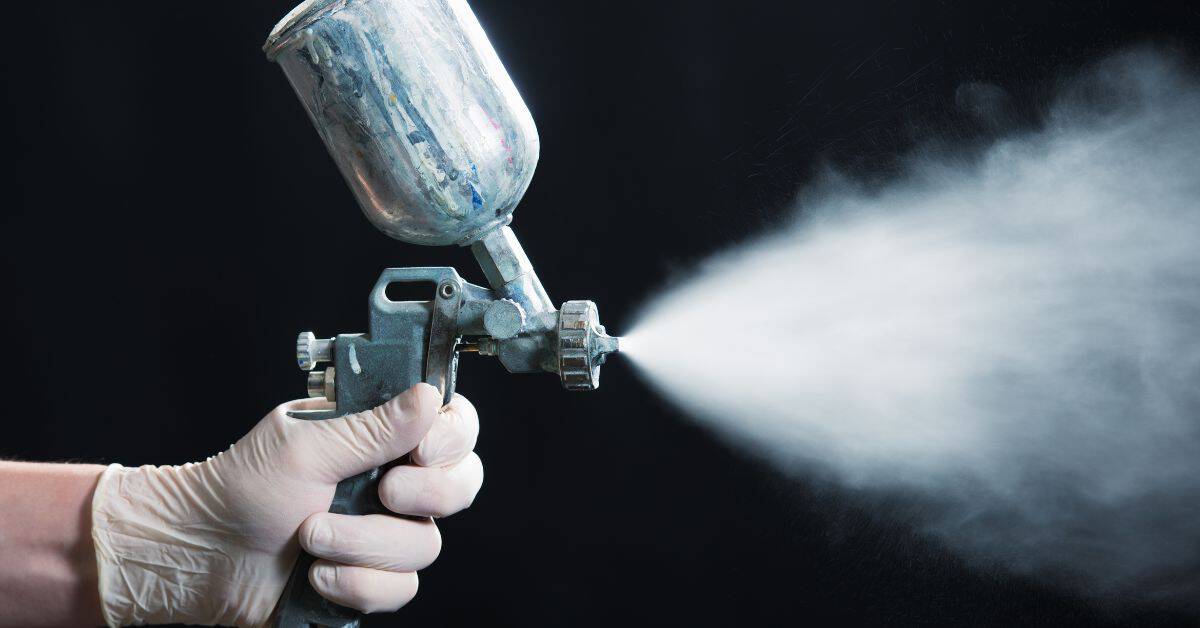
Finishing Systems, Application Methods and Denibbing Best Practice
Finish families differ: film-forming coatings build a surface film, while penetrating types soak in. Choose your method—brush, roller, or applicator—based on room size and finish type, and plan denibbing between coats with dust control in mind. Always check the manufacturer’s cure and recoat guidance before sanding or applying the next coat.
Getting this right keeps dust down, reduces finish damage, and makes the recoat go smoothly. Follow a dust-control workflow: sequence coats, contain dust, and adjust cleanup to the finish type, then verify cure per label before sanding or next coat. When in doubt, check the label or datasheet for your product.
How finish choice changes dust strategy
Choosing the right finish is crucial for managing dust. Film-forming finishes like latex and acrylic seal the surface, trapping dust within. They’re great for busy homes with kids or pets where a bit more dust won’t show as much.
Penetrating finishes like oil-based and shellac soak into the concrete, leaving it porous. They demand cleaner conditions to avoid visible dust particles. Ideal for formal spaces or high-end projects where every speck shows.
Pick your finish based on lifestyle and wear needs. If you can’t keep it pristine, go film-forming. For showrooms, choose penetrating.
Denibbing, scuff-sanding and final coats
Between coats, remove nibs gently to avoid creating new ones. Use a fine-grit sanding sponge (120-150 grit) with light pressure. Work in small sections, moving the sponge in straight lines.
Don’t press hard or scrub. That creates more dust and damages the finish. Before the last coat, prepare carefully:
Wipe down with a tack cloth to remove all dust. Inspect for any missed nibs or imperfections. Address them now; once that final coat goes on, it’s too late.
Planning, Safety, Cost Comparison and When to Get a Professional Quote
Plan the sanding project from start to finish: timeline, the order of sanding stages, containment, and cleanup to keep dust under control. Nail down safety steps—PPE, ventilation, and barriers—and decide what you can DIY vs what needs a pro. When you request a fixed-price quote, specify the scope, inclusions, exclusions, timelines, site access, and cleanup expectations.
Getting this right matters because it reduces dust, prevents delays, and protects your space. It also clarifies who handles containment and cleanup, so you’re not surprised by the bill. For quotes, ask for a detailed scope, exclusions, timelines, site access, cleanup, and any warranty, and check the label or manufacturer instructions for dust-control steps if you’re unsure.
Safety and PPE for Dust Control
Protecting yourself from dust is crucial. Here’s what you need:
Respiratory Protection: Use a NIOSH-certified N95 or P100 respirator for silica dust. Check product-specific recommendations and local regulations.
Eye Protection: Wear safety glasses with side shields or goggles to protect your eyes from debris.
Gloves: Use work gloves to protect your hands from cuts and irritants.
DIY vs Hire: Cost Drivers and When to Hire
The decision to DIY or hire depends on several factors:
Room Complexity: Simple rooms are easier to tackle yourself. Complex layouts may require a pro.
Equipment: You’ll need extraction equipment for dust control. Hiring pros often includes this cost.
Time and Rework Risk: DIY can save money but takes time. Pros may be faster, reducing rework risk.
When requesting a fixed-price quote, ask about:
– Scope of work
– Inclusions (materials, labor)
– Exclusions (items not covered)
– Timeline and site access
– Cleanup responsibilities
– Warranty coverage
Conclusion
Keep the finish pristine by controlling dust from the start. Prioritize safety, then durability and appearance, so every coat goes down clean and true without rework or costly fixes.
As you finish, proceed with a simple, room-wide check: seal off the space, vacuum thoroughly, wipe and ambient-dust with clean rags, apply in the recommended sequence, and test a small area before committing to a full coat. Move in clear, logical steps: prep and clean, sand in the right order, denib when advised, apply, cure, recheck, and repeat only as needed in a controlled, low-dust manner.
Common missteps to avoid are skipping prep or rushing between coats, neglecting edges and tricky profiles, and ignoring safety gear. Always test materials in a hidden spot first, protect your lungs and eyes, and keep dust out of the air by proper ventilation and between-coat etiquette. If the room is large, or the profiles are dense, consider a pro quote before proceeding to protect the surface and your investment—but with discipline and the right steps, you can finish confidently and safely.
Final thought: stay disciplined, follow the workflow, and you’ll deliver a durable, professional-looking result that will stand up to wear without unnecessary risk or damage. If in doubt or the space is complex, don’t push past safe limits—a quick professional consult can save time and avoid costly mistakes.
FAQ
What are the best dust-control techniques I can use while sanding?
Seal off the room as best you can and keep doors closed. Use a vacuum with a proper dust collection attachment and run it near the sanding zone to pull particles away from your breathing space.
How should I prep flooring before I start sanding to keep dust contained?
Protect the floor with a clean drop cloth or plastic sheeting. Tuck the edges tight at baseboards and use painter’s tape where the sander might touch, so dust has fewer routes to escape.
What is a safe grit progression to avoid heavy dust and achieve a smooth finish?
Start with a coarse grit only if necessary and move up in small jumps. Finish with a finer grit that matches your finish goals, keeping the surface clean between steps.
How do I handle edges and perimeter sanding without making a mess?
Switch to a corner or edging sander for tight zones and dust inlets for handheld work. Clean the edge area often and vacuum right after you lift the sander to prevent new dust from spreading inward.