
Introduction
Fish eyes are tiny clear holes or bubbles in painted surfaces caused by surface moisture or contaminants. They can show up when the surface isn’t clean, the air is dusty, or incompatible products are used. Fixing them starts with finding the source, then re-prepping the area before touching up.
Start by wiping the area clean and letting it dry thoroughly, then lightly sand the spot to smooth it. Repaint with fresh material and proper surface preparation, following the product label and your local conditions. If the issue repeats, recheck moisture sources, humidity, and the compatibility of primers and topcoats before proceeding.
Key takeaways
- Inspect for fish eyes during topcoat prep and verify surface cleanliness before painting.
- Contaminants may come from rags, rollers, or incompatible cleaners used.
- Check substrate- coating compatibility and exact manufacturer directions before selecting products.
- Ensure proper ventilation and avoid applying in damp or extreme humidity conditions.
- For small fixes, feather edges and recoat after cleaning and curing per label.
- Full-surface remediation requires thorough cleaning, priming, and staged inspections.
- Wear PPE, avoid skin contact with solvents, and follow label warnings at all times.
Table of Contents
- Introduction
- Key takeaways
- What Fish Eyes Are and How to Recognize Them
- Common Contamination Sources (Materials and Environment)
- Substrate and Coating Compatibility Issues
- Environmental and Application Factors
- Diagnosis and Inspection Techniques
- Step-by-Step Fixes for Small Areas (DIY)
- Full-Surface Remediation and Repainting
- Prevention Checklist and Best Practices
- Conclusion
- FAQ
What Fish Eyes Are and How to Recognize Them
Fish eyes are tiny, crater-like pits or raised bubbles that appear in a finished paint film. They often look like small circles with a distinct edge or a hollow center. Recognizing the defect early helps you pick the right repair method and avoid repainting larger areas.
These defects usually occur where the surface wasn’t sealed properly or where a contaminant disrupted film formation. Pay attention to texture, spread patterns, and how the film dries so you can distinguish fish eyes from other flaws. Accurate identification matters because the repair path depends on the underlying cause.
Definition and visual characteristics
Fish eyes are circular crater-like openings that appear in painted surfaces. They’re usually surrounded by a glossy rim, contrasting with the rest of the paint.
You’ll typically see fish eyes when the paint is still wet or shortly after it’s dried. They can be small, around 1/8 inch to 1/4 inch in diameter, but sometimes grow larger if not addressed promptly.
Fish eyes are caused by contaminants in the paint film that rise to the surface as the paint dries. These contaminants create a weak spot in the film, causing it to bubble up and form a crater-like depression.
How fish eyes differ from similar defects
Fish eyes are often confused with other paint defects. Here’s how they differ:
Popping: Unlike fish eyes, popping occurs when the paint film separates from the substrate due to poor adhesion. It appears as raised bubbles but doesn’t have a glossy rim or crater-like center.
Orange peel: Orange peel gives the paint surface a textured, dimpled appearance similar to an orange’s skin. Unlike fish eyes, it covers the entire surface and isn’t concentrated in specific spots.
Blistering: Blisters are raised, often filled with air or moisture, and can be large and irregularly shaped. Fish eyes, on the other hand, are smaller, crater-like, and usually appear early in the drying process.
Solvent entrapment: This defect occurs when solvents from thinners or previous coats don’t evaporate properly, creating a weak, often wrinkled paint film. Unlike fish eyes, solvent entrapment doesn’t create distinct crater-like openings.
Common Contamination Sources (Materials and Environment)
Contaminants in the air or on the surface can prevent the paint from wetting and bonding. Common offenders include oils, dust, silicone, and waxy residues left from cleaners or hand tools. Understanding what you’re dealing with helps you choose the right cleaning and prep steps.
Each contaminant interferes with adhesion in its own way, so assess whether the source is a finished surface, a masking product, or an environmental particle. Look at where the film shows defects to narrow down the likely culprit and determine the cleaning method best suited for that contaminant.
Silicon and Silicone-based Products
Silicone oils, spray lubricants, and stain blockers are common culprits behind fish eyes. They create strong hydrophobic spots that repel paint, making adhesion difficult.
These products leave an invisible film on the surface. Even if you can’t see it, your paint will know it’s there. It’ll bead up and form those pesky fish eyes.
Tip: Always check labels. If it says ‘silicone’ or ‘silane’, keep it away from your painting area.
Oils, Waxes, and Fingerprints
Skin oils, car wax residues, and handling marks can all cause fish eyes. They’re tough to remove with standard cleaning.
These contaminants create a barrier that paint can’t stick to. And they don’t always wash off easily. You might think you’ve cleaned the surface, but those fish eyes will tell you otherwise.
Tip: Use a degreasing agent before painting. It’ll cut through oils and waxes, giving your paint a clean slate to stick to.
Contaminated Tools, Rags, and Thinners
Brushes, rollers, tack cloths, or solvents contaminated with residues can transfer contaminants to your surface. This is how cross-contamination occurs.
- Dirty Brushes/Rollers: Contaminants from previous use can ruin a fresh coat of paint.
- Tack Cloths: If not cleaned properly, they can transfer dirt and debris onto your surface.
- Solvents/Thinners: Old or contaminated thinners can leave residues that cause fish eyes.
- Rags: Rags used to clean up spills can pick up contaminants and transfer them back onto the surface.
- Optional/Rentable Tools: Consider renting high-quality tools. They’re usually cleaner and better maintained than store-bought options. Prices vary, but it’s often worth it for a smooth finish.
Substrate and Coating Compatibility Issues
Substrate condition affects how a new coat lays down and cures. A previous coating that isn’t compatible with the new system can cause poor wetting and mimic fish eyes. Before repair, check what was last applied and the substrate type involved.
Incompatible layers—primer, sealer, or topcoat—can create a mismatch that looks like fish eyes after painting. Knowing the substrate history helps you decide whether a repair should include stripping, sanding, or selecting a compatible coating system.
Old coatings, primers, and incompatible additives
Residual additives, sealers, or certain primers on your substrate can cause fish eyes. They prevent new paint from wetting out properly.
Before you start painting, verify compatibility of your new coating with any existing layers. Check the manufacturer’s guidelines for recommended primers and topcoats.
If incompatible, you’ll need to remove or seal these old coatings before applying new paint. Sanding, scraping, or using a suitable primer can help.
Remember, incompatibility isn’t always obvious. Even if the old coating looks fine, it might still cause issues under a new one.
New substrates and surface treatments
Freshly treated or factory-coated panels often carry release agents or treatments. These can cause fish eyes if not cleaned or primed properly.
Plastisol, for instance, is a common substrate that needs special attention. Its factory coating must be removed or sealed before painting to prevent fish eyes.
Always check the manufacturer’s instructions for your specific substrate. Some may require a special primer or cleaning process.
Even if you’re working with a new, untreated surface, it’s wise to clean and prime before painting. This ensures any contaminants are removed and provides a better base for your paint.
Environmental and Application Factors
Airborne contaminants and ventilation influence how paint dries and how contaminants affect film formation. Inadequate airflow can cause dust to settle more readily on a fresh coat. Address these factors to reduce fresh fish eyes during the next coat.
Application technique also plays a role; improper spray distance, temperature variance, or inconsistent thinning can encourage defects. Implement practical controls like a cleaner environment and steady application to minimize recurrence.
Airborne contaminants and ventilation
Contaminants like overspray from other trades, silicone dust from nearby sanding, or HVAC systems blowing old dust around can cause fish eyes. Control airflow to keep these out.
Isolate the area with plastic sheets. Use HEPA filters in your ventilation system to trap particles.
Keep doors and windows closed, especially when spraying. If you’re using HVAC, run it on recirculate mode before painting.
Temperature, humidity, and flash-off issues
Extreme temperatures and high humidity can cause solvents to evaporate too fast or slow, leading to fish eyes. Stick to moderate conditions.
Follow the manufacturer’s recommendations for ideal painting conditions. If unsure, keep it between 65-85°F (18-29°C) and relative humidity below 70%.
Allow adequate flash-off time before applying the next coat to prevent solvent entrapment. This helps maintain surface tension and reduces defects.

Diagnosis and Inspection Techniques
Start with a visual check of the affected area for the size, pattern, and depth of the defects. Run a simple touch test to see if a contaminant remains on the surface. A careful inspection helps confirm contamination as the cause before you begin repairs.
Use low-cost DIY checks such as clean swabbing of suspected zones and comparing treated versus untreated spots. Document findings as you go so you can trace the source and plan a targeted repair rather than a full repaint.
Visual inspection and lighting tips
Before you start poking around, use your eyes. Visual inspection is quick and cheap.
- Oblique lighting: Shine a flashlight at an angle to see craters better.
- Magnification: Use a loupe or magnifying glass for close-ups.
- Defect patterns: Map where fish eyes are. They often follow contaminant paths.
- Color variation: Check for discoloration around defects. It might hint at the cause.
- Surface texture: Feel for rough or smooth spots. Contaminants can change surface feel.
- Edge inspection: Look at edges and corners. Contaminants often gather there.
- Previous repairs: Check if fish eyes are around old repair sites. It might be the same issue recurring.
- Tool marks: See if there are tool marks nearby. They could indicate a contaminated tool was used.
Quick rule: If you can’t see it, chances are you won’t fix it. So, look close and look smart.
Simple contamination tests (waterbreak, solvent wipe)
When visuals aren’t enough, use these simple tests to confirm contamination.
- Waterbreak test: Spray water on the surface. Hydrophobic contaminants repel water, forming beads or running off.
- Solvent-wipe test (acetone): Wipe with acetone on a clean cloth. If it turns dark or leaves residue, there’s contamination.
- Follow-up: If tests are positive, check for contaminants in the area using visuals and other tests.
- Negative results: If tests are negative, recheck your methods. Contaminants might be present but not detected by these tests.
Quick rule: These tests are cheap and easy. But remember, they’re not perfect. Use them wisely.
Step-by-Step Fixes for Small Areas (DIY)
Begin by cleaning the affected area with a suitable cleaner that removes oils and residues. Lightly scuff the surface to improve adhesion before reapplying primer or paint. Keep the area dry and free of dust during the repair process.
Feather the edges of the repair and apply the next coat with consistent technique. Use patient, shallow passes and avoid overloading the brush or roller. Follow manufacturer directions for recoat times and curing, and verify those instructions on the product label or data sheet.
Step-by-Step Repair Process
Follow these steps to fix small fish eye areas like a pro. Safety first, then prep, repair, and finish.
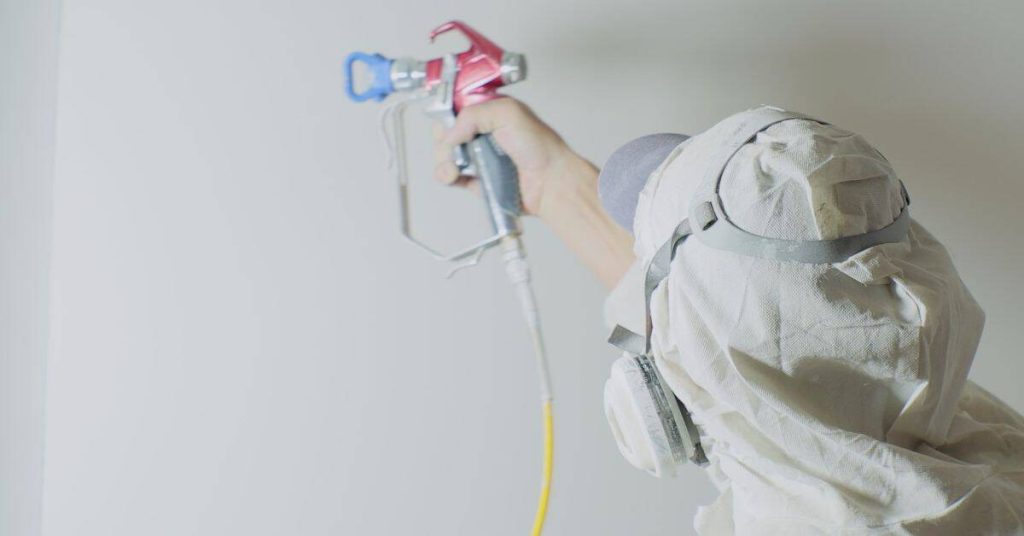
- Safety check: Ensure the area is well-ventilated and wear appropriate PPE (gloves, goggles).
- Prep: Gently clean the area with a damp cloth to remove dust. Let it dry.
- Main work: Identify fish eyes, then use a razor blade or scraper to carefully remove them.
- Sand: Lightly sand the affected area using 220-grit sandpaper, following the grain. Wipe off dust.
- Check: Inspect the area under good lighting. If it’s smooth and clean, proceed. If not, repeat steps until satisfied.
- Prime: Apply a compatible primer or tack coat to seal the surface and improve adhesion.
- Paint: Using a high-quality paint and brush, recoat the area in thin layers, allowing proper drying time between coats.
- Final check: Inspect your work once dry. If it’s smooth and even, you’re done. If not, lightly sand and repaint.
Spot repair procedure: clean, sand, recoat
To fix fish eyes in paint, follow this safe spot repair workflow:
Cleaning: Use an appropriate solvent (like mineral spirits or acetone) to remove any contaminants. Wipe with a clean cloth until no residue remains.
Sanding: Lightly sand the perimeter of the affected area using 220-grit sandpaper. This helps feather the edges and promotes better adhesion.
Priming/Sealing: Apply a compatible primer or tack coat to seal the surface and improve adhesion. Let it dry according to manufacturer’s instructions.
Repainting: Using a high-quality paint that matches your existing finish, recoat the area in thin layers, allowing proper drying time between coats.
Using adhesion promoters or sealers for localized repairs
In some cases, using an adhesion promoter or sealer can help isolate residual contaminants and improve topcoat adhesion:
When to use: If you suspect there are still contaminants present after cleaning and sanding, applying a sealer can help lock them in place.
How to use: Apply the sealer according to manufacturer’s instructions. Ensure it’s compatible with your substrate and topcoat. Let it dry completely before painting.
Pro tip: Always check product compatibility to avoid further issues. If unsure, consult a paint professional or contact the manufacturer.
Full-Surface Remediation and Repainting
Decide if the defect is isolated or if the entire surface shows signs of adhesion problems. When localized repair isn’t enough, a larger strip and repaint may be necessary. Consider the overall durability and color match in the decision.
High-level options include stripping back to a clean substrate or performing a complete repaint with a compatible system. Check substrate compatibility and surface preparation requirements in the product instructions or with the manufacturer before proceeding.
When to strip vs. sand and recoat
Before you decide whether to strip or just sand and recoat, consider these factors:
Extent of contamination: If it’s limited to a few spots, sanding might be enough. But if it’s widespread, stripping is your best bet.
Substrate condition: If the surface is in good shape, you can get away with just sanding and recoating. But if it’s damaged or weak, stripping allows you to start fresh.
Coating system: Some paints don’t play nice with others. If your old paint isn’t compatible with your new one, stripping is the way to go.
Surface prep workflow before repainting
Here’s a step-by-step surface prep workflow to ensure a smooth paint job:
1. Cleaning and Degreasing: Start by cleaning the surface with a degreaser to remove any dirt, grease, or grime.
2. Mechanical Abrasion: Use sandpaper or a power sander to rough up the surface. This helps paint adhere better.
3. Solvent Testing: Before priming, do a solvent test to ensure there are no hidden contaminants. Just rub some solvent on the surface and see if it beads up or wipes away clean.
4. Priming: Apply a coat of primer to seal the surface and provide a better base for your topcoat.
5. Final Inspection: Before you start painting, do one last inspection to ensure the surface is clean, dry, and free of any defects.
Prevention Checklist and Best Practices
Implement a routine that covers surface prep, cleaner selection, and tool cleanliness. Keep masking materials and solvents organized to avoid cross-contamination. A simple plan reduces recurrence and speeds up future projects.
Control the jobsite environment with adequate ventilation, dust control, and proper storage of paints and primers. Use straight, repeatable application techniques and follow label directions to minimize defects in future coats.
Tools and materials checklist
Before you start painting, ensure your tools and materials are clean and uncontaminated. Use this checklist to double-check.
- Lint-free rags: Inspect for any dust or debris. Shake them out if necessary.
- Brushes/rollers: Check for old paint or contaminants. Clean them before use.
- Solvents: Ensure they’re fresh and uncontaminated. Discard if questionable.
- Protective coverings: Inspect for tears or dirt. Replace if needed.
- Cleaners: Check expiration dates. Dispose of old ones.
Quick rule: Always use uncontaminated consumables to minimize risk of contamination.
Jobsite protocols and visual checkpoints
Implement these simple protocols throughout your painting process to prevent contamination.
- No silicone nearby: Keep silicone products away from the jobsite. They can contaminate paint.
- Clean-room mindset: Maintain a clean workspace. Sweep and dust regularly.
- Tack checks: Perform tack checks on paint before application to ensure it’s not contaminated.
- Final visual inspection: Inspect the surface one last time for any contaminants before painting.
Quick rule: Regular, thorough visual inspections are key to preventing contamination.
Conclusion
Fish eyes are a sign of incompatible materials or mixed conditions. Fixing them now protects safety, durability, and the look of the finish, and it saves you from costly rework later. Stay deliberate and follow the checks and steps you already know work in the shop and on site.
Always move with a simple, practical checklist: start by confirming contamination sources and compatibility in a small test area, clean and prep the surface thoroughly, choose primers and coatings that match the substrate, apply per the product directions, address any full-surface remediation if needed, let it cure, then inspect and recoat if required, and finally implement the prevention steps for next time. Do the work in the right order, document what you changed, and test a patch before doing the whole job. Safety first means gloves, ventilation, and eye protection, plus never guess when a product isn’t behaving right.
Common mistakes to avoid are skipping the compatibility check, using the wrong cleaner or moisture-prone products, and rushing through masking or drying. Don’t skip cleaning, don’t mix products without confirming compatibility, and don’t apply coats over a damp or dirty surface. A simple safety rule is to test on a small area first, wait for the specified dry time, and inspect before moving on. If anything looks off, pause, re-evaluate materials, and revisit the prep steps.
If the problem spans large areas, or you’re unsure about substrate integrity or environmental controls, consider a pro—especially for full-surface remediation and repainting. With careful prep, correct product choices, and deliberate execution, you can restore a smooth, durable finish and keep future projects straightforward and safe. You’ve got this—steady, methodical work now pays off in long-lasting results.
FAQ
What quick checks should I do on the surface before painting to avoid fish eyes?
Wipe the surface with a clean cloth and a compatible solvent, then let it dry completely. Look for any slick or dull spots that don’t feel clean. A bright light or flashlight helps spot residues you might miss.
If cleaning doesn’t fix fish eyes, what’s likely going on and what should I do?
Contaminants like oil, wax, silicone, or moisture can stay behind. Remove the finish, scrub or abrade the area, and re-clean with the appropriate product per label, then dry thoroughly before repainting.
How should I choose primers and topcoats to prevent fish eyes in the next coat?
Check the label for compatibility with the existing coating. Test a small area first, and use products recommended or specified by the manufacturer. Don’t mix brands unless the instructions explicitly permit it.
What environmental or application conditions are risky, and how can I control them?
Avoid painting when the surface or air is too humid, dusty, or cooler/warmer than the product allows. Follow product instructions for temperature and drying times, and keep the area clean and free of dust during and after application.