
Introduction
The process of painting over old limewash involves several crucial steps that require careful timing to ensure a successful outcome. Understanding the duration and sequence of these steps is key to achieving a durable, long-lasting finish.
In this guide, we’ll walk you through each step, focusing on how long it takes to complete each task, so you can plan your project timeline effectively.
The Complete Timeline for Painting Over Old Limewash
From identification to application, here’s a detailed breakdown of the entire process and the time it takes for each step:
- Identification (15-30 minutes): Inspect your surfaces to confirm they are indeed limewashed. Check for a chalky finish, color shifts, and a characteristic lime odor when wet.
- Preparation (2-4 hours): Clean the surface thoroughly using a suitable cleaner or water with a mild detergent. Allow it to dry completely before proceeding.
- Testing and Neutralization (30 minutes – 1 hour): Test adhesion by scraping with your fingernail and performing a damp wipe test. If necessary, neutralize or remove limewash as per manufacturer instructions to ensure primer bond.
- Priming (1-2 hours): Choose a breathable primer compatible with lime-based coatings. Apply the primer according to the manufacturer’s instructions, allowing adequate drying time between coats.
- Painting (2-4 hours per coat): Apply your chosen paint in thin, even coats, allowing sufficient drying time between applications. The number of coats will depend on your desired coverage and the paint type.
- Troubleshooting and Final Inspection (30 minutes – 1 hour): Check for any signs of peeling, bubbling, or other issues. Make necessary touch-ups before declaring the project complete.
Key takeaways
The preparation stage is crucial as it significantly impacts the overall duration of your project. Proper cleaning and neutralization can take time but are essential for a successful paint job.
- Identify limewash by chalky finish, color shifts, and characteristic lime odor when wet.
- Test adhesion with fingernail scrape and damp wipe before painting.
- Neutralize or remove limewash as per manufacturer instructions to ensure primer bond.
- Use breathable primers compatible with lime-based coatings to prevent moisture trapping.
- Clean surfaces thoroughly and test in a hidden area before full coating.
- Safety: wear eye protection and a mask; limewash dust irritates eyes and lungs.
Table of Contents
- Introduction
- Key takeaways
- Understanding Limewash: Composition, Properties, and Why It Matters
- Identifying Old Limewash Vs Other White Coatings
- Risks of Painting over Limewash Without Proper Prep
- Preparing Limewashed Surfaces: Cleaning, Testing, and Neutralization
- Choosing the Right Primer: Types, Properties, and Compatibility
- Tools, Materials Checklist, and Surface Specs
- Application Best Practices: Priming and Painting Steps
- Troubleshooting, Visual Checkpoints, and When to Call a Professional
- Conclusion
- FAQ
Understanding Limewash: Composition, Properties, and Why It Matters
Limewash is a simple, mineral-based coating made from lime putty or hydrated lime mixed with water and sometimes pigments. It was traditionally used on masonry and plaster for its low cost and ability to shed surface dirt while allowing the substrate to breathe.
Two properties dictate how it behaves under paint: high alkalinity and vapor permeability. Those traits control adhesion, interact with modern binders, and determine whether a breathable paint system or neutralization step is needed—check product data sheets and manufacturer instructions for compatibility details.
What limewash is made of and how it cures
Limewash is a traditional wall coating made from slaked lime (calcium hydroxide) mixed with water. It’s like milk of lime, but thicker.
The chemistry here is simple: lime + water = limewash. But the real magic happens when it cures. When exposed to air, the limewash starts a process called carbonation. This is where the lime reacts with carbon dioxide from the air to form calcium carbonate – that’s your hard, protective layer.
Now, here’s what you need to know about this cure: it creates a surface that’s slightly porous and textured. This texture helps paint adhere better than on smooth surfaces. But remember, too much water in your limewash can leave it soft and powdery, so keep that mix right.
How aged limewash behaves differently than fresh applications
Aged limewash can act funny compared to fresh stuff. Over time, it can powder – that’s when the surface turns into a fine dust. This happens because the limewash has lost its binders over years of exposure to weather.
You might also see chalking. That’s when a white, chalky residue forms on the surface. This is usually due to salts leaching out from within the limewash. These salts can cause all sorts of issues if not dealt with properly.
Adhesion can be another problem. Fresh limewash sticks like glue, but aged stuff might not. This is because the binders that hold it together have broken down over time. So, when you’re painting over old limewash, expect to do some extra prep work to ensure good adhesion.
Identifying Old Limewash Vs Other White Coatings
Look for visual and tactile clues: limewash is usually thin, powdery when failing, and may reveal faint brushstroke patterns that sink into porous masonry. In contrast, modern emulsion or acrylic coatings sit on the surface and tend to chip or peel in thicker flakes.
Use simple in-place tests like light scraping to see if the layer powder-scrubs away, a drop of vinegar to indicate carbonate (it may fizz on lime residues), and a damp cloth to check for smearing or binder transfer. If results are unclear, verify with a manufacturer’s test kit or lab sampling recommended by product instructions.
Visual and tactile checks (appearance, sheen, and rubbing)
First off, look at the surface. Limewash has a distinctive matte, chalky finish. It’s not shiny like emulsion or acrylic paints.
Try gently rubbing your finger on it. If it leaves a white powdery residue, that’s a sure sign of limewash. Other paints won’t do this.
Pro tip: Limewash doesn’t form a film like other paints. It soaks into the surface and reacts with carbon dioxide in the air to form a protective layer.
Simple chemical and scratch tests to confirm limewash
Grab some white vinegar from your kitchen. Apply a small amount to an inconspicuous area. If it starts fizzing, you’ve got limewash. That’s the carbonates in the limewash reacting with the acid.
Now, try lightly scraping the surface with a coin or a nail. Limewash should crumble and flake off easily. Other paints will scrape off in large pieces or not at all.
Safety first: Always test in an area that won’t be visible. And remember, limewash dust can be harmful if inhaled, so wear a mask when disturbing it.
Risks of Painting over Limewash Without Proper Prep
Skipping preparation can lead to adhesion failure, blistering, and paint delamination as the breathable lime layer and the new paint compete for moisture transfer. Alkalinity can also break down certain binders, while salts trapped under limewash can migrate and cause staining or bubbling through successive coats.
Those failures shorten coating life and typically mean stripping back and redoing the work, which raises long‑term cost and labor compared with proper prep up front. When in doubt, follow manufacturer guidance and consider a test patch to reveal likely problems before finishing the whole surface.
How alkalinity and soluble salts affect paint systems
Limewash, being a lime-based product, leaves behind residual alkali even after it’s cured. This alkalinity can attack certain types of paint binders over time.
Soluble salts from the limewash can also migrate to the surface, causing staining and lifting. This is known as efflorescence. Some paints are more susceptible to these issues than others.
Water-based acrylic paints, for instance, may not fare well against high alkalinity or efflorescence. Oil-based paints might perform better but can still be affected over time.
Tip: Always check the paint’s compatibility with alkaline surfaces before application.
Common failure examples and timelines
Skipping proper preparation when painting over limewash can lead to various failures:
Short-term failures (within months): Blistering, bubbling, or peeling paint. These are often caused by trapped moisture or incompatibility with the underlying surface.
Long-term failures (years): Discolouration, chalking, or complete delamination of the paint film. These can result from continuous alkali attack, efflorescence, or UV degradation due to poor adhesion.
In both cases, the paint’s lifespan is significantly reduced, leading to costly re-painting jobs down the line.
Preparing Limewashed Surfaces: Cleaning, Testing, and Neutralization
Begin by removing all loose, powdery lime by dry brushing or gentle scraping and then clean the surface with appropriate methods to remove dirt and salts. After cleaning, perform a surface pH test and salt checks rather than guessing—use a pH indicator or test strips and a salt testing method per product instructions.
If the pH is strongly alkaline or salts are present, neutralization and salt mitigation steps are required; follow manufacturer instructions for the neutralizing agent and recheck before priming. Also decide whether removal to sound substrate is needed—if the limewash is thick, unstable, or contaminated, removal may be safer than trying to stabilize it in place.
Methods to remove loose lime and contaminants safely
Before you start painting, it’s crucial to remove any loose lime and contaminants from your surface. Here are some safe methods:
Gentle Scraping & Brushing: Use a stiff-bristled brush or a scraper with a flexible blade to gently remove loose material. Be careful not to damage the substrate.
Low-Pressure Washing: Use a low-pressure washer (around 600-800 PSI) with a wide-angle nozzle to rinse off any remaining loose lime and dirt. Keep the nozzle at least 12 inches away from the surface to avoid damaging it.
If these methods aren’t enough, you might need to use a more aggressive stripping method. But remember, limewash is sensitive, so be gentle and test in an inconspicuous area first.
Neutralization and pH testing: how and when to do it
Limewash is highly alkaline. Before painting, you need to neutralize this alkalinity and ensure the surface is close to neutral (pH 7). Here’s how:
Neutralization: Use a dilute acidic rinse like white vinegar or a commercial limewash neutralizer. Apply it with a sprayer or a cloth, then let it sit for about 15 minutes before rinsing off.
pH Testing: After neutralizing, test the pH of your surface using pH test strips or a meter. Test multiple spots to ensure consistency. Keep testing and reapplying neutralizer until you’re close to neutral (pH 6-8).
Why test? Guessing won’t cut it. Alkalinity can cause paint failure, so make sure your surface is truly neutral before painting.

Choosing the Right Primer: Types, Properties, and Compatibility
Select primers that match a breathable, alkaline substrate: look for alkali-resistant, masonry, or silicate-compatible primers and breathable formulations designed for mineral substrates. Avoid non-breathable, solvent-heavy primers that can trap moisture against a lime-treated surface.
Read technical data sheets and product labels to confirm suitability for high pH substrates and for application over previously lime-treated walls. If the primer’s compatibility is unclear, consult the manufacturer’s instructions or technical support before proceeding.
Alkali-resistant and masonry primers: what they solve
Limewash is highly alkaline. Over time, it can break down paint systems. That’s where alkali-resistant and masonry primers come in.
These primers block high alkalinity, preventing it from damaging your topcoat. They create a barrier that stops the lime from reacting with your new paint.
But they’re not just about protection. They also improve adhesion. Limewash is porous, and these primers can penetrate deep into the surface, creating a strong bond between old and new.
Think of them as a shield against alkalinity and a glue that holds everything together.
Breathable silicate and mineral-compatible options versus non-breathable coatings
When it comes to limewash, breathability is key. Limewash needs to ‘breathe’ to stay healthy. That’s why you want a primer that allows this.
Breathable silicate and mineral-compatible primers are your best bet. They’re made for porous surfaces like limewash. They let moisture escape, preventing dampness from building up and causing problems later on.
Epoxy or heavy-solvent primers might seem tempting, but they can trap moisture. This can lead to long-term damage, like peeling paint or mold growth. So, stick with breathable options for the best results.
Remember, breathability is crucial. It’s what keeps your limewash – and your paint job – looking good in the long run.
Tools, Materials Checklist, and Surface Specs
Assemble a toolbox with sturdy wire brushes, scrapers, low‑pressure washers if appropriate, pH test strips or kits, salt test supplies, suitable primers, rollers/brushes, and PPE such as gloves, eye protection, and a respirator for dust or chemical use. Include small quantities for test patches and materials for patching or replastering if removal reveals damaged substrate.
Verify surface readiness: soundness (no loose areas), acceptable pH for the selected primer, and dry conditions per product guidance before priming. If any spec is uncertain, check the product label or manufacturer data sheet to avoid mismatches that lead to failure.
Essential tools and PPE for safe prep and priming
Before you start, gather these essentials to ensure a safe and efficient job.
- Natural bristle brushes: For applying primer and cleaning. Don’t use synthetic ones on limewash.
- Scraper: To remove loose lime and contaminants. Skip this, risk damaging paint later.
- Soft and stiff bristle brushes: Soft for gentle cleaning, stiff for scrubbing tough spots.
- Low-pressure washer (optional): For thorough cleaning without damaging the surface.
- pH strips: To test alkalinity. Skip this, risk applying paint to high pH surfaces.
- Respirator: Protect your lungs from lime dust during scraping and brushing.
- Gloves: To protect hands from lime burns and chemicals.
- Eye protection: Goggles or safety glasses to shield eyes from debris and splashes.
Quick rule: Always prioritize safety. Use the right tools for the job.
Surface condition specs to confirm before priming
Before you prime, ensure your surface is ready with these checks.
- Loose lime: Tap the surface. If it crumbles or flakes off, remove it all.
- Salt deposits: Look for white crystals. If present, clean them off with a solution of water and vinegar (1:1).
- pH level: Test with pH strips. Aim for neutral (7) or slightly acidic (6-7).
- Moisture levels: Use a moisture meter. readings should be below 15%.
- Stability: Check for cracks, gaps, or movement. Prime unstable surfaces at your peril.
- Consistency: Test multiple areas. Surfaces can vary, even within the same wall.
Quick rule: A thorough check now saves you paint and headaches later.
Application Best Practices: Priming and Painting Steps
Work from a clean, neutralized, and tested test patch through priming and finishing coats, keeping to the substrate and product guidance on application methods. Apply primer evenly with the recommended tool, allow the manufacturer-specified drying checks, and monitor conditions like humidity and temperature as advised by the product literature.
Do a small test area first to confirm adhesion and appearance before completing the project, and stagger work in manageable sections so you can inspect and correct issues early. When in doubt about drying or adhesion, follow the manufacturer’s instructions or contact technical support for the primer or paint.
How to apply primers and what to watch for during curing
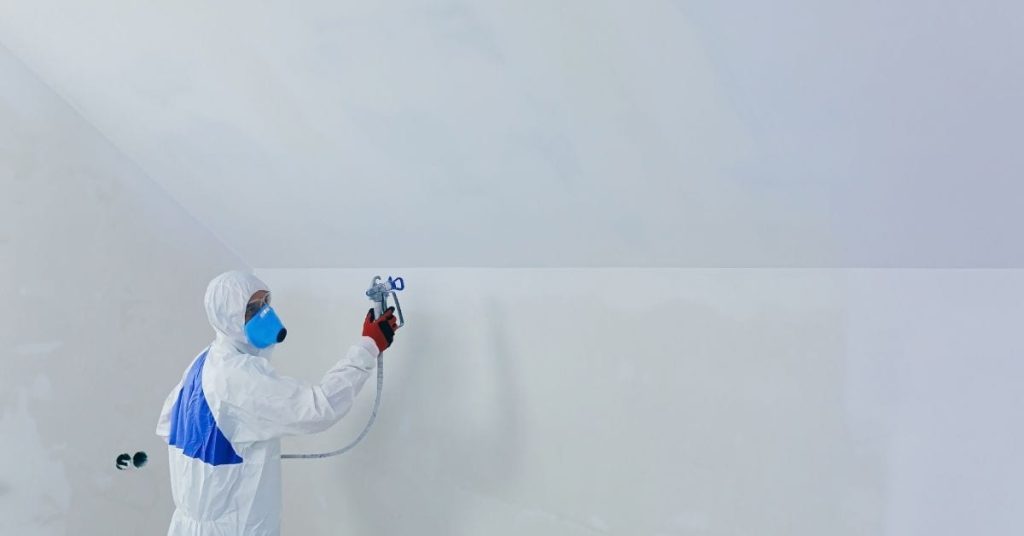
Apply primer using a roller, brush, or sprayer depending on the surface and manufacturer’s instructions. For porous limewashed surfaces, use a roller with a medium nap cover to ensure even coverage.
Key: Work in manageable sections, keeping a ‘wet edge’ to avoid lap marks.
During curing, watch for signs of inadequate cure or compatibility issues. If the primer appears tacky, bubbly, or peels after drying, it may not be compatible with your substrate or has been applied incorrectly. Allow the recommended drying time before painting.
Selecting compatible topcoats and maintaining breathability
Choose a topcoat that’s compatible with your primer and substrate. For limewashed surfaces, prioritize breathable paints like silicate or mineral-compatible options to prevent moisture buildup.
Consider the paint’s sheen level too. Higher sheens are less porous and can trap moisture, while flat or matte finishes allow better breathability.
When layering paints, apply thin coats and allow adequate drying time between each application. This helps maintain breathability and prevents trapped moisture from causing issues later on.
Troubleshooting, Visual Checkpoints, and When to Call a Professional
Inspect newly painted areas at set intervals for signs like peeling, blistering, or salt stains; early detection makes remediation simpler. For each issue, start with the least invasive fix—test patch, localized sanding, or re-coating with a compatible primer—before considering full strip-out.
If problems reappear, affect large areas, or indicate underlying moisture or structural issues, consult a specialist with experience in lime and masonry substrates. When a product’s data sheet doesn’t cover your situation, ask a manufacturer or professional for written guidance rather than guessing.
Diagnosing failures and stepwise remedies
Use this checklist when you notice issues after painting over limewash.
- Peeling paint: Check for loose or bubbling paint. Use a putty knife to gently lift edges.
- Salt efflorescence: Look for white, powdery deposits on surface. Moisture meter can confirm dampness.
- Blistering: Inspect for raised, bubble-like areas. Poke with a needle to check for trapped moisture.
- Incompatible primer: Check if primer was alkali-resistant and compatible with limewash.
- Moisture issues: Use a moisture meter to test for excess dampness in walls.
- Poor prep: Inspect for missed spots during cleaning, testing, or neutralization.
- Inadequate curing: Check if primer was allowed to cure properly before painting.
- Recurring problems: If issues persist after repairs, consider other underlying causes.
Quick rule: Address each issue promptly. Spot treat where possible; full strip-and-repair may be needed for severe cases.
When to strip back to substrate or hire specialists
Use this checklist when problems persist despite troubleshooting efforts.
- Pervasive decay: Check for widespread crumbling, cracking, or missing limewash. Structural damage may be present.
- Structural dampness: Use a moisture meter to test walls and floors. Prolonged dampness can cause severe damage.
- Recurring salt issues: If efflorescence keeps reappearing, underlying problems may need professional diagnosis.
- Mold or mildew: Look for greenish-black spots indicating mold growth. This could signal hidden moisture problems.
- Uneven surface: Inspect for severe irregularities that affect paint adhesion and appearance.
- Professional advice: Consult with a specialist if you’re unsure about the cause or extent of damage.
- Hire professionals: Consider hiring specialists for complex repairs, structural work, or when DIY efforts fail.
Quick rule: If issues are severe, persistent, or beyond your skillset, don’t hesitate to call in professionals.
Conclusion
Take the right prep seriously and you’ll get a durable, good-looking finish that lasts. Prioritize safety, do careful testing, and follow a clear priming path so you don’t trap failure under fresh paint.
First, confirm the limewash is properly identified and neutralized, clean the surface well, test adhesion in a small area, then choose a compatible primer and apply it evenly before painting. From there, proceed in calm, measured steps: clean, protect nearby surfaces, apply primer, let it cure, then apply finish coats with clean tools, checking for uniform coverage and dry film. Finally, inspect your work under daylight and fix any missed spots before you call it done.
Common mistakes to avoid are skipping neutralization or cleaning, using the wrong primer for limewash, and rushing the process with cold or damp conditions. Always work in good light, keep the surface dry for the recommended cure times, and wear a mask and eye protection when testing or scrubbing. If you’re unsure about the surface condition, or if you see active peeling, mold growth, or deep cracks, stop and reassess—these signals mean risk and potential damage.
If the wall shows persistent moisture, major structural issues, or you’re uncertain about the limewash history, it makes sense to bring in a pro. For most homes, sticking to tested steps and taking time to verify readiness will save money and prevent costly mistakes. You’ll finish with a safer job and a finish that looks right and lasts.
FAQ
How do I test whether the limewash is still soluble and needs neutralizing?
Do a damp sponge wipe on a small patch. If the surface powders or rubs off easily, it likely needs neutralization before painting. Follow the product label or manufacturer instructions for the neutralizing step and rinse well.
What primers are best for old limewashed surfaces?
Choose a breathable acrylic or acrylic-masonry primer that lists compatibility with lime-based coatings. Avoid sealers that trap moisture or block moisture movement. Check the label for surface prep, adhesion, and humidity guidance.
How should I test a small area before applying primer to the whole wall?
Do a spot test on an inconspicuous area. Apply primer and a small amount of finish paint to a patch, then watch for adhesion and any peeling over time. If it fails, re-evaluate the surface prep or try a different primer designed for lime-based substrates.
What common mistakes should I avoid when priming over limewash?
Skip cleaning or neutralizing, use the wrong primer, or apply a coat that’s too thick. Follow the product instructions, apply thin coats, and let each coat dry as directed before adding more. If in doubt, check labels or manufacturer guidance for your exact product.