
Introduction
Milk paint is a water-based, pigment-rich finish made from casein or plant binders that gives a matte, worn look and can bond to bare wood; acrylic is a synthetic polymer paint that forms a tougher, flexible film and resists moisture better. For a DIY, that means milk paint is great for authentic, chippy furniture finishes while acrylic is usually the safer pick for trim, doors, and high-contact surfaces. Check product labels and manufacturer instructions for prep, adhesion, and topcoat recommendations before you start.
In practice, milk paint can hold up well on interior furniture and low-traffic pieces when mixed and sealed properly, but it can chip if the substrate, prep, or sealer aren’t right. Acrylic will generally stand up to knocks and cleaning, though adhesion and UV resistance depend on the product and surface—so always follow the label and consider primer or sanding for best results.
Key takeaways
- Test adhesion on a small hidden area before full application.
- Creamy milk paint requires sealing; acrylic benefits from primer when bonding.
- Prepare surfaces to remove dust, oils, and flaking finishes for best adhesion.
- Expect chips where high abrasion occurs; choose finishes accordingly and recoat.
- Wear eye protection and gloves; ventilate area when sanding and painting.
- Label surfaces and test water exposure before applying topcoats for durability.
Table of Contents
- Introduction
- Key takeaways
- Quick Comparison: Composition and How They Work
- Surface Preparation and Adhesion Factors
- Durability, Wear, and Where They Chip
- Finishes, Topcoats, and Sealing Strategies
- Application Techniques That Improve Longevity
- Tools and Materials Checklist
- Best Projects and Use Cases: Where Each Paint Excels
- Troubleshooting, Repairs, and How to Fix Chips
- Conclusion
- FAQ
Quick Comparison: Composition and How They Work
Milk paint is typically a dry powder based on casein and mineral pigments that you mix with water; acrylic is a ready-to-use synthetic polymer emulsion. Their base chemistries create different film characteristics that influence adhesion, porosity, and final sheen.
The powdered, porous nature of milk paint often soaks into raw wood and cures into a matte, breathable layer, while acrylic forms a continuous, less-porous film that sits on the surface. Check manufacturer instructions or the product data sheet for specific mixing guidance and recommended substrates before starting.
Ingredients and chemistry
Understanding the key components of milk paint and acrylic helps you predict their behavior on your project.
- Milk Paint: Casein (milk protein) provides flexibility. Earth pigments give color, but can stain if not sealed properly. Look for non-toxic, lead-free options to avoid health risks.
- Acrylic: Synthetic polymer emulsion offers durability and adhesion. High-quality binders ensure a strong bond. Avoid low-grade acrylics that may crack or peel over time.
- Milk Paint Additives: Pigment powders can be added to create custom colors, but they may affect the paint’s flexibility if not balanced properly.
- Acrylic Additives: Primers and sealers enhance adhesion and protect against moisture. Use them wisely to avoid over-application leading to cracking.
- Moisture Behavior: Milk paint absorbs moisture, so it’s breathable but can swell if exposed to too much water. Acrylic resists moisture, preventing swelling but may trap moisture underneath, causing issues if not properly primed and sealed.
Forms and mixing/activation
Milk paint comes as a powder that needs activation with water. Acrylic is available in ready-to-use or concentrate formats.
Milk Paint: Mixing is simple, but the shelf life is short once activated. Use it within 24 hours to avoid waste. Consistency may vary between batches if not mixed well.
Acrylic (Ready-to-use): No mixing required, but storage can be messy due to the wide-mouth container. Shelf life is longer than milk paint, but once opened, it should be used within a few months.
Acrylic (Concentrate): Needs thinning with water before use. This allows for better control over consistency and coverage. However, proper thinning is crucial to avoid weak adhesion or poor finish.
Surface Preparation and Adhesion Factors
Raw wood usually needs light sanding and dust removal for either paint, but milk paint can benefit from bare, dry wood while acrylic often requires a clean, keyed surface or primer on slick substrates. Laminate and glossy finishes typically demand deglossing or an adhesion primer for acrylic; milk paint may not bond well without proper mechanical abrasion or a bonding agent.
For metal and previously painted surfaces, remove loose paint, rust, and contaminants, then use a suitable primer noted on the product label or datasheet. When in doubt about compatibility, consult the manufacturer instructions and consider a test patch to confirm adhesion before doing the whole piece.
Substrate-by-substrate guidance
Milk paint and acrylic have different adhesion needs. Here’s what you need to know for common surfaces.
Wood: Both paints bond well without primer, but sanding (120-grit) and deglossing are crucial. Wipe with a damp cloth after sanding.
Laminate: Not ideal for laminate. If you must, use a latex primer first to create a better surface for adhesion.
Metal: Milk paint needs a phosphate wash or bonding agent. Acrylic bonds well with sandblasting and priming (zinc or epoxy).
Previously painted surfaces: Both need deglossing with a liquid sander or light sanding (220-grit) to improve adhesion.
Primers and bonding agents
Using the right primer or bonding agent can boost adhesion for both paints.
For milk paint: Use a shellac-based primer or bonding agent like BIN. Apply 2-3 thin coats, letting each dry fully.
For acrylic: Use a latex primer with good adhesion properties. Zinsser’s Bulls Eye 1-2-3 is a popular choice. Apply 2 coats, allowing drying time between.
Always spot test primers before committing to ensure compatibility with your chosen paint and surface.
Durability, Wear, and Where They Chip
Acrylic paint generally resists abrasion, moisture, and UV better than raw milk paint because the polymer film is tougher and less permeable; milk paint can chip where the bond to substrate is weak or where it sits over incompatible finishes. Chipping frequently appears at edges, high-traffic corners, and areas that experience flex or repeated impact.
Humidity and direct sunlight accelerate different failure modes—check product guidance for outdoor use and UV resistance claims rather than assuming one type will hold indefinitely. If you need specific durability metrics, look at the technical data sheet or contact the manufacturer for test results and recommended applications.
Common causes of chipping
Chipping paint is a common issue, but it’s not inevitable. Understanding the primary triggers can help you prevent it.
Poor preparation is often the culprit. If your surface isn’t clean, dry, and free of defects, your paint won’t stick.
Substrate movement – like wood expanding and contracting with humidity changes – can also cause chipping. Heavy use or impact, especially on high-traffic areas or exterior trim, can lead to chips as well.
Using incompatible coatings or not allowing proper drying time between coats can also cause issues. Always follow the manufacturer’s instructions for best results.
Long-term wear case examples
Let’s look at some real-life scenarios to see where milk paint and acrylic hold up – and where they might chip.
Furniture: Milk paint is great for furniture because it’s durable, but it can chip if not properly sealed. Acrylic holds up well too, but it may look worn over time due to its softness.
Cabinetry: Both paints work well on cabinets, but milk paint might be more prone to chipping in high-use areas like kitchen cabinets due to its chalky finish. Acrylic is more resistant to chips but can show wear and tear over time.
Exterior Trim: Milk paint can last outdoors for years with proper sealing, but it may chip if not maintained regularly. Acrylic holds up well to outdoor elements but can become brittle in extreme temperatures, leading to chipping.
Finishes, Topcoats, and Sealing Strategies
Milk paint often needs a sealer—wax, hard wax oil, or a compatible waterborne polyurethane—to improve wear and stain resistance, but that can change the look and breathability; acrylic can be left unsealed or protected with clear coats for extra durability. Choose sealers based on the desired sheen, feel, and whether you need a breathable finish for antiques or a tough surface for furniture.
Compare product labels and technical sheets for compatibility notes; some oils or solvent-based polyurethanes can interact poorly with milk paint or acrylic. If unsure, do a small-area test and follow manufacturer instructions for recoat windows and cure times.
Best topcoats for milk paint
Milk paint’s natural beauty comes from its breathability, but it needs protection. Here are your best bets:
Clear Wax: Enhances the natural look, adds protection against moisture and minor wear. Apply thin coats, letting each dry before buffing.
Waterborne Polyurethane: Offers excellent durability and resistance to water and sunlight. It’s clear, so it won’t alter milk paint’s color or finish. Apply 2-3 thin coats for best results.
Avoid: Oil-based poly and varnishes. They can yellow over time and trap moisture, leading to chipping.
Best topcoats for acrylic
Acrylic paint is tough, but it needs a compatible sealer. Here’s what works best:
Waterborne Polyurethane: This is the gold standard for acrylics. It enhances durability, resists water and sunlight, and won’t yellow over time. Apply 2-3 thin coats.
Oil-based Polyurethane: Offers excellent protection but can yellow slightly over time. Use it if you want a slight amber hue or need extra durability in high-traffic areas.
Curing Consideration: Ensure acrylic paint is fully cured (at least 30 days) before applying any topcoat to prevent adhesion issues and future failures.

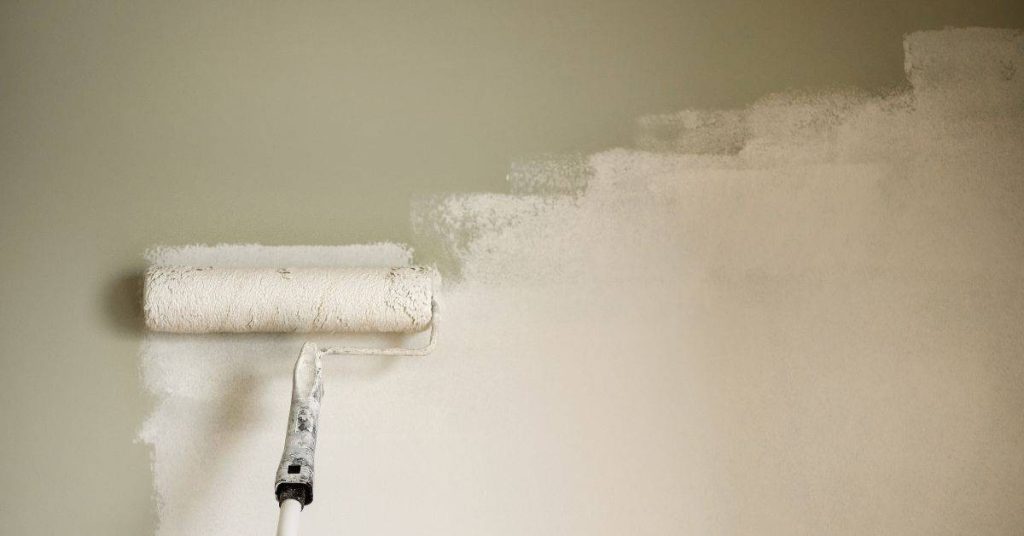
Application Techniques That Improve Longevity
Brush, roller, and spray techniques differ: thin, even coats reduce runs and promote uniform film build—milk paint may need multiple thin coats with proper mixing, while acrylic often benefits from slightly higher film build per coat. Sand lightly between coats where recommended to flatten brush marks and improve mechanical adhesion for the next layer.
Adjust technique to the product: use high-quality brushes or a foam roller for smooth finishes, and follow spray setup guidance on the product data sheet. When in doubt about thinning, dry times, or spray settings, consult the manufacturer instructions to avoid weakening the film and increasing future chipping risk.
Brush, Roller, and Spray Tips
For both milk paint and acrylic, start with a good quality brush. Natural bristles work best for milk paint due to its water-based nature.
Rollers are great for large areas. Use a 3/8″ or 1/2″ nap roller cover for smooth surfaces, and a 3/4″ or 1″ for textured ones. Always use a good quality roller with synthetic fibers.
Spraying gives the best results but requires proper equipment. Use an airless sprayer for milk paint, and a high-volume low-pressure (HVLP) sprayer for acrylic.
Layering, Sanding Between Coats, and Curing Times
Apply thin layers. A good rule of thumb is to apply no more than 2-3 mils (dry film thickness) per coat.
After each coat, lightly scuff-sand with fine grit sandpaper (120-150 grit). This helps to remove any raised grain and ensures good adhesion for the next coat. Wipe off dust with a damp cloth.
Allow proper curing time between coats. For milk paint, wait 24 hours before recoating. For acrylic, follow the manufacturer’s recommendations, usually 16-24 hours.
Tools and Materials Checklist
Essential items include appropriate brushes, rollers, mixing tools, sandpaper, tack cloths, safety gear, and chosen primers or sealers for your paint type. For milk paint you may also need measuring scoops and containers for mixing powder with water; for acrylics, have proper thinning agents and cleanup supplies on hand.
Include PPE such as gloves, eye protection, and a respirator when sanding or spraying; check product labels for required protection and recommended consumables. If a specific product calls for a special primer or sealer, follow the manufacturer instructions rather than substituting without confirmation.
Essentials for Milk Paint Projects
Before you start your milk paint project, make sure you have all these essentials ready. This list will help you avoid common mistakes and ensure a successful finish.
- Milk Paint: Check the label for the correct type (bonding or non-bonding) based on your surface. Ensure it’s within its expiration date.
- Bonding Agent: If using non-bonding milk paint, apply a bonding agent first to ensure adhesion. Check that it’s compatible with your chosen paint.
- Mixing Tools: You’ll need a mixing bucket and a drill with a paint mixer attachment for smooth, lump-free paint.
- Appropriate Brushes: Use natural bristle brushes (2-3 inches wide) for milk paint. Inspect them for any damage before use.
- Sandpaper (120-grit): Check that you have enough to lightly sand your surface before painting, helping the paint adhere better.
- Tack Cloth: Ensure you have a tack cloth to remove dust after sanding and before painting.
- Cleanup Supplies: Have soap and water ready for brush cleaning. For spills, use a damp cloth immediately to avoid staining.
- Protective Gear: Check that you have safety glasses, gloves, and old clothes or a drop cloth to protect yourself and your workspace.
Quick rule: Always spot test milk paint on a small, hidden area first. This helps you check for color consistency and compatibility with your surface before committing to the entire project.
Essentials for acrylic projects
Before you start your acrylic painting project, use this checklist to ensure you have everything you need. This will help you avoid common mistakes and achieve a professional finish.
- Synthetic Angled Brush (1.5-2.5 inches): Check bristles are firm yet flexible. If they’re too soft or hard, they won’t hold paint well or may leave brush marks.
- Synthetic Roller Cover (9-18 inches): Ensure it’s designed for acrylic paints and has a suitable nap length for your surface. Too short or long can cause uneven coverage.
- Optional: Paint Sprayer: If using, check it’s compatible with acrylics and has the right tip size for your project (e.g., 0.8-1.4mm).
- Acrylic Primer/Sealer: Verify it’s suitable for your surface type and acrylic paints. Check expiration date to ensure it’s still active.
- Paint Tray Liners: Ensure they fit your tray size to prevent mess and waste.
- Drop Cloths/Tarps: Check they’re large enough to protect the entire work area from drips and spills.
- Painter’s Tape: Make sure it’s blue or green (not yellow, which can leave residue). Test adhesion on a small area before use.
- Cleanup Materials: Rags, Solvent (like acetone): Check rags are lint-free and solvent is suitable for acrylic paint removal. Always test on a small area first.
Quick rule: Always check your materials before starting. Using the wrong brush or expired sealer can lead to costly rework and poor results.
Best Projects and Use Cases: Where Each Paint Excels
Milk paint is often favored for authentic-looking antique restoration, rustic furniture, and certain decorative crafts because of its matte, slightly textured appearance and historical composition. Acrylic works well for modern cabinetry, trim, and outdoor items where a tougher, more flexible film and broader color stability are important.
Match the paint to the project’s needs—consider surface flexibility, expected wear, and desired finish—and consult product technical data or labels for recommended uses. When unsure whether a paint fits a particular application, run a small test piece to evaluate appearance and performance before committing.
When to choose milk paint
Milk paint is your best bet when you’re after that old-world, historic look. It’s made from natural pigments and casein protein, giving it a unique, soft appearance.
Its breathable finish makes it ideal for antique restoration projects. Milk paint allows wood to expand and contract with humidity changes, preventing peeling or chipping.
Tip: Milk paint is great for furniture pieces, cabinetry, and decorative crafts where you want a rustic, aged look.
When to choose acrylic
Acrylic paint is your go-to when durability and flexibility are top priorities. It’s water-based but dries to a durable, long-lasting finish.
It offers a broad range of colors and can be used both indoors and outdoors. Plus, it dries quickly, making it perfect for projects with tight deadlines or those that need multiple coats.
Tip: Acrylic paint is excellent for modern cabinetry, exterior items like decks or fences, and decorative crafts where you want a smooth, uniform finish.
Troubleshooting, Repairs, and How to Fix Chips
Small chips in milk paint often require cleaning, light sanding of loose edges, and either a spot touch-up or a fill-and-seal approach depending on the substrate and finish; acrylic chips usually need feathering of edges and a matched acrylic touch-up or full-panel repaint for the best blend. Assess adhesion around the damaged area first to determine whether the problem is localized or systemic.
For step-by-step repair, follow manufacturer repair recommendations when available and use compatible primers and topcoats noted on labels or data sheets. If you can’t determine compatibility from the product info, test the repair in an inconspicuous spot or consult the manufacturer for guidance before doing a full refinishing job.
Quick fixes for small chips
Don’t let those tiny chips and blemishes stress you out. Here’s how to tackle them like a pro.
First, match the color. If you’ve got leftover paint, great! If not, mix up a small batch using your original formula. A little goes a long way here.
Using a small, stiff-bristled brush, dab a tiny amount of paint onto the chip. Work it in gently, blending with surrounding paint as you go. Wipe off any excess with a damp cloth.
Let it cure, then lightly sand and apply a topcoat to blend it all together. No one will ever know there was a chip.
Dealing with widespread flaking
When the chips start piling up, it’s time to roll up your sleeves and get serious. Here’s how to rehab those surfaces.
Strip or sand the affected area down to a sound surface. This might mean stripping off old paint or sanding down to bare wood. It’s not fun, but it’s necessary.
Prep the surface by cleaning off any dust and debris. Then, prime. Use a good quality primer suitable for your new topcoat. If you’re switching systems (milk to acrylic or vice versa), make sure your primer can bond with both.
Now, decide if you want to recoat with the same system. If it’s not working for you, consider switching. Just ensure your new topcoat is compatible with your primer and substrate. Then, apply as usual, following the application techniques we covered earlier.
Conclusion
Safety and durability drive results here. Doing the prep right and choosing the coating that fits your surface saves time, avoids costly fixes, and keeps the finish looking sharp run after run.
Do this: start with a clean, dry surface and fix any damage, then choose the product based on the surface and expected wear; test a small patch first, apply per its instructions, and seal or topcoat where the plan calls for it; let each step dry fully before moving on, and work in good lighting with proper ventilation and protective gear.
Common mistakes to avoid are skipping prep, rushing the adhesion test, and overworking the finish or topcoat in one spot. Always wear eye protection and a mask when sanding or spraying, work in a well-ventilated area, and label your cans so you don’t mix up milk paint and acrylic mid-project.
If you encounter deep chips, persistent peeling, or a surface that isn’t responding to standard prep, it’s sensible to bring in a pro rather than guessing. When you follow the steps here, you’ll finish with a durable, good-looking result and the know‑how to handle the next project with confidence.
FAQ
Which paint lasts longer on interior surfaces, milk paint or acrylic, and why?
Generally, acrylic paints tend to hold up longer on common interior surfaces, especially high-traffic spots, because of their tougher polymers. Milk paint is breathable and porous, which can wear faster in busy areas. Check the product label for surface recommendations and cure times.
Can milk paint be used over finished wood or concrete, and will it chip easily?
Milk paint works best on raw, porous surfaces or properly prepared wood. On sealed or glossy finishes, adhesion can be poor and chipping may occur. Always follow the manufacturer’s prep instructions and test a small area first.
What should I seal or topcoat to reduce chipping on acrylic or milk paint?
Topcoats or sealers can help, but they must be compatible with the base paint. Look for clear topcoats labeled for use with milk paint or acrylic paints. Read the label for recommended curing times and recoat intervals.
How do I repair chips or scratches without causing more damage?
Clean the area, gently abrade the edge of the chip, then feather in fresh paint. For larger chips, you may need to reprime and recoat the affected area. Use the product’s repair instructions and test first on a hidden spot.