
Introduction
Urethane traffic coatings and acrylic systems are two common deck coatings for concrete that you apply to protect and beautify a surface. This article gives a plain‑language look at how each one works and what to expect from applying them.
Areas we support cover common concrete decks and patios in residential settings. For questions or project details, contact the listing owner. Always check manufacturer instructions and local rules for prep, application, and cure times.
Key takeaways
- Overview: urethane traffic coatings offer chemical resistance and abrasion durability versus acrylic systems.
- Preparation matters: proper surface cleaning, moisture control, and priming before any coating.
- Application process: follow manufacturer instructions for primer, base coats, and topcoat layers.
- Durability and longevity: consider traffic, exposure, and maintenance to gauge service life.
- Safety and environmental: ensure ventilation, PPE, and proper solvent disposal per rules.
- Practical steps: Download the Free Life Coatings App, review Areas we Support, and Contact to Listing Owner.
Table of Contents
- Introduction
- Key takeaways
- Types of Deck Coatings and System Components
- Application Process and Installation Steps
- Durability, Wear Resistance, and Environmental Exposure
- Cost, Lifecycle, and Long-Term Value
- Maintenance, Repairs, and Common Mistakes
- Safety, Environmental Impact, and Compliance
- Choosing the Right System — Planning and Decision Guide
- Practical Next Steps and Trusted Sources
- Conclusion
- FAQ
Types of Deck Coatings and System Components
Deck coatings over concrete fall into a few core system families. Urethane traffic coatings, acrylic systems, cementitious membranes, and fabric-reinforced membranes each have distinct strengths and typical use cases. Consider exposure, traffic, and maintenance when choosing between them, and map how each system handles adhesion, flexibility, and waterproofing. Start by sketching a simple plan for your deck: high-wriction needs, UV exposure, and potential chemical contact all shape the best choice.
Next, outline the common components and how they fit together. You’ll typically see primers, base coats, broadcast blends (either aggregate or color), mid-coats, top coats or seal coats, and optional interlayers or fabric reinforcement. Prep steps like surface cleaning and moisture testing directly influence how well each layer bonds. Substrate prep decisions, including laitance removal and pore sealing, impact long-term durability across systems and conditions.
Urethane Traffic Coatings Explained
Urethane traffic coatings are two-part, moisture-cured systems designed for high-traffic areas like concrete decks. They’re known for their exceptional abrasion and chemical resistance.
The typical build-up consists of a primer, a base coat, and a topcoat. The primer seals the concrete, promoting better adhesion. The base coat provides the bulk of the wear layer, while the topcoat offers UV protection and enhances skid resistance.
Urethane traffic coatings excel in areas with heavy foot or vehicle traffic, chemical exposure, and extreme temperature changes. They’re often used in industrial settings, parking garages, and high-traffic pedestrian areas.
Acrylic Deck Systems Explained
Acrylic-based systems are water-based, fast-curing coatings that provide excellent UV stability and color retention. They’re typically applied in two coats: a primer/topcoat, with an optional reinforcement layer.
The primer/topcoat serves as both the initial seal and the final protective layer. It’s usually applied at 10-15 mils wet film thickness, providing good coverage and durability. The optional reinforcement layer can be a fabric or mesh, enhancing crack-bridging and preventing delamination.
Acrylic systems are ideal for residential decks, pool decks, and other areas with moderate traffic and exposure to the elements. They’re easy to apply, clean up quickly, and have low VOC emissions.
Reinforcement and Membrane Options
To enhance waterproofing and crack-bridging capabilities, both urethane and acrylic systems can be paired with various reinforcement and membrane options.
Fabric or mesh reinforcement is often used to strengthen the coating system. It’s applied over the base coat and embedded in the topcoat, preventing cracking and delamination. Under-tile membranes are also used for additional waterproofing, especially in wet areas like showers or pool decks.
Cementitious overlays can be used as a membrane option. They provide a smooth, durable surface that’s resistant to chemicals and abrasion. These overlays can be applied over existing concrete or other substrates, providing a seamless, waterproof finish.
Application Process and Installation Steps
Start with substrate assessment to determine compatibility and the needed prep for each system. Look for concrete condition, moisture content, crack presence, and current coatings. Note slope and drainage as these affect application and performance. Gather existing data or labels to guide primer choice and sequence.
Then detail surface preparation and primer selection. Mechanical profiling, moisture mitigation, dust control, and contaminant removal set the stage for a solid install. For each system, list the application sequence (primer, base coat, broadcast, topcoat), the recommended equipment, and typical film thickness goals. Include cure times and environmental controls to plan safe recoat windows and workload sequencing.
Step-by-Step Installation Process
The following steps guide you through applying deck coatings over concrete, ensuring a durable and long-lasting finish.
- Preparation: Inspect the area for safety. Gather tools (brooms, squeegees, rollers, tape), materials (primer, coating, aggregate), and PPE (gloves, goggles, respirator).
- Surface Prep: Follow the concrete surface prep guidelines below to ensure a clean, dry, and sound substrate.
- Priming: Apply primer according to system compatibility. Urethane typically uses a urethane primer, while acrylic uses an acrylic latex primer. Allow proper cure time.
- Base Coat Application: Using recommended equipment (roller, squeegee, or spray), apply the base coat at specified film thickness. Ensure even coverage and no missed spots.
- Broadcast/Aggregate Application (urethane only): While base coat is still wet, broadcast or apply aggregate using a squeegee or spreader. Remove excess material after curing.
- Topcoat Application: Apply topcoat at recommended film thickness once base coat and aggregate are fully cured. Ensure even coverage and no missed spots.
- Cure and Inspect: Allow the final coat to cure according to manufacturer’s guidelines, monitoring temperature and humidity. Perform adhesion tests, film thickness checks, and defect inspections before using the surface.
Concrete Surface Prep and Diagnostics
Proper concrete preparation is crucial for successful deck coating application. Here’s what you need to do:
Moisture Testing: Use a calcium chloride test or a moisture meter to ensure the slab has less than 4 lbs per 1000 sq ft of moisture content.
Crack Repair: Fill and repair cracks using an appropriate concrete crack filler. Ensure all cracks are properly sealed before proceeding.
Surface Preparation: Shot-blast or diamond grind the surface to remove existing coatings, laitance, and contaminants. This opens the pores of the concrete for better adhesion. Do not proceed if the slab is delaminating, has excessive spalling, or shows signs of active movement.
Urethane Application Workflow
The following steps outline a typical urethane installation sequence:
Apply a urethane primer to the prepared concrete surface. Allow it to dry according to manufacturer’s guidelines (usually 1-2 hours).
Apply the base coat of urethane using a roller or squeegee at a recommended film thickness (typically 15-20 mils wet). While still wet, broadcast or apply aggregate.
Allow the base coat and aggregate to cure according to manufacturer’s guidelines (usually 24 hours). Apply the topcoat of urethane using a roller or squeegee at a recommended film thickness (typically 10-15 mils wet). Allow it to cure for another 24 hours before use.
Acrylic Application Workflow
The following steps outline a typical acrylic installation sequence:
Apply an acrylic latex primer to the prepared concrete surface. Allow it to dry according to manufacturer’s guidelines (usually 1-2 hours).
Apply the base coat of acrylic using a roller or spray at a recommended film thickness (typically 8-10 mils wet). Allow it to cure for 4-6 hours, depending on temperature and humidity.
Apply the topcoat of acrylic using a roller or spray at a recommended film thickness (typically 5-8 mils wet). Allow it to cure for another 24 hours before use. Recoat windows are typically 12-24 hours, so plan accordingly.
Durability, Wear Resistance, and Environmental Exposure
When comparing systems, establish criteria for abrasion resistance, impact resistance, UV stability, thermal movement tolerance, and waterproofing performance. These factors determine how each coating will hold up under deck traffic and sun exposure. Use practical expectations rather than lab figures to guide your choice and maintenance planning.
Next, map how climate and exposure alter performance. Consider sun exposure, freeze-thaw cycles, humidity, and chemical threats like pools or coastal air. Discuss movement across joints, crack-bridging capabilities, and typical wear patterns. End with quick guidance on matching system type to climate and maintenance tolerance.
How each system handles wear and traffic
Urethane coatings are your best bet for high-traffic areas. They’re tough, with excellent abrasion resistance. Acrylics are more suited to light foot traffic, like patios or pool decks.
Abrasion Resistance: Urethanes win here. They can handle point loads and furniture better than acrylics.
Both systems can crack under heavy, concentrated loads. Reinforce your deck properly to prevent this.
Weather, UV, and thermal movement
Urethanes handle extreme weather better than acrylics. They’re more resistant to UV degradation and freeze-thaw effects.
UV Stability: Urethanes maintain their color and film integrity longer under direct sunlight. Acrylics can fade and chalk over time.
Thermal movement is a concern for both systems. Use expansion joints and proper substrate preparation to mitigate cracking due to thermal expansion/contraction.
Cost, Lifecycle, and Long-Term Value
Explain upfront cost drivers in broad terms, focusing on materials, surface preparation needs, substrate condition, and cure times. Note that labor hours will shift with prep complexity and system choice. Emphasize that a higher initial cost can be justified by longer service life or reduced maintenance in harsh environments.
Outline maintenance implications and total cost of ownership conservatively. Describe how to compare bids by surface prep scope, warranty terms, ventilation requirements, humidity limits, and cure/dry times. Provide guidance on interpreting cost ranges without quoting exact prices, and suggest how to weigh durability metrics and supplier support when evaluating bids.
Initial cost factors to request and compare
When comparing quotes for urethane traffic coatings vs. acrylic systems, ask contractors about these key line items:
Substrate Preparation: This includes cleaning, grinding, or shotblasting the concrete surface. Better prep means better adhesion, but it adds labor hours.
Primer and Reinforcement: Some systems require primers or reinforcement layers. These add to material costs but can enhance performance.
Square-Foot Unit Rates: Ask for these to compare apples-to-apples. They’ll vary based on system type, surface prep needed, and substrate condition.
Warranty Terms: Longer warranties often mean higher initial costs but can provide peace of mind and lower long-term risks.
Lifecycle and return-on-investment considerations
Understanding the lifecycle of each system helps you weigh upfront costs against long-term value:
Maintenance Intervals: Urethane systems typically require less frequent recoating than acrylics. Less downtime for maintenance means more usable time for your space.
Expected Repairs: Both systems can crack or peel under stress, but urethanes generally handle heavy traffic and chemical exposure better, reducing early-life repairs.
Downtime Impact: Longer cure times (especially with urethanes) mean more downtime initially. However, fewer maintenance cycles later on can offset this.
Weighing Costs: A higher upfront cost for a system that lasts longer and requires less maintenance can be a better investment in the long run. Consider the total cost of ownership over 5-10 years.
Maintenance, Repairs, and Common Mistakes
Provide system-specific maintenance tasks, covering surface cleaning, pretreatment, re-coating intervals, and environmental constraints. Differentiate between urethane and acrylic needs while staying practical for a DIY audience. Use clear, actionable steps for routine upkeep.
Offer a concise repair framework: minor chips, abrasion wear, UV fade, and small substrate cracks, with step-by-step approaches and notes on product compatibility. Include surface prep and resealing cadence, and finish with installer vs homeowner mistakes to avoid. End with a quick-reference checklist you can print for monthly, quarterly, and annual maintenance.
Routine maintenance checklist
Use this checklist monthly, quarterly, and annually to keep your concrete deck coatings in top shape.
- Monthly: Inspect for debris, dirt, or stains. Remove any with a soft-bristle broom and mild detergent.
- Quarterly: Check for wear patterns, gloss loss, microcracking, and moisture seepage. Address minor issues promptly to prevent spread.
- Annually: Inspect the entire surface for signs of delamination or peeling. Test recoat readiness with a simple adhesion test: scratch the surface lightly with a coin; if coating comes off, it’s time to recoat.
Quick rule: Regular maintenance extends your deck coatings’ lifespan and keeps warranties valid.
Common installation and maintenance mistakes
Avoid these common pitfalls to ensure a long-lasting, high-performing concrete deck coating.
- Inadequate surface prep: Skipping proper cleaning, etching, or moisture checks leads to poor adhesion and premature failure.
- Moisture trapped under coating: Trapped moisture causes delamination. Ensure the substrate is dry before applying any coating.
- Incorrect primer choice: Using the wrong primer can affect adhesion and overall performance. Always use a primer compatible with your chosen coating system.
- Wrong cure windows: Improper cure times lead to inadequate curing, affecting durability. Follow manufacturer guidelines for optimal results.
Prevent these mistakes by following manufacturer instructions, using quality products, and maintaining proper installation conditions.
Safety, Environmental Impact, and Compliance
Lay out safety precautions for installers and residents, including PPE, site access controls, ventilation, fall protection, and re-entry timelines after application. Provide practical tips to minimize risk during and after work.
Address environmental impact and compliance by noting VOC considerations, waste disposal, and spill response. Describe how to verify relevant standards and certifications with suppliers and contractors, and how to read SDS and product data sheets. Emphasize the importance of documenting compliance for warranty and long-term performance.
On-site safety and mitigation measures
Safety is paramount during deck coating application. Here’s what you need to know:
Personal Protective Equipment (PPE): Installers should wear protective clothing, gloves, eye/face protection, and respiratory protection as needed.
Ventilation: Ensure proper ventilation in the work area to prevent the buildup of harmful fumes. Use fans or open windows if possible.
Temporary Access Controls: Restrict access to the work area during application and curing. Use signs, barriers, or ropes to keep occupants safe.
Environmental and regulatory considerations
Understanding environmental impacts and regulations is crucial for responsible coating selection and disposal:
VOC Content: Check the product’s VOC content. Lower VOCs mean less pollution and better air quality.
Local Disposal Rules: Familiarize yourself with local waste management rules. Some areas may require special handling or disposal of coating materials.
Eco-labels/Standards: Look for eco-labels or standards like GREENGUARD, ECOLOGO, or LEED to ensure the product meets certain environmental criteria. Check with local permitting offices if these certifications are required.
Choosing the Right System — Planning and Decision Guide
Offer a practical decision framework for traffic load, climate, substrate condition, aesthetics, and maintenance tolerance. Translate usage categories into reasonable coating expectations and service life considerations. This helps homeowners match system choice with real-world deck use.
Discuss planning factors such as aesthetic goals, warranty needs, and contractor qualifications. Provide a simple checklist to compare urethane versus acrylic options, including cure times, compatibility with drainage and expansion joints, and expected maintenance. Finish with a quick rubric to guide the final decision.
Key questions to ask contractors and manufacturers
Before you hire, make sure your contractor knows their stuff. Here’s what to ask:
Experience: How many concrete decks have they coated?
Warranty terms: What does the warranty cover? How long is it valid?
Referenced projects: Can they show you examples of their work on similar surfaces?
Lab data: Do they have lab test results showing wear resistance and adhesion?
Maintenance: What’s required to keep the warranty valid?
Planning timeline and permit/inspection touches
Use this checklist once you’ve chosen your system. It helps keep your project on track.
- Assessment: Evaluate substrate condition and climate factors (see earlier sections).
- Permit check: Confirm if local permits are needed for coating work.
- Contractor selection: Choose your installer based on qualifications and references.
- Material order: Order materials, considering lead times.
- Surface prep: Plan and schedule surface preparation (etching, grinding).
- Installation scheduling: Coordinate with contractor for installation dates.
- Inspection points: Schedule inspections at key stages: before prep, after prep, post-installation.
- Final walkthrough: Inspect the finished job with your contractor and building owner/manager.
Quick rule: Always inspect before and after major steps. It helps catch issues early.
Practical Next Steps and Trusted Sources
Practical next steps start with how the surface will look and feel. Choose color options that hide dirt and chips, then pick a texture—broom, stamped, or a smooth trowel finish—and anti-slip aggregate styles that match maintenance needs. Understand that finishes change appearance and color retention, while coatings influence slip resistance, durability, and UV stability. Always check the label and manufacturer instructions for what each option does in real life, and consider ADA-related surface feel and safe access when planning thresholds and transitions.
For DIY versus pro-grade work, weigh ease of application, curing time, and cost against long-term performance. Finishes and coatings vary widely in how they perform on concrete decks, so compare pros and cons, then map out a simple maintenance plan with cleaning and recoating intervals. Signs a coating needs refresh include dullness, loss of traction, or uneven wear. Use trusted sources, spec sheets, and local distributors to guide choices, and reach out to experts when your deck will see heavy use or weather exposure.
Color, texture, and slip-resistance options
When choosing a deck coating over concrete, consider the aesthetic impact of color, texture, and slip resistance.
Color: Urethane and acrylic coatings come in various colors. Urethanes often provide richer, more vibrant hues due to their higher pigment concentration. Acrylics may require additional coats for full opacity but offer a wider range of pastel shades.
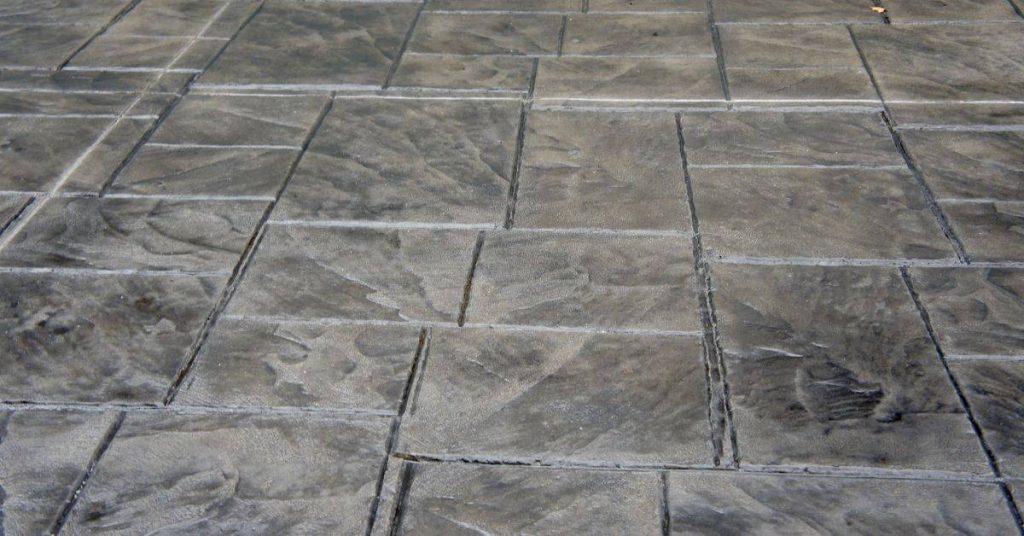
Texture: Texture affects both appearance and traction. Broom-finished textures create a rough surface with visible strokes, providing good slip resistance. Stamped finishes mimic natural stone or brick patterns, offering moderate traction. Trowel finishes give a smooth, sleek look but may require additional anti-slip aggregates for traction.
Slip-resistance: Broadcast aggregates like silica sand or aluminum oxide can be added to enhance slip resistance. Topcoat gloss levels also impact traction; higher gloss means less grip. Always consider your specific needs and local regulations, such as ADA compliance, when selecting a finish.
Download the Free Life Coatings App
Life Specialty Coatings offers a user-friendly app to help you make informed decisions about your deck coating project.
Access product information, color selectors, and specification tools right at your fingertips. Check your app store or visit the manufacturer’s site for availability and features.
With the Life Coatings app, you can:
- Browse product catalogs
- Use color selectors to visualize different options
- Access technical specifications and installation guides
Areas we Support and Contact for Listing Owner
Life Specialty Coatings and their authorized installers operate in various regions across North America. To find out if they service your area, check the ‘Find an Installer’ page on their website.
For specific inquiries or to get in touch with listing owners or local reps, we recommend visiting the Life Specialty Coatings site. They provide contact channels and service area details for each installer.
Here’s how you can reach out:
- Visit the ‘Contact Us’ page
- Fill out the form with your details and inquiry
- Wait for a response from their team or local installer
Conclusion
Deck coatings matter. A durable finish protects concrete, preserves value, and looks good for years. Get safety right first, then pick the coating system that fits your exposure, foot traffic, and maintenance budget.
Ask yourself these checks in order: verify the concrete is clean and dry, confirm the coating system matches your surface and environment, review cure times and ventilation needs, test a small area before full coverage, and follow exact product directions for mixing, rolling, or spraying. If you’re unsure about the system, start with a simple test patch and document the results before committing to the whole deck.
Common mistakes to avoid are skipping surface prep, choosing a product based on price alone, and ignoring weather or humidity windows. Always work with the manufacturer’s safety data, wear proper PPE, and keep pets and kids off the surface until fully cured. If the project requires complex coatings, uncertain substrate conditions, or you’re dealing with severe exposure, don’t push your luck—call a professional and get a written maintenance plan. Stay deliberate, stay safe, and you’ll finish with a deck that lasts and shines.
FAQ
What’s the quick difference between urethane traffic coatings and acrylic deck systems?
Urethane is tougher, chemical resistant, and handles wear from foot traffic and moisture better. Acrylic is lighter, easier to apply, and often cheaper upfront. For DIY, think urethane for high-traffic or exposed surfaces; acrylic for simple, low-odor projects in good conditions.
What are the main benefits of each coating type?
Urethane coatings resist abrasion, chemicals, and UV fading a lot better. They seal small cracks and stay glossy longer, but cure times and ventilation matter. Acrylic systems dry quickly, cure easier in drier weather, and are more forgiving for first-time applicators but can wear faster in sun or standing water.
How does the application process differ between urethane and acrylic coatings?
Apply in clean, dry conditions with compatible primers and topcoats. Urethane needs careful surface prep and longer tack times; follow the product label exactly. Acrylics go on smoother for beginners but need steady conditions to avoid peeling or blistering.
Where should I use each system and how long will they last?
Use urethane on busy, outdoor decks, high-wear zones, or areas exposed to moisture and chemical spills. Acrylics work well for light-traffic porches, patios, or areas with limited sun exposure. Longevity depends on prep, climate, and maintenance—check labels for expected service ranges.
What maintenance is required to keep either system performing?
Keep surfaces clean, recoat when gloss fades or minor wear appears, and fix cracks before coating again. Urethane may need more frequent inspections in sunny, hot environments; acrylics need attention if UV fade or peeling starts. Always follow manufacturer maintenance recommendations on the label or data sheet.