
Introduction
A plaster bonding agent is a product that helps new plaster stick to an existing surface. It can affect how fast the mix grabs and how evenly it spreads, so you’ll want to read the label and follow the directions. Always prep the surface clean, dry, and sound before applying, and test a small area if you’re unsure.
Coverage and tack time vary by product and conditions, so don’t rely on a guess. Watch for common mistakes like applying too thick a coat, skimming too soon, or skipping a rough key; these are easy to fix with careful prep and timing. If you’re unsure, check the product instructions and tailor your approach to what it recommends for your job.
Key takeaways
- Understand plaster bonding agents improve adhesion between old plaster and new coat.
- Estimate material needs by measuring surface area and coating thickness per product label.
- Tack time vs open time affects workflow; plan trowel work and breaks accordingly.
- Prepare surfaces: clean, dampen with appropriate moisture, and remove contaminants before bonding.
- Dilution and mixing: follow manufacturer instructions; test small batch for compatibility.
- Common mistakes: skipping cure gaps, using incompatible products, or neglecting surface profile.
- Safety: wear goggles, gloves, and respirator when mixing dusty compounds.
Table of Contents
- Introduction
- Key takeaways
- What Is a Plaster Bonding Agent and Why Use One
- Coverage: Estimating How Much Product You Need
- Tack Time and Open Time: Definitions and Practical Impact
- Surface Preparation and Step-by-Step Application
- Mixing, Dilution, and Pot Life
- Common Mistakes and Troubleshooting
- Tools and Materials Checklist
- Material Specs, Compatibility, and Quality Control
- Conclusion
- FAQ
What Is a Plaster Bonding Agent and Why Use One
A plaster bonding agent is a product you apply to a substrate before plaster to improve adhesion. It creates a better bond between old surfaces and fresh plaster by promoting grip and cohesion. You’ll want to use one when you’re coating bare walls, repairing porous substrates, or switching to a different plaster formulation.
Look for guidance on when to use bonding agents in the product label or manufacturer instructions. Check if the substrate type or surface condition is specifically listed as needing a bonding aid. When in doubt, verify compatibility with the plaster you plan to apply and follow local building guidance.
How bonding agents work (mechanical vs chemical adhesion)
Bonding agents improve adhesion between substrates and plaster by creating a strong, lasting bond. They work in two main ways: mechanically and chemically.
Mechanical: Some bonding agents, like cementitious primers, create tiny pores or microscopic hooks on the surface. These give the plaster something to ‘grab onto’, increasing friction and mechanical bond strength.
Chemical: Others, such as PVA/acrylic bonding agents, contain chemicals that react with both the substrate and the plaster. This creates a chemical bond, making them stick together even better.
Typical use cases and limitations
Bonding agents are most effective on smooth surfaces where adhesion might otherwise be poor. They’re great for:
– Weak substrates: Like old, crumbling plaster or porous surfaces like concrete.
– Patch repairs: When you’re applying new plaster to an existing surface that’s been patched up.
However, they might not be necessary (or effective) in these situations:
– Already rough surfaces: Like textured walls or those with good ‘tooth’.
– Wet conditions: Bonding agents need time to dry and cure properly. Applying plaster too soon can weaken the bond.
Coverage: Estimating How Much Product You Need
Coverage depends on how porous the substrate is, how you apply the product, and whether you dilute it. A rough estimate should account for the first coat and any additional coats you plan to use. Porous or dusty surfaces will typically absorb more product than smooth, sealed ones.
Consider the method you’ll use—brush, roller, or spray—as well as any dilution you’ll perform. Always check the product data sheet or label for guidance on coverage per area and the number of coats recommended.
Step-by-step quantity calculation
Calculate how much plaster bonding agent you need for your project with these simple steps.
- Measure the length and width of your surface in feet. Multiply them to get the area (e.g., 10ft x 5ft = 50 sq ft).
- Check if you’re applying one or two coats. If it’s two, double your area.
- Divide the total area by the coverage rate listed on the product label (e.g., 20 sq ft per gallon). Round up to ensure you have enough.
- Convert gallons needed into quarts if that’s how the store sells it (1 gallon = 4 quarts).
- Add a 5-10% contingency for spills, waste, or unexpected surfaces. Recheck your math and adjust as needed.
Planning tolerances and safe ranges
When planning how much plaster bonding agent to buy, it’s crucial to consider variances in coverage rates. Manufacturers’ estimates can differ.
Low-end estimates are usually around 15-20 sq ft per gallon for one coat. For two coats, double this range.
To budget safely, plan on the high end of these ranges. This ensures you won’t run out mid-project. Always confirm the specific product’s stated coverage before purchasing.
Tack Time and Open Time: Definitions and Practical Impact
Tack time is the interval after application when the surface just starts to feel dry to the touch. Open time is how long you have before the material begins to set so you can work efficiently. Understanding both helps you plan passes and avoid premature plaster bonding failure.
These times can vary with temperature, humidity, and product type, so confirm on the product label or data sheet. If you’re unsure, check the manufacturer’s instructions and allow a conservative window to finish your application in one continuous step.
Factors that change tack time (temperature, humidity, dilution)
Tack time can vary based on site conditions. Here’s what to watch out for:
Temperature: Warmer temps speed up drying and reduce tack time. In cold weather, tack time increases.
Humidity: High humidity slows down drying, extending tack time. Low humidity does the opposite.
Dilution: Over-diluting your bonding agent reduces its effectiveness and extends tack time. Always follow manufacturer’s guidelines for mixing ratios.
Typical timelines and how to plan plastering work
Tack times can range from a few hours to overnight, so planning is key:
First, check the technical data sheet for exact tack time ranges. Then, schedule your trades accordingly.
For example, if you’re using a bonding agent with a 4-8 hour tack time, plan for plastering to start late morning and finish before lunch, giving enough time for the next trade (like taping and jointing) to begin in the afternoon.
Always allow extra time for unexpected delays or changes in conditions that could affect tack times.
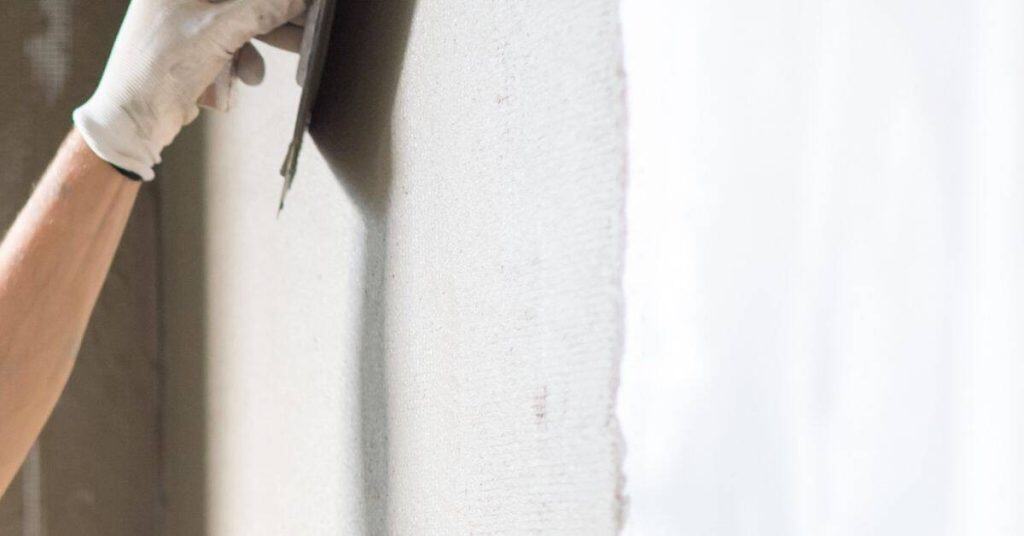
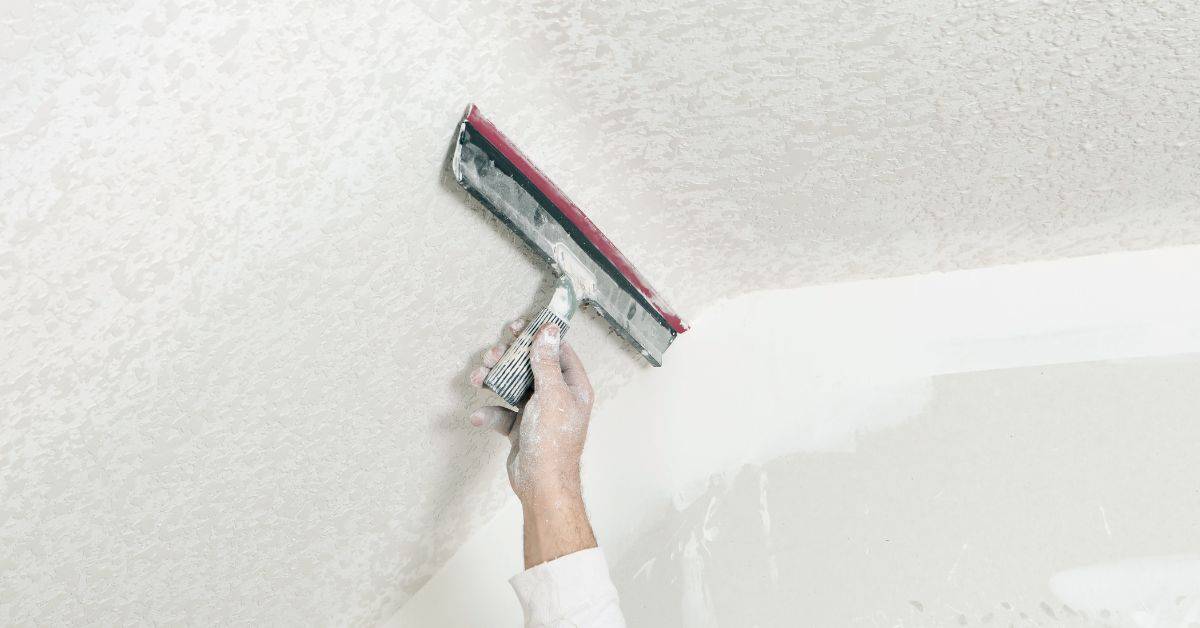
Surface Preparation and Step-by-Step Application
Begin with a clean, sound surface free of loose material, oil, and dust. Remove weak concrete, flaky plaster, and anything that will not accept a bond. Minor repairs should be addressed before applying the bonding agent.
Prime as directed by the product instructions, and keep surfaces dry unless the label specifies otherwise. Always verify prep requirements on the label or data sheet before starting each stage.
Step-by-Step Process
The following steps guide you through preparing your surface and applying the plaster bonding agent correctly.
- Inspect the area for safety. Remove any debris or obstacles.
- Clean the surface thoroughly using a suitable cleaner to remove dirt, grease, and other contaminants.
- Repair minor cracks and holes with a suitable filler. Allow it to dry completely before proceeding.
- Prime the surface using a bonding primer to seal the substrate and improve adhesion.
- Apply the bonding agent evenly following the manufacturer’s guidelines for coverage and tack time. Use a brush, roller, or sprayer as needed.
- Allow the bonding agent to cure according to the manufacturer’s instructions before applying plaster.
- After plastering, allow it to dry completely before sanding or painting.
- Perform final checks for any missed spots or areas that need touch-up.
Pre-application Inspection and Prep Checklist
Before applying the bonding agent, use this checklist to ensure your surface is in optimal condition.
- Inspect for contamination: Check for dirt, grease, or other contaminants. Remove them using a suitable cleaner.
- Check for efflorescence: Look for white, powdery deposits on the surface. If present, remove them with a wire brush and clean the area.
- Inspect for movement cracks: Check for hairline cracks that may indicate structural issues. If found, consult a professional before proceeding.
- Repair minor cracks: Fill small cracks with a suitable filler to prevent plaster from cracking later.
- Remove loose material: Scrape off any peeling paint or loose mortar to ensure good adhesion.
- Check for dampness: Ensure the surface is dry. Moisture can affect bonding agent performance and plaster adhesion.
- Inspect for previous coatings: Check if there are any old, incompatible coatings that need removal.
- Prepare the edges: Tape off any areas you don’t want to be affected by the bonding agent or plaster.
Quick rule: Always follow manufacturer’s guidelines for specific surface preparation instructions.
Application Techniques (Brush, Roller, Roller, Spray) and Best Practices
Each application method has its pros and cons. Choose the one that suits your project best.
Brush: Ideal for small areas and edges. Apply in a ‘W’ or ‘M’ pattern to ensure even coverage. Avoid overbrushing, which can remove the bonding agent.
Roller: Great for large, flat surfaces. Use a short-nap roller for best results. Apply in a ‘W’ or ‘M’ pattern, ensuring full coverage without leaving streaks or bare spots.
Sprayer: Fast and efficient for large areas. Spray in even, overlapping passes to avoid missed spots or overapplication. Ensure proper ventilation when using spray equipment.
Best practices: Always follow the manufacturer’s guidelines for coverage and tack time. Maintain a consistent film appearance to ensure even curing and adhesion. Keep your tools clean during application to prevent contamination.
Mixing, Dilution, and Pot Life
Follow the mixing directions exactly as printed, using the recommended tools and containers. Mix thoroughly to achieve a uniform consistency and avoid lumps. If dilution is advised, do it slowly and within the stated limits.
Pot life depends on the product and whether you’ve mixed it on site. Do not extend mix time beyond what the manufacturer allows; if unsure, consult the data sheet or instructions for pot life guidance and disposal practices.
How to determine correct dilution
Always follow the label instructions for dilution rates. These are set by the manufacturer based on extensive testing.
But don’t stop there. Test a small, hidden area with your intended mix to see how it performs. This ensures you’re getting the right balance between coverage and effectiveness.
Over-dilution can reduce bonding power, leading to poor adhesion. It also increases the risk of trowel marks and other application issues.
Storage, pot life, and recoat windows
Store your bonding agent in a cool, dry place. Heat and humidity can reduce its effective lifespan.
Pot life is the time during which the product remains usable after mixing or opening. It’s crucial for planning your work. Check the technical sheet to know yours.
Adhere to recoat times. Recoating too soon can lead to poor adhesion and reduced effectiveness of subsequent coats. Too late, and you might end up with a weak bond between layers.
Common Mistakes and Troubleshooting
Common errors include selecting the wrong product for the substrate, skipping or rushing prep, and over-diluting beyond recommendations. Poor prep strongly undermines bonding effectiveness and long-term durability. Keep the process aligned with the product instructions.
When trouble shows up, recheck substrate suitability, prep quality, and timing. For persistent issues, consult the label or data sheet for corrective steps and consider trialing on a small area.
Diagnosing adhesion failures
Poor bond between the plaster and substrate can lead to flaking, peeling, or powdering. First, check for signs like:
- Cracking or lifting at edges.
- Powdery residue when touched.
- Blisters or bubbles under the surface.
Confirm adhesion issues with a simple test: gently pull on the plaster with wide tape. If it lifts easily, you’ve got a problem.
Remedy this by:
- Re-prepping the surface: remove any loose material, clean, and prime again.
- Using the correct primer for your substrate.
- Ensuring proper tack time before applying plaster.
Quick fixes versus when to strip and start over
Before deciding, assess the damage:
- Small cracks or minor peeling can often be patched.
- Widespread issues, like large areas lifting off, need a complete redo.
When to strip and start over:
- Severe damage where patches won’t hold.
- Incorrect or incompatible primer was used initially.
- The original surface wasn’t properly prepared.
For quick fixes, use a flexible patching compound. But remember, if the problem’s extensive, it’s better to strip and start fresh for lasting results.
Tools and Materials Checklist
Assemble a basic DIY-friendly kit: bonding agent, clean brushes or rollers, a mixing container, a trowel, and painter’s tape for edges. Have personal protective equipment on hand, such as gloves and eye protection. Stock standard rags or brushes for cleanup.
Keep additional consumables like extra rollers, buckets, and a scraper ready for adjustments. Verify any site-specific requirements on product labels and local guidelines before starting.
Recommended application tools and accessories
Before you start applying your concrete mix, make sure you have the right tools to ensure a smooth, even finish. Use this checklist to double-check your equipment.
- Concrete Brush: For edging and finishing small areas. Check bristles are stiff yet flexible for effective spreading and smoothing.
- Push Broom: For spreading concrete quickly over large areas. Ensure broom has a sturdy handle and well-secured bristles.
- Concrete Float: For leveling and initial finishing. Check float’s wooden handle is secure, and magnesium or aluminum head is undamaged.
- Finishing Trowel (Square Shovel): For final smoothing and texturing. Inspect trowel for straight edges and no bends in the blade.
- Concrete Sprayer: For applying sealers or waterproofing agents. Ensure sprayer has a consistent spray pattern and adjustable nozzle.
- Paint Roller (for sealers): For applying sealers over large areas. Check roller cover is the right size (usually 9″ or 18″) and in good condition.
- Concrete Edger Tool: For creating clean, sharp edges along forms. Verify tool’s blade is straight and securely attached to the handle.
- Concrete Mixer (optional): For mixing large batches of concrete. Ensure mixer has a powerful motor and sturdy drum for efficient mixing.
Quick rule: Always clean your tools thoroughly after use to prevent concrete buildup, which can damage equipment and affect future jobs.
PPE and site protection items
Before you start any concrete work, ensure you have the right safety gear and site protection to avoid contamination and protect your finishes.
- Gloves: Check for durable, water-resistant gloves that provide a good grip. Ensure they fit well to prevent slipping.
- Safety Glasses or Goggles: Inspect for ANSI-approved eye protection with side shields to protect from debris and splashes.
- Dust Mask: Verify it’s a NIOSH-rated mask (e.g., N95) to protect against concrete dust. Ensure it fits properly around your nose and mouth.
- Ear Protection: Check for earmuffs or earplugs that provide adequate noise reduction, especially if using power tools.
- Drop Cloths: Inspect for heavy-duty plastic sheets to protect floors and surfaces from concrete spills. Ensure they’re large enough to cover the work area.
- Painter’s Tape: Check for high-quality, low-tack tape to secure drop cloths and create clean lines on walls or other surfaces. Avoid cheap tape that leaves residue.
- Concrete Sealer (optional): If applying a sealer, check the manufacturer’s instructions to ensure it’s compatible with your concrete mix and application method.
Quick rule: Always prioritize safety first. Ensure all PPE is in good condition and fits properly before starting any task. Regularly inspect and replace as needed.
Material Specs, Compatibility, and Quality Control
Learn to read the technical data sheet and label for substrate compatibility, VOC information, and recommended uses. Look for explicit notes about which surfaces are approved and any limitations. Cross-check with the plaster you intend to apply.
Check for standards or certifications that matter to your project and follow the manufacturer’s instructions. If anything on the label is unclear, contact the supplier or refer to the official data sheet for clarification.
Compatibility with gypsum, lime, and cement plasters
Bonding agents are not one-size-fits-all. They behave differently with various plaster types.
Gypsum: Most bonding agents work well here. But check if it’s designed for gypsum specifically to avoid issues like reduced adhesion or faster drying.
Lime: Lime plasters are trickier. Some bonding agents can cause lime to flash off, leading to poor adhesion and a weak finish. Always test first or consult the manufacturer.
Cement: Cement-based plasters need bonding agents designed for them. These ensure strong adhesion and prevent delamination. Again, testing is crucial.
Visual checkpoints and final inspection before plastering
Before you start plastering, use this checklist to ensure your bonding agent application is spot on.
- Uniform sheen: The surface should have a consistent gloss. Pooling or patchy areas mean you need to reapply.
- No pooling: Check for any puddles. These can cause weak spots and affect the final finish.
- Tack consistency: Gently touch the surface. It should feel slightly sticky, not wet nor dry. If it’s wrong, let it sit longer or reapply.
- No bubbles or foam: These can cause weak spots and affect adhesion.
- Edges are sealed: Ensure bonding agent reaches all edges to prevent plaster from peeling off.
- No dust or debris: Check for any contaminants. They can interfere with adhesion.
- Correct drying time: Wait until the recommended tack time is up before plastering. Too soon, and you’ll have poor adhesion; too late, and it might be over-dried.
- No signs of delamination: Gently tap the surface. It should sound solid, not hollow.
Quick rule: If anything’s off, don’t rush. Fix it before plastering to avoid costly repairs later.
Conclusion
Getting plaster bonding right protects safety, keeps finish quality, and prevents costly repairs later. With solid prep, correct mixing, and respect for tack and open time, your work will bond strong and look true.
First, estimate how much product you need and read the open time for your mix, then prep the surface, test a small area, mix and dilute only as specified, apply within the tack window in even coats, and keep conditions stable until the layer cures. Check that the bonding agent is compatible with your plaster and substrate, use the right tools, and control environment to avoid voids or cracks. Finally, seal and finish with a clean edge and follow a short curing routine so the job stays durable.
Common mistakes to avoid include applying after the surface has seized or dried, skipping proper surface cleaning or roughening, and ignoring the stated mix ratios or open time. Do not over-wet or over-thin the mix, and never proceed if you notice inconsistent bonding or delamination in a test area. Wear appropriate safety gear, work in a ventilated space, and never rush through curing or skip the quality checks.
If the substrate is unsupported, severely damp, or you’re unsure about compatibility with your plaster or environmental conditions, it makes sense to call a professional. Otherwise, stay disciplined with the plan, verify each step, and push forward with confidence—your finish should be solid, smooth, and built to last.
FAQ
Will a bonding agent stick to a glossy painted surface or a slick in-kind finish?
Bonding agents need a rough, clean surface to grab onto. If paint is slick or glossy, you’ll likely need to scuff or etch it and remove flaking paint before applying the bonding agent. Check the product instructions or label for surface preparation guidance.
Can I apply plaster over a bonding agent on a porous surface like drywall or masonry?
Yes, bonding agents are designed to improve adhesion on porous surfaces. Make sure the surface is clean, dry, and properly prepared per the product instructions. If in doubt, test a small area and follow manufacturer guidance.
What should I do if I’ve waited too long between applying the bonding agent and plaster?
The bond can weaken if the surface dries out or dusts. Re-blend or re-activate the surface as directed by the product label, or reapply the bonding agent after cleaning. Don’t assume it will still hold without recheck against the instructions.
How do I dispose of leftover bonding agent safely?
Follow the label for disposal details and local rules. Do not pour large amounts down the drain. If you’re unsure, contact the product’s manufacturer or your local waste facility for guidance.