
Introduction
Transforming a chalkboard surface into a fresh, new look requires careful planning and understanding of the time commitment involved. This step-by-step timeline guide walks you through painting over chalkboard paint, ensuring you allocate sufficient time for each stage to achieve lasting results.
From surface preparation to final sealing, follow this detailed duration breakdown to ensure your project stays on track and looks flawless.
Understanding the Timeline: How Long Does It Take?
The total duration of painting over chalkboard paint depends on various factors such as surface size, existing condition, and weather. On average, expect to spend around 3-5 days for the entire process, with each stage requiring specific drying times.
- Surface Preparation (Day 1): Cleaning, sanding, and repairing take approximately 2-4 hours, plus additional time for materials to dry.
- Priming (Day 2): Applying a bonding primer takes around 1-2 hours, with an additional 2-4 hours for drying.
- Painting (Day 3): Painting the surface requires about 2-4 hours, depending on the number of coats needed. Allow 2-4 hours of drying time between coats and overnight drying after the final coat.
- Sealing & Final Touches (Day 4-5): Applying a sealant takes around 1 hour, with an additional 2-4 hours for drying. Allow the surface to cure for at least 24 hours before heavy use.
By following this timeline and allowing adequate drying time between stages, you’ll ensure a durable, long-lasting finish that minimizes ghosting and maximizes adhesion.
Key takeaways
Properly preparing the surface is crucial for achieving a smooth, even finish and preventing ghosting. This stage can take up to half a day, but it significantly impacts the overall project duration and final result.
- Understand chalkboard paint’s composition and ghosting causes before refinishing properly.
- Test adhesion on small area after cleaning to prevent future surprises.
- Choose bonding primers and stain-blocking options suited to your surface.
- Clean, sand, and repair; don’t skip repairs that trap ghosting.
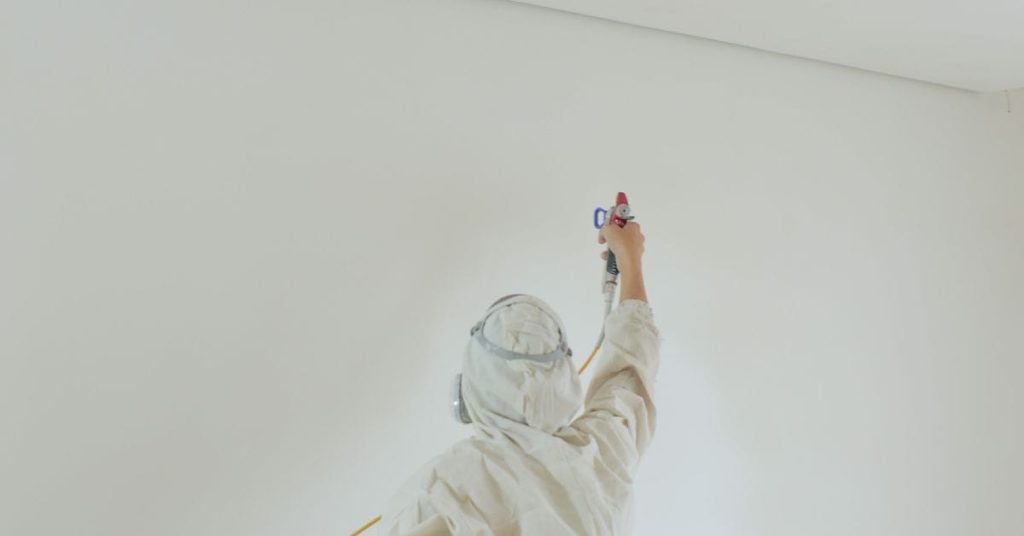
- Apply thin, even coats and allow proper drying per label instructions; wear PPE.
- Seal with appropriate topcoat and test for any lingering ghosting.
Table of Contents
- Introduction
- Key takeaways
- Understanding Chalkboard Paint and the Causes of Ghosting
- Assessing the Existing Surface and Doing Proper Testing
- Tools and Materials Checklist
- Surface Preparation: Cleaning, Sanding, and Repairs
- Priming for Bond and Stain-Blocking
- Painting Strategies to Avoid Ghosting
- Sealing, Specialty Treatments, and Alternatives
- Troubleshooting Persistent Ghosting and Corrective Actions
- Conclusion
- FAQ
Understanding Chalkboard Paint and the Causes of Ghosting
Chalkboard paint is a coarse, matte coating formulated to accept chalk mark residue and provide a low-reflective writing surface. Its finish and porosity let chalk particles and binding fillers sit in or on the film, which can show through subsequent coatings as faint lines or shadows called “ghosting.”
Ghosting happens when surface residue, absorbed pigment, or incompatible chemistries interfere with adhesion or stain-blocking of new paint. Porous film, leftover chalk dust, and a primer or topcoat that won’t seal or bond to the chalk layer are the typical culprits to check.
Composition and surface characteristics of chalkboard paint
Chalkboard paint is a special type of latex paint that contains fine particles of calcium carbonate, the same material found in traditional chalk. This gives it its unique ability to be written on with chalk.
The binders used in chalkboard paint are typically acrylic or vinyl, which create a porous surface. This porosity allows for better adhesion of chalk but also makes the surface prone to holding chalk particles and staining.
Chalkboard paint usually has a matte finish, which further enhances its ability to accept chalk writing. However, this matte finish can also make it more susceptible to showing stains and residue from previous use.
How ghosting forms and why it shows through new coats
Ghosting, or the appearance of faint outlines of old chalk drawings after repainting, is primarily caused by embedded chalk residue. Even if you’ve wiped down the surface, tiny particles can remain trapped in the porous paint.
The pigment in chalkboard paint also plays a role. When you write on the surface with chalk, some of the chalk’s pigment gets absorbed into the paint. This staining can bleed through new coats of paint, causing ghosting.
Moreover, not all parts of the surface absorb paint evenly. Differential absorption occurs when certain areas take in more paint than others. This can cause visible differences in color and tone, contributing to the ghosting effect.
Assessing the Existing Surface and Doing Proper Testing
Start by visually inspecting the area, feeling for texture differences, and checking edges for previous topcoats or exposed substrate; photograph trouble spots for your records. Identify the substrate under the chalkboard paint and note whether the surface was primed or previously sealed.
Run quick tests in an out-of-the-way patch: clean a small area, abrade another, and apply a test primer and topcoat to see if ghosting reappears after curing. Record results and keep photos and notes so you can compare treatments and show product manufacturers if you need guidance.
Visual checkpoints and contamination tests
Before you start painting, use this checklist to inspect your chalkboard surface. Contaminants and previous coatings can cause ghosting or poor bonding.
- Chalk haze: Wipe with a damp cloth to reveal any remaining chalk residue that could interfere with bonding.
- Sheen differences: Check for areas with varying sheen, which might indicate previous topcoats or contaminants.
- Streaks or discoloration: Inspect for these signs of dirt, grease, or other contaminants that could affect paint adhesion.
- Cracking or peeling: Check for any damaged areas where new paint might not adhere properly.
- Wax or oil residue: Wipe with a cloth dampened with rubbing alcohol to test for these contaminants that can prevent bonding.
- Previous topcoats: Use a solvent like mineral spirits and a cotton swab to gently rub the surface. If paint comes off, you’ve found a previous topcoat.
- Substrate type: Ensure your chalkboard paint is on a suitable substrate (like drywall or wood) before proceeding.
- Photograph problem areas: Document any issues for future reference and to track progress.
Quick rule: If you find contaminants, clean them. If you find previous topcoats, sand lightly and clean again.
Small-scale test patch protocol
Before painting the entire surface, create a small test patch to ensure your chosen primer and paint bond well with the chalkboard paint. This helps avoid costly mistakes.
Step 1: Choose an inconspicuous area or section off a small part of the wall using painter’s tape.
Step 2: Apply your chosen primer following the manufacturer’s instructions, then let it dry according to the recommended timeframe. Observe any changes in appearance during this period.
Step 3: Once dry, apply a coat of your chosen paint and allow it to cure completely. Inspect for signs of ghosting or poor adhesion. Gently clean the area with a damp cloth to check if any chalk residue comes off.
Step 4: Evaluate the test patch. If there’s no ghosting, good adhesion, and no chalk residue, your chosen primer and paint should work well on the entire surface. If not, try different primers or paints until you find a suitable combination.
Tools and Materials Checklist
Gather cleaning agents (mild detergent, TSP alternative), hand and power abrasives (sanding blocks, orbital sander), fillers or spot-putty, and a selection of primers and topcoats suitable for adhesion and stain-blocking. Include applicators (brushes, rollers), tack cloths, and disposable mixing/container supplies.
Don appropriate PPE: respirator for dust/solvent work, gloves, and eye protection, plus testing supplies like sample panels or small cans for trial sections. Verify compatibility and instructions on each product label or technical data sheet before proceeding.
Cleaners, abrasives, and application tools
Before you start any concrete work, use this checklist to ensure you have the right cleaners, abrasives, and application tools. This will help you achieve a smooth, durable finish.
- Degreaser: Check that you have a degreaser suitable for your surface. It should be designed to remove oil, grease, and dirt. Always follow the manufacturer’s instructions.
- Trisodium Phosphate (TSP) alternative: If using an eco-friendly TSP substitute, ensure it’s specifically designed to replace TSP in concrete cleaning applications. Check the product label for compatibility.
- Sanding grits: Have sandpaper or sanding screens with grit sizes ranging from 120 to 320. You’ll need these for smoothing and preparing your surface.
- De-glossing pads: Include non-woven de-glossing pads in your tools. These help remove any remaining gloss or sheen, allowing better paint adhesion.
- Concrete brushes: Ensure you have stiff-bristled concrete brushes for scrubbing and removing loose material from the surface.
- Rollers: For application, have 9-inch or 18-inch rollers with a 3/4-inch or 1-1/2-inch nap cover. These are suitable for most concrete surfaces.
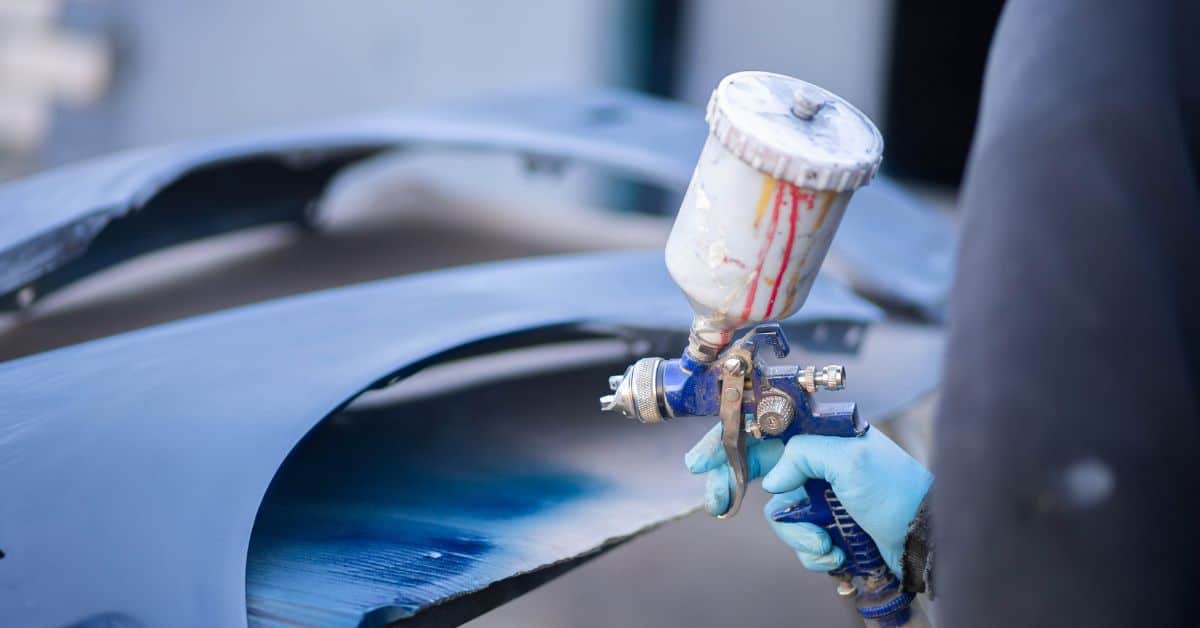
- Paint sprayer (optional): If planning to use a paint sprayer, ensure it’s compatible with your chosen concrete sealer and has the appropriate nozzle size for your project.
- Protective gear: Don’t forget safety equipment like gloves, goggles, and a dust mask. These protect you from harsh chemicals and airborne particles during cleaning and application.
Quick rule: Always test your chosen cleaners, abrasives, and application tools on a small, hidden area first to ensure compatibility with your specific concrete surface and desired finish.
Primers and Topcoat Types to Consider
Before you start applying your topcoat, use this checklist to ensure you’ve chosen the right primer and topcoat for your concrete surface. This will help you achieve a durable, long-lasting finish.
- Bonding Primer: Check if it’s designed for concrete and promotes adhesion between old and new surfaces. Confirm by reading the product label.
- Stain-Blocking Primer: Use if your surface has stains or tannins that could bleed through. Test a small area first to ensure it works effectively.
- Shellac-Based Primer: Consider if you’re painting over existing paint and want to seal the surface before applying your topcoat. Check manufacturer instructions for compatibility with your topcoat.
- Oil-Based Primer: Use if you’re applying an oil-based topcoat. Verify it’s compatible with your chosen topcoat by checking product labels.
- High-Adhesion Waterborne Primer: Opt for this if you’re using a waterborne topcoat and want to improve adhesion. Confirm it’s high-adhesion and suitable for concrete on the product label.
- Latex Topcoat: Choose if you want a durable, flexible finish that cleans up easily with water. Check if it’s suitable for your specific application (e.g., floor, vertical surface) by reading the product label.
- Alkyd Topcoat: Consider if you need better durability and stain resistance than latex can provide. Ensure it’s compatible with your chosen primer by checking both product labels.
- Proper Surface Preparation: Before applying any primer or topcoat, ensure the surface is clean, dry, and free of contaminants. A quick visual check should suffice.
Quick rule: Always match your primer to your topcoat’s base (oil-based, waterborne). This ensures optimal adhesion and durability. Skipping this can lead to peeling or flaking, causing expensive rework.
Surface Preparation: Cleaning, Sanding, and Repairs
Begin with a thorough cleaning to remove chalk dust and grease, then progressively abrade the surface to remove loose film and key the finish for primer. Work from solvent or cleaner stage into light sanding, then heavier sanding where adhesion or peeling is present.
Repair gouges or substrate damage with appropriate filler, feather the repairs into the surrounding area, and clean again to remove sanding dust. Don’t skip repetitive cleaning and inspection—proper preparation is what prevents reappearance of ghosting under new paint.
Deep cleaning and de-greasing methods
Start by removing any loose chalk dust with a soft brush. Then, apply a degreasing cleaner to cut through grease and grime. Let it soak for 10-15 minutes before scrubbing with a non-abrasive pad or sponge.
Rinse thoroughly with clean water after scrubbing. Use a neutralizer like white vinegar diluted in water to ensure no cleaning residue is left behind, which could interfere with paint adhesion.
Let the surface dry completely before moving on to sanding. This step might seem time-consuming, but it’s crucial for a successful paint job.
Sanding and de-glossing techniques
Lightly sand the chalkboard surface to create ‘teeth’ that primer and paint can grip onto. Start with 120-grit sandpaper for a fine, even finish.
For small areas or hard-to-reach spots, use sanding sponges or a sanding block by hand. For larger surfaces, consider using an orbital sander to speed up the process.
Sand with the grain of the chalkboard paint, not against it. Wipe off dust with a damp cloth after sanding, then let it dry before priming.
Filling, patching, and addressing substrate defects
Inspect the surface for any gouges, seams, or flaking areas. Use a suitable filler (like spackling compound or wood filler) to fill these defects.
Apply the filler with a putty knife, ensuring it’s slightly below the surface level. Let it dry according to the manufacturer’s instructions, then lightly sand it smooth using 120-grit sandpaper. Wipe off dust and let it dry before priming.
For larger defects or holes, you might need to apply multiple layers of filler. Make sure each layer is completely dry and sanded smooth before applying the next one.
Priming for Bond and Stain-Blocking
Choose a primer designed to bond to slick or porous coatings and to seal in staining agents; if unsure, test a small area or check the manufacturer data sheet for substrate compatibility. In some cases, a bonding primer followed by a stain-blocking sealer is the correct layering approach to isolate chalk residues.
Apply primer according to the product directions and inspect the test patch for any bleed-through or adhesion loss before committing to the whole job. If the test shows ghosting, step up to a stronger sealer or consult the product instructions for alternative specification.
Choosing between shellac, oil, and high-adhesion primers
When it comes to priming your chalkboard surface, you’ve got a few options. Let’s break down the benefits of each.
Shellac-based sealers are great for stain-blocking. They’re natural, non-toxic, and dry fast. But they can raise the grain of the surface and may not be the best choice if you’re painting a dark color over light chalkboard paint.
Oil/alkyd primers offer good adhesion and stain-blocking properties. They’re versatile and can be used on a variety of surfaces. However, they take longer to dry compared to shellac and may yellow over time if not fully cured.
High-adhesion primers are designed for tough jobs. They provide excellent bonding and stain-blocking capabilities. They’re ideal when you’ve got a challenging surface or severe staining issues. But they can be more expensive than other options.
Proper primer application and cure considerations
Applying primer right is half the battle. Here’s how to do it:
Start with thin, even coats. You’re not painting a masterpiece here; you just want a consistent layer. Too thick and you’ll end up with drips or a tacky surface that won’t accept paint.
Check the manufacturer’s cure time. Don’t guess at this one. Different primers need different drying times before you can apply your topcoat. Rushing it could lead to solvent entrapment, which means your new paint might not stick properly.
To avoid film failure, make sure each coat is completely dry before applying the next. And don’t forget to sand lightly between coats with fine-grit sandpaper to remove any dust or imperfections. This will give you a smooth surface for your topcoat.
Painting Strategies to Avoid Ghosting
Select a durable topcoat with good hiding and apply it in consistent, properly wet coats—avoid both film that’s too thin to hide stains and overly thick single passes that can sag. Control the drying environment and follow recommended recoat windows from the product label to promote even curing and adhesion.
Promote adhesion by ensuring surfaces are primed correctly and by scuff-sanding between coats if the product instructions advise. Always test your chosen system on a trial area and check for ghosting after full cure before finishing the entire surface.
Topcoat choices and finish recommendations
For painting over chalkboard paint, choose a durable, high-quality latex paint. These paints have better hiding power, helping to minimize the appearance of ghosting.
Sheen matters. Higher sheens reflect more light, making minor shadows less noticeable. Semi-gloss or satin finishes are good choices for chalkboard surfaces.
Stay away from flat or low-luster paints. They absorb light, emphasizing any underlying stains and making ghosting worse.
Application tips: coats, environment, and technique
Apply topcoats in thin, even layers. Thick coats can highlight imperfections and cause ghosting. Aim for 2-3 coats, allowing each to dry according to the manufacturer’s instructions.
Control your painting environment. Ideal conditions are between 65°F – 85°F (18°C – 29°C) with humidity below 70%. Too much moisture in the air can slow drying and increase ghosting risks.
Use a combination of techniques: brush for edges, roll for large areas, and spray for fine details. This ensures even coverage and reduces the likelihood of visible strokes causing ghosting.
Sealing, Specialty Treatments, and Alternatives
Consider clear coats or specialty sealers when you need extra protection against residual staining or when converting functional chalk surfaces to decorative finishes. Alternatively, stripping the chalkboard layer back to substrate or embracing the chalk surface as a feature are valid options with different long-term maintenance implications.
Weigh the pros and cons—sealing may require compatible topcoats and recoat timing, while stripping introduces extra labor and possible substrate repair. When unsure which route to take, consult product literature and test small sections to see how each option performs.
Clear coats and protective top layers
A clear coat can lock in your paint job, protect it from scuffs, and enhance its sheen. It’s ideal when you want to preserve the chalkboard functionality but need extra protection.
The most common types are:
- Polyurethane: Tough, durable, and available in gloss or satin finishes. It can yellow over time.
- Varnish: More natural-looking, less durable, and can darken with age.
- Wax: Provides a soft sheen, easy to apply, but offers less protection.
Consider: Clear coats can affect appearance. They may emphasize imperfections or change the chalkboard’s matte finish. Future repainting will be easier with a clear coat on.
When to strip or chemically remove chalkboard paint
Stripping is best when you want to completely remove the chalkboard functionality and start fresh. It’s also necessary if the existing paint is damaged, peeling, or has severe ghosting.
Safety first: Always wear gloves, eye protection, and work in a well-ventilated area. Test stripper on a small hidden area first.
Removal options: Use chemical strippers specifically designed for latex paints. Apply, let it sit, then scrape off the paint using a putty knife or paint scraper. Follow up with sanding to smooth the surface.
Troubleshooting Persistent Ghosting and Corrective Actions
If ghosting reappears after your first attempt, follow an escalating approach: re-clean and abrade, retry a more robust primer/sealer, then, if necessary, strip to the substrate and restart. Look for clues—staining that returns after cleaning points to deep embedment, while poor adhesion suggests chemical incompatibility or inadequate surface profile.
After each corrective step, re-test a patch, document the results, and photograph changes so you can confirm progress or show details to a product rep. If repeated attempts fail, check manufacturer technical guidance or local pros for methods compatible with your specific materials.
Quick fixes for minor ghosting
If you’re seeing light ghosting, don’t panic. Here are some quick remedies:
Spot-priming: Apply a bit more primer to the affected areas. This can help seal any remaining chalkboard paint and prevent further ghosting.
High-hide primer coat: If you’ve already primed, adding another coat of high-hide primer might do the trick. It’ll help cover up any lingering ghosting.
Sanding and re-coating: Lightly sand the affected areas with fine-grit sandpaper, wipe clean, then apply another coat of paint. This can help smooth out minor ghosting.
Major interventions and when to call a professional
Sometimes, quick fixes aren’t enough. Here’s when you might need to consider major interventions:
Full stripping: If ghosting is severe and persistent, it might be time to strip the chalkboard paint off completely. This involves using chemical strippers and thorough cleaning.
Substrate replacement: In some cases, the substrate (the surface you’re painting on) itself might be at fault. If it’s damaged or incompatible with your paint, you might need to replace it.
Professional restoration: If DIY methods aren’t working and the ghosting is causing significant issues, it might be time to call in a professional. They have access to specialized tools and techniques that can tackle tough ghosting problems.
Conclusion
A durable, clean look comes from surface prep, the right bonding primer, and smart sealing. Safety steps and careful testing prevent costly fixes and keep the chalkboard area looking even and flat over time.
Complete the work by following a simple flow: test a small area for adhesion and ghosting, clean and repair the surface, sand where needed, apply a stain-blocking primer, choose a painting strategy that minimizes ghosting, and seal the finish. Work in clear order, check each step off, and prioritize safety—eye protection, masks if dust is present, and proper ventilation.
Avoid these common mistakes: skipping a test patch or rushing through cleaning and repairs, using the wrong primer or too thin a coat, and skipping sealing or choosing an incompatible top coat. Safe rules of thumb are to test first, read the product directions, and allow full cure time between coats; never apply solvent-heavy products in a confined space without ventilation, and don’t over-sand or gouge the surface, which invites failure.
If the ghosting persists after following the tested plan, or if the chalkboard surface is severely cracked, warped, or peeling, it’s wise to bring in a professional. When in doubt, err on the side of caution and get a second opinion before you damage the substrate. Stay steady, follow the steps, and you’ll see a solid, long-lasting finish that handles wear and cleaning with confidence.
FAQ
Why does chalkboard paint ghost through fresh topcoats, and how can I stop it?
Ghosting happens when the chalky film or oil in the chalkboard paint isn’t fully blocked by primer or sealed by the topcoat. Start with a proper clean and a suitable stain-blocking primer, then use a high-quality finish that’s compatible with chalkboard paint. Check the product labels for layering tips and wait times between coats.
Can I test for ghosting before committing to a full recoat process?
Yes. Do a small test spot in an inconspicuous area with your chosen primer and paint. If the dark or chalky look still shows through after the test coats, adjust your approach before proceeding to the whole surface. Rely on the manufacturer’s instructions for testing guidance.
What should I look for in a primer to prevent ghosting?
Look for a primer that specifically mentions stain-blocking or chalkboard compatibility. Some primers are labeled as universal bonding or sealer; read the label to confirm it’s suitable for chalky surfaces. If in doubt, contact the primer maker or check their instructions for chalkboard paints.
If ghosting returns after painting, what practical steps can I take next?
Reinspect the surface for any remaining chalk residue, and re-clean thoroughly. Consider applying a fresh coat of a compatible sealant or a different topcoat as recommended by the product instructions. Always verify that each product you use is compatible with the previous layer.