

Introduction
Roller shedding and lint in paint happen when fibers from the roller or surface lint mix with wet paint and leave fibers on the wall. This article shows practical, hands-on steps to prevent it and clean up without repainting the whole wall.
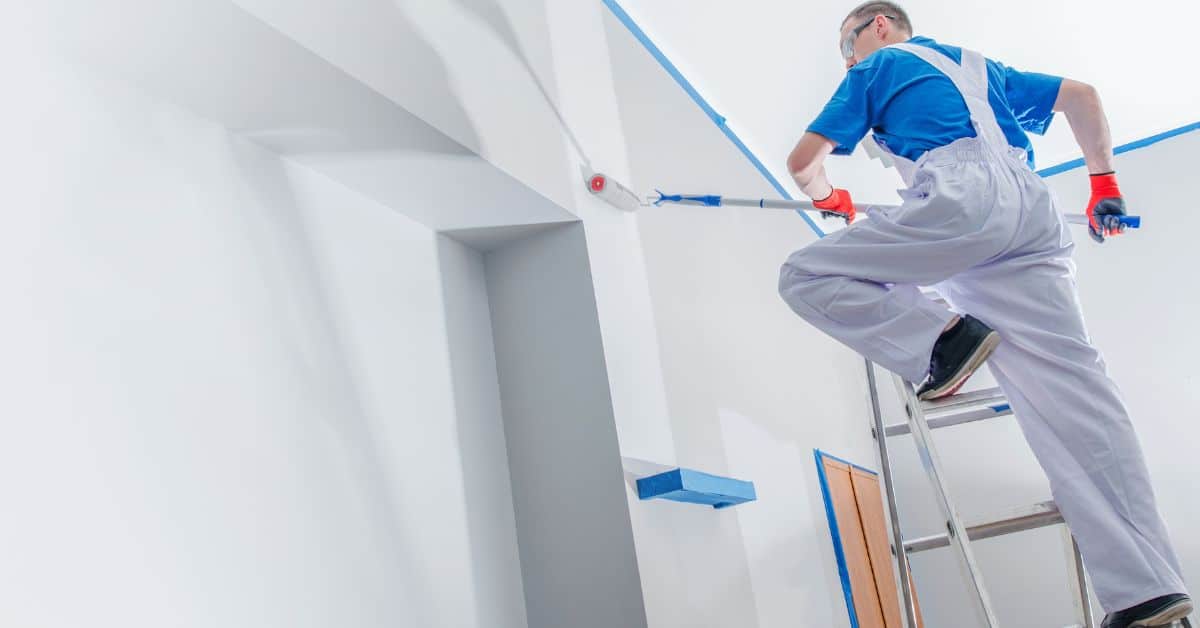
Use a clean roller and check for loose fibers before you start. Load the roller evenly and keep a steady, light touch to minimize shedding. If lint appears, wipe it off gently with a clean cloth while the paint is still workable and follow the manufacturer’s instructions for cleanup.
Key takeaways
- Inspect walls under lighting; identify fibers, fuzz, or specks before repainting.
- Use a high-quality lint-free roller cover; replace if shedding occurs during painting.
- Check environmental conditions like humidity and dust; cover floors and protect adjacent areas.
- Clean dried lint with a damp cloth or microfiber and avoid scraping paint.
- Immediately fix tacky areas by careful re-wetting and light re-rolling, not full repaint.
- Spot repair with matching paint and thin coats after lint cleanup; blend edges.
- Wear a mask and eye protection when sanding or sweeping to minimize dust exposure.
Table of Contents
- Introduction
- Key takeaways
- What Roller Shedding and Lint Look Like and Why They Matter
- Tools and Materials Checklist
- How Shedding Happens: Rollers, Materials, and Environmental Causes
- Preventing Shedding Before and During Painting
- Immediate Fixes While Paint Is Still Tacky or Just Set
- Cleaning and Removing Dried Lint and Fibers Without Repainting
- Spot Repair and Minimal Repainting Options When Cleaning Isn’t Enough
- Visual Checkpoints, Troubleshooting, and When to Call a Pro
- Conclusion
- FAQ
What Roller Shedding and Lint Look Like and Why They Matter
Roller shedding is when fibers break loose from the roller cover and end up in the paint film. Lint refers to small fibers that cling to the surface as you roll. You might see fluffy patches, stringy trails, or speckles sticking to wet or dry paint, and these textures can linger if not addressed.
Leaving fibers or flaky bits behind can spoil the evenness of the finish and may shorten the life of the paint job. A good cleanup now helps prevent visible defects later and reduces touch-up work. Understand what you’re looking for so you can target the right fix without repainting large areas.
Visual characteristics to spot
Roller shedding and lint can be tricky to spot, but knowing what to look for helps. Here’s how:
Loose Fibers: You might see tiny threads or strings hanging off the wall or embedded in the paint. They’re usually white or match your roller cover color.
Tiny Bumps: These are like small, hard pimples on the surface. They feel rough to touch and can be tough to sand down.
Embedded Lint: This looks like tiny, soft balls or clumps in your paint. It’s usually grayish-white and feels like fabric when you rub it.
Short- and long-term risks
Lint might seem harmless, but it can cause issues both now and later:
Appearance: It ruins the smooth finish you’re after. Your wall will look bumpy or have visible fibers.
Topcoat Adhesion: Lint can prevent new paint from sticking properly. This means your topcoat could peel, chip, or flake off over time.
Susceptibility to Dirt/Staining: Those tiny bumps and fibers trap dirt and dust. They also absorb stains more easily than smooth paint, making them harder to clean.
Tools and Materials Checklist
Create a simple kit with a few cleaning and repair tools that won’t scratch the surface. Include a soft brush or microfiber cloth, a clean damp cloth, and a vacuum with a brush attachment for dry lint. Have a putty knife or plastic scraper handy for minor dry spots if needed.
Also gather safety items like gloves and eye protection, plus simple household options such as mild soap and water. Consider having a small container for spot cleaning and a lightweight touch-up brush for any delicate areas. Always check manufacturer instructions or product labels to confirm compatibility with your paint finish.
Cleaning tools and consumables
Before you start, gather these cleaning tools to tackle lint and roller shedding. They’re gentle on paint and effective at removing debris.
- Vacuum with soft-brush attachment: Gently removes lint without damaging the paint surface. Use it first to avoid spreading lint around.
- Lint roller: Ideal for small areas and edges. It picks up lint quickly but may leave residue behind.
- Tack cloths: Stickier than lint rollers, they’re great for larger areas but can be messy.
- Microfiber cloths: Soft and gentle, they won’t scratch the paint. Use damp with mild soap for tougher spots.
- Soft bristle brush: Gently removes stubborn lint. Avoid using on textured or delicate surfaces.
- Gentle erasers (like Mr. Clean Magic Eraser): Effective on tough stains but may remove some paint if not used carefully.
Quick rule: Start with the vacuum, then use other tools as needed based on the size and type of lint.
Safe solvents and spot-test protocol
Before using any solvent or cleaner, follow this checklist to ensure you’re not damaging your paint.
- Check manufacturer’s recommendations: Always consult the paint can label or manufacturer’s website for cleaning guidelines.
- Perform an inconspicuous spot test: Apply a small amount of cleaner to a hidden area (like behind a piece of furniture) to check for any adverse reactions.
- Use mild, paint-safe cleaners only: Opt for gentle solvents like isopropyl alcohol or mild dish soap diluted in water. Avoid harsh chemicals like acetone or bleach.
Quick rule: Always spot test and follow manufacturer’s guidelines to prevent damaging your paint finish.
Protective gear and surface protection
Safety first! Protect yourself, your paint job, and surrounding areas with these essentials before you start cleaning.
- Gloves: Protect your hands from solvents and debris. Choose a pair that fits well for better control.
- Eye protection (safety glasses or goggles): Shield your eyes from flying lint, dust, or solvent splashes.
- Drop cloths: Cover the floor and surrounding areas to protect them from cleaners and prevent further spreading of lint.
Quick rule: Always wear protective gear and cover nearby surfaces before starting any cleaning task.
How Shedding Happens: Rollers, Materials, and Environmental Causes
Low-quality rollers or those with improper loft can shed more fibers during use. Incomplete roller prep, such as not breaking in the cover, can also release loose strands. A dusty or dirty surface increases the chance of lint sticking to the wet paint.
Environmental factors like humidity or air movement can cause fibers to loosen or attract dust as you work. Poor storage or aging of the roller can contribute to shedding over time. By understanding these sources, you can target the root cause rather than chasing symptoms.
Roller and Nap Quality Explained
The roller’s construction and nap type play a significant role in shedding. Here’s what you need to know:
Nap Type: Longer naps hold more paint but can shed more fibers. Shorter naps are less likely to shed but may not hold enough paint for smooth coverage.
Roller Construction: High-quality rollers have tightly wound, uniform fibers that resist shedding. Cheap rollers often have loose, uneven fibers that fall off easily.
Before using a new roller, spin it in a bucket of water to remove any loose fibers. This simple step can prevent many shedding issues.
Paint Compatibility and Additives
The type of paint and any additives used can affect how well it adheres to the roller and minimize shedding. Here’s why:
Paint Formulation: Some paints are more prone to picking up fibers than others. Latex paints, for instance, tend to be less forgiving with rollers.
Additives: Certain additives like primers or texture enhancers can change the paint’s tack and make it stickier, reducing shedding. However, they may also trap more fibers if not compatible.
Always check your paint’s compatibility with rollers and consider using a suitable primer to minimize shedding risks.
Environmental and Surface Factors
Your painting environment and the condition of your walls can contribute to lint pickup. Consider these factors:
Dust: A dusty surface or environment can cause fibers to stick to your roller, leading to shedding during application.
Airflow: Strong airflow from fans or open windows can dry the paint too quickly, causing it to pick up more fibers as you roll.
Humidity: High humidity can make paint tacky and prone to picking up lint. Conversely, low humidity can cause paint to dry too fast, leading to similar issues.
Ensure your walls are clean, the environment is dust-free, and consider the humidity levels before painting to minimize shedding.
Preventing Shedding Before and During Painting
Inspect and prepare the surface thoroughly before you start to reduce loose fibers that can catch on fresh paint. Use a clean, dry cloth to wipe down the area and remove visible dust. Roll and re-roll in small sections to watch for loose fibers before they set.
Keep the work area free of dusty debris and avoid rolling over lint-prone textures. If you must pause, cover the space to prevent stray fibers from falling onto the wet film. Always follow product labels for recommended prep steps and drying times.
Preparing rollers and new supplies
The quality of your roller can make a big difference in preventing shedding. New rollers often come with loose fibers that can end up on your wall.
- Shake it out: Before use, gently shake the roller to remove any loose fibers. Do this outside to avoid creating a mess indoors.
- Tap and rinse: For a more thorough cleaning, tap the roller against a hard surface to loosen fibers, then rinse with water. This works best for synthetic rollers.
- Use a lint-free towel: Wipe the roller with a damp, lint-free cloth to remove any remaining fibers. This is especially useful for foam rollers.
- Avoid low-quality rollers: Cheap rollers may shed more due to poor construction. Look for rollers with good reviews and ratings.
- Check for damaged naps: Inspect your roller’s nap for any damage or unevenness. Damaged naps can cause inconsistent coverage and increased shedding.
Surface preparation and dust control
Proper surface preparation is key to preventing dust from getting into your paint and causing shedding. Start by cleaning the walls with a damp cloth or sponge.
Control airflow: Keep windows closed and use fans to direct airflow away from the painting area. This helps prevent dust from being kicked up.
If possible, pause painting during heavy dust activity, like when trucks are driving by or it’s windy outside. Resume once the dust has settled.
Rolling technique and workflow tips
A consistent rolling technique can help minimize shedding. Start by lightly loading your roller with paint, ensuring it’s evenly distributed across the nap.
Avoid overworking tacky paint: Be careful not to overwork the paint once it starts to tack. This can cause fibers from the roller to stick to the wall and later shed off.
Use even strokes, working in ‘W’ or ‘M’ patterns to ensure consistent coverage. Don’t press too hard; let the weight of the roller do the work.
Immediate Fixes While Paint Is Still Tacky or Just Set
Gently lift loose lint with a soft brush or microfiber cloth while the film is still tacky. A light, non-abrasive touch helps remove fibers without disturbing the coating. Avoid scrubbing or pressing hard on the surface.
If fibers are stubborn, use a clean, dry brush to coax them away from the edge of a painted area. A quick, careful wipe with a damp cloth can pick up stray pieces after the film begins to set but before it fully cures. Do not use harsh tools that could mar the finish.
Using a soft vacuum or brush
If your paint is still tacky, you can gently remove lint using a soft-brush attachment on your vacuum. Be careful not to press too hard and disturb the wet paint.
Alternatively, use a very soft brush to lightly flick the fibers off the surface. Work in small sections at a time.
Tip: Always test these methods on a small, hidden area first to ensure they don’t damage your paint.
Lint rollers and low-tack tape
For fresh lint, use a lint roller. Gently roll it over the affected area to pick up fibers without pulling paint.
Low-tack masking tape can also work wonders. Press it lightly onto the surface, then pull it off quickly at a 45-degree angle to lift away lint.
Caution: Be gentle to avoid pulling off wet paint or leaving adhesive residue.
When to wait and let cure slightly
If your paint is too wet, you might end up smearing it or pulling it off. Wait for the paint to firm up a bit before attempting removal.
For latex paints, this usually takes around 15-30 minutes. For oil-based paints, it could take longer – up to an hour or more.
Rule of thumb: If you can lightly touch the paint without leaving a fingerprint, it’s ready for lint removal.
Cleaning and Removing Dried Lint and Fibers Without Repainting
Start with gentle options like a soft brush, microfiber cloth, or light tapping to loosen fibers from the cured surface. A low-abrasion pad used cautiously along the edge of a fiber can lift it without creating new marks. Test in an inconspicuous spot first.
If still stubborn, consider careful local abrasion or spot blending using compatible repair products, following the manufacturer’s instructions. Apply pale touches or blends only where needed to avoid noticeable repainting. Always verify compatibility with the existing finish on the label or data sheet.
Dry methods: microfibre, erasers, and soft brushes
Start with dry methods to lift or crumble embedded fibers without risking paint damage. Grab a clean microfibre cloth, a rubber cleaning eraser, or a soft-bristled brush.
Microfibre cloths are gentle yet effective. Gently rub the affected area in small circles. The static can help lift lint.
Rubber erasers can be useful for stubborn fibers. Gently press and twist to break up the fibers, then blow off or vacuum away.
Use a soft brush for larger areas or tougher fibers. Lightly stroke in one direction to avoid spreading lint around.
Gentle wet cleaning and solvent precautions
For set-in fibers, use minimal dampening agents. Start with water, then try mild soap or a paint-safe cleaner if needed.
Test first on a hidden spot to ensure no color bleeding or lifting. Blot the lint gently using a clean cloth, do not rub as it can lift the paint.
If water isn’t cutting it, try a small amount of rubbing alcohol or mineral spirits. Apply sparingly with a cotton swab, blot, and let it evaporate before touching again.
Remember, less is more. Over-wetting can lift paint, so keep it damp but not soaked.
Fine abrasion and smoothing
For tiny bumps or stubborn fibers, use a very fine abrasive or polishing compound. Start with a hidden spot to test for any adverse reactions.
Use a soft cloth or foam applicator pad to apply the compound in small circles. Let it sit briefly, then buff off gently using a clean, dry cloth.
If you’re still seeing bumps, try a very fine sandpaper, like 2000-grit or higher. Gently sand in one direction, then wipe away dust and check your progress.
After any abrasion, clean the area gently with a damp cloth and let it dry completely before touching again.
Spot Repair and Minimal Repainting Options When Cleaning Isn’t Enough
For persistent defects, you can perform small, controlled touch-ups that blend with the surrounding area. Use a fine brush and apply a thin, even layer to mask the imperfection. Feather the edges to minimize hard lines where the repair sits.
Consider a glaze or clear topcoat over a small patch if appropriate for your finish. Limit the repaint area by blending edges into nearby untouched surfaces and test color match on a hidden area first. Check guidance on the product label or with the manufacturer instructions before proceeding.
Feathering and blending touch-ups
When cleaning doesn’t remove all shedding or lint, it’s time for a touch-up. But beware of visible edges. Here’s how to feather your paint:
Start with a small amount of paint on your roller or brush. Work outward from the center of the defect. As you reach the edge, use less pressure and less paint.
This gradation helps blend the touch-up into the surrounding wall. It mimics the natural texture and sheen of the existing paint.
Tip: Use a fan brush or a roller with a fine nap for better control and feathering.
Using clear topcoats or glazes
A clear topcoat or glaze can be your secret weapon. It won’t cover the entire wall, but it’ll even out sheen and texture.
Choose a product that matches your paint’s sheen. Apply it thinly over the affected area using a soft brush or roller. Work in small sections.
Let it dry according to the manufacturer’s instructions. If needed, lightly sand with fine-grit sandpaper and wipe off dust before applying another coat.
Note: Glazes can darken colors slightly. Test on a small area first.
When small spot repainting is the better choice
Sometimes, a touch-up just won’t cut it. Here’s when to opt for a small spot repaint:
If the defect is large or the texture is significantly different from the surrounding wall, a full-blown touch-up might stand out. In such cases, carefully match your paint color and sheen.
Confine the repaint to the smallest practical area. Use painter’s tape to protect the edges. Work quickly and evenly to avoid visible edges.
Pro tip: If you’re unsure about matching the paint, take a small sample of the existing paint to your hardware store for color-matching.
Visual Checkpoints, Troubleshooting, and When to Call a Pro
After cleanup, inspect for leftover fibers, texture inconsistencies, and color uniformity in multiple lighting conditions. Look for any dull patches, ridges, or gloss differences that stand out. If the finish still shows defects, review your cleaning steps and re-check the prep and containment of dust.
If the problem persists or the area is large, it may be time to call a professional. Indicators include widespread fiber adhesion, discolored patches, or repeated failures in the same area. Get a clear assessment and a practical plan from a pro before proceeding with further work.
Final Inspection Checklist
Use this checklist once you’ve finished cleaning and touch-ups to ensure your wall is lint-free and uniformly finished.
- Check under different light angles: Ensure no lint or fibers are visible from various angles, including low and high.
- Feel the surface: Run your hand across the wall to check for any rough spots or raised areas.
- Inspect edges: Check corners and trim for any missed lint or uneven paint.
- Check for gloss variation: Ensure there are no dull or overly shiny patches.
- Examine touch-up areas: Make sure they blend seamlessly with the rest of the wall.
- Look for any missed spots: Use a magnifying glass if needed to check for tiny fibers or dust.
- Test adhesion: Gently press on the paint with your thumb; it should feel solid and not peel off.
- Check for drips or runs: Ensure there are no visible imperfections from the painting process.
Quick rule: If anything feels rough, looks uneven, or doesn’t pass these checks, re-clean or touch up as needed.
Troubleshooting Persistent Texture or Adhesion Issues
If you’re still seeing problems after initial cleaning and touch-ups, follow this checklist to diagnose the issue.
- Check for recurring shedding: If lint keeps appearing in the same spots, there might be an underlying problem with your surface preparation.
- Inspect for bubbling: Bubbles under the paint could indicate moisture or poor adhesion.
- Examine adhesion: Lightly scratch the paint with a nail; it should not peel off easily.
- Check for widespread issues: If many areas are affected, there might be a problem with your paint or primer.
- Test surface pH: Use pH test strips to ensure your surface is within the acceptable range (5-8) for paint adhesion.
- Inspect for contaminants: Check for any remaining dirt, grease, or other substances that could hinder adhesion.
- Review manufacturer guidelines: Ensure you’re following the correct application and preparation procedures.
- Contact the paint manufacturer: If issues persist, consult with their technical support to rule out product-related problems.
Quick rule: If these troubleshooting steps don’t resolve your issues, it’s time to consider professional help.
When to Call a Professional
Knowing when to seek professional help can save you time, money, and frustration. Here are signs that it’s time to call in the experts.
- Widespread defects: If large areas of your wall are affected by shedding or adhesion issues, it might be best to have a pro assess the situation.
- Structural paint failure: Cracking, peeling, or flaking that affects the structural integrity of your paint job requires professional attention.
- Materials uncertainty: If you’re unsure about the cause of your issues or the best course of action, consult a pro to get expert advice.
- Time constraints: If you need the job done quickly and efficiently, hiring a professional can save you time and stress.
- Complex surfaces: Intricate or hard-to-reach areas might be best left to professionals to ensure a thorough and safe cleaning.
- Allergies or sensitivities: If you’re sensitive to paint fumes, solvents, or other materials, it’s safer to hire someone else to do the work.
- Long-term results: A professional job is more likely to last and maintain its appearance over time.
Quick rule: When in doubt, don’t hesitate to call a pro. It’s better to be safe than sorry when it comes to your home’s finishes.
Conclusion
Stay focused on safe, simple fixes that stop shedding and lint from ruining a wall you’re not ready to repaint. Quick checks, careful cleaning, and small repairs protect the finish and your wallet.
First, evaluate the area with a careful touch: confirm the exact spots with loose fibers, test any cleaner or technique on a hidden patch, and follow the order of operations from gentle removal to light touch up. Then proceed in this order: verify you have the right tools and materials, address tacky or set paint while it’s still workable, remove dried lint with appropriate extensions or scrapers, and do spot touch-ups or minimal repaint only where necessary.
Common mistakes to avoid are rushing through cleanup, using harsh scrapers or solvents on fresh paint, and skipping a test patch or safety check. Always wear eye protection and a mask when sanding or brushing, work in good light, and keep ventilation steady. If the job would require large areas or you’re unsure about the paint system, stop and call a pro rather than risk a bigger repair.
When in doubt, pairing a conservative approach with professional help keeps you safe and preserves the wall. Do the careful checks, apply only what you need, and you’ll finish with a solid, durable result you can be proud of.
FAQ
How can I tell if lint from a roller will cause problems before I paint?
Do a quick test on a small patch with the roller. Look for loose fibers clinging to the wet film as you pull the roller away. If you see a lot of fibers, pick a different roller or change out the cover before you proceed.
What should I do if lint starts shedding while I’m still rolling or just after the paint is on?
Pause, and pull off any loose fibers with a clean brush or gloved hand. If the film is still tacky, you can often re-roll over the area with a fresh pass to smooth it out. Don’t press hard; you don’t want to embed more lint into the paint.
How do I clean up dried lint or fibers without repainting the whole wall?
Gently pick or scrape visible fibers from the dried film, then lightly mist with water to soften and remove loose specks. For stubborn spots, use a clean, damp cloth to blot and lift fibers, avoiding harsh rubbing that could lift the paint. If needed, do a small spot touch-up after the area dries.
When should I replace the roller or use a different technique to avoid repainting?
If shedding continues after cleaning, switch to a fresh roller cover and clean tool. High shedding rollers should be retired after a limited number of uses or if fibers appear loose at the core. Check the label or manufacturer instructions for replacement guidance and compatibility with your paint.