
Introduction
Plaster feather edges that don’t flake are thin finish edges keyed and bonded to the existing surface, wetted and timed correctly so the new plaster grabs without lifting. Check whether the area needs repair by tapping or scraping loose material and by checking for movement; if substrate is dusty, crumbling, or contaminated you must clean or remove it first. Choose a bonding method—mechanical keying by roughening or a compatible chemical primer—based on what the surface is and what the product label or manufacturer instructions say.
Surface preparation is the job: clean, remove dust/paint that won’t bond, and roughen glossy areas so the new plaster has something to bite into. Wet the surface just enough to stop it sucking water from the fresh plaster, and work in sections so you finish before the flash-off time specified on the product; if in doubt, follow manufacturer directions or consult local rules.
Key takeaways
- Assess likely causes, test for flaking, and decide if repair is needed.
- Clean and remove loose material; a solid substrate improves keying and adhesion.
- Choose mechanical or chemical bonding based on surface type and project scope.
- Pre-wet the substrate appropriately before application to prevent rapid suction.
- Feather edges smoothly while timing finish; avoid thick ridges and cracks.
- Inspect work frequently; wear safety gear and follow manufacturer guidelines.
Table of Contents
- Introduction
- Key takeaways
- Assessing the Repair Area and Planning the Job
- Tools and Materials Checklist
- Surface Preparation and Mechanical Keying Techniques
- Chemical Bonding Methods and Using Primers
- Proper Wetting and Moisture Control of the Substrate
- Feather Edge Application and Timing for Finishing
- Visual Checkpoints and How to Check Workmanship
- Common Mistakes, Troubleshooting, and Fixes
- Conclusion
- FAQ
Assessing the Repair Area and Planning the Job
Start by confirming a feather edge repair is the right scope: inspect the depth and length of the damaged edge and look for movement or full-thickness cracks that need structural repair instead. If you see shifting, large cracks, or exposed rebar, plan for stabilization before any feathering.
Walk the site and note substrate types, access needs, and containment for dust and runoff; map scaffolding, ladders, and where tools will stage. Make a materials and time checklist, estimate cure or rework contingencies, and flag safety risks so PPE, ventilation, and fall protection are in place; check product labels or manufacturer instructions for any specific prep or cure notes.
When to repair vs replace
Before you start, understand when a feather edge repair is suitable and when it’s not. A patch job might be fine for small cracks or minor damage. But if the damage is extensive, or there are signs of structural issues, you may need a full replacement.
Signs that a patch will do: Small cracks, minor chips, or delamination over a small area.
Signs that replacement might be needed: Large cracks, extensive damage, movement in the wall, or multiple failed patches. If you see these signs, consider consulting a professional before proceeding.
Mapping and staging the work
Break down your repair job into manageable sections to ensure a smooth process. Start with smaller feather edges or those in less visible areas, then move on to larger ones.
Consider weather conditions when planning your stages. Avoid working in damp conditions if possible, as this can affect the adhesion and curing of your patch material.
Sequence your work based on: Size of feather edges, accessibility, and weather conditions. Plan for drying times between stages to ensure a strong bond between patches.
Tools and Materials Checklist
Gather hand tools that let you shape a feathered taper: hawk, plastering floats, stiff putty knives in multiple widths, margin trowels, scrapers, and taping/edging tools, plus a mixing paddle and sturdy drill or portable mixer. Include PPE—respirator, eye protection, gloves—and containment gear such as drop cloths and dust barriers.
Choose mixing containers sized for small batches and select patch materials appropriate to the substrate: polymer-modified plasters, lime-putty blends, or lightweight repair mortars; check product data sheets for compatibility with existing plaster or concrete. Add bonding agents or primers where needed, keep cleanup supplies handy, and store tools to prevent damage between coats; if unsure which product fits a scenario, consult the product label or technical data sheet.
Tools: mixing, keying, and finishing
Before you start your concrete project, ensure you have the right tools for mixing, keying, bonding application, wetting, and final finishing. This checklist will help you gather everything you need to get the job done right.
- Wheelbarrow: Check it’s in good condition with no cracks or leaks. Test by filling it with water.
- Shovel: Ensure it’s sturdy and the handle is secure. Try lifting a full bucket of concrete to test.
- Concrete Mixer (optional): For large jobs, check if you have access to one. If renting, ensure it’s the right size for your project (check manufacturer guidelines).
- Keying Tool (Wire Brush or Broom): Inspect for wear and replace bristles if necessary. Test by running it over a concrete surface.
- Bonding Agent: Check the label to ensure it’s suitable for your project type. Confirm it’s not expired or frozen (check storage conditions).
- Wetting Agent: Inspect the bottle and check if it’s compatible with your concrete mix (check manufacturer instructions).
- Finishing Tools (Float, Edger, Trowel): Check each tool for damage. Test by running them over a flat surface.
- Protective Gear (Gloves, Safety Glasses, Ear Protection): Ensure they’re in good condition and provide adequate protection.
Quick rule: For small jobs, manual tools are usually sufficient. But for large projects, consider renting or purchasing a concrete mixer to save time and energy.
Materials: plasters, primers, bonding agents, and sealers
Use this checklist before starting any plastering or sealing work to ensure you have the right materials for your substrate and exposure conditions.
- Plaster Type: Check product label for type (e.g., gypsum, cement-based). Gypsum plasters are suitable for interior walls; cement-based for exterior or damp areas.
- Plaster Finish: Confirm finish required (e.g., smooth, textured, skim coat). Different plasters achieve different finishes.
- Primer Selection: Choose a primer suitable for your substrate (e.g., new plaster, existing paint, bare walls). Check manufacturer instructions for compatibility.
- Bonding Agent: For new or poorly bonded surfaces, use a bonding agent. Check product label for application method and drying time.
- Sealer Type: Select a sealer suitable for your exposure conditions (e.g., interior, exterior, high humidity). Check manufacturer instructions for usage guidelines.
- Sealer Application Method: Confirm if the sealer is to be applied by brush, roller, or spray. Ensure you have the correct applicator.
- Material Pot Life: Check product labels for pot life (time from mixing to application). Plan your work accordingly to avoid waste.
- Mixing Ratio: Follow manufacturer instructions for mixing ratios. Incorrect ratios can lead to weak or poorly adhering plasters and sealers.
Quick rule: Always check product labels and manufacturer instructions before starting any application. Skipping this step can result in poor adhesion, premature failure, and costly rework.
Surface Preparation and Mechanical Keying Techniques
Remove all loose plaster, laitance, failed patches, and any coatings that could prevent adhesion until you reach a sound substrate; don’t leave feathered edges on crumbling material. Clean the area of dust, oils, or efflorescence using the appropriate cleaner and rinse method, and allow the surface to reach the readiness indicated by the product you plan to use.
Use mechanical methods to create a shallow, uniform profile—wire brushing, cup wheel, light grinding, scarifying, or light shot-blasting depending on condition—and avoid over-roughing that exposes too much aggregate. Control dust with extraction and PPE, and confirm the achieved profile suits the plaster system by comparing to the manufacturer’s surface profile guidance or a CSP reference.
Cleaning and contaminant removal
Start by removing any loose material, crumbling concrete, or laitance with a chisel or wire brush. Inspect the surface for any coatings or sealers that may prevent bonding. Use a scraper to remove these if necessary.
Next, tackle dirt, oils, adhesives, and efflorescence. Use a suitable cleaner or degreaser, following the manufacturer’s instructions. For tough stains, you might need to use a targeted chiseling technique or a stronger chemical stripper.
Rinse the surface thoroughly with clean water after cleaning. Allow it to dry completely before proceeding. This could take anywhere from a few hours to a full day, depending on weather conditions.
Creating a mechanical key
To improve plaster adhesion, you need to roughen the surface. This is called ‘keying’. The goal is to create a shallow, uniform profile that facilitates plaster adhesion without exposing too much aggregate.
For small areas, a wire brush or angle grinder with a concrete grinding wheel can be used. For larger surfaces, consider using a scarifier or light shot blasting. Always wear appropriate PPE and ensure proper dust control when working with these tools.
When using an angle grinder, start with a coarse grit (around 24-36) to remove the top layer of concrete. Follow up with a finer grit (around 80-120) to create a smooth profile. Be careful not to over-roughen the surface, as this can lead to plaster delamination.
Remember, the key depth should be around 1-3mm on the C or CSP scale for feather edges. This provides enough ‘tooth’ for the plaster to grip onto without being too deep.
Chemical Bonding Methods and Using Primers
Choose chemical bonding when the substrate is smooth, dusty, contaminated, or when mechanical keying alone won’t give reliable adhesion; wide cracks, dampness, or sealed surfaces often need a bonding treatment. Match the method—primer, slurry coat, or adhesive—to the defect and substrate and follow compatibility guidance on product technical sheets.
Apply bonding primers or slurry coats per manufacturer directions: mix, apply (brush, roller, or trowel), and respect recommended rework windows and cure times before feathering. Test a small area for bond strength and watch for signs of incompatibility such as poor tack or beading; if unsure about compatibility with a sealer or existing coating, check the product data sheet or contact the manufacturer.
Types of bonding agents and how they work
Bonding agents are crucial for a strong plaster feather edge finish. Here’s what you need to know about the three main types:
Cementitious primers are water-based, thin liquids that create a chemical bond with the substrate. They’re ideal for porous surfaces like concrete or brick.
Polymer-modified primers combine cement and polymers to form a tough, flexible bond. Use these on smooth surfaces or where extra durability is needed.
Epoxy adhesives are high-strength, two-part systems that work best on non-porous substrates like metal or glass. They’re great for repairing cracks and gaps.
Applying a scratch or bonding coat
A scratch coat or slurry bond layer is a thin, roughened layer of plaster applied before the final feather edge. Its purpose is to create more surface area for better adhesion.
Apply it using a trowel, ensuring it’s thick enough to key but not so thick that it slumps. Let it cure until it’s no longer tacky but still slightly damp – usually 15-30 minutes.
Use a scratch coat instead of or alongside bonding agents when the substrate is very smooth or dusty, or if you’re applying a thick plaster layer. It should be used in addition to mechanical keying for best results.
Proper Wetting and Moisture Control of the Substrate
Manage substrate moisture to prevent rapid suction that pulls water from fresh plaster—perform a quick thumb or paper test to judge surface dampness and consult the repair material’s guidance for acceptable substrate moisture conditions. Different substrates (concrete, old patch, masonry) behave differently, so verify readiness with the product label or data sheet.
Apply water lightly and uniformly when dampening is appropriate—mist or damp-wipe rather than puddling—and wait the recommended interval before applying material. If wetting isn’t suitable (for example on certain sealed or sensitive substrates), use a compatible bonding primer or a polymer-modified mortar as an alternative; check manufacturer instructions for the correct approach.
When and how to dampen the surface
The goal of pre-wetting is to prevent water loss from your repair mix. Here’s how:
Light dampening for concrete: Mist the surface with a fine spray, just enough to darken it. Don’t overdo it; too much water weakens adhesion.
Deeper moisture for old patch or masonry: Apply water with a damp cloth or sponge, ensuring even coverage. Avoid puddles that can weaken the surface.
Wait 15-30 minutes before applying plaster to let the substrate absorb the water evenly. Use a thumb press test (press your thumb onto the surface; it should feel tacky but not wet) to check readiness.
Dealing with porous or hot substrates
Porous surfaces and warm temperatures can cause rapid water loss. Here’s how to manage:
Porous surfaces: Apply additional wetting cycles. Mist the surface, let it absorb for 15 minutes, then mist again. Repeat until the substrate is evenly damp but not wet.
Hot temperatures: Use retarding admixtures in your plaster mix to control setting time and improve bond. Follow manufacturer’s instructions.
For both cases, keep an eye on the surface. If it feels hot or dry during work, mist again and wait for it to cool/dampen before proceeding.
Feather Edge Application and Timing for Finishing
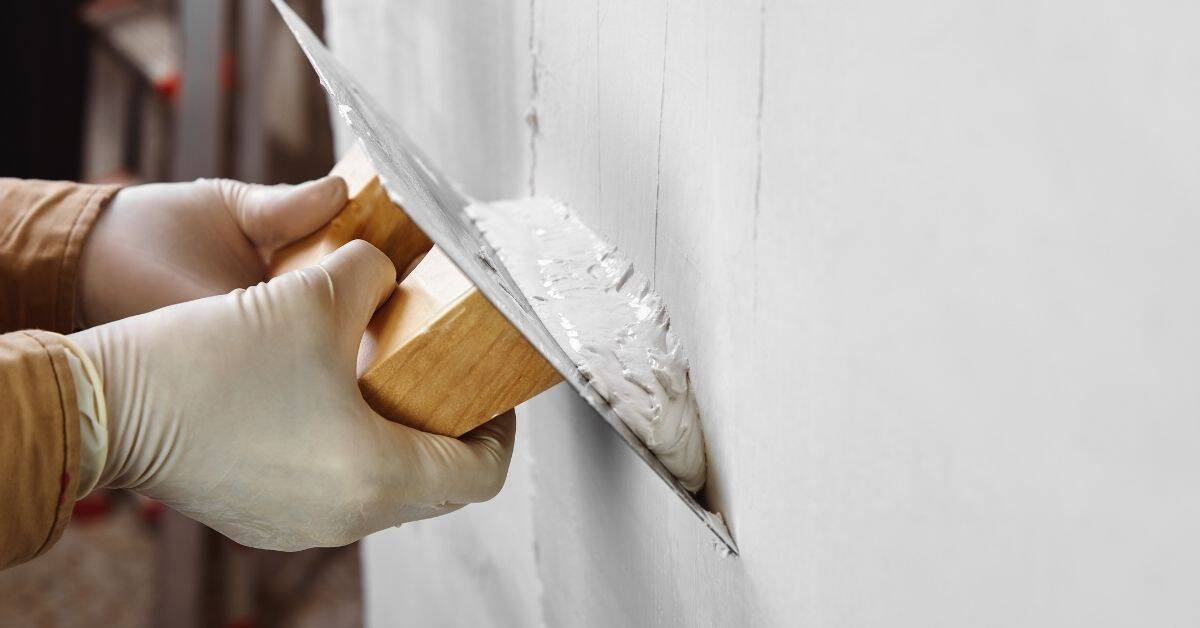
Build the feather by starting thin at the edge and gradually increasing thickness toward the body of the patch to avoid abrupt transitions that chip or flake. Use small, controlled passes with appropriate knives and floats, and plan intermediate skim coats if you need more build without stressing the bond.
Respect dwell times between coats and the product’s recommended timing for floating and final troweling; premature overworking or too-rapid finishing is a common cause of failure. Choose finish textures that suit the edge—smooth feathering or light stipple—and if unsure about timing, follow the material’s data sheet for set and recoat windows.
Application technique for thin-to-thick transitions
When moving from a thin to a thick layer of concrete, you’ll need to feather your edges to avoid a sharp transition. Here’s how:
Start by checking the base compaction. If it’s not solid, fix it before proceeding. Then, for the first lift (thin), apply as usual. For the second lift (thick):
1. Start at one end of your formwork and pour a thick layer.
2. As you move along, gradually reduce the thickness until it meets the first lift. This is ‘feathering’.
3. Once done, let it start to set (check manufacturer’s recommended time). Then, use a broom or brush (back-brush) to lightly disturb the surface of the first lift.
4. Now pour your second lift, starting thick and feathering down to meet the first.
Key takeaways: Feather gradually, back-brush lightly, and don’t rush it. Patience here prevents cracking later.
Finish timing and curing considerations
The moment to finish your repair is crucial. You’ve done the feather edging, now let’s make sure it sticks.
Check base compaction. Before you start, ensure the base is solid. A loose base means a flaky finish.
Now, judge the weather. Concrete needs moisture to cure right. Too hot or too cold, and it won’t set properly. Check your local climate guidelines for safe temperatures. Generally, aim for 50-90°F (10-32°C).
Time your finish. Don’t rush it. Let the concrete start to lose its gloss, but don’t wait until it’s bone-dry. That’s when you know it’s ready for a final trowel and cure.
After finishing, protect and cure. Cover with plastic or wet burlap to keep moisture in. Check local rules on curing times, but typically, leave the cover on for 3-7 days.
Visual Checkpoints and How to Check Workmanship
Perform ongoing visual checks for uniform texture, consistent edge taper, absence of pinholes, and no color shifts that indicate poor adhesion or trapped moisture. Inspect immediately after troweling and again after initial cure for signs like edge lifting or surface dusting.
Use tactile tests—gentle press, drag, and light sounding—to detect soft spots or hollows without damaging the repair; reserve a light knife-scratch only in inconspicuous spots if needed. Record observations and compare them to the product’s cure cues, and if bond doubts arise, consult the manufacturer’s test methods for non-destructive checks.
Visual cues of a good versus poor bond
Before applying the final coat, use this checklist to ensure a strong bond.
- Uniform texture: A good bond has an even surface. Inconsistencies may indicate weak adhesion.
- Consistent feather-edge thickness: Even edges mean proper application. Thinning or thickening can lead to flaking.
- Absence of pinholes: Pinholes suggest air pockets, which weaken the bond and invite moisture.
- Even color: Uniform color indicates consistent bonding. Discoloration might hint at contamination or poor adhesion.
- No voids or bubbles: Visible voids or bubbles signify trapped air or improper wetting, weakening the bond.
- No laitance or efflorescence: These indicate excess water and can compromise long-term performance.
- No micro-cracking at edges: Cracks at feathered zones suggest premature drying or settlement issues.
- No signs of debonding: Lifting or peeling indicates poor adhesion, likely due to insufficient keying or contamination.
Quick rule: If you spot any of these red flags, recheck your prep work and consider reapplying.
Post-install inspection and tests
After initial curing, perform these checks to catch any issues early.
- Gentle tapping: Tap the patched area with a trowel or hammer. A hollow sound indicates a void or weak bond.
- Surface firmness: Gently press on the surface. It should feel solid, not spongy or crumbly.
- No squeaking: Tap and listen for any squeaky sounds, which suggest delamination.
- Moisture balance: Check for proper curing (not wet) and no signs of premature drying.
- Wicking and suction: Recent areas should show proper moisture absorption without laitance or efflorescence.
- Non-destructive bond check: Lightly scratch the surface in an inconspicuous zone. If it exposes the substrate, there’s a bonding issue.
- Color, sheen, and hardness: Check these cues for proper set before applying subsequent coats.
- Edge flaking: Inspect feathered zones for any signs of flaking or debonding.
Quick rule: If you find any problems, address them promptly to prevent further issues.
Common Mistakes, Troubleshooting, and Fixes
Most feather-edge failures stem from inadequate prep, incorrect wetting, or premature finishing; environmental swings and substrate movement also contribute. Diagnose by checking surface cleanliness, keying, moisture, and any residual sealers or curing compounds.
Correct failures by re-profiling edges, removing loose material, and applying the correct bonding treatment or primer; re-wet or precondition the surface per the repair material instructions before reapplying finish. For persistent issues, follow a stepwise remediation: roughen, bond, recoat with appropriate timing and cure protection, and document each step to prevent repeat problems.
Fixing delamination and flaking
If your feather edge is flaking, don’t panic. Here’s how to fix it:
Local Repair: For small areas, rekey the surface using a wire brush or sandpaper. Clean off any loose material, then apply a bonding agent and reapply the skim coat.
Sectional Replacement: If large sections are failing, you might need to remove them completely. Scrape off the old plaster, clean the surface, rekey it, apply a primer, and reinstall the feather edge.
Preventing recurring problems
To keep your feather edges in tip-top shape, follow these preventive tips:
Material Selection: Use high-quality materials designed for your specific substrate and conditions. Cheap or wrongly specified products can cause recurring issues.
Staging and Timing: Don’t rush the process. Allow each stage to cure properly before moving on to the next. This includes surface preparation, priming, wetting, and finishing.
Environmental Controls: Maintain consistent temperature and humidity levels during application and curing. Fluctuations can cause failures over time.
Conclusion
Getting feather edges to stay flat and not flake is about clean prep, steady timing, and smart moisture control. Do it right and the repair will look solid, wear well, and blend with the room without calling attention to themselves.
Check in this order: confirm the repair area and plan the job, verify tools and materials are ready, key the surface and apply a proper bond using the chosen method, wet the substrate to control suction, apply the feather edge in thin, even coats and time the finish to cure, then inspect with a fresh eye for uniform edge, depth, and adhesion. Work in small sections, test a patch first, and always keep the area damp enough to prevent fast drying that causes flaking.
Common mistakes to avoid are trying to rush the keying or finish, using too thick a coat, and skipping moisture control. Don’t skip safety steps—protect yourself with eye and skin protection, and never mix or apply products beyond manufacturer guidance or in a damaged area. Test in a discreet spot first, and if anything seems off, pause, reassess the plan, and fix before proceeding.
If the substrate shows frequent movement, unusual softness, or you’re unsure about the bond, consider bringing in a pro instead of pushing on. A measured, well-timed approach now saves costly rework later and keeps your finish looking crisp and durable. Stay patient, follow the checks, and you’ll finish with a result you can trust.
FAQ
Do I really need to repair this patch, or can I leave it alone?
If the damaged area continues to crumble or shows loose edges, plan a repair. If you’re unsure, test by gently probing with a putty knife; flaky edges mean a patch is needed. When in doubt, check the project’s guidelines or manufacturer instructions for guidance.
How should I clean and prepare the surface before feathering the edge?
Remove loose material, dust, and grease with a stiff brush and a damp cloth. Let the area dry completely before applying any bonding method. A clean, dry surface helps the patch adhere and sets up better.
Should I use mechanical keying or chemical bonding, and how do I decide?
Mechanical keying gives grip by roughening the surface, while chemical bonding relies on a compatible primer or bonding agent. Choose based on the substrate type, patch size, and what the product instructions allow. When in doubt, follow the plaster or patch material label and local guidance.
How do I wet the surface correctly and know when to apply the finish layer?
Moisten the area evenly with a damp, not soaked, sponge or spray bottle. Wait until the surface stops showing surface sheen and feels just tacky to the touch before finishing. Do not apply finish on a surface that is actively drying quickly or still wet in spots.
How can I check bond quality after patching?
Gently test the edge with a putty knife to feel for solid adhesion. Look for a uniform feather edge without soft spots or cracking. If movement or separation appears, address it before moving to finish layers.