

Introduction
Plastering over old calcimine paint means confirming the paint is the flaky, powdery lime-based finish that repels new plaster and then removing or treating it so plaster can bond. I’ll show simple tests to identify calcimine and practical fixes for adhesion problems you can do with common tools. If a product or spec matters, check the paint label or manufacturer instructions and follow local building rules.
First, expect to test small areas, scrape and clean, and decide whether to seal, prime, or fully remove the coating before plastering. I’ll cover what tools and materials to have on the job and hands-on steps to prepare the wall so your new plaster goes on solid. When in doubt about a chemical or structural issue, check product instructions or consult a pro.
Key takeaways
- Identify calcimine by chalky finish and peeling surface common on old walls.
- Scrape and wire-brush edges to assess soundness and bond potential.
- Wear protective gear; lead dust risks require contained cleanup and reporting.
- Prepare surface by removing loose paint and etching with appropriate adhesion primer.
- Choose plaster with good bonding to porous calcimine surfaces for best results.
- Inspect adhesion after cure and address cracks with proper repair techniques.
Table of Contents
- Introduction
- Key takeaways
- What Is Calcimine and Why It Matters for Plastering
- Simple Identification Tests You Can Do on-Site
- Safety, Lead Risk, and Regulatory Precautions
- Step-by-Step Surface Preparation Before Plastering
- Choosing the Right Plaster for Calcimine Surfaces
- Troubleshooting Adhesion Problems and Repair Techniques
- Tools and Materials Checklist, Costs, and Long-Term Durability
- Conclusion
- FAQ
What Is Calcimine and Why It Matters for Plastering
Calcimine is an old, water‑based decorative coating often made with lime or calcium‑based binders and simple pigments applied to interior plaster. It was widely used historically for its low cost and matte finish, but the binder can leave a weak, powdery surface that does not form a strong mechanical or chemical bond to later layers.
That powdering and poor cohesion are the core reasons calcimine challenges modern plaster: dusty film, flaking, and loss of adhesion create a weak plane between the plaster and substrate. Inspectors and DIYers should look for chalky residue, peeling, and efflorescence, perform simple wipe and scrape checks, and plan to remove or stabilize loose material, key the surface, and use compatible bonding primers before attempting full plastering.
Visual and Tactile Recognition
Calcimine paint has a distinctive look and feel. It’s usually matte, not glossy, with a slightly chalky finish. When you touch it, you might notice a fine powder transferring onto your fingers or a cloth – that’s calcimine dusting.
It was commonly used in the late 19th to mid-20th century on interior walls and ceilings. So, if your home is from this era, especially in older cities or rural areas, it might have calcimine under those old layers of paint.
Remember: Not all matte finishes are calcimine. But if you suspect it, do some tests to be sure before plastering.
Chemical and Physical Behavior Relevant to Adhesion
Calcimine’s main ingredient is calcium carbonate, a water-soluble salt. This means it can dissolve in moisture, which is bad news for plastering. Here’s why:
When you apply new plaster or primer, they’re wet. That moisture softens the calcimine, making it lose cohesion and lift off. It’s like trying to stick something onto a surface that’s slowly turning into mush.
Alkaline plasters, which are common, can make this worse by reacting with the calcimine and causing even more lifting or delamination – that’s when your new plaster starts peeling off in sheets.
Simple Identification Tests You Can Do on-Site
Use quick, non‑destructive checks to confirm whether a coating behaves like calcimine and to estimate how the wall will accept new plaster. Visual inspection, a dry wipe/dusting test, a light scrape, and a damp sponge test each give different clues about whether the surface is chalky, soluble, or firmly adhered.
Interpret results to decide next steps: if the coating powders or dissolves with water, plan to remove or stabilize it and select a primer or bonding agent intended for weak, limey films; if it resists water and doesn’t powder, a bonding primer and light keying may suffice. Keep a simple checklist on site and when in doubt, pause and consider a lab or professional inspection to avoid trapping moisture or applying incompatible primers.
Water rub / cotton swab test
Dampen a clean cloth or cotton swab with water. Gently rub an inconspicuous area of the wall.
If the surface powders, turns chalky, or dissolves slightly, you’re likely dealing with calcimine. This indicates poor binding and a weak substrate for plastering.
Be careful not to scrub too hard; we don’t want to damage the surface before testing is complete.
Solvent and scraping tests (vinegar, alcohol, gentle scraping)
For limited checks, use a cotton swab dampened with vinegar or rubbing alcohol. Gently rub an inconspicuous area.
If the coating dissolves easily and leaves no residue, it’s likely calcimine. If it resists or turns cloudy, it might be limewash or another type of paint.
Gentle scraping with a dull putty knife can also help. If the surface flakes off in large pieces, it’s calcimine. Be careful not to damage underlying plaster or finishes.
When to get lab testing (lead, composition)
If your home was built before 1978, always test for lead. Old calcimine often contains lead. Use a certified lead testing kit or send samples to a lab.
If you’re unsure about the coating’s composition, send samples to a paint analysis lab. They can identify the type of paint and its components. This helps choose the right primer and bonding agent.
To collect samples, gently scrape a small amount from an inconspicuous area into a sealed plastic bag. Follow lab instructions for submission.
Safety, Lead Risk, and Regulatory Precautions
Old calcimine can contain lead or other hazards depending on building age, so treat suspect coatings with caution and follow applicable local and national lead‑safe rules. Before work begins, do representative on‑site lead spot tests and check whether regulated lead renovation protocols (notification, containment, certified renovators) apply in your area.
Use appropriate PPE (respirator rated for fine dust, disposable coveralls, gloves, eye protection), set up containment with taped plastic and negative pressure where possible, favor wet methods to minimize dust, and plan HEPA vacuum cleanup and disposal per local guidance. If test kits are inconclusive or the job is large or in a sensitive occupancy, get laboratory confirmation or hire a certified contractor to manage regulatory compliance and waste handling.
Personal protective equipment and worksite controls
The safety of you and your crew is paramount when dealing with old calcimine. Here’s what you need to protect yourself and control dust.
- Respirator: A P100 respirator or equivalent is mandatory. It filters out at least 99.97% of particles, including lead. Make sure it fits properly and maintain it well.
- Gloves: Wear chemical-resistant gloves to protect your hands from lead exposure and paint chemicals. Disposable nitrile gloves are a good choice.
- Eye/face protection: Use safety glasses with side shields or a full-face shield to protect your eyes from dust and debris. Some respirators come with integrated eye protection.
- Containment: Seal off the work area using plastic sheeting taped at seams. This helps contain dust and prevents contamination of other areas.
- HEPA vacuum: Use a HEPA (High-Efficiency Particulate Air) vacuum for cleanup. These vacuums capture 99.97% of particles, ensuring thorough removal of lead dust. Rentals are available starting at around $50 per day.
Disposal and legal considerations
When dealing with old calcimine, especially if it contains lead, proper disposal is crucial. Here’s what you need to know:
Hazardous waste: Lead-containing materials are considered hazardous waste. They must be disposed of according to local, state, and federal regulations. Contact your local waste management department for specific guidelines.
Recordkeeping is also important. Keep detailed records of the amount and type of waste generated, as well as the disposal method used. This is not only a good practice but may also be required by law.
Consult local regulations: Lead-safe work practices and disposal methods can vary depending on your location. Always consult with your local health department or environmental agency before starting any work involving old calcimine.
Step-by-Step Surface Preparation Before Plastering
Start with confirmation: identify the coating, test for lead where indicated, and assess substrate stability, moisture, and pH so you know whether plastering is appropriate and what pretreatments are needed. Address safety and containment first if the material is old, then remove loose powder and flaky material without over‑scraping the sound plaster beneath.
Create a mechanical key by light abrasion or wire brushing, control dust with wet methods and HEPA vacuums, and clean the surface with a mild detergent rinse, allowing full drying before any primer. Finish with an appropriate bonding primer or slurry compatible with your plaster choice and re‑check adhesion with a small test patch before proceeding to full coats.
Step-by-Step Process
This section guides you through the surface preparation process before plastering over old calcimine paint. Follow these steps to ensure the best chance of successful bonding.
- Confirm coating and substrate status: Identify calcimine, test for lead if relevant (as discussed earlier), and check substrate stability. If unsure, consult a professional.
- Assess moisture and pH: Perform quick moisture checks using a moisture meter or visual inspection. Test surface pH with litmus paper to ensure it’s within the acceptable range for plaster adhesion.
- Plan safety and containment: Outline lead-safe handling if older materials are suspected, wear appropriate PPE, contain dust, and follow disposal guidelines.
- Remove loose coatings and clean: Gently remove loose calcimine using a scraper or light sanding. Vacuum the area, wash with mild detergent, and allow thorough drying to prevent moisture trapping.
- Create mechanical key and final checks: Use wire brushing, light grinding, or mechanical scarifying to create a proper key without excessive substrate damage. Perform visual/diagnostic cues (uniform key, dry surface, clean edges) before plaster application.
Removing loose calcimine and cleaning methods
Start by removing loose calcimine using a scraper or light sanding. Be careful not to over-scrape the substrate.
Wet-cleaning: Use water or a mild detergent solution to clean the surface. Avoid alkali washes as they can damage the substrate and affect plaster adhesion.
Rinse thoroughly with clean water and allow the surface to dry completely before proceeding. If moisture is trapped, it can lead to poor plaster adhesion and potential failures.
Mechanical keying versus full removal
Deciding between mechanical keying and full removal depends on the substrate type and extent of calcimine failure.
Mechanical keying: If the substrate is stable and calcimine is only partially delaminated, use wire brushing, light grinding, or mechanical scarifying to create a proper key. This method preserves the existing substrate and reduces waste.
Full removal: If the substrate is unstable, extensively damaged, or calcimine is completely delaminated, full removal down to the substrate may be necessary. Consult a professional if you’re unsure about the extent of damage.
Visual checkpoints and moisture testing before plastering
Before applying plaster, use this checklist to ensure your surface is ready. Perform these checks after the final cleaning and mechanical keying.
- No powder residue: Ensure there’s no visible calcimine dust or powder on the surface. A clean surface promotes better adhesion.
- Sound substrate: Inspect the substrate for any signs of damage, such as cracks or holes. Repair these before plastering to prevent issues later on.
- Acceptable moisture levels: Use a moisture meter to check that the surface is within acceptable moisture limits (usually 12-15% for plastering). High moisture can lead to poor adhesion and potential failures.
- … (add remaining checklist items)
Quick rule: If any of these checks fail, address the issue before proceeding with plaster application. This ensures a successful outcome and prevents costly repairs down the line.
Choosing the Right Plaster for Calcimine Surfaces
Plaster selection affects flexibility, vapor permeability, and compatibility with a previously calcimine‑treated wall; breathable systems are often preferred to avoid trapping moisture against weak undercoats. Compare lime, gypsum, and cement‑based products by considering breathability, alkali level, and how they bond to a prepared, keyed substrate.
When deciding, factor in substrate condition, room use, and climate: lime‑based plasters are typically more breathable and compatible with historic substrates, gypsum sets faster and is easier to finish, and cementitious mixes are stronger but less permeable. Test a small area with your chosen primer and plaster system to verify adhesion and performance before committing to large‑scale application.
Pros and cons of lime, gypsum, and cement plasters
Each plaster type has its own strengths and weaknesses when it comes to calcimine surfaces. Here’s a quick rundown.
Lime Plaster – Pros
- High flexibility and crack resistance.
- Breathable, allowing moisture vapor transmission.
- Low alkali content, minimizing risk of corrosion on metal lath or embedded items.
- Good adhesion to prepared calcimine surfaces.
Lime Plaster – Cons
- Slower curing time compared to gypsum and cement plasters.
- More susceptible to efflorescence (salt deposits) if not properly cured or if moisture issues persist.
- Requires more skill to apply and finish.
- Can be more expensive than other options.
Gypsum Plaster – Pros
- Fast setting time, allowing for quicker project completion.
- Low water demand during mixing, reducing shrinkage risk.
- Good fire resistance.
- Readily available and relatively inexpensive.
Gypsum Plaster – Cons
- Less flexible than lime plaster, making it more prone to cracking over time or in areas with movement.
- Lower breathability, which can lead to moisture issues if not properly addressed.
- Higher alkali content, potentially causing corrosion on metal lath or embedded items.
- Poor adhesion to calcimine surfaces without proper preparation and bonding agents.
Cement Plaster – Pros
- High bond strength and durability.
- Good fire resistance.
- Can be applied over a wide range of temperatures.
- Readily available and relatively inexpensive.
Cement Plaster – Cons
- Low flexibility, leading to cracking over time or in areas with movement.
- Poor breathability, which can cause moisture issues if not properly addressed.
- Higher alkali content, potentially causing corrosion on metal lath or embedded items.
- Requires aggressive surface preparation and bonding agents for adhesion to calcimine surfaces.
Choose the plaster type based on your project’s specific needs, budget, and timeline. Lime plaster is often best for historic homes with calcimine, while gypsum and cement plasters may be more suitable for modern construction or when speed is a priority.
Mixing, layering, and curing best practices
Proper mixing, application, and curing are crucial for a strong, durable plaster finish. Here’s how to do it right.
Mixing: Follow the manufacturer’s guidelines for water-to-plaster ratios. Aim for a consistency similar to thick peanut butter – not too wet or dry. Over-mixing can introduce air bubbles that weaken the plaster.
Layering: Apply plasters in multiple coats for better adhesion and finish. Start with a scratch coat, followed by a brown coat, and finish with a finish coat. Scratch and brown coats help create a strong bond and even surface for the final coat.
Curing: Keep the plaster consistently moist during curing to allow it to gain full strength. Cover the area with plastic sheeting or keep it damp using a fine mist spray. Follow the manufacturer’s recommended curing times, typically 3-7 days depending on temperature and humidity. Inspect the plaster daily for any signs of cracking or other issues.
Troubleshooting Adhesion Problems and Repair Techniques
After plastering, look for blistering, peeling, localized delamination, efflorescence, and cracking as signs the new coat did not bond properly to the old calcimine layer or substrate. Begin diagnosis by checking for active moisture, loose or dusty substrate, incompatible prior coatings, and environmental conditions that could have affected curing.
For localized failures remove loose material back to sound substrate, re‑key edges, dry thoroughly, and apply a compatible bonding slurry or primer before re‑plastering; for broad failures investigate moisture sources and consider cutting back to a solid base and rebuilding with appropriate mixes. If issues persist or damage is extensive, bring in a professional to evaluate structural or moisture problems before repeating application.
Diagnosing failure modes (blisters, powdering, edge lift)
When plaster starts to fail, it’s crucial to identify the root cause. Here’s how to tell them apart:
Blistering: Look for raised, bubble-like areas. These are often caused by moisture trapped beneath the surface or incompatible materials.
Powdering: If the plaster turns into a fine powder when touched, it’s likely due to poor mechanical keying or a weak substrate. The old surface might not have been properly prepared before plastering.
Edge lift: When plaster peels off around edges or corners, it could be due to moisture intrusion, inadequate bonding at the edges, or improper curing conditions.
Repair methods: re-keying, spot removal, and re-plastering
Once you’ve identified the problem, here are targeted repair options:
Re-keying & Spot Removal: For small areas with blisters or powdering, carefully remove loose material. Use a wire brush to create new keying points on the surface. Apply a bonding slurry before re-plastering.
For larger issues or edge lift, you might need to strip and re-plaster. Cut back to sound substrate using a utility knife or scraper. Treat any moisture sources first.
If problems persist or cover large areas, it’s time to call a professional. They have specialized tools and knowledge for complex repairs.
Tools and Materials Checklist, Costs, and Long-Term Durability
Gather hand tools (scrapers, wire brushes, scoring tools), PPE, mixing equipment, bonding agents, primers, and cleanup items (HEPA vacuum, disposal bags) specific to working with calcimine and fragile substrates. Estimate material needs from area and intended coat thickness, allow waste, and plan labor for prep, drying, and multiple coats rather than assuming a single visit will finish the job.
Consider durability tradeoffs: breathable lime systems often age more gracefully over historic substrates, while gypsum or cement mixes may need different maintenance regimes; document your prep and testing so future workers know what was done. If you need exact material quantities or cost estimates, verify coverage rates on product data sheets and calculate based on your measured square footage and chosen coat thicknesses.
Tools and materials checklist and material specs to verify
Before you start your concrete project, use this checklist to ensure you have the right tools and materials. Verify these on-site to avoid costly mistakes.
- Scrapers: Check blade condition; sharp edges are crucial for efficient surface preparation.
- HEPA Vac: Ensure it’s in good working order; test suction power and filter replacement status.
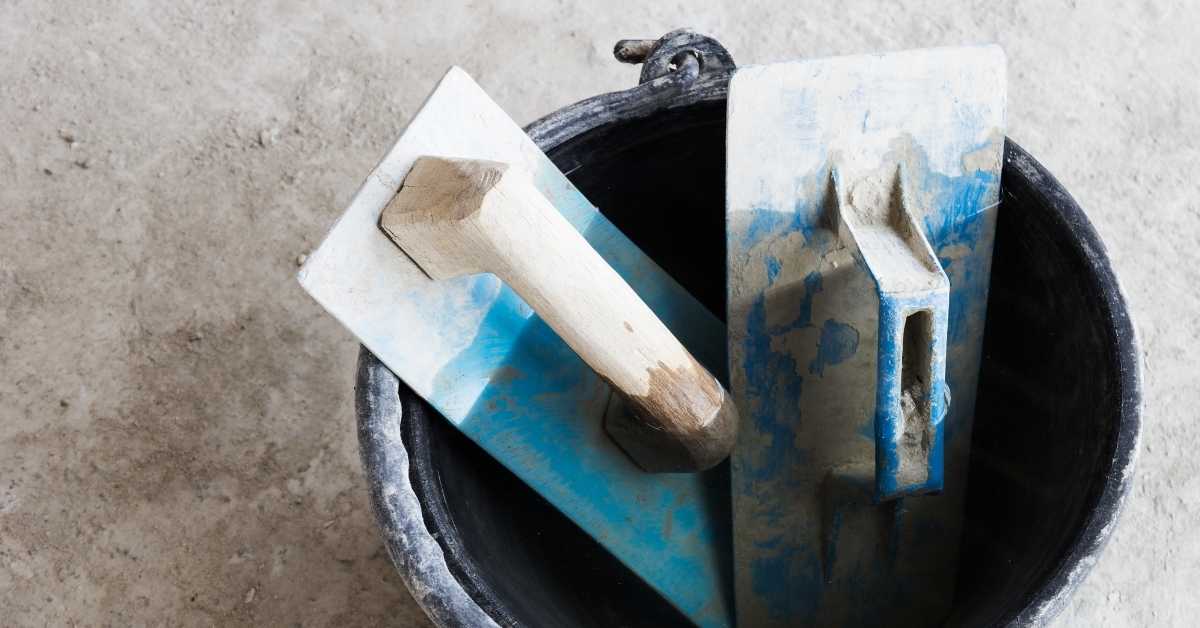
- Trowels (hand, straight, and finishing): Inspect trowel edges for wear; sharp edges are essential for smooth finishes.
- Primer: Verify compatibility with your substrate; check label for recommended uses and surface types.
- Bonding Agent: Check alkali resistance; ensure it’s suitable for your concrete mix and conditions.
- Concrete Mix Design: Confirm proportions (cement, sand, aggregate); check slump test results on-site.
- Plaster Types: Verify VOC levels; check manufacturer instructions for application guidelines and safety precautions.
- Substrate Preparation: Inspect surface for contaminants; remove any debris or laitance to ensure proper bonding.
Quick rule: Always double-check product labels and manufacturer instructions. They provide vital information tailored to your specific products, ensuring you’re using them correctly and safely.
Cost considerations and expected lifespan comparisons
Use this checklist before starting your concrete repair project to understand the costs involved and ensure long-term durability. Check local labor rates, condition-dependent scope, and material choices.
- Labor Rates: Check with local contractors or check online resources for average labor rates in your area.
- Condition Assessment: Thoroughly inspect the concrete. Look for cracks, spalls, and other damage. Use a moisture meter to check for hidden issues.
- Material Choices: Consider different repair approaches like patching, resurfacing, or replacing. Check product labels for expected lifespan and maintenance requirements.
- Concrete Type: Identify the type of concrete (e.g., normal-weight, lightweight) to ensure you’re using compatible materials.
- Reinforcement: Inspect for exposed or damaged reinforcement. If found, repair or replace before proceeding.
- Moisture Barrier: Check if a moisture barrier is needed. Skipping this can lead to recurring issues and costly rework.
- Expansion Joints: Ensure expansion joints are properly installed and maintained to prevent cracking due to movement.
- Curing Method: Consider the curing method (e.g., wet curing, membrane curing). Different methods have varying costs and effects on longevity.
Quick rule: Always prioritize thorough preparation and using quality materials to avoid costly rework and ensure long-term durability of your concrete repairs.
Conclusion
Protecting your health and your walls pays off in a lasting, smooth plaster finish. Get the prep and testing right, and you’ll avoid costly repairs and patchy adhesion down the line.
First, run through a simple on-site check: identify the finish and test a small area for adhesion, clean and dampen the surface, then choose the plaster that matches the surface porosity; apply in workable sections, monitor for set and bond, and keep the work area dry and well-ventilated while you cure.
Common mistakes to avoid are skipping surface prep, neglecting safety rules around dust and lead risk, and pushing plaster onto a calcimine surface that’s still loose or highly volatile. Always wear a mask around dust, test a patch first, and don’t mix or apply products beyond their recommended instructions.
If the surface is flaky, the tests fail, or you’re dealing with unknown materials, consider calling a professional for guidance or a small, paid trial section. Stay steady, follow the plan, and you’ll end with a durable, good-looking finish that lasts.
FAQ
How can I identify calcimine paint on my walls?
Calcimine often looks chalky and may rub off easily with your fingers. It can be white or tinted and may show a fine powder when you scrub the surface. If in doubt, test a small spot and check the layer beneath with a scraper or utility knife.
What preparation steps are essential before plastering over calcimine?
Clean the wall to remove dust and loose material. Scrape any peeling paint and mask off areas you don’t want plaster on. Prime or treat according to the plaster system’s instructions so the new coat can bond properly.
What common adhesion problems should I watch for, and how can I fix them?
Poor adhesion shows as cracking, peeling, or loose patches after a short time. Fix by removing loose material, properly abrading the surface, and following the bonding and priming steps specified for your plaster type. If adhesion issues persist, consult the product label or manufacturer guidance before proceeding.
What tools and materials do I need for plastering over calcimine?
Have the basic hand tools for mixing and applying plaster, plus a suitable bonding agent and primer per the plaster system. You’ll also need fasteners, trowels, hawk, straightedge, and a mixing container. Always verify with product instructions if a specific tool or additive is recommended.
What are some proper application techniques to avoid future peeling or cracking?
Apply in controlled passes using even pressure and a consistent thickness. Allow each coat to set per instructions before the next one, and keep surface moisture conditions within the ranges stated by the manufacturer. If you’re unsure about technique, follow the label’s guidance or contact the product maker for details.