
Introduction
Cloudy water is usually caused by simple, fixable issues that you can diagnose yourself.
This article explains how to identify common causes, what steps to take, and how to judge when a fix is working, so you can safely restore clarity.
Key takeaways
- Identify cloudiness causes by testing for minerals, sediments, and microbial indicators.
- Flush lines to clear mineral buildup before considering softeners or filters.
- Sanitize hot water systems with proper steps to reduce bacterial risk.
- Check pressure reducing valve and inspect for leaks to stabilize flow.
- Document preventive maintenance schedule and mark symptoms prompting professional assessment.
- Budget flexible: compare DIY costs versus pro repair for major fixes.
Table of Contents
- Introduction
- Key takeaways
- Quick overview: Is your water cloudy or something else?
- Common causes of cloudy hot (and cold) water
- DIY diagnostic plan: step-by-step checklist
- Fix mineral buildup: flushing, softening, and filters
- Eliminating bacterial contamination: sanitizing and temperature control
- Plumbing and pressure fixes: PRV, pipes, and leaks
- Preventive maintenance, long-term strategies, and common mistakes to avoid
- Cost, tools, and next steps: budgeting your DIY vs. pro repair
- Conclusion
- FAQ
Quick overview: Is your water cloudy or something else?
Cloudy water isn’t always the same problem as air in the line, and the quick takeaway is to tell the difference fast: air bubbles usually sparkle and clear up quickly, while mineral buildup, metals like iron or manganese, discoloration, or signs of bacteria tend to linger or color the water and may show up in both hot and cold taps. Do a few simple home checks to separate causes: note when clouding starts (hot or cold), how long it lasts after running taps, inspect faucet aerators and screens for debris, and sniff or feel for any unusual textures or odors. If you’re unsure after these checks, use a simple at-home decision approach—start with the easiest tests, observe changes, and be prepared to move to more definitive steps if the clouding persists or presents color, smell, or texture changes.
This matters because a quick, structured check can save you time and prevent unnecessary disassembly or mistaken fixes, especially since some causes need professional testing or treatment. You’ll benefit from a simple at-a-glance plan: run hot and cold separately, flush the system for several minutes if you suspect air, look for mineral scale on fixtures, and consider a basic test strip to screen for hardness, iron, and chlorine/bacteria indicators. If clouding sticks around beyond a few minutes or coupled with color or smell, follow the recommended next steps or call in experienced help to avoid overlooking a real problem and to keep your family safe.
Air vs. particles vs. color
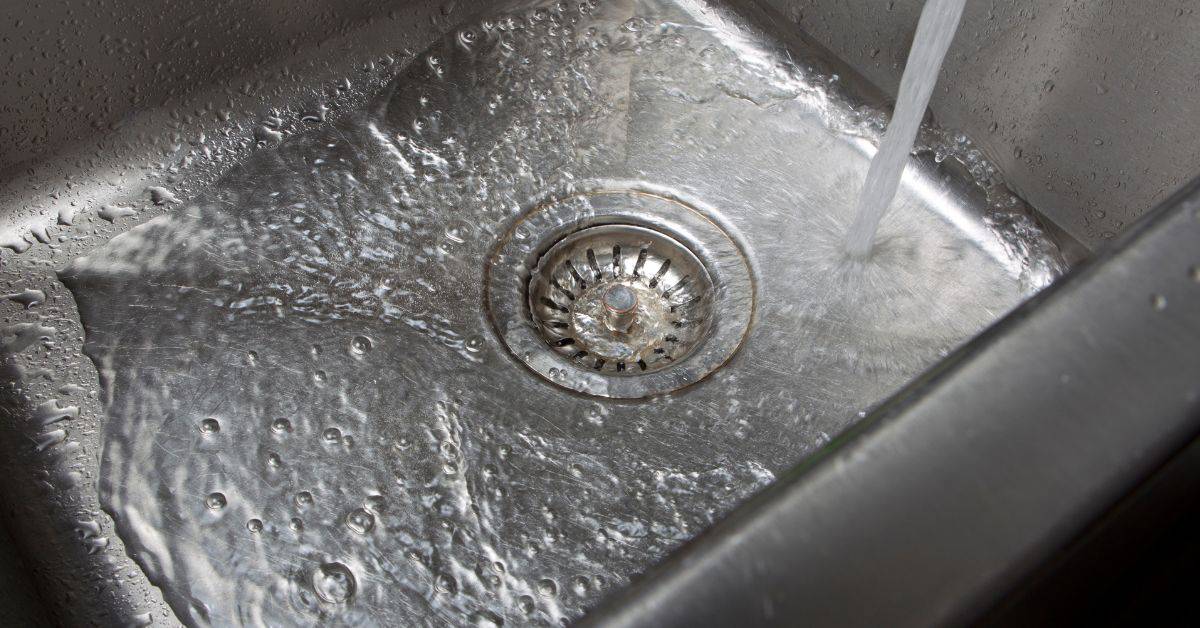
To figure out if your cloudy water is just air bubbles, suspended particles, or dissolved minerals and metals, start by filling a clear glass with the affected water. Let it sit for a few minutes to see what happens.
If the cloudiness clears up quickly and leaves no sediment at the bottom, you’re likely dealing with trapped air. This is usually harmless and temporary. If there’s residue left behind after settling, or if the water remains cloudy, it could be due to suspended particles like dirt or sand.
To check for dissolved minerals or metals, look at the color of the settled sediment. Brown or red might indicate iron; black often points to manganese. If you see no sediment but the water stays cloudy and has a metallic taste, it’s likely dissolved minerals causing the issue.
Take these simple steps to diagnose your problem without needing fancy equipment—just a clear glass and some patience.
When to call a pro immediately
Sometimes, cloudy water can be more than just air or particles. If you notice any of these signs, it’s time to get professional help:
A strong foul odor, like rotten eggs, often indicates bacterial contamination and needs immediate attention from a plumber.
If the water feels slimy when running your hands through it, this could be a sign of biofilm or bacteria buildup in your pipes. Don’t ignore this—it can lead to health issues.
Skin irritation or rashes after bathing are another red flag that suggests something is seriously wrong with your water quality and should prompt you to call for professional testing.
Finally, if the cloudy appearance persists even after flushing your system thoroughly, or if there’s a sudden change in color or smell, these could be signs of serious contamination. Don’t wait—get it checked out right away.

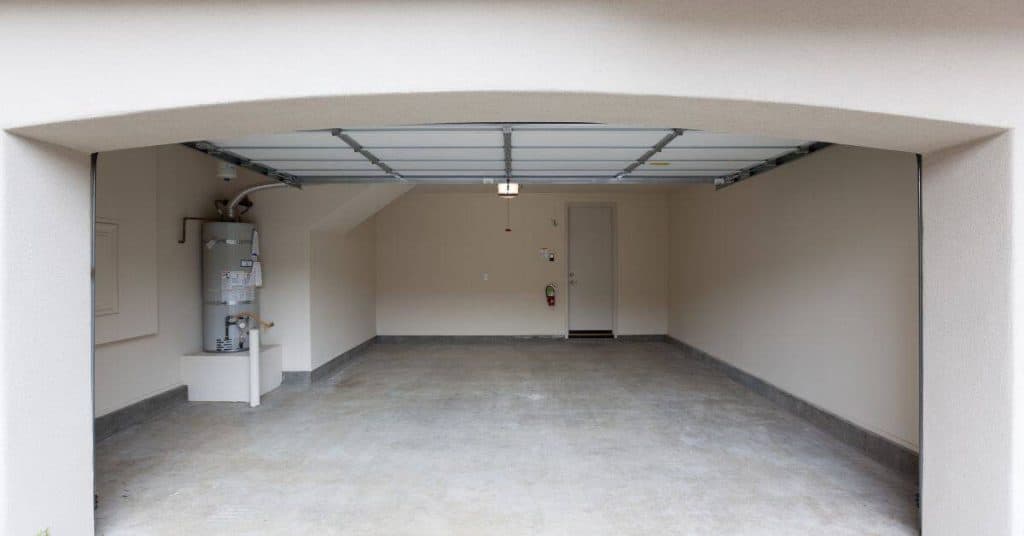
Common causes of cloudy hot (and cold) water
Cloudy water can come from mineral buildup, sediment, bacteria in the heater or tank, filtration failures, metal contamination, or piping issues. Hot water is more likely to show mineral scale and bacterial growth near the heater, while cold water problems often point to filtration, sediment, or corrosion elsewhere. Check both hot and cold separately to spot the pattern.
Do simple checks: flush the heater to inspect sediment, replace or clean filters, test for flow and pressure, and look for obvious pipe corrosion. If the problem persists in hot water, suspect the storage tank or heater; if cold water is cloudy, focus on filtration or pipes. Safety note: call a plumber or follow manufacturer instructions for high-pressure, gas, or suspected microbial contamination.
Mineral Buildup and Hard Water
Hot water systems are a magnet for mineral buildup, especially calcium and magnesium. These minerals can accumulate over time, creating sediment that clouds your water. When you notice cloudy hot water, it’s often due to this scale formation.
To diagnose if the issue is mineral-related, flush out your water heater. If you see a lot of sediment coming through, it’s likely the culprit. Cold water issues can also stem from minerals but are less common since cold water doesn’t concentrate them as much.
Fixing this problem typically involves flushing the tank to remove accumulated sediment and considering a water softener if hardness is an ongoing issue. Regular maintenance of your heater will help prevent future buildup.
Bacteria and Biological Growth
Low temperatures or stagnant hot water can foster bacterial growth, leading to cloudy water with a foul odor. This is especially true in storage tanks where water sits for long periods.
To check if bacteria are the cause, test your hot water separately from cold water. If you notice cloudiness and an unusual smell only in hot water, it’s likely due to bacterial growth. A simple flush of the heater might clear minor issues, but persistent problems may require professional cleaning or treatment.
Preventative measures include regularly flushing your water heater and ensuring proper circulation to avoid stagnant water conditions that promote bacterial growth.
Plumbing, Pressure, and Metal Issues
High water pressure can cause sediment and small particles to become suspended in the water, making it cloudy. Additionally, damaged pipes or corrosion from metals like iron or manganese can introduce colored particles into your water.
To diagnose these issues, check for signs of high pressure by observing leaks at fixtures or hearing banging noises (water hammer). Inspect your plumbing for any visible damage or discoloration that might indicate metal contamination.
If you suspect high pressure is the cause, install a pressure-reducing valve. For corrosion and damaged pipes, consider replacing faulty sections to prevent further issues. Always consult a professional if dealing with pressurized systems or suspected microbial contamination to ensure safety.
DIY diagnostic plan: step-by-step checklist
This DIY diagnostic plan gives you a safe, step‑by‑step way to check the hot water system. Start with a quick visual of the heater, pipes, and fixtures for rust, sediment, or leaks, then compare cold versus hot temperatures and run a glass-settle test if needed. Always shut off power or gas to the heater before you touch anything.
The idea is to identify likely causes with simple checks you can do, and know when to stop and call a pro. It helps you spot filter issues, improper aeration, pressure problems, or wrong thermostat settings, and it shows how basic test strips for pH, alkalinity, and hardness fit into the picture. If you’re unsure about readings, check the product labels and manufacturer instructions, and follow local safety rules.
Step-by-Step Process
Use this checklist whenever you notice cloudy water coming from your hot water system.
- Shut off power/gas: Before starting, turn off electricity or gas to the heater. Confirm with a meter reading zero.
- Inspect visually: Look for rust, sediment, or leaks around the heater and pipes. Note any issues.
- Compare hot/cold temps: Run both cold and hot water from taps. Check if temperatures are consistent; note discrepancies.
- Glass settle test: Fill a clear glass with hot water and let it sit for 24 hours. Observe sediment at the bottom.
- Check odours: Smell both cold and hot water. Identify any unusual smells like rotten eggs or chlorine.
- Inspect filters/screens: Remove and check all filters, screens, and aerators for blockages or debris.
- Test fixture pressure: Use a gauge to measure line pressure at fixtures. Ensure it’s within safe operating range.
- Use test strips: Test water pH, alkalinity, and hardness with basic test strips. Compare results against known standards.
Quick rule: Always prioritize safety by shutting off power or gas before inspecting any components.
Tools and materials checklist
Ensure you have all necessary tools before beginning your diagnostic process.
- Clear glass: For sediment testing. Use a clean, clear container to observe water clarity.
- Bucket: To collect samples from various points in the system.
- Water test strips: For pH, alkalinity, and hardness tests. Confirm chemical balance issues.
- Adjustable wrench: To remove filters or aerators safely. Use a proper size for each component.
- Pressure gauge: Measure line pressure accurately. Ensure it’s calibrated correctly.
- Flashlight: For checking dark areas and pipes. Helps spot leaks or blockages easily.
- Gloves: Wear protective gloves to avoid skin irritation from chemicals or hot water.
Quick rule: Always use the right tools for each task to prevent damage or injury.
Simple tests with expected outcomes
Conduct these quick tests to identify potential issues in your water system.
- Glass settle test results: Clear glass indicates clean water; sediment at the bottom suggests mineral buildup or debris.
- Hot vs. cold comparison: Consistent temperatures indicate normal operation; inconsistent temps may point to blockages or leaks.
- Odour check outcomes: Rotten egg smell hints at bacterial growth; chlorine indicates chemical treatment issues.
- Filter inspection results: Clean filters show proper maintenance; dirty, clogged filters suggest blockage or sediment buildup.
Quick rule: Each test provides clues about the water quality and system health. Follow up with appropriate actions based on findings.
Fix mineral buildup: flushing, softening, and filters
Mineral buildup shows up as cloudy water or sediment, and the first move is to confirm whether the issue is minerals, sediment, or a bacterial problem, then pick a path: flush the tank, consider a softener, or add filtration. A practical flush starts with safe prep, shutting off power, isolating the cold-water inlet, opening the drain, and using a hose to rinse until the water runs clear, followed by careful refilling and re‑pressurizing, all while guarding against scald and electrical shock.
Choosing between flushing, softening, and filtering matters for your home’s size, budget, and water quality data, and each option has maintenance tasks you’ll repeat periodically, like keeping salt levels in a softener, replacing filters on schedule, and checking for leaks after changes. The right setup reduces mineral taste and buildup, protects appliances, and keeps hot water steady, so commit to a quick post-install check, a simple maintenance rhythm, and clear safety reminders—isolate power, shut off the cold supply, wear PPE, and verify all connections before I call it a day.
How to flush a water heater (tank)
Before you start, make sure the power is off at the breaker and the cold-water inlet valve is closed. Wear protective gloves and goggles to avoid scalding or electrical hazards.
To begin flushing, attach a garden hose to the drain valve on your water heater. Run the other end of the hose outside or into a bucket for sediment collection. Slowly open the drain valve and let the water flow out until it runs clear. This process can take up to an hour depending on how much sediment has built up.
Once the water is clear, close the drain valve and disconnect the hose. Turn the cold-water inlet valve back on and allow fresh water to fill your tank. Re-pressurize by opening a hot water tap until you see clean water coming out. If the water remains cloudy or sediment continues to flow after an hour of flushing, it’s time to call in a professional.
Water softeners and scale prevention
A salt-based water softener works by exchanging hard minerals for sodium ions. This process prevents limescale buildup, but it does add some sodium to your water supply. Regular maintenance includes checking the brine tank level and cleaning the resin bed.
Maintenance frequency varies based on usage and hardness levels. Typically, you’ll need to refill salt once a month or so. Softeners can range widely in cost, from $500 to over $1,500 depending on size and features. Local providers can give you accurate pricing tailored to your home’s needs.
For those looking for alternatives, salt-free softening systems are available but may not be as effective at removing hard minerals completely. Always check compatibility with existing appliances before installing a new system.
Filters and sediment traps (point-of-entry/use)
Selecting the right filter depends on your water quality issues. For cloudy water, focus on filters with high micron ratings like 5 or 10 microns to catch larger particles.
Install point-of-use (POU) filters at individual faucets or showers for targeted treatment. Point-of-entry (POE) filters should be placed right after your main water line before it splits to different parts of the house.
Micron ratings and filter types vary, so choose based on manufacturer recommendations and test results from your DIY diagnostic checks. Replace filters every 3-6 months or as recommended by the manufacturer to ensure they remain effective in preventing cloudy water.

Eliminating bacterial contamination: sanitizing and temperature control
Sanitizing a water heater can reduce bacterial contamination when done safely. Use a chlorine flush or shock, turn off power and isolate the unit, drain a portion of the tank, circulate the solution, and flush until the smell of chlorine is gone. Wear PPE, ensure proper ventilation, avoid mixing cleaners, and don’t leave a high chlorine residual in the system; if you’re unsure, stop and get professional help.
Thermostat adjustments can help control bacterial growth while keeping hot water reasonably safe. Use the thermostat and anti-scald controls to manage risk without pushing the system too hard. If you still see cloudiness, odor, or sediment after cleaning, or if anyone in the home is elderly or immunocompromised, escalate to a professional for evaluation.
How to sanitize your water heater safely
To sanitize your water heater, start by turning off the power and isolating the unit. Drain a portion of the tank before adding a chlorine solution according to the manufacturer’s guidelines. Circulate this solution through the system thoroughly, then flush until all traces of chlorine are gone.
Wear PPE, including gloves and goggles, and ensure proper ventilation during sanitization. Avoid mixing different cleaning agents as it can lead to dangerous reactions. After sanitation, check for any signs that indicate professional help is needed such as persistent cloudiness or unusual odors.
Always verify local codes before attempting this process yourself. If you’re unsure about any step, it’s best to call a professional plumber who has the experience and equipment to handle sanitization safely.
Temperature and usage strategies to prevent bacteria
Maintaining your water heater at an optimal temperature is key in preventing bacterial growth. A good starting point is setting the thermostat around 120°F (49°C). This balance helps reduce energy costs while minimizing scald risk.
To further control hot water delivery, consider installing anti-scald valves or mixing valves that blend hot and cold water to maintain a safe temperature at fixtures. These devices can help prevent accidental burns from excessively hot water.
Regularly using your hot water helps too. Letting water sit stagnant in pipes for long periods increases the risk of bacterial growth. So, run your faucets periodically to keep water moving through the system and reduce potential contamination.
Plumbing and pressure fixes: PRV, pipes, and leaks
Cloudiness in water often comes from pressure issues or damaged pipes, because elevated or fluctuating pressure can stir up sediments, create air bubbles, or drive micro-leaks that introduce particulates. You’ll also see daily signs like cloudy look, inconsistent flow, or mineral deposits at fixtures. To check home pressure, attach a gauge to a faucet or hose bib following the gauge instructions and record the reading; if it seems off, compare to the system label or datasheet and note it.
PRV basics: it reduces incoming pressure, and a worn or misadjusted PRV can cause inconsistent pressure and cloudiness. For DIY steps, tighten fittings to stop small leaks, isolate affected lines, and only perform a cautious PRV adjustment if you have the instructions and the right tools; always check the manufacturer label and local rules first. If you’re unsure, call a licensed plumber for pipe replacement or complex valve work, and use a visual inspection to look for corrosion, pinhole leaks, white mineral deposits, swollen or discolored pipes, and leaks at joints, distinguishing supply from return lines.
Checking and adjusting the pressure reducing valve (PRV)
To start, grab a pressure gauge from your local hardware store. Attach it to an outdoor faucet or any accessible point in your home’s water supply line. Turn on the faucet and read the gauge. Normal range is between 40-60 psi; anything outside this means you need to adjust your PRV.
Locate your PRV, usually near your main water shut-off valve. It has a screw that can be turned clockwise or counterclockwise to increase or decrease pressure. Turn it slowly and check the gauge after each turn. Be careful not to over-tighten; this could damage the valve.
If you’re unsure about adjusting the PRV yourself, call in a pro. A licensed plumber will know how to safely adjust your system without causing further issues. Remember, messing with water pressure can lead to bigger problems if done incorrectly.
Inspecting pipes and detecting corrosion or leaks
Start by turning off the main water supply valve and opening all faucets to drain the system. Look for any signs of wet spots, discoloration, or flaking material on your pipes. These are clear indicators of potential issues.
Check joints and connections closely; these areas often show wear first. White mineral deposits can also signal corrosion or scaling inside the pipe walls. If you spot swollen sections or discolored patches, it’s time to replace those parts.
To test for leaks, isolate a section of your plumbing by closing valves on either side. Turn off all faucets and open one valve at a time while checking for water flow from nearby fixtures. This helps pinpoint the exact location of any leaks or faulty connections.
Preventive maintenance, long-term strategies, and common mistakes to avoid
This section lays out a practical preventive maintenance plan for cloudy water, with a simple calendar: monthly checks on filters and water tests, quarterly checks on pressure, pump function, and filter changes, plus an annual heater flush and mineral buildup assessment. It also covers long-term fixes like whole-house filtration, a properly sized water softener, and a ongoing testing plan to verify hardness, alkalinity, and contaminants over time. Finally, it calls out common DIY mistakes to avoid, such as overusing clarifiers, overheating or mis-sizing heating equipment, neglecting safety, or mixing incompatible chemicals.
The point is to give you a clear, actionable path you can follow without guessing. You’ll benefit from reminders, a simple log, and a realistic budget for replacement parts, plus straightforward testing methods to track water quality between professional checks. Use the decision framework and notes here to decide when upgrades are needed based on test results, household use, and what the water is doing, and always check labels or manufacturer instructions before changing systems.
Routine maintenance checklist and schedule
Use this checklist monthly, quarterly, and annually to keep your water system running smoothly.
- Monthly visual checks: Inspect filters for clogs. Confirm by opening filter housing; replace if dirty or damaged. Skipping can lead to cloudy water.
- Quarterly pressure tests: Check PRV settings and adjust if necessary. Use a gauge at the faucet; ensure it reads within manufacturer specs. Neglecting this may cause leaks.
- Semi-annual heater checks: Test heating elements for proper function. Turn off power, remove cover plate, and check connections. Overheating can damage your tank.
- Quarterly filter replacements: Follow manufacturer guidelines on replacement dates. Check packaging or manual; replace filters to prevent sediment buildup.
- Semi-annual water tests: Test pH levels and sanitizer presence. Use test strips or a digital meter; adjust as needed based on readings. Ignoring this can lead to bacterial growth.
- Annual heater flush: Flush your hot water tank completely. Follow manufacturer instructions carefully; skipping this allows mineral buildup.
Quick rule: Always refer to the equipment manuals for specific maintenance schedules and procedures.
Common DIY mistakes and how to avoid them
Avoid these common errors that can damage your water system or lead to cloudy water.
- Overusing clarifiers: Clarifiers are not a long-term fix. Use sparingly; excessive use can disrupt the balance of minerals in your water.
- Skip safety shutoffs: Always turn off power before servicing equipment. This prevents electrical hazards and ensures safe working conditions.
- Incorrect PRV adjustments: Improper settings cause pressure issues. Use a gauge to check; adjust slowly until correct reading is achieved.
- Failing to document changes: Keep records of maintenance activities. Document dates, parts replaced, and test results for future reference.
Maintaining your water system requires diligence but avoiding these mistakes will save you time and money in the long run.
Cost, tools, and next steps: budgeting your DIY vs. pro repair
Cost drivers vary a lot: some fixes are DIY-friendly like simple filter replacements or softener salt recharges, while others require a plumber or water specialist for repairs or sanitization. Distinguish service categories such as softener maintenance, whole-house filtration, plumbing repairs, and professional sanitization, and keep in mind there are upfront inspection or diagnostic fees, parts, and labor. Do your local research and get quotes to set a practical budget range based on your system and needs.
This matters because it helps you decide when to DIY or hire pros, using a simple rubric: test results, health risk, system complexity, permits or code issues, and how much time you can invest. Gather multiple estimates, ask about warranties, and check what parts are included versus extra costs like recurring filters or salts. If in doubt about safety, contamination risk, or complex repairs, leaning on a licensed plumber or water specialist is the safer path.
Comparative cost considerations and ROI
To budget for your cloudy water fix, start by researching local prices for equipment like water softeners and filters. For example, a basic water softener can range from $500 to $1,200 depending on size and features. Replacement parts such as salt bags or filter cartridges will add an ongoing cost of about $30-$60 per month.
DIY maintenance like recharging your softener’s salt tank is straightforward but requires regular attention. Professional services like plumbing repairs can be more complex, with costs ranging from $150 to over $500 depending on the issue and labor rates in your area. Factor in any upfront diagnostic fees charged by pros before they start work.
Non-monetary benefits of fixing cloudy water include improved appliance lifespan and better overall water quality for drinking and household use. These long-term gains can outweigh initial costs, especially if you catch issues early with preventive maintenance. Get local quotes to compare prices accurately and weigh the ROI based on your specific situation.
When to hire a pro and what to ask them
If you encounter issues like severe bacterial contamination or complex plumbing problems, it’s best to call in the pros. Red flags include persistent cloudy water despite DIY fixes, unusual tastes or odors, or signs of leaks or corrosion that could cause major damage.
When hiring a plumber or water specialist, ask about their licenses and experience with specific equipment like water heaters and softeners. Inquire about warranties on parts and labor to ensure coverage if issues arise later. Request reference tests they can perform to diagnose your cloudy water problem accurately.
Professional sanitization is also crucial for eliminating harmful bacteria in your system. Ensure the pro uses safe methods and follows all local codes for proper treatment without risking further contamination or property damage. By asking these questions, you’ll get a clearer picture of what’s needed and avoid costly mistakes down the line.
Conclusion
Dealing with cloudy water is about safety, durability, and a clearer finish. Use the right checks and fixes now to prevent costly damage and repeat problems later.
Run a simple, practical check sequence: inspect for visible leaks and test pressures in a small area first, flush mineral buildup from one fixture, swap or filter where buildup is likely, sanitize and heat-treat to kill bacteria, and track changes with quick tests before moving to the next step. Do the tasks in a steady, logical order and document what you do so you know what actually helped.
Common mistakes to avoid are taking shortcuts on sanitation, skipping pressure checks, and pushing fixes beyond their safe limits. Always isolate power and water before working on any component, work in a small, controlled area first, and double-check that a fix is compatible with your plumbing and water heater settings. If something feels risky, or you’re not sure about the fixture, stop and reassess; safety first, and avoid irreversible damage.
If the problem persists after the basic DIY steps, or you uncover persistent leaks, irregular pressure, or signs of a failing heater or corrosion, call a professional. A tight, well-documented plan with a clear budget helps you decide quickly between DIY and pro repair, and staying proactive today protects your home tomorrow.
FAQ
Why is my pool water cloudy after I shock it?
Cloudy water after shocking usually means the shock didn’t fully mix or the filter can’t remove the extra minerals. Check your circulation for a good 24 hours and run the filter longer. If it stays cloudy, you may need to clean the filter or run a clarifier as a next step.
What should I do first if the water is milky and green?
Stop guessing and test first. Check chlorine, pH, and alkalinity, then adjust to the proper range. If it’s still discolored, vacuum debris and clean or replace the filter before trying more chemicals.
How can I clear a cloudy pool quickly?
Run the filter continuously and brush the walls to free debris. Add a clarifier if recommended by your product instructions and clean the filter as needed. Don’t overdo chemicals; follow the label for dosage limits.
When should I call a pro instead of DIYing?
If you’ve done basic tests, adjusted chemistry, and the water stays cloudy or green, call for help. If you notice visible leaks, equipment failure, or odd smells, stop and get a technician. Some problems cost more to fix later if ignored now.