

Introduction
Venetian plaster is a traditional decorative plaster that creates a smooth, marble-like finish. It’s applied in thin layers over a prepared substrate and polished to a low sheen. This article covers common problems and practical fixes you can try safely.
Start by diagnosing the issue, then follow simple, hands-on steps: inspect moisture and substrate stability, ensure each coat adheres, and use a compatible plaster mix. If you see cracking or uneven shine, fix by cleaning the area, lightly abrading the surface, and re-applying thin coats in the recommended order, then protect with an appropriate finish. Always follow manufacturer instructions, check product labels, and respect local rules for your project.
Key takeaways
- Inspect plaster surface for cracks and moisture before repairs to prioritize work.
- Use appropriate plaster patching methods; avoid bonding failures by proper adhesion.
- Cracking: feather edges, monitor movement, recoat after substrate stabilization, then verify.
- Peeling or delamination requires surface prep and compatible materials; avoid mismatches.
- Staining and color issues: test in inconspicuous area before full application.
- Moisture and mold: address source, ventilate, and dry before finishing; safety matters.
Table of Contents
- Introduction
- Key takeaways
- Quick Diagnostic Checklist for Problems
- Cracking and Hairline Fractures
- Peeling, Flaking, and Delamination
- Staining, Efflorescence, and Color Inconsistency
- Texture Problems: Uneven Texture, Trowel Marks, and Burnishing Issues
- Moisture-Related Problems and Mold
- Preventative Care, Maintenance, and Planning Repairs
- Conclusion
- FAQ
Quick Diagnostic Checklist for Problems
Start with a visual survey of symptoms: note where cracking, peeling, or staining appears. Check substrate, moisture sources, and finish conditions.
Match symptoms to categories: substrate movement, moisture intrusion, technique or product issues. Note urgency: address active leaks or rising moisture first.
Visual checkpoints to identify issues
Before you start poking and prodding, grab a flashlight and take a close look at your Venetian plaster. This quick visual checklist helps you pinpoint problems early.
- Cracks: Tiny hairline cracks are normal, but wide or numerous ones indicate issues with technique or substrate.
- Blisters: Puffy areas mean there’s trapped moisture or air beneath the surface. Ignoring this can lead to delamination.
- Efflorescence: White, powdery deposits on the surface signal excess moisture, which can degrade your plaster over time.
- Discoloration: Uneven colors or stains might indicate inconsistent mixing, application, or underlying substrate problems.
- Sheen inconsistencies: Glossy and matte patches side by side suggest variations in application or curing conditions.
- Pinholes: Tiny holes can be filled with dust or debris during application. If left untreated, they can trap moisture and cause bigger problems.
- Delamination: Peeling or flaking plaster indicates a serious problem with adhesion, often due to moisture or substrate issues.
Quick rule: Regular visual checks help catch minor issues before they become major headaches.
When to test substrate and moisture
Before you apply Venetian plaster, ensure your substrate is dry and suitable. Here’s a simple checklist to help you determine when to test.
- Feel the surface: A cold or damp wall might indicate moisture issues. If it feels warm or dry, proceed with caution.
- Tap test: Gently tap the surface. A hollow sound could signal delamination or voids in the substrate.
- Check for damp spots: Look for water stains, mold, or mildew, which indicate moisture problems.
- Manufacturer’s requirements: Always check if your Venetian plaster requires a specific substrate type and condition. Ignoring these can void warranties.
- Professional testing: If you suspect serious moisture issues, consider hiring a professional to conduct tests like calcium chloride or infrared scans.
Quick rule: Always test your substrate and moisture levels before applying Venetian plaster. Skipping this step can lead to costly repairs down the line.
Cracking and Hairline Fractures
Identify common causes such as substrate movement, poor adhesion, over-thick coats, or improper prep. Look for pattern, location, and edge conditions to guide the plan.
Choose safe repair approaches and know when reapplication is needed: small cracks can be filled or re-skimmed, while large or moving cracks may require substrate prep or a new finish layer. Always check the product instructions or label to ensure compatibility and safety.
Small hairline cracks — DIY fixes
If you spot small hairline cracks, don’t panic. Here’s how to tackle them:
Clean the area first. Use a soft brush or vacuum to remove any debris.
Next, feather the edges of the crack using a damp sponge or cloth. This helps create a smooth transition for your filler.
Apply a compatible filler or thin skim coat. Use a flexible filler if the crack is due to minor movement. Ensure it’s compatible with your Venetian plaster. Apply in thin layers, allowing each to dry before sanding lightly.
Structural or recurring cracks — professional solutions
If cracks are wide, deep, or keep reappearing, it’s time to call in the pros. Here’s why:
Wide or deep cracks often indicate substrate movement. This could be due to settling, inadequate support, or other structural issues.
Recurring cracks suggest a persistent problem. It might be an ongoing moisture issue, inadequate prep, or over-thick coats (as discussed in our quick diagnostic checklist).
Professionals can install joint systems to accommodate movement. They may also reinforce the substrate or recommend structural repairs. Don’t DIY this; it’s a job for licensed contractors.
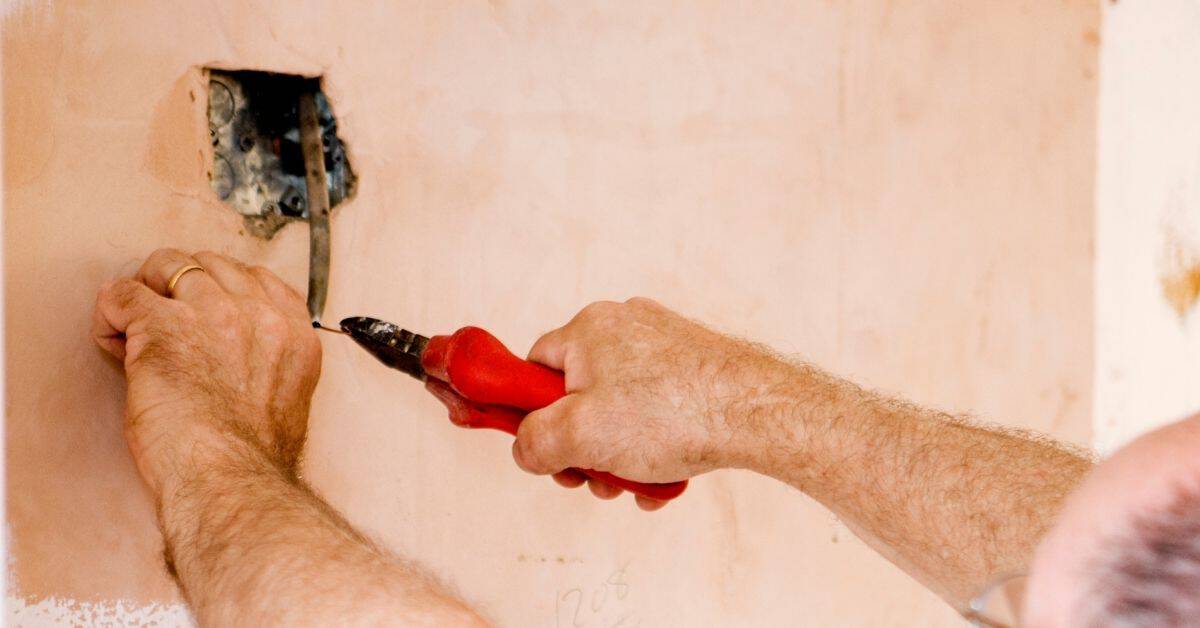
Peeling, Flaking, and Delamination
Peeling or flaking points to adhesion problems, trapped moisture, or incompatible primers and finishes. Inspect edge seams and surface preparation history to narrow the cause.
Restore adhesion or safely remove and reapply by following proper surface prepping, primer compatibility checks, and controlled re-coating. If unsure, verify with manufacturer instructions or product data sheets before proceeding.
Re-adhesion techniques
If your Venetian plaster is peeling, flaking, or delaminating, you might be able to restore adhesion without full removal. Here’s how:
Preparation: Lightly sand the affected area with 120-grit sandpaper. Vacuum and wipe clean.
Adhesion testing: Apply a small amount of water to the surface. If it beads up, adhesion is poor. If it soaks in, proceed.
Priming: Use a compatible primer or bonding agent to improve adhesion. Follow manufacturer’s instructions.
Reapplication: Apply thin, keyed coats of Venetian plaster using a trowel. Work quickly and evenly.
Full removal and reapplication
Sometimes, the best solution is to remove the old finish and start fresh. Here’s how:
Removal: Use a heat gun or scraper to carefully remove the loose plaster. Be cautious not to damage the substrate.
Substrate remediation: Inspect and repair any damaged areas on your wall. Ensure it’s clean, dry, and primed for new application.
Re-priming: Apply a fresh coat of primer suitable for Venetian plaster. Let it dry according to the manufacturer’s instructions.
Reapplication: Follow the same application process as before, ensuring each layer is thin and evenly applied.
Staining, Efflorescence, and Color Inconsistency
Stains and salt-related efflorescence come from moisture movement and mineral migration. Color shifts can occur from pigment settling or improper mixing.
Apply targeted cleaning and remedial approaches to restore appearance, then reseal or repaint as needed. Always verify pigment compatibility and stain-removal methods on the product label or instructions.
Removing efflorescence and mineral stains
Efflorescence and mineral stains are common issues with Venetian plaster, often caused by salt migration from the substrate. Here’s how to tackle them:
Dry brushing: Start by gently dry brushing the affected area using a soft-bristled brush. This helps remove any loose material and prepares the surface for cleaning.
Next, use a mild cleaner specifically designed for Venetian plaster. Always test cleaners in an inconspicuous area first to ensure they don’t damage your finish. Apply the cleaner with a sponge or cloth, let it sit for a few minutes, then gently scrub the stain using circular motions. Rinse thoroughly and allow the surface to dry.
If stains persist, consider using specialty products like efflorescence removers or mineral stain strippers. Always follow the manufacturer’s instructions and wear appropriate safety gear when using these products.
Correcting color and sheen differences
Color and sheen inconsistencies can occur due to pigment shift or improper application. Here’s how to correct them:
Spot blending: For minor inconsistencies, spot blending may be sufficient. Mix a small amount of plaster with the desired color and sheen, then apply it directly onto the affected area using a trowel. Blend the new material into the surrounding surface using circular motions.
Feathering: If the inconsistency is larger but still localized, feathering may be necessary. Apply a thin layer of plaster around the perimeter of the affected area, blending it into the existing finish. Then, apply a full layer over the entire area to ensure uniform color and sheen.
In some cases, the only reliable way to achieve uniform color and sheen is to recoat or repolish the entire surface. This involves removing all existing plaster, preparing the substrate, and applying a new layer of Venetian plaster. This process should be done by an experienced professional to ensure the best results.
Texture Problems: Uneven Texture, Trowel Marks, and Burnishing Issues
Texture defects commonly arise from technique, drying conditions, or product choice. Check roller or trowel pressure, timing, and temperature during application.
Outline corrective smoothing or rework steps such as touch-up skim coats or re-troweling, followed by proper curing. Review product guidelines and local rules for any limits on rework timing or layering requirements.
Smoothing and blending minor texture faults
Minor texture issues can be addressed by lightly abrading the surface. Use a fine-grit sandpaper, around 220 or 320 grit, to gently remove any high spots.
Clean the area thoroughly to remove dust and debris. Then, mix a small amount of Venetian plaster and apply it as a thin corrective skim over the affected area using a trowel. Maintain consistent pressure and motion with your trowel to ensure a seamless blend with the surrounding surface.
Tip: Work quickly but carefully to avoid overworking the material, which can lead to more texture problems.
Fixing over-burnished or flat areas
Over-burnishing or flat areas can be addressed by targeted re-burnishing. First, identify the affected area and ensure it’s fully cured to prevent damage.
Using a soft cloth or pad, apply gentle pressure and circular motion to redistribute the sheen. Be careful not to overwork the surface, as this can lead to more flat areas.
If re-burnishing doesn’t achieve the desired result, consider applying a finishing glaze. Follow the manufacturer’s instructions for mixing and application. Remember that most Venetian plasters allow for limited reworking, so be mindful of product limits.
Moisture-Related Problems and Mold
Rising damp, leaks, and condensation damage plaster panels and finish. Identify moisture source and track its reach on walls and ceilings.
Follow the proper remediation sequence: stop the water, dry the area, treat mold, and then repair or recoat. Verify that chosen products are rated for humid or damp environments and compatible with the substrate.
Identifying moisture sources and stopping leaks
First, you gotta find where that moisture’s coming from. Grab a flashlight and inspect these spots:
- Basement walls and floors for signs of rising damp.
- Plumbing fixtures and pipes for leaks.
- Roof and windows for water intrusion.
Fix the building envelope: Repair any cracks, gaps, or holes. Ensure your roof, windows, and doors are watertight. If you’ve got rising damp, install a damp-proof course.
Improve ventilation: Make sure your home breathes. Exhaust fans in bathrooms and kitchens, vents in attics and crawlspaces. Cross-ventilation helps too.
Treating mold and preventing regrowth
Mold loves moisture. Once you’ve stopped the leak, it’s time to clean it up. Safety first: wear gloves, goggles, and a mask.
For non-structural mold (less than 10 sq ft):
– Use detergent and water, or a mold-specific cleaner.
– Scrub, then dry thoroughly.
– Apply a mold-resistant primer before repainting.
Biocides: For larger areas, consider using biocides. Follow the manufacturer’s instructions to the letter. Improve ventilation and drying:
– Run dehumidifiers.
– Use exhaust fans.
– Ensure proper insulation and air sealing.
Preventative Care, Maintenance, and Planning Repairs
Set maintenance intervals and seasonal care routines to catch issues early. Document inspections and any changes in appearance or moisture.
Plan repairs with product compatibility in mind and schedule ahead to maximize longevity and finish quality. When in doubt, consult the product label, data sheet, or manufacturer instructions before starting a repair plan.
Tools and materials checklist
Before starting any preventative care, maintenance, or repair work on your concrete surfaces, use this checklist to ensure you have the right tools and materials. This will help you avoid common mistakes and save time and money.
- Tape measure: To accurately measure areas for repairs and to check if surfaces are level.
- Hammer and chisel: For removing damaged concrete or preparing surfaces for repair.
- Wire brush: To clean and remove loose debris from the surface before applying any materials.
- Safety glasses: Essential to protect your eyes from debris and chemicals.
- Gloves: To protect your hands from concrete dust, chemicals, and sharp edges.
- Respirator: For protection against harmful dust particles when drilling or chipping concrete.
- Concrete cleaner: A compatible cleaner to remove dirt, grease, and stains. Always check the manufacturer’s instructions for compatibility with your surface type.
- Concrete primer: To prepare the surface for new plaster or sealant. Ensure it’s suitable for your specific project and surface type.
- Plaster or patching compound: For filling cracks, holes, or other damaged areas. Check compatibility with your existing concrete and follow manufacturer instructions for mixing and application.
Quick rule: Always check product labels and manufacturer instructions to ensure compatibility with your specific surface type and project requirements. Skipping this step can lead to poor adhesion, discoloration, or even complete failure of the repair material.
Material specs and standards explained
The right materials make all the difference. They’ll give you a durable, good-looking job that lasts.
- Cement (Type I/II): Used for mixing mortar and concrete. Look for Type I or II on the bag. Type I is general-purpose, Type II has moderate sulfate resistance. Avoid cheap, unknown brands – they can cause weak mixes and cracking.
- Masonry Cement: For rendering and stucco work. Check it’s compatible with your substrate (brick, block, etc.). Cheap alternatives may stain or crack over time.
- Type N Mortar: Used for laying bricks and blocks. Look for ‘N’ on the bag. It has moderate suction and good bond strength. Avoid Type S – it’s too strong and can cause cracking in walls.
- Waterproofing Membrane: For preventing moisture penetration. Check it’s suitable for your substrate and climate. Cheap, unknown brands may fail, leading to damp issues later.
- Concrete Sealer: To protect and enhance concrete surfaces. Look for acrylic or silicone-based sealers. Avoid cheap, oil-based sealers – they can yellow over time.
- Expansion Joint Fillers: For filling control joints in concrete. Check they’re compatible with your joint size and shape. Cheap alternatives may not last, leading to joint failure and cracking.
Pro tip: Always check product labels and manufacturer instructions before buying. Store materials properly to maintain quality – keep cement dry, mortar mixes covered, and sealers away from heat and direct sunlight.
When to DIY vs. hire a pro
Alright, listen up. You wanna keep your concrete in tip-top shape, but knowing when to roll up your sleeves and when to call the pros is crucial.
DIY: Small cracks, minor chips, or uneven slabs – you can handle these with some elbow grease and the right tools. Just remember, preparation is key. Clean the area, remove any loose debris, and ensure the surface is dry.
Hire a pro: When it comes to structural issues like settling, major cracks, or moisture problems, it’s time to bring in the big guns. These jobs need expert eyes to assess if there’s underlying damage that needs fixing first. Plus, they’ve got the heavy-duty tools and know-how to tackle tough finishes.
Before you pick up the phone, have these ready: a clear description of the problem, photos from different angles, and any relevant info like when it started or if there’s been recent heavy rain. And always ask for references and examples of their work – don’t be shy!
Conclusion
Take this work seriously and keep safety at the center. With plaster issues, fast, small steps and careful checks protect your walls, your health, and your budget.
Proceed with a simple, practical checklist: start by testing a tiny area to confirm compatibility and cure before you commit; scan for moisture or staining patterns and address moisture sources first; clean the surface and roughen only where it’s clearly needed; apply repairs in thin, controlled passes and let each layer cure fully before moving on; finish with a small test of color and texture in a hidden spot before you treat the whole room. If anything looks risky, step back and reassess rather than pushing through.
Common mistakes to avoid are rushing repairs, skipping the moisture test, and overworking the surface when it’s not fully dry. Keep your area well protected, wear eye and respirator safety when you work, and never apply new plaster over damp substrate. Plan repairs in stages, document what you changed, and stay away from irreversible shortcuts that seal in problems.
If you’re unsure about persistent moisture, efflorescence that returns, or large cracks and delamination, consider calling a pro. They can diagnose hidden leaks, test substrates, and prevent costly mistakes. Stay steady, work methodically, and you’ll keep the finish durable and looking right.
FAQ
What causes color inconsistencies after a Venetian plaster repair and how do I fix it safely?
Color variance usually comes from uneven absorption or uneven application. Check your primer and finish coats for evenness, and follow the manufacturer’s guidance for re-coating times. If in doubt, test a small patch on a hidden area to dial in the process before touching the whole wall.
I found pinholes or small air voids in the finished surface—what’s the best way to patch them without making a mess?
Let the surface dry, then lightly sand the area and apply a thin patch of compatible plaster, feathering edges smooth. Wipe away any dust, and re-bond the patch with the same finish coat you’re using on the rest of the wall. Don’t overwork the patch, or you’ll create new marks.
If there’s water intrusion or high humidity after plastering, what steps should I take before re-coating?
Address the moisture source first and allow the area to dry completely according to the product instructions. Use a dehumidifier or fan to speed drying, and inspect for any staining or signs of mold before applying a new coat. Never seal in moisture with additional plaster until the wall is truly dry.
The final finish feels sticky or soft weeks after application—what should I check and how do I fix it?
Sticky or soft spots mean not enough curing time or trapped moisture. Verify you followed the cure guidance, and check for any ongoing moisture problems. If safe to proceed, gently abrade the surface and reapply the finish coat following the product’s curing schedule. If there’s any doubt, pause and confirm instructions from the manufacturer or local guidance.