
Introduction
The time it takes to sand or polish plaster can vary greatly depending on the surface area, condition, and your chosen method. Before you start, understanding the timeline for each process will help you plan effectively.
In this guide, we’ll compare the duration of sanding vs polishing plaster, breaking down each step’s time commitment to help you estimate how long your project will take.
The Sanding vs Polishing Plaster Timeline: Step-by-Step Duration Comparison
To give you a clear idea of the time involved in sanding and polishing plaster, we’ve broken down each process into steps with approximate duration ranges:
- Sanding Plaster (Total estimated time: 3-6 hours per 100 sq. ft.)
- Preparation (15-30 minutes)
- Sanding (2-4 hours, depending on surface condition and grit used)
- Cleanup (30-45 minutes)
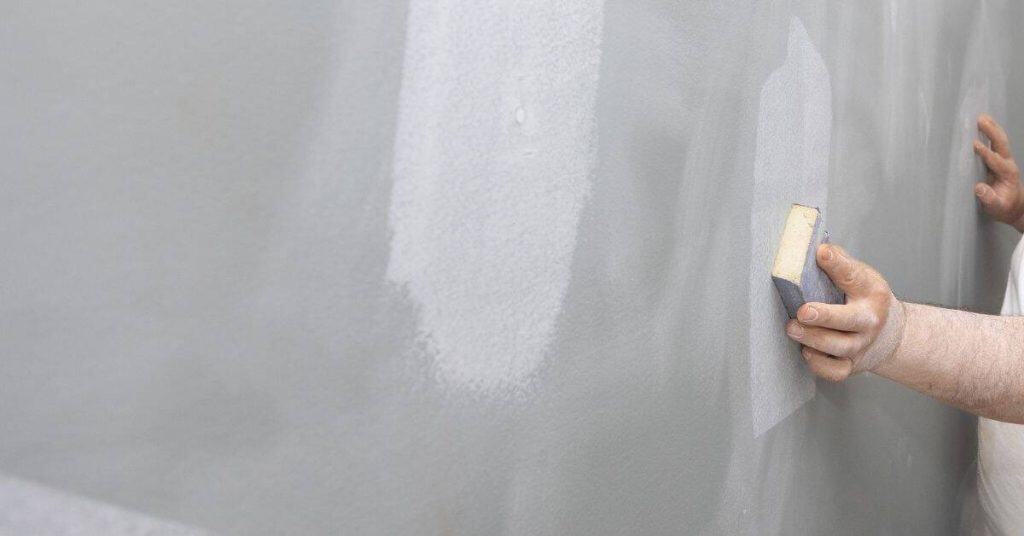
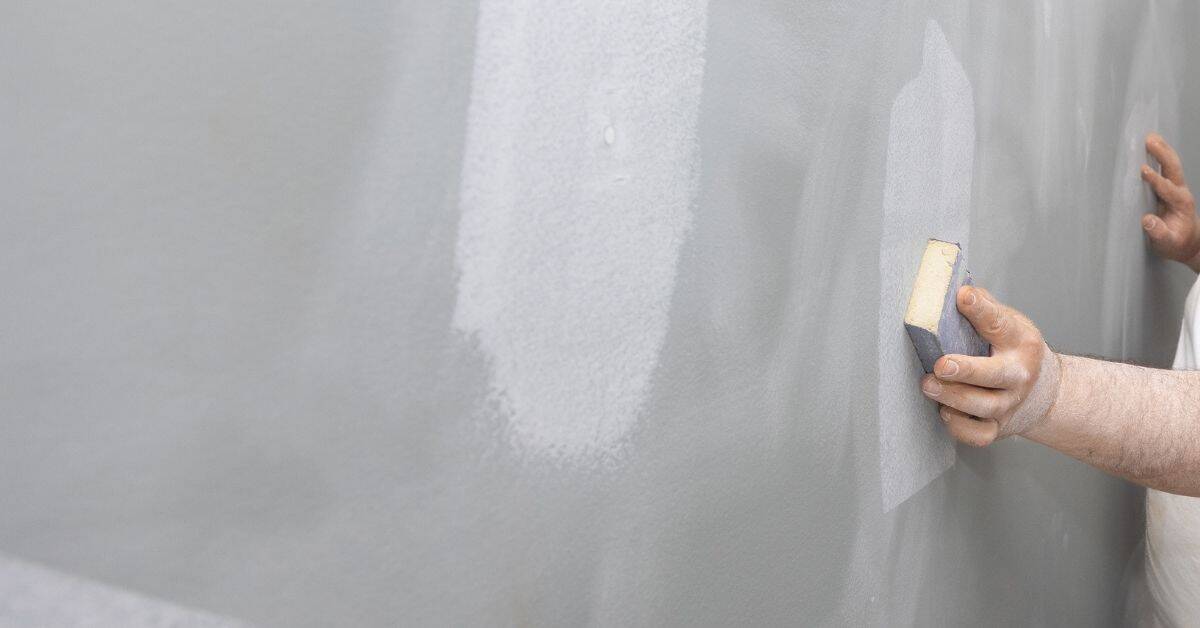
- Polishing Plaster (Total estimated time: 2-4 hours per 100 sq. ft.)
- Preparation (15-30 minutes)
- Polishing (1-2 hours, depending on surface condition and polishing compound used)
- Cleanup (30-45 minutes)
These timeframes are approximate and can vary based on your specific project. Keep in mind that larger areas or more challenging surfaces will take longer.
Key takeaways
The preparation time for both sanding and polishing is crucial as it sets the stage for a successful finish, affecting the overall duration of your project.
- Sanding dulls surface sheen and can feather edges, worsening texture irregularities.
- Polishing preserves smoother finish when using proper compounds and gentle pressure.
- Test a small area before wide sanding to assess adhesion risk.
- Use non-abrasive prep methods and compatible primers for better paint adherence.
- Protect surrounding surfaces and wear PPE to avoid plaster dust exposure.
- Document surface type and follow manufacturer guidance for sanding or polishing limits.
Table of Contents
- Introduction
- Key takeaways
- Quick Comparison: Sanding Vs Polishing
- Signs Sanding Has Ruined the Plaster Finish
- Why and When to Avoid Sanding: Plaster Types and Scenarios
- Alternative Techniques: Polishing and Non-Abrasive Preparation Methods
- Tools, Materials and Supplies Checklist
- Step-by-Step Plan: Prepare, Test, and Execute
- Paint Adhesion, Texture, and Long-Term Durability Implications
- Costs, Time, and Common Mistakes to Avoid
- Conclusion
- FAQ
Quick Comparison: Sanding Vs Polishing
Sanding and polishing change plaster in different ways. Sanding abrades the surface to create texture and micro-dimping that can dull sheen and expose underlying layers. Polishing smooths and tightens the surface to enhance sheen with less material removal.
For finish and paintability, sanding often requires more primer or coatings to hide dust and scratches, while polishing can yield a more uniform base with fewer pinholes if done on sound plaster. Use a simple decision framework based on surface condition, desired look, time, and budget to choose the method that fits the job.
What sanding achieves
Sanding is like scraping off the top layer of your plaster. It’s great for removing high spots, leveling out imperfections.
Pro: It creates a matte keyed surface that paint loves to stick to.
Con: Over-sand and you’ll end up with a dull, flat finish. Plus, it can create micro-dimps if not done carefully.
What polishing achieves
Polishing is like pressing down on your plaster surface. It compacts and smooths without abrading, preserving the profile.
Pro: It produces a sheen and dense finish that’s perfect for gloss or eggshell paints.
Con: It won’t fix deep imperfections. It’s more about refining what you’ve already got.
Decision checklist
Use this quick guide to decide between sanding and polishing your plaster.
- Plaster type: Sanding is best for new or rough surfaces. Polishing is ideal for smooth, uniform ones.
- Desired sheen: Sanding gives a matte finish. Polishing offers a smoother sheen.
- Existing damage: Sanding can help fix minor issues. Polishing won’t hide deep imperfections.
- Paint type: Matte paints work well after sanding. Gloss or eggshell need polishing for best results.
- Plaster hardness: Soft plaster? Skip sanding to avoid damaging it further.
- Previous skim coats: Be cautious with sanding over old skim coats. They can flake off.
- Time and budget: Sanding is quicker but creates more dust. Polishing takes longer, less mess.
- Test patch: Always test a small area first to see how your plaster reacts.
Quick rule: If in doubt, start with sanding for rough surfaces or polishing for smooth ones. You can always follow up with the other method if needed.
Signs Sanding Has Ruined the Plaster Finish
Visual indicators include a dull, powdery surface with gouges or scratches and uneven sheen. Hairline fissures or random cracks may appear where the plaster was thinned or weakened. Patches that look flatter or dull compared to surrounding areas are also red flags.
Tactile signs are a rough or gritty feel and powder rub-off on skin. Absorption irregularities, haloing around repairs, or early paint flaking in sanded zones signal deeper issues. Assess severity by testing a small patch and comparing with intact areas under light from different angles.
Visual and Tactile Clues
Sanding can leave visible signs of damage on your plaster. Keep an eye out for:
Patchiness: Sanded areas might look flatter or dull compared to surrounding plaster.
Powdery surface: A dust-laden, powdery finish indicates that sanding has removed too much material.
Exposed aggregate or lathing: If you see small stones or the underlying support structure, sanding has gone too deep.
Paint and Adhesion Problems After Sanding
Sanding can affect how paint adheres to your plaster. Watch for these issues:
Flaking or blistering: Paint peeling off in large sheets or forming bubbles indicates poor adhesion.
Rapid primer soak-in: If primer is absorbed too quickly, it’s a sign that sanding has opened up the plaster surface too much.
Uneven sheen: Inconsistent gloss or matte finish across the wall suggests uneven sanding.
How to Measure Damage Extent
Before deciding on repairs, test the plaster to assess the damage:
Scrape test: Gently scrape a small area. If too much material comes off, it needs repair.
Tape test: Apply painter’s tape, let it sit, then pull it off. If paint or plaster comes with it, adhesion is poor.
Water droplet absorption: Drip water onto the surface. If it’s absorbed too quickly or leaves dark patches, resealing might be needed.
Why and When to Avoid Sanding: Plaster Types and Scenarios
Some plaster types resist sanding or suffer texture and binder damage when abraded. Venetian or polished plasters, lime-based finishes, and certain gypsum coatings can lose their intended look with mechanical abrasion. Sanding can also worsen delamination or create uneven porosity.
Thin, multi-layer finishes, high-sheen surfaces, or moisture-affected areas are poor candidates for aggressive sanding. Consider alternatives like deglossing, light cleaning, or skim-coating instead of sanding, and verify with product instructions or local rules before proceeding.
Sensitive Plaster Types
Certain plasters are delicate and prone to damage from sanding. Lime-based plasters, for instance, have a soft surface due to their natural composition. Abrasive sanding can break down the lime binder, leaving your finish dull or even crumbly.
Decorative polished plasters like Venetian plaster also require careful handling. These plasters are designed to have a specific sheen and texture. Sanding can ruin this effect by removing the desired patina or exposing underlying pigments.
Tip: Always check your plaster type before deciding to sand.
Situations to Avoid Sanding
Sanding in these scenarios can lead to disastrous results.
- Very thin finish coats: Sanding can remove too much material, leaving your surface uneven or patchy.
- New shiny plaster: Sanding new plaster can dull the sheen and ruin the intended look.
- Moisture-weakened areas: Sanding in these areas can cause delamination or further damage.
- Decorative textures: Sanding can remove the desired texture, leaving your surface flat and uninteresting.
Always assess your plaster’s condition before sanding. If you’re unsure, it’s better to skip sanding altogether.
When Light Abrasion is Acceptable
In some cases, minimal sanding can be done safely. This is often true for robust gypsum plasters.
Scuff-sanding: A light scuff-sand between coats can help improve adhesion and remove any dust or debris. But remember, this should be a very light touch, just enough to roughen the surface slightly.
Spot refinement: If you have a small area that needs refining, a light sand can help. Just ensure it’s done carefully to avoid damaging surrounding areas.
Mechanical prep before sealing: Some plasters may require mechanical prep before applying a sealant. Always follow the manufacturer’s guidelines for this.
Alternative Techniques: Polishing and Non-Abrasive Preparation Methods
Non-abrasive options include burnishing, sponge-sanding, trowel refinishing, and mechanical polishing with pad systems. These methods aim to refine sheen and microtexture without removing large amounts of material. They work best on sound, well-bonded plaster.
Describe expected results and limits for each method, and identify surfaces where they may underperform. When in doubt, test a small area and compare before committing to the full area, and plan primers or sealers accordingly.
Burnishing and trowel reworking
Before plaster sets, you can smooth it out without dust. This works best on new plasters or after a skim coat.
Troweling: Use a steel trowel to spread and flatten the plaster. Work in small sections, applying firm pressure.
Burnishing: While the plaster is still workable, use a wooden float or burnisher to smooth it further. This densifies the surface, improving its finish.
Mechanical polishing with pads and compounds
For existing plasters, use low-abrasion pads and fine compounds. Start with coarser grits, then progress to finer ones.
Pads: Use foam or felt pads designed for plaster. They’re gentler than sandpaper.
Compounds: Choose fine polishing compounds specifically made for plaster. They cut less aggressively and help achieve a sheen without deep abrasion.
Surface consolidation and sealing
Instead of sanding away material, stabilize powdery surfaces with consolidants or sealers. This works well after skim coats or on old plasters.
Consolidants: Apply a consolidant to lock in loose particles. This prevents dusting without removing material.
PVA Primers/Sealers: Use breathable PVA primers or sealers to stabilize the surface and improve paint adhesion. They also help prevent dusting.

Tools, Materials and Supplies Checklist
Organize safe sanding and polishing tools, plus PPE such as respirators, goggles, and gloves. Keep dust containment ready and set up ventilation. A clear plan helps control work area and speed up cleanup.
Include core tools, abrasives, pads, primers, and sealers, with guidance on selecting appropriate grades and pad types. Use labeled sections to streamline procurement and avoid mixing incompatible products.
Sanding equipment and when to use it
Use this checklist for initial surface preparation or touch-ups. Skipping these steps can lead to uneven results.
- Sanding blocks: Ensure even pressure, prevent gouging.
- Fine-grit sandpaper (120-220): Ideal for plaster, prevents scratches.
- Dust-control sanders (HEPA vacuum or orbital with dust bag): Reduce mess and health risks.
- Grit range: Start at 120, progress to 220 for fine finish.
Quick rule: Always use appropriate grit for your project’s stage.
Polishing tools and consumables
Use this checklist after initial sanding or for final polishing. Missing items can hinder the desired gloss.
- Trowels: Smooth out plaster, prep for polishing.
- Microfiber polishing pads (non-marring): Protect surface, distribute compound evenly.
- Polishing compounds (ceramic or diamond): Enhance gloss, fill micro-scratches.
- Buffing devices: Apply even pressure, achieve consistent shine.
Quick rule: Match pad type and compound to your desired finish.
Safety and dust-control gear
Use this checklist for every preparation task. Neglecting safety can lead to serious health issues.
- Respirator (P100 or P2): Protect against plaster dust, silica.
- Safety goggles: Shield eyes from debris, particles.
- Dust extractor (wet/dry vacuum): Contain and remove dust at source.
- Wet sanding method: Reduce dust, improve surface prep.
Quick rule: Always prioritize safety; use appropriate gear for each task.
Step-by-Step Plan: Prepare, Test, and Execute
Start with a thorough assessment of substrate type, existing finish, and any moisture or damage concerns. Decide if sanding or an alternative method is best, and document the plan. Outline prep, dust control, and ventilation steps before work begins.
Then perform small tests to gauge adhesion and porosity, prepare the workspace, and execute the chosen technique with steady, even pressure. Include contingency steps if results are not as expected and verify finish readiness with a final inspection.
Step-by-Step Process
This section walks you through the complete process of preparing, testing, and executing your chosen finish method on your plaster surface.
- Assess the current plaster surface for type, finish, moisture levels, and damage. Identify if sanding is suitable or if alternative methods are better.
- Perform tests to check adhesion, hardness, dust generation, porosity, and sealant needs before starting any work.
- Decide on your method and preparation plan based on test results. Choose between sanding, polishing, micro-burring, or repaint-ready skim coats.
- Prepare the workspace and surface by protecting surrounding areas, removing loose material, repairing cracks, cleaning thoroughly, and addressing moisture issues.
- Execute the chosen technique with quality controls in place to ensure a uniform finish. Document progress and adjust timing as needed.
- If sanding damages the surface, plan and execute contingency steps such as patching, re-skimming, or re-leveling.
- Perform final checks for uniform sheen and paintability before completing the project.
Pre-work inspection and tests
Before starting any work, use this checklist to assess your plaster surface’s condition and identify potential issues.
- Substrate type: Identify if it’s new or old, gypsum or lime-based. Incorrect identification can lead to improper treatment.
- Existing finish: Check for previous paint, wallpaper, or other coatings that may affect adhesion.
- Moisture levels: Use a moisture meter to check for excess moisture, which can cause failure of the new finish.
- Efflorescence: Look for white, powdery deposits indicating water damage. Remove with a wire brush and clean thoroughly.
- Adhesion test: Perform a cross-hatch adhesion test to ensure the surface can hold new coatings.
- Hardness test: Scratch the surface gently to check for soft or crumbly areas that may need consolidation.
- Dust generation test: Lightly sand a small area and observe dust production. Excessive dust may require additional containment measures.
- Porosity test: Apply a small amount of primer or sealant to check for absorption. Inadequate absorption may require a different product.
- Photograph and mark problem areas: Document any cracks, holes, or other defects for repair during preparation.
Quick rule: Skipping these tests can lead to costly mistakes and project delays.
Execution checklist for polishing approach
Use this checklist when executing a polishing method on your plaster surface.
- Clean the surface: Remove all dust, dirt, and debris using a damp cloth or vacuum. A clean surface ensures proper adhesion of subsequent products.
- Consolidate if needed: Apply a consolidating primer or sealant to strengthen weak areas and improve adhesion.
- Polish progressively: Start with a coarse polishing pad, then progress to finer grits for a smooth finish. Skipping grits can cause scratches.
- Seal or prime: Apply a suitable sealant or primer to protect the surface and improve paint adhesion.
- Avoid final sanding: Lightly buff with a very fine pad instead of sanding, which can damage the surface.
Quick rule: Following this checklist ensures a smooth, even polish that’s ready for painting or other finishes.
Repair and remediation after sanding damage
If sanding damages your plaster surface, follow these steps to repair and restore it:
For minor damage, patch the affected area using a suitable joint compound. Allow it to dry completely before proceeding.
For more severe damage, you may need to re-skim or re-level the entire surface. Apply a new layer of plaster, ensuring it’s smooth and even. Allow it to dry according to the manufacturer’s instructions.
After repairing, apply a bonding primer to seal the patched area and improve adhesion of subsequent coatings. If damage is extensive, consider hiring a professional for full re-plastering.
Paint Adhesion, Texture, and Long-Term Durability Implications
Prep choices influence surface porosity, smoothness, and microtexture, which in turn affect paint adhesion and film formation. Sanded surfaces may require different primers or sealers than polished or non-sanded ones. Assess how the chosen prep affects final glow and uniformity under lighting.
Match paint type to surface condition and primer system, considering long-term durability. Think about potential for cracking, delamination, or moisture-related issues and choose primers, sealers, and coatings accordingly.
How surface texture affects paint finish
The texture of your plaster surface plays a big role in how your final paint job turns out. Here’s what you need to know:
Sheen: A smooth, polished surface reflects light differently than a textured one. This can make colors appear brighter or duller depending on the lighting.
Micro-roughness: Even tiny bumps and valleys in your plaster can affect paint adhesion and coverage. The more micro-roughness, the better paint will adhere and hide imperfections.
Porosity: Porous surfaces absorb moisture and paint differently than non-porous ones. This affects how much paint you’ll need and how well it adheres.
Long-term risks of improper prep
Improper preparation can lead to a host of long-term problems. Here are some you should watch out for:
Accelerated wear: Over-sanding can remove too much material, leaving your plaster thin and prone to damage.
Moisture ingress: Insufficient consolidation or sealing can allow moisture to penetrate your plaster, leading to mold, mildew, and efflorescence.
Repeated repainting cycles: A poorly prepared surface will require more frequent touch-ups or repainting, costing you time and money in the long run.
Best paint and primer pairings
The right primer and paint combo can make all the difference. Here are some recommendations:
Polished plaster: Use a breathable, high-adhesion primer to ensure good paint adhesion without trapping moisture. Opt for a satin or semi-gloss paint sheen to complement the smooth finish.
Sanded plaster: For sanded surfaces, use an impregnating sealer to consolidate and protect your plaster before painting. A flat or matte paint will help hide any remaining texture.
Costs, Time, and Common Mistakes to Avoid
Identify what drives costs, such as materials, equipment, and labor, and outline safe budgeting ranges. Consider how scope changes affect price and timeline without naming exact figures. Plan for contingencies and have a clear scope in mind.
Common mistakes include over-sanding thin plaster, neglecting edge work, or poor dust management. Use a progressive grit plan and proper ventilation, and know when to call a pro for complex shapes or damaged substrates.
Cost and time factors
The cost of sanding vs polishing plaster varies based on several factors. Let’s break down the key elements affecting your budget and timeframe.
Materials: Both methods require specific materials like sandpaper, polish, or sealers. Sanding may need more frequent material replacement due to wear.
Equipment rental/purchase: Sanding typically needs power tools like orbital sanders, while polishing uses specialized equipment like floor polishers. Rental costs can add up, so consider purchasing if you have multiple projects.
Labor time: Polishing generally takes longer due to the progressive grit process and additional coats required for a glossy finish. However, it may save time in the long run by avoiding repair work from aggressive sanding.
Common DIY mistakes
Even with careful planning, DIY projects can go awry. Here are some frequent errors and tips to avoid them:
- Over-aggressive sanding: Using too high a grit or applying too much pressure can damage thin plaster or create an uneven surface.
- Inadequate dust control: Neglecting proper dust management can lead to poor finish quality and potential health hazards. Always use appropriate safety gear and containment methods.
- Skipping tests: Not performing test patches can result in unexpected outcomes, like incompatible primer or sealant. Always test on a small area first.
- Wrong primer: Using the wrong primer can affect paint adhesion and overall finish durability. Choose a primer suited to your plaster type and intended paint.
Learning from these common mistakes will help you achieve a better, longer-lasting result.
When to hire a professional
While DIY projects can be rewarding, there are times when hiring a professional is the best choice. Here’s when to consider calling in an expert:
Extensive damage: If your plaster has significant cracks, holes, or other extensive damage, it may be best left to professionals who have the tools and experience to repair it properly.
Decorative plaster: Specialty plasters like Venetian or trowel-finished plasters require specific techniques and knowledge. A professional can ensure your decorative features are preserved and enhanced.
High-value finishes: If you’re investing in high-end materials or a complex design, it’s worth hiring a pro to ensure the best possible outcome. When hiring, ask for references, examples of their work, and clear communication about the project scope and timeline.
Conclusion
Sand can ruin a plaster finish fast if you push too hard or use the wrong approach. The safer path is to polish or use non-abrasive prep methods that respect the plaster type and the texture you want to preserve, so the job lasts and looks right.
Here’s the quick check in plain language: assess the plaster type and your goal, test a small area first, choose a polishing or light-sanding method only if the test area looks good, keep pressure light and even, seal or prime key surfaces as needed for paint adhesion, then proceed in small sections and stop as soon as you see diminishing returns or edge gouges. Follow the steps you tested in a controlled order, and document any adjustments before moving to the next area.
Common mistakes to avoid are sanding too aggressively, skipping a test area, and ignoring paint adhesion needs after finish work. Safety rules matter: wear a dust mask or respirator, goggles, and gloves, keep ventilation up, and clean dust frequently to prevent buildup. If you see cracks, hollow areas, or uneven texture that won’t respond to polishing or non-abrasive prep, stop and re-evaluate before you push ahead.
If the project scope grows or the plaster shows severe damage, calling a professional is sensible rather than forcing a DIY fix. When in doubt, pause, get a second opinion, and plan the next steps with a clear, small-area test and a defined finish goal. Stay steady, stay safe, and you’ll finish with a durable, professional-looking surface.
FAQ
What’s the practical difference between sanding and polishing plaster?
Sanding removes material to flatten the surface, while polishing smooths and reflects light for a subtle shine. Sanding is more aggressive and can dull the texture if not careful; polishing relies on finishing compounds and careful technique to enhance smoothness without digging into the surface.
How can sanding affect finish quality on plaster?
Sanding can scratch, gouge, or create swirls that trap dust and ruin adhesion for paint. It can also remove the top skim coat unevenly, making future coats hard to apply evenly.
What are safe alternatives to sanding when prepping plaster for paint?
Use non-abrasive cleaning, light dusting, and a careful glaze or skim-pass using appropriate filler as needed. Polishing with gentle compounds and clean rags can improve smoothness without breaking the surface.
Which tools and steps help prepare plaster surfaces for paint without damage?
Choose soft, non-metallic pads or scouring sponges and follow manufacturer guidance. Test a small area first, then apply even pressure, and clean thoroughly before priming or painting to ensure good adhesion.