
Introduction
Mismatched patching materials can fail later due to incompatible chemistry. Lime and gypsum set and breathe differently, so using the wrong combo can lead to cracks, dusting, or damp spots. Stick to a patching mix that matches what’s already on the wall for best results.
When patching, verify that the material is compatible with the existing wall type and follow the manufacturer’s instructions. Check labels and local rules if you’re unsure, and avoid mixing products without guidance. If you need to switch materials, plan for careful curing and a possible follow-up repair to address any issues that come up.
Key takeaways
- Ensure lime or gypsum patch material is labeled for plaster repair compatibility.
- Test substrate moisture before patching to prevent premature curl or crack.
- Match binder type and finish to avoid differential movement and failure.
- Clean and prime substrate per manufacturer instructions to enhance adhesion.
- Protect cured patches from moisture, UV, and impact during early cure period.
- When in doubt, consult local code and test for chemical compatibility.
Table of Contents
- Introduction
- Key takeaways
- Basic Chemistry and Material Properties Compared
- Why Mismatch Leads to Failure — Mechanisms Explained
- Real-World Examples and Common Failure Scenarios
- How to Test Compatibility Before You Repair
- Best Practices for Matching Materials and Prepping Substrates
- Remediation Strategies for Existing Failed Patches
- Tools, Materials Checklist and Specification Guidance
- Prevention Checklist and Maintenance Tips to Extend Patch Life
- Conclusion
- FAQ
Basic Chemistry and Material Properties Compared
Lime-based patching compounds cure through a carbonation or lime-set process. Gypsum sets through a hard chemical reaction with water. Both materials behave differently when exposed to moisture and air.
Expect lime to be more porous and breathable, while gypsum tends to be less forgiving with moisture movement. Pay attention to how each material handles alkali and acid exposure by checking the product label and manufacturer instructions.
How lime sets and behaves
Lime-based patching compounds set through a process called carbonation. This means they react with the carbon dioxide in the air to harden.
Breathability is key here – lime allows moisture to pass through, making it great for damp areas but not ideal for underwater use.
Lime is also flexible, which helps it move with the substrate and resist cracking. It’s typically used in applications where some movement is expected.
Compressive strength varies by type – check product data sheets, but expect around 300-500 psi for most hydrated limes.
How gypsum sets and behaves
Gypsum patching compounds set through hydration, mixing with water to form a hard, solid mass. This happens quickly – within minutes.
Rapid setting makes gypsum ideal for quick repairs, but it also means you’ve got to work fast once mixed.
Gypsum is less tolerant of moisture during application and can be susceptible to re-dissolution if exposed to water or salts after setting. Avoid using in areas prone to water intrusion or freezing/thawing cycles.
Compressive strength is typically around 1000-2000 psi, making gypsum stronger than lime but still suitable for many patching applications.
Why Mismatch Leads to Failure — Mechanisms Explained
Incompatible patches often struggle with adhesion because the substrate and patch move differently. Differential moisture movement can drive cracks and debonding. Salt transfer and crystalline growth can occur where materials react oddly to damp conditions.
These mechanisms train together to create a patch that fails under routine use. When in doubt, verify substrate type and compatibility guidance on the product data sheet or manufacturer instructions.
Adhesion and bond issues
When you mix lime and gypsum patches, they don’t play nice. Lime is alkaline, gypsum is acidic. Different as night and day.
Their surfaces repel each other like oil and water. No mechanical bonding there. Plus, their chemical makeup’s different too. No chemical reaction to make them stick together either.
Result? Delamination – that’s when the patch starts peeling off like a sunburnt scab. Pop-outs too. You’ll see chunks of your hard work falling out. Not pretty.
Moisture and vapor mismatch
Lime breathes, gypsum doesn’t. That’s a problem when they’re stuck together like an awkward dance partner.
Lime wants to soak up moisture from the air, then let it go when it dries out. Gypsum? It just sits there, doing nothing. So, moisture gets trapped between them.
What happens next? Freeze-thaw damage. Water seeps in, freezes, expands, cracks your patch. Efflorescence too – that ugly white stuff that ruins the look of your hard work. And mold? Yep, that can grow in all that trapped moisture.
Real-World Examples and Common Failure Scenarios
Common setups include patching old lime plaster with gypsum filler. Another frequent mismatch is repairing gypsum drywall with lime putty. Each scenario tends to reveal delamination and tool marks that won’t settle over time.
Recognize the early warning signs: powdery surfaces, efflorescence, and rapid shrinkage cracks after cure. Always cross-check with the product data sheets or technical notes for recommended pairings.
Historic plaster and masonry restorations
When restoring old buildings, it’s crucial to match the original materials. Lime plasters were commonly used in historic structures.
Gypsum can’t bond properly with lime. It sets too fast, pulling away from the surface instead of adhering. This causes flaking and peeling.
Moisture is another issue. Gypsum absorbs water, causing expansion. Lime doesn’t. This mismatch leads to cracks and crumbling.
To avoid these problems, use lime-based products for historic restorations. They behave like the original materials, ensuring longevity and authenticity.
Interior drywall and skim-coat mistakes
Applying gypsum over lime skim coats can lead to issues. Here are common DIY errors to avoid:
- Hard-setting gypsum on soft lime: Gypsum sets hard and fast, pulling away from the soft lime underneath. This causes cracking.
- Incompatible expansion rates: Lime expands slightly when wet, while gypsum shrinks. This mismatch leads to popping or delamination.
- Moisture trapping: Gypsum can trap moisture from the lime below, leading to mold growth and further damage.
- Inconsistent finish: Lime and gypsum have different sheens. Mixing them results in an uneven final coat.
To avoid these mistakes, match materials. Use lime-based products for skim coats over lime plasters, and gypsum for drywall over gypsum.
How to Test Compatibility Before You Repair
Start with a simple visual check of porosity and surface hardness. Observe how the surface absorbs water and how quickly it dries. Look for salts or crystalline residues that indicate past moisture issues.
If unsure, consider a basic substrate test or consult a professional to run a materials compatibility assessment. Refer to product labels, data sheets, or local guidelines for recommended tests.
Step-by-Step Repair Process
Before you start any repair work, follow these steps to ensure compatibility and prevent future failures.
- Preparation: Wear safety gear – gloves, goggles, and a dust mask. Clear the area and lay down drop cloths.
- Safety Check: Ensure no live electrical wires or hidden hazards behind the repair area.
- Main Work:
- For lime-based substrates, use a lime-based patching compound.
- For gypsum-based substrates, use a gypsum-based patching compound.
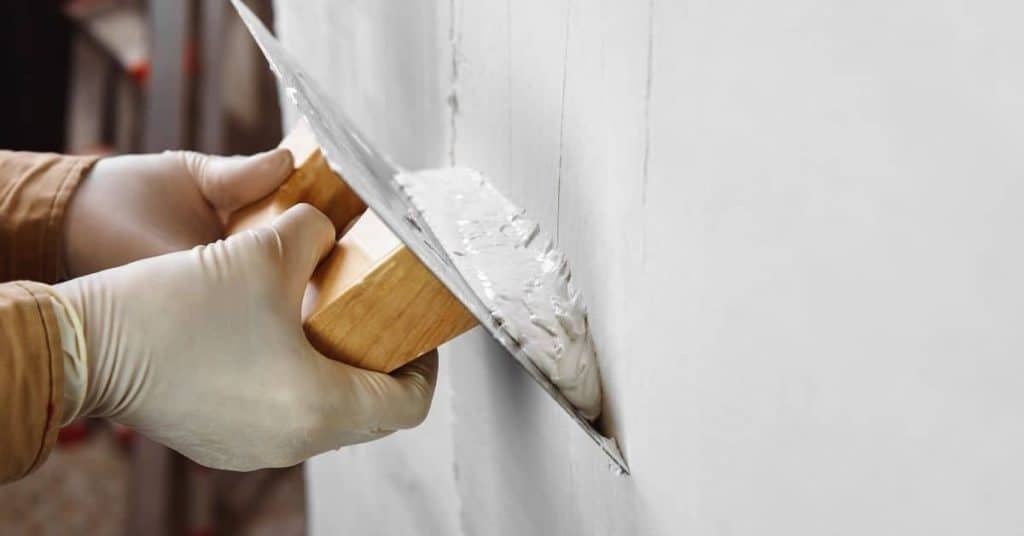
- Application: Follow manufacturer’s instructions for mixing and applying the patch. Use a trowel or putty knife for small repairs.
- Final Checks: Allow the patch to cure as instructed. Inspect for any signs of failure, like cracking or delamination.
Quick DIY Substrate Identification
Identify your substrate type quickly with these simple tests and visual cues.
Scratch test: Scrape the surface gently. If it feels gritty or sandy, it’s likely lime-based. If it crumbles easily, it might be gypsum.
Water absorption drop test: Place a few drops of water on the surface. Lime-based substrates will absorb water slowly; gypsum will absorb it quickly and may darken.
Visual cues: Lime plasters often have a rough, textured finish. Gypsum plasters are usually smooth and uniform.
Salt and Moisture Diagnostics
Detect salts and moisture pathways to ensure your repair lasts.
Salt test: Apply a piece of clear tape to the suspect area, press firmly, then remove it. If there’s a white residue, you have salt efflorescence – a sign of moisture and potential salt damage.
Moisture meter: Use a non-invasive moisture meter to check for excess moisture. readings above 15-20% may indicate a problem.
Tape test: Apply painter’s tape to the area, let it sit for 24 hours, then remove it. If paint comes off with it, you have moisture or salt issues that need addressing before repair.
Best Practices for Matching Materials and Prepping Substrates
Clean the area thoroughly to remove dust, oils, and loose material. Mechanically key the surface to improve bonding between layers. Use a compatible primer or bonding agent where appropriate as directed by the product instructions.
Address salt reduction and moisture control before patching. Follow the manufacturer’s prep steps and verify any required cure or timeout periods on the data sheet.
When to use lime-compatible products
Lime-based substrates need special care when patching. Use lime-compatible products for best results.
Check manufacturer specs. Some mortars are designed for lime, others aren’t.
Use lime putty or hydrated lime-based mortars. They’re compatible with existing lime substrates and provide better adhesion.
Cure patched areas slowly and evenly. Cover with plastic sheeting to control moisture loss. Follow manufacturer’s curing guidelines.
When gypsum is acceptable and how to prepare it
Gypsum can be used on dry, stable substrates. Here’s how to prep them:
Check moisture levels. Gypsum doesn’t like moisture. Use a moisture meter to ensure your substrate is dry (below 16%).
Remove any loose or damaged material. Vacuum or brush off dust.
Prime the surface with a gypsum-compatible primer. This improves adhesion and seals the surface. Follow manufacturer’s instructions.
Remediation Strategies for Existing Failed Patches
Start by safely removing failed patches and inspecting the substrate for damage. Assess whether underlying plaster, drywall, or masonry needs repair. Choose a replacement system that matches the substrate’s properties and expected movement.
Limit future failures by following a compatible layering sequence and revisiting priming requirements. When in doubt, check the product instructions or consult a professional for guidance on suitable materials.
Removal and assessment
Before you start, safety first. Wear gloves, goggles, and a dust mask.
Use a utility knife or chisel to carefully cut around the failed patch. This helps prevent further damage. Don’t use power tools; they can cause vibrations that weaken surrounding materials.
Inspect the backing material. If it’s crumbling, delaminating, or shows signs of moisture damage, you’ve got bigger issues than just a bad patch job. Call in a pro to assess structural integrity and potential moisture problems.
Repair pathways: replace vs. isolate
You’ve got options, but they depend on your situation:
Replace the patch with a matching material. This is best when the original was lime-based and you’re dealing with historic plaster or masonry. Use our earlier guide to test compatibility first.
Isolate the new patch from old materials using an isolation layer or compatible bonding coat. This works well when you’ve got moisture mismatch issues, but remember, it’s a band-aid. Address the root cause too.
If your home’s historic or has unique features, consult a conservator. They can provide tailored advice and help preserve your home’s character. For major repairs, consider hiring a contractor with experience in lime-based materials.
Tools, Materials Checklist and Specification Guidance
Have a basic set of tools for mixing, troweling, and surface prep. Gather samples or reference materials to compare porosity and texture. Always bring the product data sheets for lime and gypsum options you plan to use.
Review manufacturer specifications for set time, flexibility, and curing conditions. Verify any local code or standard requirements that might affect material choice or installation steps.
Tools and on-site testing gear
Before you start, gather these tools to ensure compatibility checks go smoothly.
- Moisture meter: Check for hidden moisture that can ruin your patch. Use it before and after repairs.
- Small hammer: Gently tap the surface to listen for hollow spots or delaminating plaster.
- Wire brush: Clean the area to remove loose material and ensure good adhesion.
- Stiff-bristle brush: For scrubbing away dirt and debris from porous surfaces.
- Trowel or putty knife: Mixing and applying patch materials.
- Safety glasses: Protect your eyes from dust and debris.
- Dust mask: Shield your lungs from harmful particles.
- Gloves: Keep your hands clean and protected during the repair process.
Quick rule: Always have these tools on hand to avoid delays and ensure a successful patch job.
Material specs and standards explained
Understand these key product specifications before purchasing materials to ensure compatibility with your substrate.
- Setting mechanism: Check if it’s hydraulic (lime) or crystalline (gypsum). Mismatches cause failure.
- Compressive strength range: Ensure the material can handle expected loads. Too weak, it cracks; too strong, it pulls away.
- Vapor permeability: Match with your substrate to prevent trapped moisture and delamination.
- Recommended substrates: Confirm it’s suitable for your surface type (masonry, drywall, etc.).
- Cement content: High cement content in lime can cause cracking; low cement content in gypsum weakens it.
- Additives: Check for added fibers or chemicals that could react with your substrate.
- Standards compliance: Ensure the product meets relevant ASTM, EN, or other local standards.
Quick rule: Always consult technical data sheets to confirm these specs and avoid costly mistakes.
Prevention Checklist and Maintenance Tips to Extend Patch Life
Choose materials with compatible porosity and movement characteristics for the area. Maintain a clean, dry surface before patching and sealing as recommended. Schedule periodic inspections of patched areas to catch early signs of distress.
Tailor maintenance to interior or exterior exposure and follow up with appropriate sealing or breathable finishes. Always confirm that ongoing products and methods align with the substrate and climate conditions using labels or manufacturer notes.
Visual checkpoints and monitoring
Use this checklist during the first months after repair to ensure your patch is holding up.
- Hairline cracks: Check for any new or widening hairline cracks. If present, it could indicate movement or incompatibility.
- Efflorescence: Look out for white, powdery deposits on the surface. This might signal moisture issues.
- Soft spots: Gently press on the patched area. Softness may indicate delamination or deterioration.
- Color variation: Compare the patch with surrounding areas. Discoloration could hint at moisture problems or incompatible materials.
- Mold or mildew: Inspect for any signs of growth, which can cause further damage and health issues.
- Cracking at edges: Check where the patch meets the original surface. Cracks here might mean incompatibility or inadequate preparation.
- Warping or bulging: Look for any warping or bulging, which could indicate underlying issues with the substrate or moisture.
- Peeling paint/sealer: Check if paint or sealer is peeling. This might signal incompatibility or improper preparation.
Quick rule: Regular visual checks help catch minor issues before they become major problems.
Long-term maintenance recommendations
Follow this checklist for long-term care to preserve your patch’s durability and compatibility.
- Control moisture: Ensure the area remains dry. Excess moisture can cause damage over time, especially with gypsum patches.
- Avoid incompatible paints/sealers: Use only compatible paints and sealers to prevent peeling or discoloration.
- Periodic inspections: Regularly inspect the patch for any signs of deterioration, especially after extreme weather conditions.
- Cleanliness: Keep the area clean. Dirt and debris can trap moisture and cause damage.
- Temperature control: Maintain consistent temperatures to prevent thermal expansion/contraction, which can cause cracking.
- Ventilation: Ensure proper ventilation to prevent moisture buildup, especially in bathrooms or kitchens.
- Prompt repairs: Address any minor issues promptly before they become major problems.
- Annual re-evaluation: Re-evaluate the patch annually to ensure it’s still performing well and remains compatible with surrounding materials.
Quick rule: Regular maintenance extends your patch’s lifespan and prevents future failures.
Conclusion
Getting patches right comes down to matching materials, preparing the surface, and testing before you repair. Do it well and you reduce future cracking, staining, and damp issues that break the patch’s look and strength.
Before you start, check that the patch material matches the substrate and that you’ve tested compatibility in a small test area. Verify moisture levels, substrate soundness, and surface prep, then follow the chosen material’s instructions for mixing, application, and curing. Prepare tools and safety gear, pace your work, and document what you did so you can reproduce good results or spot drift later.
Common mistakes to avoid are using incompatible binders, skipping surface prep, and rushing the cure. Wear eye protection and a respirator where needed, keep workspace dry and ventilated, and never force a patch onto a damp or weak surface. If the patch or substrate shows active moisture, or if you’re unsure about material compatibility after tests, pause and seek guidance rather than guessing. When in doubt about structural or moisture-related issues, calling a qualified pro can save time and money and protect the underlying structure.
FAQ
How can I tell if the lime patch is compatible with the gypsum patch in a job I’m working on?
Look at the substrate and patch labels. If you’re unsure, check the manufacturer instructions or datasheets for both materials. If there’s any doubt, don’t mix them on the same repair—choose one system and stick to it.
What happens if I patch with mismatched materials and I don’t correct it right away?
Mismatched patches can crack, delaminate, or crumble as the walls move and moisture changes. The failure may show up years later, when you’ve forgotten the original mismatch. The safe move is to correct it before the patch fully sets and the bond becomes poor.
How should I test if a lime-based patch will bond to a gypsum-based surface without tearing things apart?
Do a small, clean patch on an inconspicuous area and follow the product’s cure and test instructions. Check for bonding strength and surface tack after initial set, then follow up with a more formal adhesion check if the product calls for it. If the test shows poor adhesion, don’t proceed with the full repair.
When is it better to remove a failed patch and start fresh rather than attempt a repair?
If the patch shows widespread cracking, significant debonding, or moisture-related staining, strip it back to sound material. If you’re unsure, consult the product instructions and consider professional guidance for a clean, compatible re-patch. Never bury a poor patch behind new material.