
Introduction
Identifying the type of plaster on your walls is a crucial first step before any repair or renovation work. But how long does it take to accurately determine if you’re dealing with lime plaster or gypsum?
In this guide, we’ll walk you through the process, breaking down each test and its duration so you can plan your project timeline effectively.
The Step-by-Step Timeline to Identify Lime vs Gypsum Plaster
To identify the type of plaster on your walls, follow this step-by-step timeline. Each test is designed to help you confirm the plaster type efficiently.
- Visual and Tactile Inspection: 10-15 minutes
- Examine the wall’s surface for signs of lime or gypsum finish.
- Check for hardness, dusting, and any visible aggregates.
- At-Home Tests: 30-45 minutes
- Prepare your testing area and materials (10 minutes).
- Perform the damp sponge test (10 minutes).
- Conduct the vinegar test (10-20 minutes, depending on reaction time).
- Observe and record results.
- Final Assessment: 5-10 minutes
- Compare your observations and test results.
- Confirm the plaster type based on the most reliable clues.
By following this timeline, you can accurately identify lime or gypsum plaster in under an hour, allowing you to plan your repair or renovation project with confidence.
Key takeaways
The duration of each test is crucial when planning your overall project timeline. For instance, the vinegar test may take up to 20 minutes for a reaction, so be sure to factor this into your schedule.
- Identify lime vs gypsum plaster by reaction to water and odor changes.
- Lime plaster breathes; gypsum dries hard and sands smoother but brittle.
- Historic use differs: lime often used in breathable masonry with pozzolans.
- Test at home with damp sponge and vinegar: note fizzing or scent.
- Avoid applying incompatible plaster over existing lime on structural walls.
- Safety: wear eye protection and masks when sanding or chiseling unknown plaster.
Table of Contents
- Introduction
- Key takeaways
- Quick Definitions and Historical Context
- Key Chemical and Material Differences
- Visual and Tactile Signs (Quick Visual Checklist)
- Simple at-Home Tests to Identify Lime Vs Gypsum
- Tools and Materials Checklist for Testing and Small DIY Work
- Finishing, Repair and Compatibility Guidance
- Safety Considerations and Common Mistakes to Avoid
- Cost, Planning and When to Call a Professional
- Conclusion
- FAQ
Quick Definitions and Historical Context
Lime plaster and gypsum plaster are two classic wall finishes with distinct binders. Lime uses lime putty or hydraulic lime as the binder, while gypsum uses calcium sulfate. Finishes range from coarse to smooth textures depending on mix and technique.
Historically, lime plaster has been common in older, masonry walls, while gypsum plasters gained traction with modern construction and drywall. Regional preferences and building methods mark notable era differences in plaster choice. Use this context to orient how an old wall might reveal its past through clues and construction details.
What is lime plaster?
Lime plaster is a traditional building material made from a mix of quicklime (calcium hydroxide), aggregate like sand, and sometimes pozzolans – volcanic ash or other materials that react with lime. Water is added to bind everything together.
Historically, it was widely used in construction due to its availability and durability. You’ll find it in older buildings, often with a rougher, more textured finish than modern plasters.
Lime plaster takes time to cure properly – sometimes months or even years. This slow curing process makes it stronger over time but also means it’s less suitable for fast-paced modern construction.
What is gypsum plaster?
Gypsum plaster, also known as ‘plaster of Paris’, is made from calcium sulfate hemihydrate. It’s a modern material that’s been widely used since the late 19th century when it started replacing lime plaster in many applications.
Today, it’s common in new construction and renovations due to its fast-setting nature, ease of application, and smooth finish. Gypsum plasters are typically applied over metal or wood laths, or directly onto concrete or brick surfaces.
Gypsum plaster is usually ready for painting or wallpapering within a few days, making it ideal for quick turnaround projects. However, it’s less durable than lime plaster and can crumble if not properly maintained.
Key Chemical and Material Differences
Lime plaster relies on lime putty or hydraulic lime for binding, versus gypsum plaster using calcium sulfate. The long-term behavior differs in moisture handling, hardness, and substrate compatibility. These differences guide how tests interpret results in situ.
Lime plaster cures slowly through carbonation and breathability, while gypsum sets quickly through hydration and crystallization. Alkali levels and porosity also vary, affecting how walls respond to moisture and testing.
Curing and setting reactions
Lime plaster cures through a process called carbonation. This happens when the lime reacts with carbon dioxide in the air over time, slowly hardening the plaster. It’s a slow but steady process that can take weeks or even months to fully cure.
Key point: Lime plaster continues to harden and strengthen after application, unlike gypsum which sets rapidly and then stops.
Gypsum plaster, on the other hand, sets quickly through a process of hydration. When water is added, it reacts with the calcium sulfate to form gypsum crystals. This happens almost instantly, making gypsum ideal for quick repairs or touch-ups.
Porosity, breathability, and alkalinity
Lime plaster is highly porous due to its crystalline structure. This makes it breathable, allowing moisture vapor to pass through the wall easily. However, this also means lime plaster can absorb water more readily than gypsum.
Key point: Lime plaster’s high porosity and breathability make it suitable for damp environments but can lead to efflorescence if not managed properly.
Gypsum plaster is less porous, making it less breathable but also less susceptible to water absorption. This makes gypsum a good choice for areas prone to condensation or moisture ingress.
Lime plaster has a high pH level due to its alkaline nature. This can affect other materials around the wall, such as metals which may corrode over time. Gypsum is neutral in terms of alkalinity, making it more compatible with a wider range of materials.
Visual and Tactile Signs (Quick Visual Checklist)
Look for color variation, uniformity, and any lime-like sheen or powdery surface that hints at lime chemistry. Gypsum tends to feel smoother and more uniform.
Note texture and how the surface reacts to light. A matte, chalky feel can indicate lime; a sleeker, more homogeneous finish often points to gypsum. Use non-destructive checks first to narrow down possibilities.
Surface texture, colour and layering
Before you start testing, use this checklist to get a feel for your wall’s surface. It’ll help you spot likely candidates for lime or gypsum plaster.
- Color variation: Lime plasters often have a slight color variation due to natural aggregates. Gypsum is usually more uniform.
- Presence of hair or coarse aggregates: Lime plasters may contain visible fibers (hair) or coarse aggregates, unlike gypsum.
- Multi-coat lime finishes: Lime plasters often have multiple coats, giving a layered look. Gypsum is typically single-coated.
- Smoothness: Gypsum plasters are usually smoother than lime plasters, which can have a slight grain or texture.
- Lime-like sheen: Lime plasters may have a subtle sheen, especially after washing with limewash. Gypsum is generally matte.
- Powdery or dusty surface: A powdery or dusty surface can indicate lime plaster, while gypsum should feel smooth and clean.
Quick rule: If your wall shows signs of multiple coats, has visible aggregates or fibers, or feels grainy to the touch, it’s likely a lime plaster. But always follow up with tests for confirmation.
Reaction to knocks and nails
Listen and feel your way through this checklist. It’ll help you understand the hardness and sound of your wall, indicating whether it’s lime or gypsum plaster.
- Gentle scratch test: Lime plasters are softer than gypsum. A gentle scratch should leave a mark on lime but not gypsum.
- Tapping sound: Tap small areas with your knuckles or a light hammer. Lime plasters sound duller and more solid, while gypsum has a higher-pitched, hollow sound.
- Ease of nailing: Nails go into lime plaster easier than gypsum due to its softer nature. Be careful not to split the surface.
Quick rule: If your wall feels soft, sounds dull when tapped, and nails go in easily, it’s likely a lime plaster. But remember, hardness can vary with lime plasters, so use this as a guide, not a definitive test.
Simple at-Home Tests to Identify Lime Vs Gypsum
Differentiate plaster types with simple, low-risk checks that you can do on a small patch. Interpret the results with safety in mind and consult instructions if unsure.
Acid, scratch, water absorption, and heat tests provide initial clues. Record what you observe and compare to typical lime or gypsum behavior, then decide on the next steps or seek professional help if needed.
Vinegar (acid) test — what to do and interpret
Apply a small drop of white vinegar to an inconspicuous spot on your wall. Vinegar is acidic, so if you see fizzing or bubbling within 10-20 seconds, it’s likely lime plaster due to the reaction with calcium carbonate.
Safety: Wear gloves and keep the area well-ventilated. Clean up any residue immediately.
If there’s little to no reaction, you’re probably dealing with gypsum plaster. After testing, gently scrape off the vinegar patch using a razor blade or putty knife.
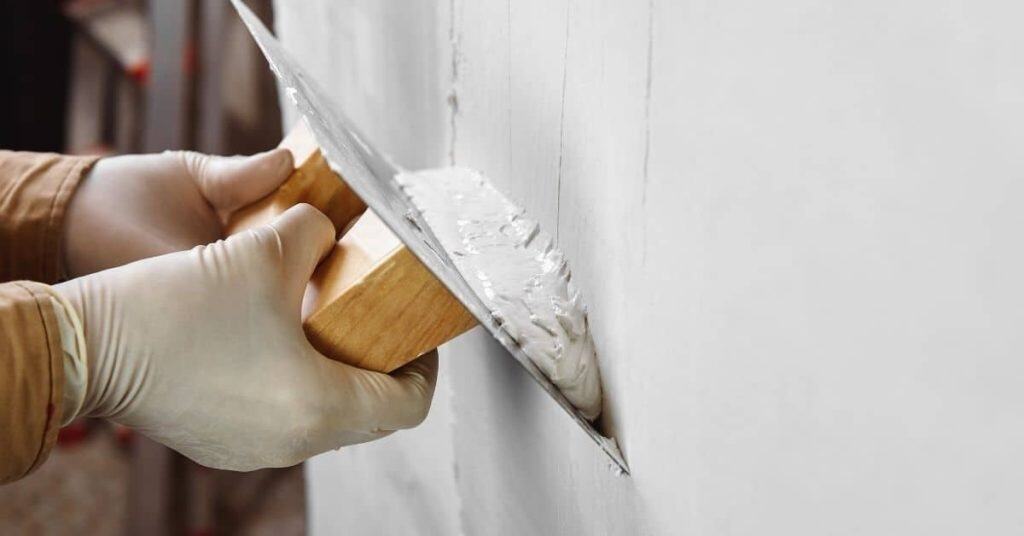
Scrape/scratch and thickness test
Gently scrape a small, hidden area with a sharp tool like a utility knife. Lime plaster is often thicker and may have visible aggregates or layering from the base coat. Gypsum is usually thinner and smoother.
Tip: Check multiple spots as layers can vary.
Be cautious not to damage your wall. If you’re unsure, consult a professional.
Water absorption and damp reaction
Dampen a finger or cloth with water and touch an inconspicuous spot on your wall. Lime plaster should absorb the water quickly, feeling cool and slightly damp. Gypsum may soften faster when wet but will dry out quicker.
Note: If efflorescence (white salt deposits) appears after drying, it’s a sign of lime plaster.
Test in multiple areas as results can vary due to age and condition.
Heat or flame test (controlled)
Gently heat a small, hidden area using a warm metal object or low-temperature heat gun. Avoid edges and corners to prevent cracking.
Safety: Keep a safe distance, wear heat-resistant gloves, and have a fire extinguisher nearby.
Gypsum may turn off-white and emit a slight odor when heated. Lime plaster should not change color or smell significantly. If there’s excessive cracking or strong odors, stop the test immediately.

Tools and Materials Checklist for Testing and Small DIY Work
Gather basic hand tools, non-destructive testers, and PPE to perform checks and small patching. Include items to contain dust and protect adjacent finishes.
Plan for safe disposal of waste and know local rules for plaster dust. Keep a small patch kit and recording sheet handy to document findings and patches.
Safety gear and first aid basics
Before you start testing or sampling, ensure you’re protected from potential hazards.
- Gloves: Protect your hands from lime burn. Use rubber gloves for gypsum to avoid moisture absorption.
- Eye protection: Wear safety glasses or goggles to prevent dust and debris from entering your eyes.
- Respirator/mask: Use a dust mask or respirator to protect against plaster dust. Lime dust can cause irritation, while gypsum dust is harmful if inhaled in large amounts.
- Neutralizing materials: Have baking soda (for lime) and water (for gypsum) nearby to rinse off any contact immediately.
- Long sleeves/legs: Cover your skin to prevent direct contact with plaster.
- Washable clothes: Wear old, washable clothing to protect your regular wardrobe from dust and potential stains.
- Hearing protection: Use earplugs or earmuffs when using tools like hammers to protect against noise exposure.
- First aid kit: Keep a basic first aid kit nearby for any minor injuries that may occur during the process.
Quick rule: Always prioritize safety. If you’re unsure about any aspect, consult a professional before proceeding.
Minimal tools for sampling and inspection
Here’s a list of essential tools to help you safely and effectively test your plaster.
- Utility knife/scraper: Use this to gently scrape the surface for samples or to check for layering. Be careful not to gouge the wall.
- Small hammer: Tap the wall with a coin or nail set in the hammer’s claw to differentiate between lime and gypsum.
- Magnifier: Inspect the surface closely for signs of delamination, cracks, or other defects.
- Nails: Use small nails (e.g., finish nails) to test adhesion by trying to pull them out after tapping.
- Container with vinegar: For the acid test, use a small container of white vinegar. Be cautious not to spill it on yourself or adjacent finishes.
- Water spray bottle: Use this to mist the wall for the damp reaction test.
- Small trowel/spatula: For taking tiny samples and applying patch tests, use a small trowel or spatula.
- Measuring tape/level: Ensure your patch test is square and level to get accurate results.
Quick rule: Having the right tools makes all the difference. Measure twice, cut (or sample) once to avoid damaging your wall.
Finishing, Repair and Compatibility Guidance
Identify finishes compatible with lime plaster, such as breathable lime finishes, and contrast them with gypsum finishes and modern coatings. Breathability and moisture management are key considerations for long-term performance.
Repair principles emphasize using compatible binders and avoiding moisture traps when switching materials. Follow a stepwise plan to diagnose original thickness, substrate condition, and compatibility before larger repairs.
Best repair materials for lime plaster
The right materials ensure a strong, lasting repair on your lime plaster walls. Here’s what to use and avoid:
- Lime-based repair mortar: Use this for best compatibility. Look for high-lime content (min 70%). Avoid gypsum-based mortars as they can cause cracking.
- Breathable lime putty: Ideal for filling small cracks and holes. It allows walls to breathe, preventing damp issues.
- Lime wash: A traditional finish that’s breathable and compatible with lime plaster. Look for natural pigments or stains mixed into the wash.
- Avoid gypsum-based finishes: These can trap moisture behind them, leading to staining and weak bonds. They’re also incompatible with historic lime plasters.
- Use compatible binders: For hairline cracks, use a lime-based binder mixed with fine sand. Avoid PVA or other non-lime binders.
Best repair materials for gypsum plaster
Choosing the right materials for your gypsum plaster walls ensures a successful, long-lasting repair. Here’s what to consider:
- Gypsum-based filler: Use this for filling holes and cracks. Look for a fine grain size (e.g., ‘finesse’ fillers) for best results.
- Modern gypsum plasters: Ideal for re-plastering or large repairs. They provide good coverage and adhesion.
- Acrylic paints: These can be used over gypsum plaster, but avoid them on damp or historic substrates as they can trap moisture and cause issues.
- Avoid lime-based materials: Lime plasters and finishes are not compatible with gypsum. They can cause weak bonds and staining.
- Consider substrate condition: If the wall is damp or has rising damp, address these issues first before applying any repairs or finishes.
Safety Considerations and Common Mistakes to Avoid
Health risks include lime exposure and plaster dust; use gloves, goggles, and a respirator, plus good ventilation. Mold risk from moisture is also a concern if walls stay damp.
Common mistakes include misidentifying plaster type and skipping moisture checks. Learn from these by documenting findings, avoiding improper mixes, and when in doubt, pausing and consulting a professional.
Handling caustic lime and dust from gypsum
Lime putty can cause severe burns on contact. Always wear gloves, goggles, and a respirator when handling it.
Gypsum dust is harmful if inhaled. Ensure proper ventilation by opening windows or using fans to keep the area clear of dust clouds.
Clean up spills immediately with plenty of water. Avoid creating large amounts of lime or gypsum waste; dispose of it responsibly according to local regulations.
Misapplied modern materials and incompatible repairs
Using the wrong materials can ruin your walls. Lime plaster needs breathable finishes, while gypsum doesn’t like cement-based products.
- Cement-based plasters or renders: Don’t use on lime walls. They don’t breathe and can cause cracking.
- Non-breathable paints/finishes: Avoid on lime plaster. Trapped moisture causes damp and mold.
- Gypsum plasters over lime: Won’t stick well. Lime needs a porous base to bond with.
- Lime plasters over gypsum: Won’t work either. Gypsum is too smooth for lime to grip onto.
- Assuming all white plaster is gypsum: Not true! Many historic homes have lime plaster painted white.
Cost, Planning and When to Call a Professional
Cost considerations hinge on material choice, prep needs, and the wall’s condition. Plan for material handling and any necessary substrate work as part of a budget.
Use a simple decision framework to decide whether to DIY or hire a pro, especially in tricky areas or when moisture issues exist. Keep notes on scope, timelines, and any moisture concerns to guide planning.
Cost and time considerations for DIY vs pro work
Working with lime plaster can be more labor-intensive than gypsum, affecting your project’s timeline and budget. Lime needs multiple thin coats, each requiring 24-48 hours to cure before the next. This adds up to a longer overall drying time compared to gypsum’s single coat application.
Sanding between coats is also necessary with lime plaster, adding more time and effort. Additionally, lime plasters require specialist knowledge for proper mixing and application. Hiring a professional can ensure these steps are done right, but it comes at an extra cost.
Expect to spend: Lime: $8-$15 per sq ft (materials + labor). Gypsum: $6-$10 per sq ft (materials + labor).
When to get a survey or conservation specialist
Certain situations demand professional assessment before you start any plastering work. Historic buildings, for instance, may have unique lime plasters that require expert care and knowledge.
Suspected salt damp or rising damp issues should be assessed by a professional to prevent further damage. Structural concerns, like cracks indicating movement, also warrant a specialist’s opinion.
Large-scale repairs or extensive areas of damaged plasterwork may be beyond the scope of DIY. A survey or conservation specialist can provide tailored advice and ensure your project is safe, effective, and sympathetic to the building’s history.
Conclusion
Know what you’re dealing with before you cut or plaster again. The right identification keeps your finish smooth, your structure durable, and your project safe from costly mistakes.
Start by taking a quick look at the signs, then run the simple at-home tests in the order you’d use when planning repair: confirm the surface and plaster type with the most reliable quick clues, perform the controlled tests in a small area, collect and compare your results, and then decide on a finish or repair approach that matches the plaster you’ve got. Keep tools ready, test in a small patch first, and document what you find so you don’t guess twice.
Common mistakes to avoid are pushing tests too hard, using the wrong test materials or mixing chemicals carelessly, and skipping safety gear or ventilation. Never skip safety: wear eye protection, keep tests away from live circuits, and work in a well-ventilated space. Avoid irreversible damage by testing on a hidden or inconspicuous spot first, and stop if anything looks unexpected or dangerous.
If the results are unclear, or you uncover widespread deterioration, it makes sense to call a professional rather than push on. A quick expert check can save time, money, and a bad repair. Stay practical, stay safe, and move forward with confidence.
FAQ
What is lime plaster vs gypsum plaster?
Lime plaster is made from lime binder and aggregates that breathe and cure slowly, often used on historic walls. Gypsum plaster sets quickly and doesn’t tolerate wet conditions as well as lime, but can give a hard, smooth finish in dry interiors.
What are the main components and types of lime plaster?
Lime plaster typically uses lime putty or hydraulic lime as the binder, with sand or other aggregates. Pozzolans can be added to improve set and strength; different mixes suit different climates and applications. Always check the product label for exact composition and compatibility with your wall.
How is lime plaster applied in practice?
Apply in thin coats, allowing each layer to set before the next. Start with a rough scratch coat, then a brown coat, and finish with a fine skin coat if needed. Follow the manufacturer instructions and local conditions, and avoid overworking the surface while it’s setting.
What safety steps should I take when working with lime plaster and finishing?
-Wear gloves, eye protection, and a dust mask when handling powders or cutting plaster. Keep stacks and tools stable to avoid spills, and work in a well-ventilated area to manage dust and fumes. If finishing lime plaster, use appropriate tints or finishes designed for lime, and test in a small area first.