
Introduction
Lime plaster and gypsum plaster are two plaster options for old houses, and their compatibility with the wall is a key difference. Lime plaster lets walls breathe and flex a bit, while gypsum plaster goes on smoother and dries faster. In simple terms, choose lime if you need moisture handling and wall compatibility; choose gypsum for a quicker, flatter finish.
Breathability and how the wall moves are the main compatibility questions for old houses. Lime tends to tolerate dampness and slight movement better, while gypsum needs dry, stable backing. Always check the product label and local guidelines, and test a small area to see how the material bonds with your wall.
Key takeaways
- Lime plaster is breathable, flexible, and ideal for historic walls.
- Gypsum plaster sets hard, offers quicker finish, but less vapor transmission.
- Old wall compatibility: lime works with lime mortars and breathable substrates.
- Avoid moisture traps by matching plaster to substrate and historic lath.
- Mixing guidance: follow manufacturer instructions and local rules for compatibility.
- Safety: wear respirator, goggles, and dust control when sanding plasters.
Table of Contents
- Introduction
- Key takeaways
- Quick Comparison and When It Matters
- Properties of Lime Plaster
- Properties of Gypsum Plaster
- Compatibility Rules and Mixing Guidance
- Application Methods and Best Practices for Old Houses
- Maintenance, Repair and Long-Term Care
- Health, Environmental and Safety Considerations
- Cost, Project Planning and Regulatory Considerations
- Conclusion
- FAQ
Quick Comparison and When It Matters
The comparison highlights how lime and gypsum plaster handle moisture, salts, and structure differently on historic walls. Lime plaster breathes and transfers moisture outward, while gypsum sets quickly and can trap damp if used in the wrong place. The core takeaway is that choosing the correct plaster protects the wall fabric and helps prevent long term damage.
A practical decision framework helps you start: first assess moisture status, then identify substrate type, and finally consider movement risk. This guides you to the deeper sections on installation, testing, and remediation. Keep in mind how salt movement and historic lath or masonry influence suitability and performance before you commit to a method.
At-a-glance pros and cons
Here’s a quick rundown of the strengths and weaknesses of lime and gypsum plasters.
Pros
- Breathability: Lime plaster allows walls to breathe, preventing trapped moisture. Gypsum is less breathable but still adequate for most cases.
- Setting Time: Gypsum sets quickly (30-60 minutes), while lime takes longer (24-72 hours).
- Flexibility: Lime plaster has better flexibility, reducing cracking risk. Gypsum is less flexible but still suitable for most walls.
- Salt Tolerance: Lime plaster can handle salt movement better than gypsum, making it ideal for old houses with historic salt issues.
Cons
- Speed: Lime’s longer setting time can slow down work. Gypsum’s quick set allows faster progress.
- Cost: Lime plaster is generally more expensive than gypsum due to labor and material costs.
- Availability: Gypsum is widely available, while lime may require special ordering or sourcing.
Choose based on your project’s specific needs, considering moisture management, time constraints, and budget.
Typical use-cases in period buildings
Lime plaster is often the best choice for old houses due to its compatibility with historic materials. Here are common scenarios:
Solid Stone Walls: Lime plaster works well on solid stone walls, as it bonds better and allows moisture to escape.
Lime Putty Backgrounds: If your old house has existing lime plaster or putty backgrounds, stick with lime for a consistent finish and compatibility.
Recent Repairs: If you’ve recently repaired masonry using lime-based materials, continue with lime plaster to maintain consistency in appearance and performance.
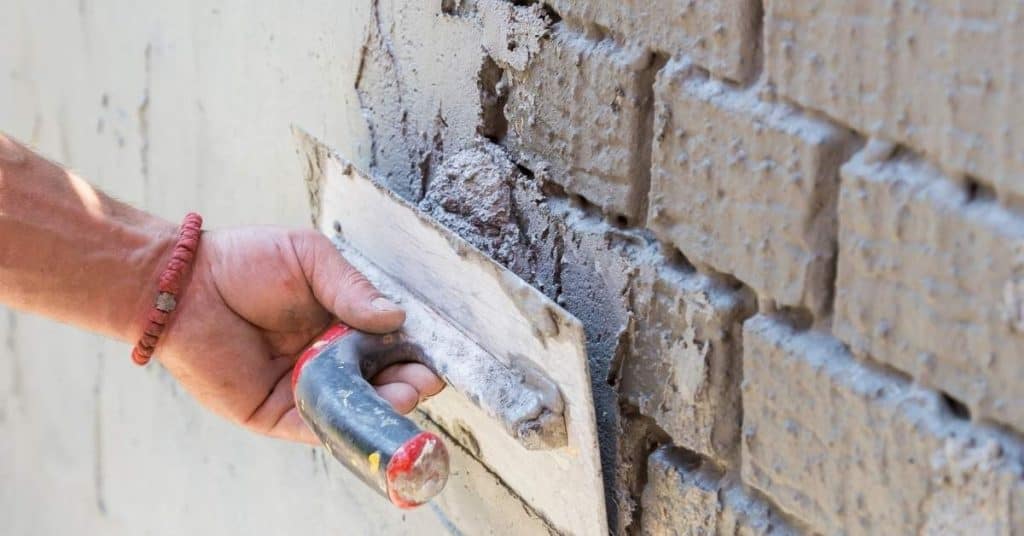
Properties of Lime Plaster
Lime plaster uses binding lime with aggregate and water, and comes in various forms from traditional lime putty to hydraulic variants. The substrate history, such as lime puttied laths or brick renders, strongly shapes mix choices. This section explains how composition ties to old walls’ needs.
Porosity and breathability are its strengths, enabling moisture movement and gradual drying. The design of the mix affects how quickly it wicks moisture and how likely it is to trap damp. Understanding this helps you predict performance on different historic substrates.
Breathability, moisture buffering and salts
Lime plaster is highly porous. This means it can absorb and release moisture, a process known as ‘breathing’. It’s great for old walls that need to breathe too.
Moisture moves through lime plaster by capillary action. It wicks up from the base, then evaporates at the surface. This helps prevent damp problems.
Salt crystallisation is a common issue in old buildings. Lime plaster can handle this better than gypsum. It’s more tolerant of salts moving through it and crystallising on its surface.
Setting, curing and long-term behaviour
Lime plaster sets slowly compared to gypsum. This is due to the carbonation process, where lime reacts with CO2 in the air.
Curing takes time too. Lime plaster needs a steady supply of moisture to cure properly. Too much or too little can cause problems.
Lime plaster shrinks as it dries and cures. This is normal but can lead to minor cracking if not accounted for. It’s why we use lime hair or other fibers in the mix.
Long-term, lime plaster’s durability is excellent. It’s repairable too, which is important in old houses where maintenance is ongoing.
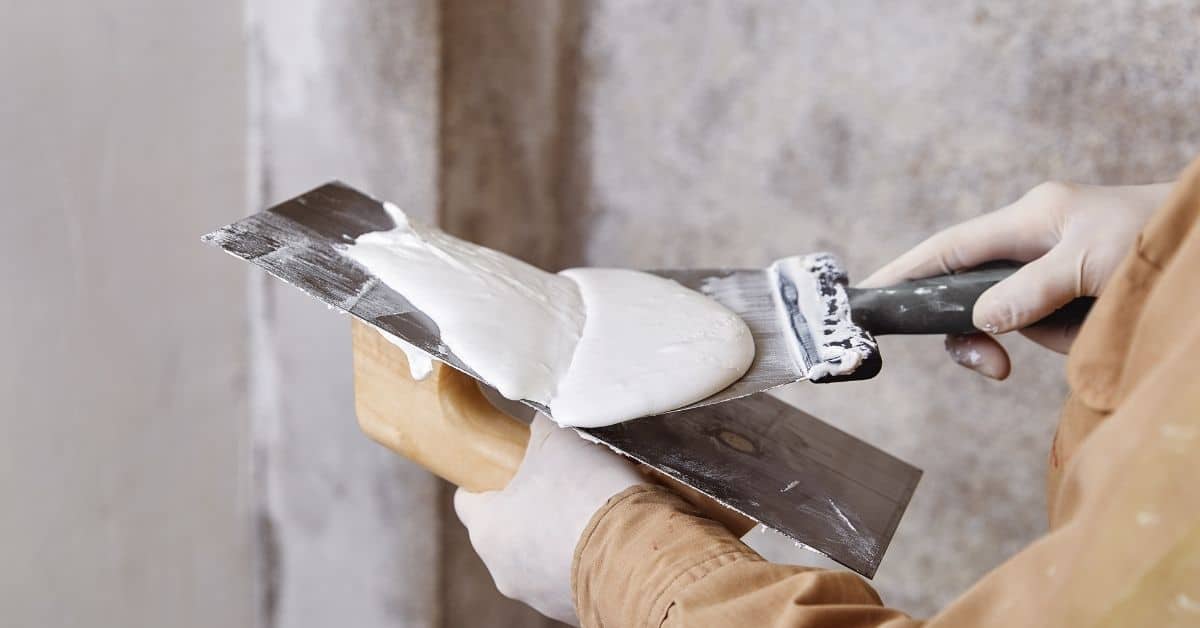
Properties of Gypsum Plaster
Gypsum plaster chemistry centers on calcium sulfate and a fast setting reaction that aids rapid work completion. The quick cure requires timely trowelling and finishing, especially in cool, damp spaces common in old houses. Its lower porosity and smoother finish appeal where speed matters.
With its lower pH and reduced permeability, gypsum can restrict moisture movement through historic walls. This raises the risk of damp pockets if applied over non-breathable layers. Proper substrate prep and vapor-open detailing are essential for compatibility.
Limitations with salts and damp substrates
Gypsum plaster is sensitive to moisture and salts. It’s crucial to address these issues before application:
Damp Substrates: Gypsum doesn’t bond well on wet surfaces. Moisture can cause efflorescence, detachment, or even substrate damage. Always ensure walls are dry (moisture content below 18%) before applying.
Salt-Laden Surfaces: Salts can react with gypsum, leading to deterioration and detachment. Remove any visible salts and consider a salt-inhibiting primer if salt contamination is suspected.
Practical handling and drying times
Gypsum’s rapid setting behavior affects your work schedule:
Workability: Once mixed, gypsum plaster has a quick initial set (around 15-20 minutes). This means you have limited time for application and finishing. Keep your trowels clean and ready.
Drying Times: Gypsum dries quickly, which can lead to rapid drying out in cool, damp conditions typical of old houses. This can cause shrinkage cracks or poor adhesion. To prevent this, maintain a consistent temperature (ideally above 50°F/10°C) and humidity during the curing period (at least 7 days).
Compatibility Rules and Mixing Guidance
Clear usage rules help you decide when lime is preferred for breathability and historic compatibility versus gypsum for finish quality and speed. Typical substrate scenarios in old houses guide these choices. Always verify which system best suits the wall fabric and moisture regime.
Assess the substrate and moisture context to identify incompatibility risks such as trapped moisture behind non-breathable layers. Look for signs of existing finishes, salt activity, and prior render to plan a compatible approach. Documentation and safety considerations round out the guidance.
When never to use gypsum over lime
Gypsum plaster is not suitable for direct application over high pH or salt-laden lime layers. Here’s why:
High pH: Lime plaster has a high pH, which can react with the gypsum, causing it to lose its binding properties and leading to plaster failure.
Salt-laden layers: Old lime plasters often contain salts. When these salts come into contact with gypsum, they form calcium sulfate, which expands and causes cracking or delamination.
Acceptable transition methods and primers
When transitioning from lime to gypsum plaster, use approved systems to ensure a successful bond:
Mechanical keying: Use render keys or wall ties to create a mechanical bond between the two plasters. This helps prevent delamination.
Breathable isolation coats: Apply a breathable isolation coat, like a lime-based primer or a suitable proprietary product, before applying gypsum plaster. This allows moisture to escape and prevents trapping dampness behind non-breathable layers.
Application Methods and Best Practices for Old Houses
The scope defines where lime versus gypsum plaster is appropriate and which substrates tolerate each system. Historic brick, stone, and lath-backed walls often drive a breathable approach. Hybrid methods may be considered when preserving historic fabric is essential.
Substrate assessment and moisture management establish proceed/modify thresholds before work begins. Test for capillary rise and wall hygrometry, and outline preconditioning steps to reduce damp before plastering. This careful prep supports durable results.
Substrate assessment and preparation checklist
Before applying any plaster, assess your substrate to ensure it’s ready. Use this checklist when you’re unsure.
- Salt testing: Check for soluble salts. They can cause efflorescence and damage plasters. Use a salt test kit or send samples to a lab.
- Moisture measurement: Test for moisture using a moisture meter. Ideal is below 18%. Above 20%, consider damp-proofing first.
- Relative humidity (RH) testing: Measure RH with a hygrometer. Lime plasters need substrates with RH around 50-60% for proper curing.
- Wall hygrometry: Check wall surface temperature and relative humidity. They should be close to ambient conditions.
- Adhesion tests: Perform pull-off or scratch tests to ensure good adhesion of old plasters or paint layers.
- Consolidation: If substrate is crumbly, consolidate with a lime-based consolidant before plastering.
- Sacrificial washes: Apply sacrificial washes (limewash) to draw out salts and prepare the surface.
- Drying cycles: Ensure substrate is dry. If damp, consider drying cycles or dehumidification.
Quick rule: Skipping these checks can lead to plaster failure due to moisture issues or poor adhesion.
Layering, thicknesses and finishing techniques
Lime plasters typically require multiple layers for strength and finish. Gypsum plasters can be applied in fewer coats.
For lime plasters, start with a scratch coat (2-3mm) to anchor the plaster to the substrate. Follow with a brown or floating coat (6-10mm), then finish with a setting coat (1-2mm).
Gypsum plasters usually require only two coats: a base coat (8-15mm) and a finishing coat (1-3mm).
For finishes, lime plasters can be left as trowel finish, or floated for a smooth surface. Gypsum plasters can be sanded or skimmed for a very fine finish.
Maintenance, Repair and Long-Term Care
Routine checks focus on humidity, dampness, and salt movement that signal breathability needs. Early signs differ between lime and gypsum finishes, so knowing the finish helps you diagnose quickly. Regular inspections prevent major failures in aging walls.
Repair strategies are finish-specific: lime repairs use breathable lime-putty, while gypsum repairs rely on gypsum-compatible mortars. Plan long-term care with seasonal checks and moisture source control to protect historic fabric and maintain compatibility.
Repairing salt or moisture-damaged plaster
First, identify the cause. Salt damage shows as white deposits (efflorescence). Moisture leaves damp patches or stains.
Remove salts: Brush off loose material, then scrub with a wire brush and water. Rinse well. For severe cases, use a diluted muriatic acid solution, but be careful – it’s corrosive.
Dry the area thoroughly. Use fans or dehumidifiers if needed. Re-plaster using compatible materials: lime-putty for lime finishes, gypsum-compatible mortars for gypsum.
Repainting and surface treatments
Choose breathable paints to maintain compatibility. Lime plasters have a high pH, so avoid pigments sensitive to alkalinity.
Test colour compatibility on lime before applying to the whole area. Mix a small batch of paint with some lime putty or wash, apply it to a hidden spot, and observe over time.
For best results, use a primer suitable for your finish type. Lime primers work well with lime plasters, while gypsum-compatible primers are ideal for gypsum.
Health, Environmental and Safety Considerations
Health profiles differ between lime and gypsum, with natural binders generally offering different indoor air implications. Consider the long-term indoor environment when choosing materials for historic spaces. Safety data should guide product selection and use on occupied buildings.
Dust and silica hazards are present during mixing and sanding, so practical controls matter. Use proper PPE, ventilation, and wet methods where possible. Clear pre-work and post-work checklists help minimize exposure and environmental impact.
Indoor air quality and material selection
The choice of plaster can significantly impact your home’s indoor air quality. Traditional plasters like lime have breathability that helps regulate humidity, reducing the risk of mold.
- Lime Plaster: Breathable, regulates humidity, reduces mold risk. Look for high calcium content (90% or more). Avoid low-quality, fast-setting types that can crack.
- Gypsum Plaster: Less breathable, may trap moisture leading to condensation and mold growth. Choose Type X for added fire resistance if needed. Avoid in damp areas without proper ventilation.
- Eco-friendly Options: Consider natural hydraulic lime or earth plasters for eco-credentials. These are made from sustainable materials but may have shorter working times.
PPE and safe working practices
Protecting yourself and your team is crucial when handling plasters. Here’s what you need:
Personal Protective Equipment (PPE): Wear a respirator or dust mask, safety glasses, gloves, and protective clothing to minimize contact with plaster dust.
Ventilation is key during mixing and application. Use fans to create cross-ventilation and keep the area well-ventilated.
Waste Disposal: Seal and dispose of waste bags carefully to prevent dust release. Clean up spills immediately with damp cloths, not dry ones that can kick up dust.
Cost, Project Planning and Regulatory Considerations
Budget factors include materials, labour, and potential protective measures for historic fabric. Plan for contingencies if additional coats or repairs are needed to preserve fabric integrity. Clarity on scope helps prevent surprises during work.
Regulatory checks cover planning permissions and listed-building considerations. Consult conservation officers when in doubt and document material histories and approvals. A well-documented plan supports smoother approvals and better long-term results.
Budgeting and labour implications
Plastering costs vary, so let’s break it down.
Materials: Lime plaster is generally more expensive than gypsum. Expect to pay around 20-50% more for lime-based products. Custom mixes or finishes can add extra cost.
Labour: Skilled labour is crucial. Specialist lime plasters may charge a premium due to their expertise. Drying times also impact labour costs – lime plaster takes longer to dry, extending work time.
Plan for contingencies too. Old houses often hide surprises needing extra coats or repairs.
Permissions, standards and testing to request
Before you start, get the green light from these folks:
Conservation Officer: If your home is listed or in a conservation area, they’ll need to OK any external changes. They can also advise on suitable materials and methods.
Building Control Officer: Ensure your project complies with building regulations. They’ll check plans and inspect work during progress.
Site Tests: Before plastering, test for moisture (using a moisture meter) and salt (with a simple water-based solution). This helps prevent issues later on. Always follow BS EN 998-1:2010 standards for lime plasters.
Conclusion
When you’re working in an old house, the key is compatibility and staying ahead of moisture and movement. Use the right plaster for the wall, couple it with proper backing and sealing, and keep safety and long-term durability in mind so you avoid costly fixes later.
First, check the wall type and moisture conditions, test a small patch, confirm the mix and coat sequence with a conservative, thin start, follow the recommended curing and ventilation, then apply in light, even layers and monitor for cracks or dampness while keeping tools clean and materials dry. If you’re unsure, confirm the compatibility rules and mixing guidance before mixing, and don’t skip moisture control or wall prep, especially in areas with prior water exposure or high humidity.
Two common mistakes to avoid are pushing a gypsum mix onto a lime-lean wall or vice versa, and ignoring moisture or movement signs that show up after the first coat. Always test first, use the correct water-to-mix ratios, and keep your work area well ventilated, with dust control and personal protective gear. Never seal materials with improper sealants or coatings that trap water behind the plaster.
If the building has significant dampness, historic finishes, or structural concerns, it makes sense to call a pro rather than push ahead. In all cases, plan realistically, respect regulatory or permitting considerations, and keep safety front and center. Stay steady, follow the rules, and you’ll protect the old house and your budget.
FAQ
What is lime plaster and what are its main benefits?
Lime plaster is a natural cement-like mix that breathes and stays flexible in old walls. It helps regulate moisture and reduces the chance of damp buildup when used on suitable substrates. Look for product labels or manufacturer guidance to confirm compatibility with your wall type.
What is gypsum plaster and what should I know about it?
Gypsum plaster is a fast-setting, hard interior plaster that does not breathe as well as lime. It’s easy to apply and finish but can trap moisture in some old walls if used where lime is required. Check the product instructions and local recommendations before using it on historic structures.
How does breathability differ between lime and gypsum plaster?
Lime plaster moves moisture through the wall more freely. Gypsum plaster blocks moisture to a greater extent unless the wall already vents well. If your house has damp or hygroscopic walls, lime is usually a safer bet for moisture management.
How should I decide which plaster to use for an old house?
Consider the wall substrate, history of damp, and existing plaster. Lime works well on traditional walls and helps with moisture control. Gypsum is fine for dry interiors with stable walls and when you don’t need high breathability. Always verify with the wall’s condition and follow manufacturer guidance.