
Introduction
Prepping glossy surfaces for paint adhesion means removing or disrupting the shiny layer and testing the bond before committing—either by sanding, using a chemical deglosser, or combining both with the right primer. You can sometimes skip aggressive sanding if a proper deglosser and an adhesion-promoting primer are compatible with the substrate, but check product labels and do a bond test first. For stained wood, consider that tannins and finishes can affect adhesion, so clean, test, and choose a primer made for stained or slick surfaces.
Practical prep is about hands-on steps: clean thoroughly, try a small bond test, then sand or apply a deglosser as needed until the test passes, followed by the recommended primer and paint. If a deglosser fails to remove the sheen or the bond test peels, be prepared to switch to mechanical abrasion and re-test, and always follow manufacturer instructions and local guidance.
Key takeaways
- Yes, with proper deglosser and bonding primer, follow manufacturer instructions.
- Choose chemical deglossers or solvents; pair with a compatible bonding primer.
- Assess surface, remove contaminants, then either degloss chemically or light sanding.
- Seal stains first, then degloss and primer before topcoat.
- Perform adhesion bond test; look for edge peel and roughness; rework if needed.
- Wear respirator or mask in solvents, ventilate area, follow label warnings.
Table of Contents
- Introduction
- Key takeaways
- Can You Paint over Glossy Surfaces Without Sanding?
- How Deglossers Work — Types, Pros/Cons, and Why They Fail
- Bonding Primers — Types, How They Work, and Selection Guide
- Sanding Grits and Techniques for Glossy Finishes
- Surfaces Compatible with Non-Sanding Methods and Special Cases
- Tools, Materials Checklist and Safety Precautions
- Step-by-Step Prep Workflows: Minimal to Full Prep
- Bond Tests, Visual Checkpoints, and When to Rework
- Conclusion
- FAQ
Can You Paint over Glossy Surfaces Without Sanding?
This section answers whether glossy substrates—like sealed wood, enamel-painted metal, and many plastics—can accept new paint without mechanical abrasion. Gloss alone often reduces surface energy and can block adhesion; some sealed or recently cured finishes may be paintable without sanding, while others will fail without added profile.
Start with a lightweight bond routine: ensure the surface is tack-free, perform a tape/peel or gentle scrape test in an inconspicuous spot, and clean thoroughly with a degreaser. If tests look suspect, try a small adhesion patch with your chosen primer and topcoat; if it peels, plan for light abrasion or full sanding. Deglossers can work on many polymer films by chemically dulling the surface, but they don’t fix contamination or poorly bonded underlying layers—mechanical keying is still required for some coatings. Use a bonding primer when appropriate, but verify primer compatibility on the product label or technical data sheet; primer won’t save a surface that’s contaminated, flaking, or heavily waxed. Follow a simple checklist—clean, test, degloss or sand as needed, prime, and re-test—so you decide reliably case by case and avoid common missteps like skipping adhesion re-tests or overrelying on solvent deglossers.
Situations where you can skip aggressive sanding
Not every glossy surface needs heavy-duty sanding. Here are some situations where you might get away with lighter prep:
Intact clear finishes, like varnished wood or sealed plastics, often just need a quick scuff to help paint adhere.
Using compatible primers can also help. They’re designed to bond well with existing glosses and may allow you to skip sanding.
Light scuffing with fine-grit sandpaper (220 or higher) can create a ‘tooth’ for paint to grab onto, without removing the original finish.
Red flags that mean you must sand to bare
Some surfaces demand full-on sanding or even stripping. Here’s when:
Peeling paint or finish means there’s no adhesion, so you need to start fresh with bare surface.
Any loose finish, like flaking enamel on metal, needs to go before painting.
Heavily contaminated surfaces – think grease or grime – won’t bond well. Clean and sand until you hit bare surface.
Old oil-based coatings often require full removal due to their poor adhesion over time. Don’t risk it; strip and start anew.
How Deglossers Work — Types, Pros/Cons, and Why They Fail
Chemical deglossers are formulated to alter or remove the shiny surface layer so paint can wet and adhere better; they may act by dissolving surface polymers, removing waxes, or changing surface tension. Products vary: solvent-based formulas often swell or soften glossy finishes, water-based deglossers rely on surfactants or mild alkalinity, and specialty cleaners target waxes or grease—each has different handling and residue behaviors.
Expect different mechanisms and trade-offs: solvent deglossers work fast but carry stronger odors and require ventilation; water-based types are milder but may need more dwell time or repeated passes and thorough drying. Common failure modes include incomplete removal of surface treatments, leaving inhibiting residues, incompatibility with the primer, or insufficient dwell/wipe procedures; always follow label directions and check the product data sheet. To avoid surprises, do an adhesion patch test after deglossing and perform a clean wipe or rinse if the manufacturer recommends it; if you detect solvent residue or poor adhesion, switch to light abrasion or a different primer system that lists compatibility on its tech data.
Deglosser types and what each does
Deglossers come in different types, each with its own way of working on glossy surfaces. Here’s a quick rundown:
Solvent-based deglossers use harsh chemicals like acetone or lacquer thinner to dissolve surface waxes and sealers. They’re tough on tough jobs but can damage certain substrates if left too long.
Acid-based deglossers rely on mild acids to break down wax and polymer films. They’re great for removing baked-on wax but may not be suitable for all surfaces due to their acidic nature.
Water/citrus-based deglossers use surfactants and sometimes citrus extracts to loosen waxes. They’re safer, with less odor and no harsh chemicals, but might need longer dwell times or multiple applications for tough gloss.
Common failure modes and troubleshooting
Even with the right deglosser, things can go wrong. Here are some common issues:
Incomplete removal of gloss or wax. If your topcoat still feels slippery after deglossing, you might need to sand lightly or apply a second coat.
Improper timing. Leaving the deglosser on too long can damage the substrate. Too short, and it won’t work. Find that sweet spot in the product’s instructions.
Residual solvent odors. If you smell strong chemicals after deglossing, wipe down the surface with a damp cloth to remove any residue that could inhibit primer adhesion.
Bonding Primers — Types, How They Work, and Selection Guide
Primers designed for glossy substrates modify surface energy and provide mechanical or chemical keys to help topcoats bond; common chemistries include shellac-based, oil/alkyd, acrylic/latex, epoxy, and urethane primers—each has strengths for particular substrates and conditions. Mechanisms include filling microvoids, penetrating slightly to lock into the substrate, providing a compatible tie layer, or chemically bonding to specialty coatings.
Choose a primer based on substrate (wood, metal, plastic), topcoat compatibility, exposure, and stain-blocking needs; verify suitability on the product label or technical data sheet before buying. After priming, validate adhesion with a quick scrape or tape test in an inconspicuous area and allow full cure per the manufacturer before topcoating. Prepare the surface appropriately for the primer: degrease, degloss or sand to the recommended grit range, and follow drying/rewipe steps the primer requires. Use a simple decision framework—identify substrate and coating, check primer compatibility and cure, test adhesion—so you pick the primer chemistry that will actually bond rather than mask surface problems.
Primer chemistries explained
Choosing the right primer for your glossy surface is crucial. Here’s a quick rundown of major primer chemistries:
Shellac/Trim Primers: These are great for wood surfaces with high-gloss finishes. They promote adhesion and seal tannins that can bleed through paint.
Oil/Alkyd Primers: Ideal for metal and primed surfaces, they provide excellent adhesion and stain-blocking properties. However, they have a longer drying time compared to other primers.
Acrylic/Latex Bonding Primers: These water-based primers are versatile and suitable for various glossy substrates like wood, metal, and plastic. They dry quickly and offer good adhesion and stain-blocking properties.
Epoxy and Urethane-Based Primers: These are high-performance, durable options for demanding applications. Epoxies are great for concrete and masonry, while urethanes excel on metal and plastic surfaces exposed to harsh conditions.
When to add an adhesion promoter or tie coat
A primer alone might not be enough in certain situations. Here’s when to consider adding an adhesion promoter or a specific tie coat:
Use an adhesion promoter when dealing with extremely slick surfaces like glass, glossy lacquers, or powder-coated metals. These promote chemical bonding between the substrate and primer.
A tie coat is necessary when you’re switching from one paint system to another (e.g., from oil-based to latex). It helps bridge the gap between incompatible topcoats and ensures better adhesion.
Also, consider using a tie coat if your substrate has been previously painted with an unknown or incompatible paint system. This helps prevent peeling and ensures better paint adhesion.
Sanding Grits and Techniques for Glossy Finishes
This section clarifies when to scuff versus sand to bare substrate and the grits matched to those goals: light scuffing uses very fine abrasives, while aggressive sanding to remove finish or reach bare wood uses coarser grits. Choose grits to create just enough profile for primer bite without over-roughening; adjust based on coating thickness and substrate hardness.
Tool choice matters—hand sanding, random-orbit, and dual-action sanders each deliver different control and heat generation; use light pressure, fluid motion, and backer pads to avoid gouging. For light scuff prep use very fine grit pads or abrasive cloths; when removing finish or leveling, step down to medium grits before finishing with finer abrasive to smooth transitions. After sanding, clean thoroughly of dust and do a tape adhesion test on a primed patch to confirm readiness; if adhesion fails, increase abrasion or switch to a compatible primer. Common mistakes include over-sanding glossy edges, causing feathering or burn marks, and leaving oils/waxes behind—re-clean or re-sand as needed.
Grit recommendations by prep type
Choosing the right grit is crucial for your sanding success. Here’s a quick guide:
Light Scuff and Repaint Prep (320-400 grit): These fine grits are ideal when you’re just scuffing up glossy surfaces to improve paint adhesion. They won’t remove much material, but they’ll help your primer and paint stick.
Removing Gloss or Blending Transitions (180-220 grit): For heavier prep work where you need to remove some gloss or blend transitions, these medium grits are your friends. They’re coarse enough to do the job but not so coarse they dull surfaces.
Avoid Overly Coarse Grits: Grits below 120 can be too aggressive on glossy finishes, leaving swirl marks and dulling surfaces. Save those for when you’re sanding down to bare wood or substrate.
Tools and methods: hand vs power
Selecting the right tool depends on your job’s size, complexity, and your patience level. Here are some options:
- Hand Sanding (120-400 grit): For small areas or tight spots, hand sanding with pads or blocks is your best bet. It offers better control but can be time-consuming.
- Random Orbital Sanders (80-220 grit): These power tools are great for larger surfaces. They’re fast and efficient, but they can leave swirl marks if not used carefully.
- Abrasive Pads (120-400 grit) with Electric Sander: For really tough jobs or when you need to remove a lot of material quickly, abrasive pads with an electric sander are the way to go. They’re powerful but can be harsh on surfaces if not used right.
- Dual-Action Sanders (120-400 grit): These tools combine orbital and random sanding motions for a more even finish. They’re good for both large areas and small details, but they might be overkill for light prep work.
- Optional/Rentable Tools: Consider renting power tools if you don’t own them. It’s cheaper than buying, and you can upgrade your tool arsenal as needed. Prices vary by location and rental duration.
Surfaces Compatible with Non-Sanding Methods and Special Cases
Glossy substrates differ in how they respond to deglossers and primer-only approaches: sealed wood, lacquered furniture, laminate, tile, metal, and glass each behave differently and demand tailored checks. Some finishes—recently cured enamels or fully sealed non-porous plastics—may accept high-adhesion primers after thorough cleaning or chemical deglossing; others like powder-coated metal, heavily waxed furniture, or certain clear polyurethane films usually need abrasion or etching for reliable long-term adhesion.
Use a simple yes/no decision flow: clean and degrease, perform a tack/tape/peel test, try a small primer patch and let it cure, then tape-test the patch. If the patch fails, plan to sand, etch, or use a specialty primer specified by the manufacturer; check product instructions for substrate listings. Note substrate-specific tips: laminate and tile often respond to primers that create mechanical tooth, metal and glass may require etching or specialty adhesion promoters, and lacquered furniture can vary widely—verify manufacturer guidance when possible. Never commit to a full job without a passing adhesion test sequence and be ready to switch to mechanical profile if contamination, wax, or old brittle finishes show up.
Wood and Varnished Furniture
Prepping wood surfaces for painting depends on whether they’re raw or already finished. Raw wood needs a seal first, then priming.
Varnished or stained wood, however, can sometimes accept non-sanding methods with proper cleaning and deglossing. But remember, every finish is different. Always test first.
Wipe down varnished surfaces with a degreaser to remove any residue. Then, use a deglosser or high-adhesion primer. If the surface feels smooth and paint sticks, you’re good to go. Otherwise, sand lightly with 220-grit paper.
Non-Porous Surfaces
Laminate, tile, metal, and glass are tough to paint without sanding. They’re non-porous, meaning they don’t absorb paint well.
Laminate and tile can benefit from porosity-creating primers. These help paint adhere better. But if the surface is worn or damaged, you’ll need to sand first.
Metal and glass require extra steps too. For metal, use a specialty primer or etch with an acid-based cleaner. For glass, use a primer designed for it. If the surface is rough or pitted, sand lightly with 220-grit paper before priming.
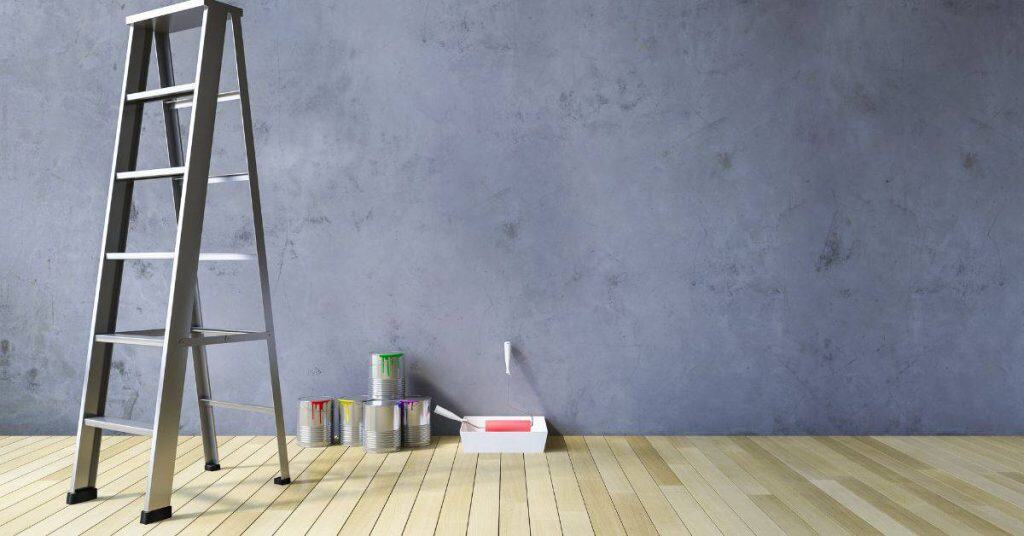
Tools, Materials Checklist and Safety Precautions
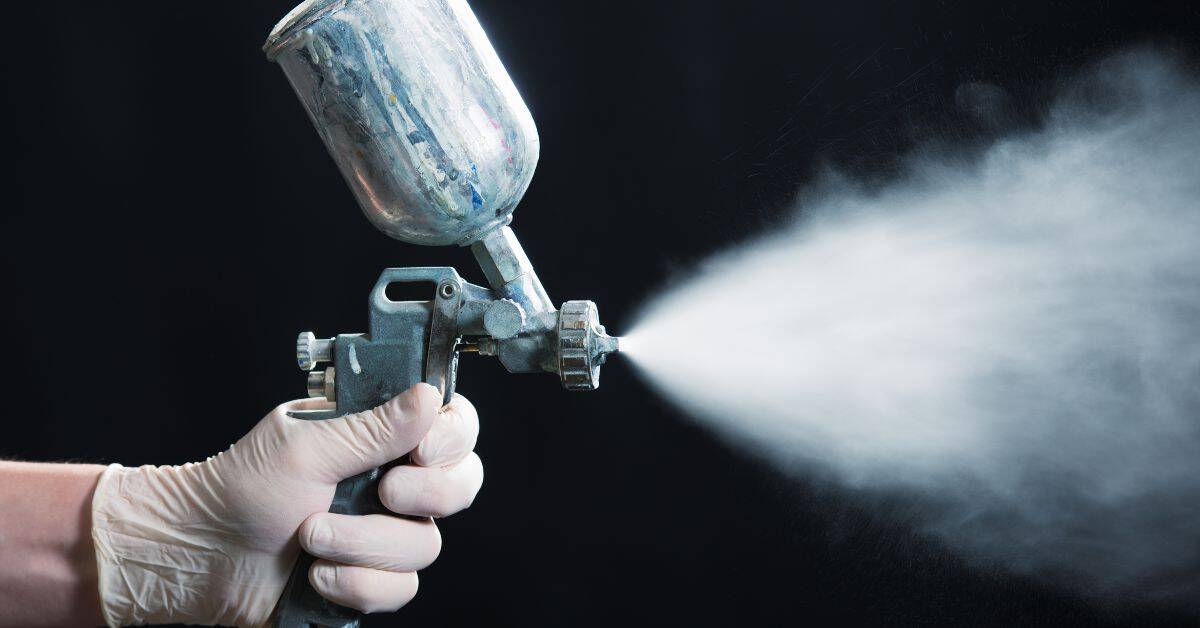
Before starting prep on glossy surfaces, assemble consumables, tools, PPE, and safety info so you don’t interrupt the workflow. Check product labels and SDS for each chemical—verify solvent types, recommended PPE, ventilation guidance, and disposal instructions before use.
Consumables & materials should include appropriate degreasers, tack cloths, primers, and waste bags; tools include sanding pads (specified grits), sanders, scrapers, and cleaning buckets. PPE should cover respirators or cartridges for solvents, gloves compatible with chemicals, eye protection, and hearing protection for power tools. Ensure adequate ventilation for solvent-based products—open windows, use fans or mechanical exhaust as suggested on the SDS—and avoid ignition sources. Keep a spill kit, waste containment, and proper disposal plan per local rules and SDS guidance. Do a quick pre-test: small deglosser trial, adhesion patch, and verify drying/cure windows before you commit to full surface work.
Essential materials and test supplies
Before you start prepping glossy surfaces, ensure you have these essentials to make your job easier and more effective.
- Primer: Choose a bonding primer suitable for your final paint. Have enough for 2 coats.
- Deglosser: Select a deglosser compatible with your surface and final paint. Test it first on a small area.
- Sandpaper: Include various grits (120, 150, 220) for different prep methods.
- Adhesion test tape: To check if your surface is ready for paint.
- Cleaners: Degreaser and all-purpose cleaner. Test degreaser on a small area first.
- Inspection tools: Tape measure, level, and flashlight to ensure surfaces are clean and smooth.
- Tack cloths: To remove dust before painting.
- Waste disposal bags: For easy cleanup of sanding debris and waste materials.
Quick rule: Always test primers, deglossers, and cleaners on a small area first to avoid costly mistakes.
Safety and ventilation best practices
Protect yourself and your environment with these safety and ventilation guidelines before starting surface prep.
- Gloves: Wear chemical-resistant gloves when handling deglossers, primers, and cleaners.
- Eye protection: Use safety glasses or goggles to protect your eyes from debris and splashes.
- Respiratory protection: Wear a respirator or dust mask when sanding or working with chemicals.
- Ventilation: Work outdoors whenever possible. If indoors, use fans to ensure adequate air circulation.
- Work hours: Avoid working late at night or early morning when ventilation is poor.
- SDS and labels: Always read and follow Safety Data Sheets (SDS) and product labels for safe handling and disposal.
- Spill kit: Have a spill kit ready to contain and clean up any chemical spills.
Quick rule: Never compromise safety. If you’re unsure about a product or process, seek professional advice.
Step-by-Step Prep Workflows: Minimal to Full Prep
Two workflows cover most jobs: minimal prep (clean, degloss, prime, paint) for surfaces that pass initial tests, and full prep (strip or sand to profile, clean, prime, paint) when adhesion tests or surface condition demand it. Decision points include the tape/peel result, age and type of existing coating, presence of wax or contamination, and whether a primer patch passes adhesion testing.
Minimal path steps: clean with a degreaser, apply recommended deglosser per label, allow specified dry time, apply a compatible bonding primer, then perform a small adhesion test before topcoating. Full path steps: remove or sand through the failed coating using chemical stripper or mechanical abrasion to reach a sound substrate, clean all residue and dust, prime with a specified primer for the substrate, and test adhesion after primer cure. At each decision point, use simple checks—adhesion tape test, visual inspection for lifting, and feel for grease—to decide to stop or escalate. If a deglosser fails, switch early to mechanical profiling rather than repeating chemical steps and always follow safety guidance for strippers and dusty operations.
Step-by-Step Process
The following is a clear, numbered sequence of practical steps for your step-by-step prep workflows: minimal to full prep. This guide will help you prepare the surface, do the main work, and finish with cleanup or final checks.
- Preparation & Safety Checks:
– Gather tools and materials.
– Ensure proper ventilation and safety gear. - Minimal Prep Path:
– Clean the surface.
– Apply deglosser (chemical or mechanical).
– Check for bond with a quick test. - Full Prep Path:
– Remove coatings (stripper or sanding).
– Achieve proper surface profile.
– Thoroughly clean the surface. - Priming & Painting:
– Apply compatible primer.
– Test adhesion after priming.
– Paint according to specs. - Cleanup & Final Checks:
– Clean tools and work area.
– Inspect final finish quality.
Quick workflow for intact gloss finishes
For surfaces with intact gloss finishes, follow this quick workflow to minimize impact. This approach relies on deglossers and bonding primer.
Surface Cleaning: Start by cleaning the surface to remove dirt and grease. Use a mild detergent or soap solution.
Deglossing: Apply a deglosser to reduce gloss level. Follow manufacturer’s instructions for application and drying times. Test adhesion with a quick bond test.
Priming & Painting: Apply a compatible bonding primer, ensuring good coverage. After testing adhesion, proceed with painting according to the paint specs.
Full prep workflow for compromised surfaces
When sanding, stripping, or repair is required prior to priming, follow this end-to-end process for compromised surfaces. This approach ensures a solid foundation for your new paint job.
Coating Removal: Use a chemical stripper or mechanical sanding/abrading method to remove old coatings. Always wear appropriate safety gear and ensure proper ventilation.
Surface Profiling & Cleaning: Achieve a proper surface profile using sandpaper or other abrasive tools. Thoroughly clean the surface to remove all dust, residue, and contaminants.
Priming & Painting: Apply a compatible primer, ensuring good coverage. Test adhesion after priming, then proceed with painting according to the paint specs. Always consider safety precautions during these steps.
Bond Tests, Visual Checkpoints, and When to Rework
Perform adhesion tests after priming and before topcoating: common checks include a firm tape pull test on a primed patch, a cross-cut or scored scratch test where appropriate, and a simple water or wipe test to check surface tension and contamination. Define pass/fail criteria before you test—no lifting, no peeling edges, and film that resists moderate tape removal are typical pass signs for a small patch.
Visual checkpoints of good prep include uniform film, crisp edges with primer holding to substrate, and absence of powdery or fuzzy residues; warning signs are blistering, edge lift, wrinkling, or inconsistent film color. If tests fail, rework options are clear: re-clean and degrease, re-degloss or increase abrasion, then re-prime with a compatible primer and retest after full cure per product instructions. Keep safety in mind during rework—dust control for sanding, ventilation for solvents—and avoid quick fixes like overcoating without addressing the root cause, which usually leads to repeat failures.
How to perform and read a cross-hatch or pull test
Before you start applying your final topcoat, use this checklist to ensure proper adhesion of your primer and base coats. This simple test can save you from expensive rework due to peeling or delamination.
- Gather tools: Utility knife, painter’s tape, ruler, and a sharpie.
- Wait for proper cure time: Check manufacturer instructions. Typically, wait at least 24 hours after applying the base coat.
- Mark test area: Using a ruler and sharpie, mark out a 3″ x 3″ square on your surface.
- Score the surface: With a utility knife, score an ‘X’ through the marked square. Make sure to cut deep enough to reach the substrate but not so deep that you damage it.
- Apply tape: Place painter’s tape over the scored area and press down firmly to ensure good adhesion.
- Pull test: Quickly pull the tape off at a 90-degree angle. If the paint comes off with it, you have poor adhesion.
- Inspect results: Look for any flaking or peeling of the paint. If more than 5% of the area is lifting, your bond test has failed.
- Check edges: Inspect the edges of the scored area. Any lifting here indicates poor adhesion and a failed test.
Quick rule: If more than 5% of the tested area lifts off, or if you see any lifting at the edges, rework is necessary. Always follow manufacturer guidelines for proper surface preparation and application procedures to avoid these issues.
Proceed or rework: decision criteria
Use this checklist before applying topcoats to ensure a strong bond and avoid costly rework. Perform these checks after the final primer coat has dried.
- Check surface dryness: Use a moisture meter (check manufacturer’s instructions for appropriate range, typically 12-15% MC).
- Inspect for dust: Wipe the surface with a damp cloth. If it leaves residue, clean and let dry.
- Look for contaminants: Check for oil, grease, or other substances that could hinder adhesion (use a solvent if unsure).
- Examine for cracks: Fill hairline cracks with patching compound, let dry, and sand smooth.
- Check for previous topcoats: If present, lightly abrade and re-prime to ensure proper adhesion.
- Perform cross-hatch test: Use a utility knife to score the surface in a crisscross pattern. Apply painter’s tape, pull off quickly at a 45-degree angle. If more than 10% of the coating remains, proceed.
- Inspect edges and corners: Ensure they’re well-coated and free from holidays (thin spots).
- Check temperature and humidity: Verify conditions are within recommended ranges for topcoat application (check product label).
Quick rule: If in doubt, rework. It’s cheaper to fix now than after applying topcoats.
Conclusion
Preparing glossy surfaces properly is the difference between durable paint that lasts and costly repairs. Do the prep with safety in mind, test first, and follow a proven workflow to avoid damage.
Start with a simple bond test on a discreet area, pick the right primer or light-deglosser if you use one, choose a sanding grit and method that matches the finish, and move through a minimal to full prep workflow with clear visual checkpoints. If the test shows poor adhesion, rework before you commit to full coating.
Common mistakes are skipping the bond test, over-sanding or under-sanding, and using the wrong product for the surface. Always ventilate well, wear appropriate protection, and apply products as directed. If a surface is heavily glossy, damaged, or textured in ways that complicate adhesion, pause and reassess—give yourself a second chance to do it right rather than forcing a poor bond.
If the job is beyond a basic refresh or you’re unsure about the coating system, it makes sense to call in a professional. A clear, controlled prep with proper products saves time, money, and headaches—stick to the plan, stay safe, and you’ll get a solid, lasting finish.
FAQ
Can you paint over glossy surfaces without sanding?
You can in some cases, but it’s not a guarantee. Use a deglosser or adhesion primer per the label, and test a small area first to confirm bite before committing.
What are the types of deglossers and adhesion primers I should know about?
Deglossers use solvents or water to remove surface shine. Adhesion primers create a good key on slick surfaces. Read the product label to match to your paint and substrate, and follow the manufacturer’s instructions for application and dry times.
What’s the safe, effective approach to prep, chemical vs. manual?
Start with the least aggressive method. If you use a chemical deglosser, follow the directions exactly and ventilate well. If that doesn’t bite, move to light mechanical scuffing with a fine grit; wipe clean and let dry before priming.
What’s the step-by-step process for painting over stained wood?
Clean the surface, test a spot, then degloss or lightly sand. Apply an appropriate adhesion primer, let it cure as directed, then apply your finish coats in calm conditions. Avoid layering too thickly and observe any recoats times from the label.
What safety precautions should I follow with chemical agents?
Wear eye protection, gloves, and ventilation. Read the safety data sheet for handling, storage, and disposal. If a product feels harsh or you get a strong reaction, stop and switch methods or products.