
Introduction
Primer fails when it cannot stick to the surface or is overwhelmed by stains; in plain terms, failed adhesion and bleed-through mean the primer lost the mechanical or chemical grip it needs or contaminants pushed through. I’ll walk you through what usually causes those problems on a jobsite and how to spot them before you waste paint. Check product labels and manufacturer instructions for specific compatibility and dry times.
Expect practical fixes like cleaning, sanding, using the right primer for the substrate, and re-coating only after proper cure, not just when it looks dry. I’ll also show simple on-the-spot tests to confirm adhesion and how to adjust for temperature, humidity, and cleanup so the next coat actually lasts. When in doubt about a material or local rules, consult the product data sheet or your local building authority.
Key takeaways
- Verify surface cleanliness and dry, dust-free substrates before primer application.
- Use compatible primers and patch using appropriate filler for a solid bond.
- Follow manufacturer guidelines for application method and avoid over- or under-coating.
- Perform simple adhesion tests on test patches before committing full surface.
- Address stain bleed through promptly with stain-blocking primer and recommended sequences.
- Safety first: wear protected gear, ventilate, and dispose according to regulations.
Table of Contents
- Introduction
- Key takeaways
- Common Reasons Primers Fail (Overview of Adhesion and Stain Problems)
- Surface Preparation: Step-by-Step Checklist
- Application Methods and Best Practices
- Simple DIY Tests to Check Adhesion and Compatibility
- How to Identify and Fix Stain Problems
- Troubleshooting Adhesion Failures and Reliable Fixes
- Tools, Materials Checklist and Visual Checkpoints
- Safety, Cleanup, Disposal, and Warranties
- Conclusion
- FAQ
Common Reasons Primers Fail (Overview of Adhesion and Stain Problems)
Adhesion failure and stain bleed-through are different problems that often look similar on the surface; adhesion failure means the primer lost mechanical or chemical bond to the substrate, while stain bleed-through means contaminants or soluble materials migrated through the primer to discolor the finish. Distinguishing the two lets you pick the right fix rather than repeating the same failed steps.
Substrate issues—porosity, surface texture, residual moisture, and poor cleanliness—are the usual suspects for adhesion problems, while contaminants like oil, wax, curing compounds, and efflorescence drive staining. Check product data sheets and manufacturer instructions for compatibility, perform simple on-site tests (tack test, tape pull, solvent wipe, and plastic-sheet moisture test), and use the quick diagnostic checklist to match visible failures—peeling, flaking, fisheyes, ghost stains—to likely causes and immediate remedies such as cleaning, targeted primers, or substrate treatment.
Adhesion Failure Causes
The first sign of primer failure is often adhesion loss. Here’s what causes it:
Poor Surface Prep: If the substrate isn’t clean, dry, and properly prepared, the primer won’t stick.
Glossy Coatings: Glossy surfaces don’t provide enough ‘tooth’ for primers to grip onto. You’ll see peeling or flaking.
Contamination: Dirt, oil, wax, curing compounds, or efflorescence can prevent adhesion. Check and clean the surface before priming.
Stain Bleed-Through Causes
The second common failure is stain bleed-through. Here’s why it happens:
Tannin: Some woods contain tannins that can migrate through primers, causing discoloration.
Water & Rust: Water and rust stains can leach through primers if the surface isn’t properly sealed or prepared.
Smoke & Oil: These contaminants can also bleed through, especially on porous surfaces like concrete or brick.
Failure Modes and Examples
Here’s what adhesion failure and stain bleed-through look like:
Adhesion Failure:
- Peeling: Primer lifts off the surface in large sheets.
- Flaking: Primer comes off in small pieces or chips.
Stain Bleed-Through:
- Ghost Stains: Faint stains appear through the primer, often resembling the original stain’s shape.
- Fisheyes: Small circular discolorations form due to contaminants trapped under the primer.
Surface Preparation: Step-by-Step Checklist
Surface prep is a strict sequence: clean and degrease, repair defects, roughen or sand to the proper profile, perform moisture and porosity checks, then do a final evaluation before priming. Missing or shortcutting any of those steps is where adhesion problems usually start.
For common DIY substrates—concrete, mortar, and old coatings—use appropriate cleaners or degreasers and check the label or product data sheet for ventilation and residue guidance; verify no tacky film remains with a simple wipe test. Repair cracks and spalls with suitable patch materials and confirm flatness and bond, control dust when sanding, and use moisture tests (meter, plastic-sheet) to decide whether to dry or choose a different primer; stop and reassess if tests or conditions don’t meet the product’s requirements.
Step-by-Step Process
Before you prime, follow this practical checklist to ensure your surface is ready.
- Safety first: Wear gloves and eye protection. Ventilate the area.
- Clean the surface: Remove dust, dirt, and loose material.
- Degrease if needed: Use a suitable cleaner to remove grease, wax, or oil residue.
- Inspect for repairs: Check for cracks, spalls, or other defects.
- Repair as needed: Fill gaps and level the surface. Allow curing time.
- Sand lightly: Create a slight profile for better adhesion. Feather edges around repairs.
- Test for moisture: Use a moisture meter or plastic sheet test to ensure the surface is dry.
- Check porosity: Ensure the surface isn’t too porous; consider alternative primers if it is.
- Final evaluation: Inspect the surface one last time for any issues before priming.
Quick rule: Don’t rush. Each step matters for a successful prime job.
Cleaning and Degreasing
Start with a clean slate. Here’s how to prep your surface for degreasing.
- Remove dust: Vacuum or brush off loose dirt and debris.
- Check for grease: Wipe the surface with a damp cloth. If it leaves residue, degrease.
- Degrease if needed: Use a suitable solvent (like mineral spirits) or TSP substitute. Follow manufacturer’s instructions.
- Avoid harsh cleaners: They can damage some surfaces. Test first on a small area.
- Rinse thoroughly: Ensure no residue remains after cleaning and degreasing.
- Test for tackiness: Wipe with a dry cloth. No residue means it’s clean.
- Allow to dry: Ensure the surface is completely dry before proceeding.
Quick rule: A clean surface is key to good adhesion and stain blocking.
Repairing and Sanding Substrates
Fix defects, create a profile, and ensure a solid bond with these steps.
- Inspect for cracks: Check for hairline or larger cracks that need filling.
- Identify spalls: Look for chipped or flaking material. Remove loose pieces.
- Select patching material: Choose a suitable repair compound based on your substrate and defect size.
- Apply and level: Fill gaps, then level the surface with a trowel or screed. Allow curing time.
- Sand lightly: Use 80-120 grit sandpaper to create a slight profile. Feather edges around repairs.
- Avoid deep sanding: It can weaken the substrate and cause more damage.
- Remove dust: Vacuum or brush off sanding debris. Ensure a clean surface for priming.
- Re-check repairs: Inspect patched areas one last time to ensure they’re level and well-bonded.
Quick rule: Proper repair and sanding create a solid base for your primer to adhere to.
Moisture and Contamination Checks
Ensure your surface is dry, clean, and ready for priming with these simple checks.
- Visual check: Look for signs of moisture damage or contamination.
- Touch test: Feel the surface. It should be cool to touch and not damp.
- Moisture meter: Use one to measure moisture content. Aim for below 15% for most primers.
- Plastic sheet test: Place a plastic sheet on the surface. Check after 24 hours for condensation.
- Porosity check: Test with a drop of water. If it’s absorbed quickly, the surface is too porous.
- Avoid oil-based primers: They can trap moisture and cause issues if the surface isn’t dry.
- Re-test after rain: If it rains, re-check for moisture before priming to avoid trapping water.
Quick rule: A dry, clean surface ensures your primer adheres well and doesn’t trap moisture.
Application Methods and Best Practices
Select tools and techniques that match the primer chemistry and the substrate: brush for edges and small repairs, roller for flats, and spray for large or textured areas—follow the manufacturer’s directions on dilution and tip sizes. Proper pre-application conditions include a clean, dry surface and acceptable temperature and humidity ranges indicated on the product label or technical data sheet.
Maintain wet edges and a uniform film by using methods like back-rolling or back-brushing, working in manageable sections, and avoiding overworking the material to prevent lap marks and thin spots. Avoid common mistakes—painting in bad weather, over-thinning, or skipping prep—and run quick field checks for uniform coverage, no dry edges, and consistent film thickness before allowing the primer to cure or applying the next coat.
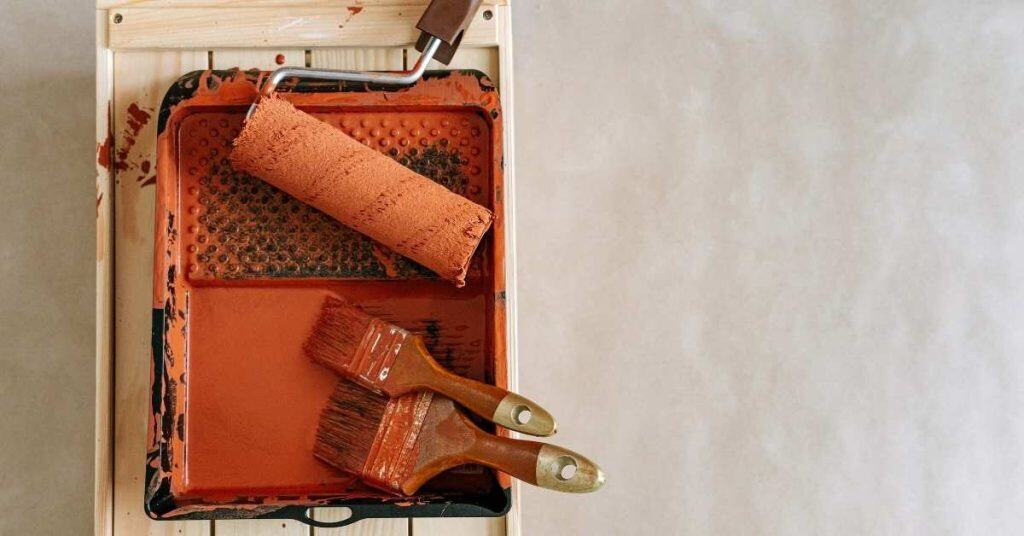
Tool choice: brush, roller, or sprayer
Choosing the right tool for applying primer is crucial. It affects film build and adhesion.
- Brush: Ideal for small areas and tight corners. Provides good control but slower coverage.
- Roller: Fast coverage on large, flat surfaces. Creates a uniform film but may leave visible roller marks.
- Sprayer (airless or HVLP): Quickest coverage and best for textured surfaces. Requires proper setup and technique to avoid overspray.
- Nozzle/tip sizes: Larger tips for thicker primers, smaller for thin ones. Rentable sprayers start around $50/day.
- Dilution/flow additives: Some primers need thinning or flow improvers. Follow manufacturer’s guidelines to maintain proper viscosity.
Achieving even coverage and avoiding recoat troubles
Proper application technique prevents uneven film build and recoat issues.
- Avoid lap marks: Overlap each stroke by about half the roller/brush width. Don’t apply too much primer at once.
- Back-rolling/back-brushing: Work backwards over previously coated areas to ensure even coverage and avoid missed spots.
- Check for dry edges: Before applying the next coat, ensure there are no dry edges that could cause adhesion problems.
- Follow recoat windows: Wait the recommended time between coats. Too soon can lead to poor adhesion, too late may require sanding.
- Avoid over-thinning: Thinning primer too much reduces its ability to bond and protect.
Consistency is key. Work in manageable sections, maintain wet edges, and follow manufacturer’s recoat intervals.
Environmental factors while applying
Temperature, humidity, and ventilation impact primer application and cure. Consider these factors to ensure optimal results:
Temperature: Most primers perform best between 50-90°F (10-32°C). Too cold or hot can slow cure time or cause poor adhesion.
Humidity: High humidity can cause condensation, leading to poor primer flow and adhesion. Keep relative humidity below 80% if possible.
Ventilation: Good ventilation is crucial for proper curing. Avoid applying in enclosed spaces without adequate airflow. If you notice slow drying or a strong odor, pause the job until conditions improve.
Simple DIY Tests to Check Adhesion and Compatibility
Low-damage tests—tape pull, cross-cut or scratch/peel tests, and small spray or wipe-compatibility checks—help confirm bond and compatibility before tackling a whole project. Always do these tests in an inconspicuous location and follow cure times printed on the product label or data sheet.
Prep the test area like the rest of the job, apply the primer, allow the recommended cure or dry time, then perform the tape or peel test and interpret results against the pass/fail cues on the technical sheet. Record date, product lot, ambient conditions, and photos; if a test fails, try re-cleaning, a different primer, or extending cure time and repeat the test rather than scaling up.
Fingernail and tape adhesion test
Before you dive into applying primer, do a quick check on existing films. This helps catch weak bonding issues early.
First, clean the surface to remove any dirt or debris. Then, press your thumbnail firmly against the film at a 45-degree angle. If it lifts easily, you’ve got an adhesion problem.
Next, apply a piece of painter’s tape over the area, press down firmly, then pull it off quickly at a 90-degree angle. If the film comes off with the tape, your primer won’t stick either. If you see lifting or peeling, re-clean and sand the surface before priming.
Solvent/rub and blot tests
Before applying primer, check for uncured coatings or contaminants. These can cause adhesion issues and stains later on.
Dampen a clean cloth with denatured alcohol or a suitable solvent. Gently rub the surface in an inconspicuous spot. If the color comes off on the cloth, you’ve got uncured varnish or stain. Let it cure longer before priming.
If there’s no color transfer, blot the area dry with a clean cloth. If it leaves a mark, you’ve got surface contaminants. Clean and degrease the surface before proceeding.
Small pilot patch and full adhesion sample
Before priming the entire surface, do a small test patch. This helps ensure your primer and topcoat play nice together.
In an inconspicuous spot, apply your primer following the manufacturer’s instructions. Let it cure as directed. Then, apply a small amount of your chosen stain or finish over the primer. Let that cure too.
After everything’s cured, check the test patch for adhesion and appearance. If it looks good, you’re ready to prime the entire surface. But if there are issues, re-evaluate your primer, topcoat, or application methods before proceeding.
How to Identify and Fix Stain Problems
Start by classifying the stain: water-related or moisture migration, mineral efflorescence, oil-based, organic (mold/vegetation), or chemical contamination—each has different fixes from cleaning to substrate treatments. Use simple diagnostics like a wipe/rag test, moisture meter reading, or pH test for alkalinity to confirm the stain source before selecting a remedy.
For many surface stains, thorough cleaning followed by a stain-blocking primer or sealer is the least invasive effective remedy; if moisture or salts are present, treat the source and use a compatible barrier product per manufacturer instructions. Always verify compatibility with the topcoat via a small test patch, observe safety and ventilation guidance when using cleaners or sealers, and re-test after treatment to ensure the stain won’t recur.
Step-by-Step Repair Process
Follow these practical steps to identify and fix stain problems on your substrate.
- Inspect the area: Check for any cracks, holes, or loose material. Mark them for repair.
- Clean the surface: Use a degreaser or cleaner suitable for the substrate. Remove all dirt, grease, and contaminants.
- Repair damaged areas: Fill cracks with a suitable filler. Allow it to dry and sand smooth. Replace any loose material.
- Test for moisture: Use a moisture meter to check for excess moisture. If present, address the source before proceeding.
- Apply primer or sealer: Choose the appropriate primer or sealer based on the stain type. Apply according to manufacturer’s instructions. Allow it to dry completely.
- Inspect and test: Check for any signs of continued staining or adhesion issues. Perform simple DIY tests as mentioned earlier in this guide.
- Apply finish coat: Once satisfied with the primer or sealer, apply your chosen finish coat following best practices.
- Clean up: Dispose of materials responsibly. Clean tools and work area thoroughly.
Tannin and Wood Bleed-Through
Tannins are natural compounds found in woods like cedar, redwood, and mahogany. They can bleed through paint or primer, causing stains.
To prevent this, use a shellac-based primer or a specialized tannin blocker before painting. Shellac seals the wood, preventing tannins from bleeding out.
Apply shellac or the tannin blocker according to manufacturer’s instructions. Allow it to dry completely before sanding lightly and applying your chosen paint or finish.
Water, Mold, and Mineral Stains
Water stains, mold, and mineral efflorescence can mar your substrate’s appearance. Here’s how to tackle them:
For water stains, clean the area thoroughly with a suitable cleaner. Allow it to dry completely. If moisture is present, address the source before applying a stain-sealing primer.
For mold, wear protective gear and use a mold remediation product. Follow manufacturer’s instructions for safe removal. Once removed, apply a mold-resistant primer or sealer.
For mineral efflorescence, clean the area with a solution of muriatic acid (follow safety guidelines). Rinse thoroughly and allow to dry. Apply a stain-blocking primer before painting.
Oil, Grease, Smoke, and Marker Stains
Deeply penetrating stains like oil, grease, smoke, or marker ink require aggressive treatment:
For oil and grease, use a degreaser to clean the area thoroughly. Allow it to dry completely. If staining persists, consider stripping the substrate and starting fresh.
For smoke stains, use a heavy-duty cleaner or stripper designed for smoke damage. Apply according to manufacturer’s instructions. Once cleaned, apply a stain-encapsulating primer before painting.
For marker stains, try using rubbing alcohol or a marker remover product. If the stain persists, consider stripping the substrate and starting fresh.
Troubleshooting Adhesion Failures and Reliable Fixes
Recognize adhesion failure by signs like peeling, delamination, and lifting edges; run quick diagnostics—tack or tape tests, moisture checks, and a contamination scan—to determine whether the issue is surface-related or deeper. Those results dictate whether to try immediate fixes (clean, sand, re-prime) or escalate to bonding primers, stripping, or substrate repair.
Use a small, documented test patch to validate any chosen remedy before committing to large areas, and follow a simple decision flow: try low-effort repairs first when contamination or surface profile is the problem, escalate when tests show moisture, deep contamination, or structural issues. Keep clear records—photos, conditions, and outcomes—to support warranty claims or to reproduce the fix reliably.
When to Sand or Abrade
Light sanding can often restore mechanical grip when adhesion fails. Use fine grit (120-220) sandpaper on concrete, and medium grit (60-80) for masonry.
Aggressive abrasion or etching is needed when surfaces are severely contaminated, have a smooth profile, or show signs of delamination. Use diamond grinding tools or acid etches for tougher jobs.
Always test a small area first to ensure you don’t damage the substrate. Document results and proceed only if improvements are seen.
Choosing Bonding or Specialty Primers
For concrete, use a high-adhesion primer with good penetration. For masonry, opt for a masonry-specific primer that promotes adhesion and seals pores.
If existing coatings are incompatible, choose a tie-coat primer designed to bridge the gap between old and new surfaces. Always follow manufacturer’s guidelines for best results.
Test primers on a small patch before committing to larger areas. Document conditions, products used, steps taken, and results for future reference.
When to Strip and Start Over
Strip coatings completely if you see widespread delamination, incompatible coatings, or structural substrate failure. Also consider stripping when adhesion tests fail repeatedly despite attempts at repair.
Safely remove old coatings using chemical strippers, heat guns, or scraping tools. Always wear appropriate PPE and follow safety guidelines.
Before reapplying, ensure the substrate is clean, dry, and free of contaminants. Test new primers and coatings on a small area first to confirm compatibility.
Tools, Materials Checklist and Visual Checkpoints
Assemble a compact kit for each stage: prep tools (scrub brushes, degreaser), repair materials (patch compound, trowels), application tools (rollers, brushes, spray tips), PPE, and testers (moisture meter, pH strips, tape). Choose items by function and compatibility rather than brand; check product labels and data sheets to confirm suitability for your substrate.
At each stage use simple visual checkpoints: surface should be clean, dry, and dust-free before priming; repairs feathered and solidly bonded; primer showing uniform absorption and no pooling. Include a cleanup and disposal plan, proper PPE for the chemicals in use, and a final close-up adhesion check on a test area before proceeding to full coverage.
Essential tools and PPE
Before you start, make sure you have these essentials to keep your project safe and efficient.
- Respirator or dust mask: Protect yourself from concrete dust. A respirator is better for extensive work.
- Safety goggles: Shield your eyes from debris and splashes.
- Chemical-resistant gloves: Guard your hands from primers, stains, and sealers.
- Knee pads: Protect your knees during extended periods of kneeling.
- Long sleeves: Cover exposed skin to prevent irritation.
- Scraper or putty knife: Remove loose material and prepare surfaces for priming.
- Sandpaper (120-grit): Smooth rough edges and remove minor imperfections. Upgrade to higher grits for pro results.
- Brushes/rollers/squeegees: Apply primers evenly. Use rollers for large areas, brushes for edges, squeegees for leveling.
- Cleaning supplies (tack cloth, damp rag): Remove dust and debris before priming.
- Concrete-specific: Look for primers designed for concrete to ensure compatibility.
- Stain-blocking: Select a primer that blocks common stains like tannin, water, and mold.
- Bonding properties: Check the primer’s ability to bond with your chosen stain or sealer.
- Porosity tolerance: Ensure the primer can penetrate and bond with your concrete’s porosity level.
- Recoat window: Consider the recommended recoat time to plan your project timeline.
- Adhesion test results: Check if the manufacturer provides adhesion test results for reassurance.
- Coverage rate: Estimate how much primer you’ll need based on coverage rates per square foot.
- Water vs. solvent base: Choose a water-based primer for easier cleanup, or a solvent-based one for better penetration and bonding.
- Surface shine: The concrete should have a consistent matte appearance, free of glossy spots.
- Uniform absorption: Check that water or a test primer absorbs evenly across the entire surface.
- Edge protection: Ensure edges are well-sealed to prevent delamination during topcoat application.
- Close-up adhesion checks: Inspect the surface under magnification for any hairline cracks or weak spots.
- Moisture test (if applicable): Confirm that the concrete is dry using a moisture meter before priming.
- pH test (if applicable): Ensure the concrete’s pH is within acceptable limits for your chosen primer and finish coats.
- Etching (if applicable): Verify that the surface has been properly etched to enhance primer adhesion.
- Cure-time reminder: Keep track of when you applied the primer, as topcoats should be applied within the recommended cure time.
Quick rule: Always prioritize safety gear. Upgrade tools as your skills improve.
Primer selection checklist
Choosing the right primer ensures better adhesion and stain resistance.
Quick rule: Always choose a primer that’s compatible with your concrete type and finish coats.
Visual and tactile checkpoints pre-topcoat
Before applying finish coats, ensure your surface is ready for optimal results.
Quick rule: Always inspect your surface visually and tactilely before applying finish coats to ensure it’s ready.
Safety, Cleanup, Disposal, and Warranties
Prioritize PPE, ventilation, and dust control; for older substrates, assume there may be lead-based paint and stop to arrange testing and follow local abatement rules if needed. Check product labels and safety data sheets for respirator recommendations, flashpoint and ventilation needs, and safe handling instructions.
Store primers sealed and labeled, follow cleanup guidance on the product label for solvents or cleaners, and dispose of waste per local regulations—confirm whether a material is hazardous before disposal. When reviewing warranties, compare the stated exclusions against your documented preparation and environmental records so you can determine if a product defect or improper application is the likely cause.
Safety and Lead Paint Warnings
When working with older substrates, be aware of the risk of lead paint. Lead exposure can cause serious health issues.
Wear appropriate PPE: gloves, goggles, and a respirator rated for lead dust (e.g., N100 or P100).
Contain dust with plastic sheets and use wet methods to minimize exposure. If you suspect lead paint, halt work, test the surface, and follow hazardous-material guidelines.
Cleanup and Disposal Best Practices
After application, clean tools thoroughly with appropriate solvents. Never mix solvents!
Contain concrete dust using HEPA vacuums or damp rags. Dispose of solvent-soaked rags in sealed, labeled containers according to local regulations.
Follow local waste disposal rules. Leftover primer and contaminated materials may be hazardous waste; check with your local waste management department.
Understanding Warranties and Manufacturer Support
Read product labels carefully. Understand that warranties often exclude improper prep, environmental conditions, and substrate moisture issues.
Keep documentation: photos of the surface before and after application, receipts, test notes (moisture readings, etc.).
If you suspect a defect, contact the manufacturer or retailer. Provide all relevant documentation. They may require samples or further testing.
Conclusion
Primer work pays off when you respect the prep, test thoroughly, and never skip protection. Doing it right now protects durability, appearance, and your safety long after the project is done.
Finish this with a simple check: verify a clean, dry surface, repair any damage, mask with care, choose the right primer for stains and surfaces, run small adhesion and compatibility tests in a hidden spot, apply per instructions in the right conditions, let it cure, and then proceed with the finish coat. Keep it logical and steady—one step at a time, and document what you did so you know what to repeat or adjust next time.
Avoid these common mistakes: skipping surface prep, using the wrong primer for stains or materials, and rushing tests or cure times. Always work in a well-ventilated area, wear a respirator when needed, and store materials sealed and off the floor. Do not apply a new coat over damp or peeling primer, and never skip cleanup or disposal steps that follow the manufacturer’s guidelines.
If the stain is stubborn, the surface is tricky, or you notice flaking, peeling, or unusual reactions during testing, call a professional rather than forcing a fix. A quick expert check can prevent costly damage and get you a durable finish faster. Stay deliberate, stay safe, and you’ll end with a job that looks good and lasts.
FAQ
What proper surface prep steps tighten up primer adhesion, especially on old paint or glossy surfaces?
Clean the surface to remove dirt, grease, and dust. Lightly scuff glossy finishes with a fine-grit pad so the primer can bite in. Always check the primer label for any prep notes and follow them to the letter.
How do I choose the right application method and technique for a DIY project?
Follow the primer’s instructions on brush, roller, or spray use. Apply in even coats with steady, overlapping strokes and avoid heavy buildup. If in doubt, test a small area first and compare how it adheres before committing to the whole job.
What are the dry time expectations under different temperatures and humidity levels?
Dry time depends on the product and the ambient conditions. Do not apply another coat until the previous coat feels dry to the touch and the surface isn’t tacky. If you’re unsure, check the product label or datasheet for your specific conditions.
What are the safe cleanup and disposal steps, and how do warranties factor in?
Wipe tools promptly and clean according to the product instructions. Dispose of rags and waste per local guidelines; some rags can be a fire risk if not handled properly. Warranties hinge on following label directions, surface prep, application method, and cure guidelines—check the manufacturer instructions for specifics.