
Introduction
Plaster is a harder-setting wall finish made from cement- or gypsum-based mixes, while joint compound is a softer, gypsum-based product meant for taping and small repairs. For DIYers that means plaster will hold up better in high-traffic areas and where impact resistance matters, and joint compound is easier to apply and feather for small patches. Check product labels and manufacturer instructions for cure times and recommended uses before you start.
Sanding feels different: plaster tends to be firmer and may need coarser or specialty abrasives and more effort, whereas joint compound sands very smoothly but creates fine dust that you should control. Paint finish also differs—plaster can give a denser, more uniform base and may require different priming than joint compound, which can absorb paint more; always follow primer and paint manufacturer guidance for best results. For application, think about tools and layers: plaster often needs scratch and brown coats, joint compound is applied in thinner finish coats—if unsure, check the product directions or ask a pro.
Key takeaways
- Plaster offers greater durability in high-traffic areas and long-term wear.
- Joint compound sands smoother but can dust more during long smoothing sessions.
- Paint finishes differ; plaster holds sheen differently than many joint compounds.
- Application skill varies: plaster requires lath work and control, joint compound simpler.
- Sanding and prep: plaster often requires less frequent sanding than compound.
- Safety and cleanup: wear masks for dust and seal work areas.
Table of Contents
- Introduction
- Key takeaways
- Quick Comparison: What Plaster and Joint Compound Are
- Durability and Long-Term Performance
- Application Process and Skill Level Required
- Sanding and Surface Preparation
- Paint Finish Outcomes and Aesthetics
- Cost, Time-to-Complete, and DIY Vs. Pro Considerations
- Safety, Prep, and Cleanup
- How to Choose — Decision Guide, Common Mistakes, and Maintenance
- Conclusion
- FAQ
Quick Comparison: What Plaster and Joint Compound Are
Plaster generally refers to traditional lime- or gypsum-based mixes applied with a trowel and chemically sets or carbonates; joint compound is gypsum-based and sold as either drying-type (air-dry) or setting-type (chemical set) formulations familiar under common trade names. Check product labels or the technical data sheet for exact ingredient notes and recommended substrates.
Use plaster when you’re matching historic or in-place plaster walls, or when a hard, trowel-applied finish is required; joint compound is common for drywall finishing, skim-coating, and small patch work. The core difference is chemistry—some plasters harden by a chemical reaction while joint compounds rely on drying or formulated set times—which changes working time, reworkability, sanding behavior, and how well the surface accepts paint and textures.
Material definitions and types
Choosing the right material is key to a successful finish. Here’s what you need to know about plasters and joint compounds.
- Joint Compound: Gypsum-based, setting-type compound. Widely used in new construction for taping and finishing drywall seams. Tip: Avoid using on exterior surfaces or areas with high moisture.
- Setting-Type Compounds: Chemical-hardening compounds that set and become rigid over time. Ideal for patching small holes and cracks. Caution: Not suitable for large repairs due to shrinkage during setting.
- Gypsum Plaster: Gypsum-based plaster, often used in new construction for plaster-in-place walls. Provides a smooth, durable finish. Tip: Ensure proper substrate preparation to prevent cracking.
- Lime/Portland Plasters: Lime or Portland cement-based plasters, commonly used in historic repairs and renovations. Offer excellent bond strength and crack resistance. Avoid: Using on interior surfaces without a suitable primer.
Material specs and standards explained
Understanding material specifications helps ensure you’re using the right product for your project. Here’s what to look for:
- Dryness: Check the moisture content of plasters and compounds. Ideal dryness levels range from 0.5% to 1%. Tip: Moisture meters can help verify dryness.
- Compressive Strength: Look for products with a compressive strength rating suitable for your needs (e.g., 800-2000 psi). Avoid: Using low-strength materials in high-traffic areas or load-bearing walls.
- Recommended Substrates: Follow manufacturer guidelines for recommended substrates. Incorrect substrate use can lead to bond failure and cracking. Caution: Do not apply plasters or compounds over incompatible surfaces without proper preparation.
Durability and Long-Term Performance
Durability here means resistance to abrasion, impact, moisture, and long-term dimensional stability; verify product technical sheets and consider substrate condition when judging expected performance. Plaster tends to create a harder, more abrasion-resistant surface but can be more brittle, while joint compound is usually more forgiving to minor flex but may soften or crumble if repeatedly exposed to moisture.
Anticipate cracking and shrinkage based on thickness, movement at joints, and cure method—proper prep, control joints or reinforcement, and staged application reduce risk. For high-traffic or high-humidity locations, confirm manufacturer guidance on moisture ratings and use appropriate sealers or finish coats; let durability priorities (wear vs. ease-of-repair) guide the material choice and follow curing recommendations to extend service life.
Impact, abrasion, and wear resistance
When it comes to durability, both plaster and joint compound have their strengths. Plaster is harder and more resistant to impact and abrasion due to its higher cement content. It’s a better choice for high-traffic areas where you need something tough that can take a beating.
Joint compound, on the other hand, is softer and more flexible. It’s less likely to crack or chip under minor impacts but may show wear over time with repeated use. For low-traffic areas or repairs that won’t see much foot traffic, joint compound might be just fine.
The thickness of your application matters too. Thicker layers provide better protection against impact and abrasion. But be careful not to apply too thickly as it can lead to cracking over time. Reinforcement with mesh or skim coat can also enhance durability.
Movement, cracking, and adhesion over time
Substrate movement is a common cause of repair failure. Plaster has less flexibility to accommodate movement, making it more susceptible to cracking if the substrate moves. Joint compound, being more flexible, can handle some movement without cracking.
Shrinkage cracks are another issue. Both materials can crack due to shrinkage during drying, but plaster is more prone to this due to its higher cement content. Proper substrate preparation, including priming and ensuring a sound surface, can help prevent this.
Adhesion over time depends on proper prep too. Ensure the surface is clean, dry, and free of contaminants for better adhesion. For plaster, applying a bonding agent can also improve long-term adhesion.
Moisture and mold considerations
Moisture tolerance is crucial in areas like bathrooms or basements. Here, cement-based plasters or moisture-rated joint compounds are your best bet. They’re more resistant to moisture damage and mold growth compared to regular joint compounds.
Avoid using regular joint compound in high-moisture areas as it can soften, crumble, or support mold growth over time. Even with moisture-rated compounds, ensure proper ventilation and consider applying a mold-resistant primer before repairs.
In freeze-thaw cycles common in colder regions, both materials can be affected. Plaster may crack due to its brittleness, while joint compound might crumble if not properly protected or reinforced. Always apply a suitable sealant after repairs in such areas.
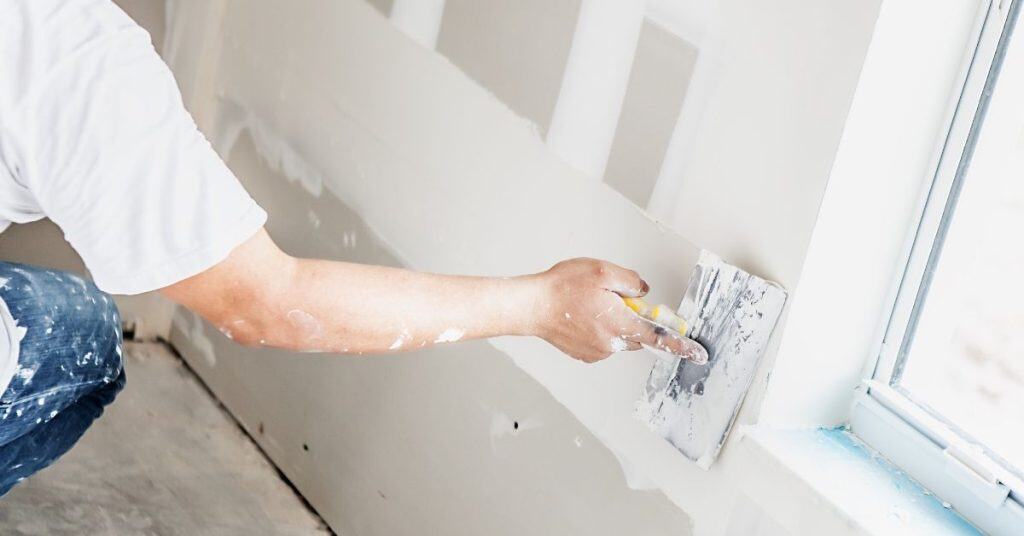
Application Process and Skill Level Required
Start every repair by assessing moisture, substrate type, and structural soundness; inspect edges, existing coatings, and check manufacturer instructions to pick plaster or joint compound. Prep includes PPE, cleaning, masking, and sometimes priming or bonding agents—each step affects adhesion and final durability.
Small patches are low-skill: clean, dampen if required, apply a thin coat, feather edges, allow cure, then sand and prime; judge readiness by the product’s stated indicators rather than elapsed time alone. Full skim coats and large restorations need progressive passes, possible lath or mesh reinforcement, and tighter environmental control—these move from beginner to intermediate or advanced and require trowels, wide knives, mixing equipment, and practice to avoid common defects.
Setting vs. drying compounds and work windows
Alright, listen up. You’ve got two types of concrete repair compounds here: setting-type and drying-type. Know the difference before you start slapping stuff on your cracks.
Setting-type compounds, they cure by chemical reaction. That means once you mix ’em, you’ve got a limited time – called pot life – to get ‘er done. Check the product label for that. Typically, it’s around 30-60 minutes. After that, it starts setting and you can’t stop it.
Now, drying-type compounds, they cure by evaporating moisture. No pot life here, but once applied, they take a while to fully harden – sometimes days or even weeks. Depends on the product and your job site conditions. Check the manufacturer’s instructions for specifics.
Here’s where it gets tricky: setting-type compounds are great for multi-layer repairs ’cause you can build up in layers before it sets. But, you gotta work fast. Drying-type compounds, they’re better for thin, single-layer repairs ’cause they take so long to cure. And remember, neither likes cold or wet conditions – check your local rules and product labels for safe working temps.
Typical step-by-step repair workflows
Here are three common concrete repair workflows for DIY homeowners. Each process starts with brief surface preparation, so refer back to that section if needed.
- Small Hole Repair (1-2 inches):
– Action: Apply setting compound into the hole using a trowel or putty knife.
– Why: Fills voids and prevents further deterioration.
– Check: Ensure the compound is level with the surrounding surface.
– Wait: Allow it to set for 30-60 minutes before troweling smooth. - Joint/Large Patch Repair (2+ inches):
– Action: Apply bonding adhesive to the repair area and surrounding joint.
– Why: Enhances adhesion between old and new concrete.
– Check: Ensure the adhesive is evenly applied and not too thin.
– Wait: Allow it to tack (become slightly tacky) before applying repair mortar. - Repair Mortar Application:
– Action: Mix repair mortar according to manufacturer’s instructions and apply using a trowel or squeegee.
– Why: Restores the structural integrity of the concrete.
– Check: Ensure the mortar is fully compacted and no voids remain.
– Wait: Allow it to cure for 24-72 hours before applying a sealant or final finish. - Finishing (Small Hole & Joint/Large Patch):
– Action: Trowel the surface smooth and level, following manufacturer’s instructions for finishing techniques.
– Why: Ensures a uniform appearance and prevents water from pooling.
– Check: Inspect the finished surface for any imperfections or low spots. - Full Skim Coat Application:
– Action: Apply skim coat mortar over the entire repair area using a trowel or squeegee.
– Why: Provides a smooth, even surface for painting or other finishes.
– Check: Ensure the skim coat is evenly applied and no thin spots remain.
– Wait: Allow it to cure for 24-72 hours before applying final finish. - Sealing (Small Hole, Joint/Large Patch & Full Skim Coat):
– Action: Apply a concrete sealant according to manufacturer’s instructions.
– Why: Protects the repaired area from moisture and further deterioration.
– Check: Ensure the sealant is evenly applied and no missed spots remain.
Pro tip: Always follow manufacturer’s instructions for mixing, application, and curing times. These guidelines are specific to their products and ensure optimal performance.
Tools and materials checklist
Before you start your repair, use this checklist to ensure you have everything you need. This will save you time and prevent costly mistakes.
- Safety gear: Check that you have a dust mask, safety glasses, and work gloves. Ensure the dust mask is rated for drywall dust (P100 or N95).
- Taping knife: Inspect your taping knife(s) to ensure they are clean, straight, and in good condition. You’ll need a 4″ or 6″ knife for joint compound application and a 12″ knife for embedding mesh tape.
- Joint compound: Check that you have the correct type of joint compound for your repair (setting vs. drying). Ensure it’s within its expiration date and has been stored properly.
- Mesh drywall tape: Inspect your tape to ensure it’s not damaged or torn. Check that it’s the right width for your taping knife (usually 2″ or 3″).
- Sandpaper or sanding screen: Ensure you have 120-grit sandpaper or a sanding screen for smoothing and finishing the repair.
- Measuring tape: Check that your measuring tape is in good condition and accurate. You’ll need it to measure and cut drywall patches.
- Utility knife: Inspect your utility knife to ensure it’s sharp and has a secure blade holder. You’ll need this for cutting drywall and mesh tape.
- Drywall screws or nails: Ensure you have the correct fasteners for attaching drywall patches. Check that they are long enough to penetrate the studs behind the drywall (usually 1-1/4″ or 1-5/8″).
- Optional: Professional equipment: If available, check that you have a drywall saw, power sander, or oscillating tool for cutting and sanding drywall patches.
Quick rule: Always double-check your measurements before making cuts. Improperly sized drywall patches are a common cause of rework.
Sanding and Surface Preparation
Sanding difficulty varies: many plasters sand to a harder, sometimes powdery finish and may require coarser initial abrasion, while joint compound usually sands easily but produces fine dust; check the product guidance for recommended methods. Expect different dust profiles and follow label recommendations for respirators and dust control measures.
Use wet-sanding where a product permits it to reduce airborne dust, otherwise employ HEPA vacuums, dust barriers, and pole sanders for high walls. Prep for paint by verifying a clean, dry substrate, repairing gouges, feathering edges smoothly, and using the primer the manufacturer suggests to ensure uniform adhesion and appearance.
Sanding techniques and dust control
When sanding plaster or joint compound, choose the right grit for a smooth finish. For plaster, start with 120-grit sandpaper, then progress to 150 or 220 for a fine finish. Joint compound responds well to 120-150 grit.
Use manual sanding for small areas and electric sanders for larger surfaces. Plaster is more delicate; use light pressure. Joint compound can handle more.
Dust control is crucial. Wear a respirator rated for dust particles. Connect your sander to a vacuum or use wet-sanding to minimize mess. Keep windows closed and dampen doors to contain dust.
When and how to skim coat instead of heavy sanding
A skim coat can save time and effort. Apply it when you need a uniform, smooth surface quickly. It’s ideal for plaster repairs as it maintains the material’s durability.
Mix your compound thin (about the consistency of heavy cream). Apply with a wide-blade trowel or hawk and knife in thin, even coats. Let each coat dry completely before sanding lightly with 220-grit paper.
Skim coating works best on large areas. For small repairs, sanding may be faster. Always test your method on a small area first.
Time and labor implications of finishing
Sanding plaster takes more time due to its delicate nature. It requires lighter pressure, slower sanding, and more frequent checking for smoothness.
Joint compound is faster to sand but may require more coats if not applied correctly initially. Both materials need thorough surface preparation before painting.
Scheduling your project around these labor implications is crucial. Allocate extra time for plaster repairs and consider applying joint compound in advance to allow for multiple sanding sessions.
Paint Finish Outcomes and Aesthetics
How a surface accepts primer and paint depends on porosity and finishing technique; consult the primer product label for compatibility with plaster or joint compound. Plaster can be more absorbent and may need sealing; joint compound often requires a leveling primer to avoid sheen and color inconsistencies.
Critical lighting reveals flaws like flash lines, sanding halos, or mottling—prevent these with consistent feathering, matched skim thickness, and proper priming. Control temperature and humidity during drying and follow finish-coat recommendations to minimize roller marks, shade mismatch, and other visible defects.
Priming and Paint Adhesion Best Practices
Plaster and joint compound have different porosities, affecting how they accept paint. Here’s how to prime each for optimal results.
Joint Compound: Use an acrylic primer or shellac to seal the surface before painting. This prevents tannins from bleeding through and ensures even paint adhesion. Apply two thin coats, allowing 30 minutes of drying time between coats.
Plaster: Plaster is more porous than joint compound. Seal it with a primer designed for high-porosity surfaces, like an oil-based or shellac primer. Apply one to two coats, waiting at least an hour between each.
Critical Lighting and Visible Imperfections
Raking light can highlight imperfections in your finish. Here’s how to minimize these issues:
Both plaster and joint compound can show flash lines (visible seams) under critical lighting. To avoid this, ensure you’re feathering out the edges of your repairs properly.
Plaster may show mottling, or uneven coloration, due to its porosity. To minimize this, use a high-quality primer and paint designed for porous surfaces. Joint compound is less prone to mottling but can still show roller marks. Use a fine-foam roller for smooth application.
Matching Texture and Blending Repairs
The key to blending repairs is matching the existing wall’s texture. Here’s how:
Plaster: Use a joint compound with similar texture to your existing plaster. Apply thin coats, allowing each to dry completely before sanding lightly. This helps maintain the original texture.
Joint Compound: Match the texture of your existing compound by using the same type (lightweight, all-purpose, etc.). Apply thin coats, feathering out the edges to blend with the surrounding wall. Sand lightly between coats for a smooth finish.
Cost, Time-to-Complete, and DIY Vs. Pro Considerations
Cost drivers include material choice, ancillary supplies, and labor—check current local prices and product coverage sheets for accurate estimates. Rework risk and finish quality affect total cost; mistakes that require extra coats or extensive sanding increase both time and expense.
Time-to-complete depends on prep, cure times between coats, and the scope of work; evaluate whether your schedule and access to tools justify DIY or if hiring a pro reduces rework risk. Use a simple checklist—project size, skill level, finish expectations, and downtime tolerance—to decide, and get detailed quotes that state scope, drying expectations, and any warranty before hiring tradespeople.
What to check when estimating cost
Before you start any repair, run through this checklist to get an accurate estimate of costs.
- Material prices: Check local hardware stores or suppliers for plaster and joint compound. Prices vary by region and brand.
- Contractor hourly rates: If hiring help, call around for quotes. Rates can differ significantly.
- Disposal fees: Find out if there are any disposal costs for old materials or waste.
- Scaffolding needs: Estimate if you’ll need to rent scaffolding or other access equipment.
- Specialty tools: Check if you need to buy or rent special tools. Prices vary.
- Tape, primer, sealant: Don’t forget these essentials. Their prices add up.
- Labor rates (if pro): Some pros charge hourly, others by the project. Know which you’re dealing with.
- Rework risk: Consider potential extra costs due to cracking or needing multiple coats.
Quick rule: The more you check upfront, the fewer surprises later.
Project timelines and cure/dry times
Understand these timelines to plan your project effectively.
Joint compound repairs usually take longer due to multiple coats. Each coat needs 24 hours to dry before sanding and applying the next. Total time depends on patch size, but expect at least three days for small patches and up to a week for large areas.
Setting plasters cure faster—often within 24-72 hours—but they require careful timing between coats (usually 15-30 minutes).
Cure time affects repaint scheduling: Joint compound needs at least 30 days to fully cure before painting. Setting plasters can be painted after 24 hours, but a full cure takes up to 28 days.
Safety, Prep, and Cleanup
Dust from sanding and mixing contains respirable particles and can include silica depending on the mix; follow manufacturer safety data sheets and local guidance on exposure limits. Use appropriate PPE—N95/P100 or better respirators, eye protection, gloves, and coveralls—especially for extended or high-dust tasks.
Contain the work area with barriers, use local exhaust or HEPA-filter vacuums, and follow safe mixing practices shown on the product label to avoid splashes and dust clouds. Clean up with HEPA vacuums and damp wiping, bag waste per local rules, and replace or launder contaminated PPE as directed.
Personal Protective Equipment and Ventilation
Safety first, buddy. Here’s what you need to protect yourself and keep dust under control.
- Respirator: N95 or P100 for most jobs. Elastomeric for heavy duty. $20-$60.
- Eye Protection: Safety glasses or goggles. $5-$15.
- Skin Protection: Long sleeves and gloves. $10-$30.
- Coverall: Washable or disposable. $5-$20.
- Ventilation: Shop fan to pull dust away. $10-$30. Seal off work area, keep doors shut.
Safe Mixing, Disposal, and Cleanup
Mixing right keeps you safe and gets the job done. Here’s how:
Mixing: Follow ratios, add dry to water slow, stir smooth. No splashing, no aerosol.
Leftover Mix: Keep sealed tight, use within 30 min. Dispose if it sets hard.
Cleanup: HEPA vacuum first, then damp-mop surfaces. Bag and label waste per local regs. Proper PPE disposal after job completion.
How to Choose — Decision Guide, Common Mistakes, and Maintenance
Match material to scenario: small holes and drywall repairs usually favor joint compound; historic or whole-wall plaster work commonly needs plaster to match performance and appearance—check the substrate and product instructions before starting. Create a short, scenario-based checklist covering prep, adhesion method, number of layers, and priming so you don’t skip critical steps.
Common mistakes include using the wrong material for moisture-prone areas, skipping bonding agents, and over-sanding; these cause poor adhesion, visible defects, or premature failure. Set up a maintenance plan—periodic inspections for moisture, hairline cracks, or delamination—and follow simple remedial steps (spot patching, resealing, or repainting) to prolong the repair’s life.
Step-by-Step Process
Follow this clear, numbered sequence to successfully choose the right material for your repair, avoid common mistakes, and maintain your repairs over time.
- Preparation: Gather materials, wear PPE, ensure proper ventilation. Safety first!
- Assess Damage: Identify type of damage (hole, water, historic, high-end), check substrate condition.
- Choose Material: Refer to decision guide below. Plaster or joint compound? Why?
- Apply & Finish: Follow specific steps for chosen material, bond well, embed tape/mesh properly, sand lightly, prime.
- Final Checks & Cleanup: Inspect work, touch up if needed. Proper cleanup prevents future issues.
Decision checklist by project type
Use this checklist to pick the right material for your repair based on size, substrate, exposure, and finish requirements.
- Small Hole (<1/4″): Joint compound is quick and easy. Plaster may be overkill.
- Water Damage: Plaster resists moisture better. Use joint compound with added primer for extra protection.
- Historic Plaster: Match existing material to maintain authenticity. Consult a pro if unsure.
- High-End Finish: Plaster offers superior aesthetics. Ensure proper application and curing for best results.
- Exterior Exposure: Plaster is more durable outdoors. Joint compound may need added protection.
- New Drywall: Joint compound is standard. Plaster can add unique texture but requires extra skill.
- Large Repair (>1/2″): Plaster offers better strength and flexibility. Use joint compound with mesh for support.
- Paint Compatibility: Both materials accept paint well. Test-fit first to ensure desired finish.
Quick rule: When in doubt, consult a pro or test small areas first.
Common mistakes and how to avoid them
Learn from these frequent errors to ensure your repair lasts.
- Skipping Bonding Agent: Without it, material won’t stick. Always use a bonding primer.
- Improper Tape/Mesh Embedding: Inadequate embedding leads to cracks. Press firmly and evenly.
- Over-Sanding: Excessive sanding removes material, weakens repair. Sand lightly, just enough to smooth.
- Neglecting Priming: No primer means poor paint adhesion. Always prime before painting.
- Ignoring Moisture Exposure: Without proper protection, repairs can fail due to moisture intrusion.
Regularly inspect your work and touch up as needed to prevent these common mistakes from turning into major issues.
Long-term maintenance and inspection schedule
Follow this simple checklist to prolong the life of your repairs and spot early failures.
- Annual Inspection: Check for hairline cracks, peeling paint, or delamination. Address minor issues promptly.
- Moisture Checks: Inspect areas prone to moisture intrusion (bathrooms, kitchens).
- Re-coat Intervals: Every 5-7 years, touch up repairs with a thin layer of matching material for added protection.
- Paint Touch-ups: Re-paint areas as needed to maintain finish and protect the repair.
- Temperature Fluctuations: Extreme temperature changes can cause cracks. Monitor and address as necessary.
Quick rule: Regular maintenance is key to preventing small issues from becoming big problems down the line.
Conclusion
Choosing between plaster and joint compound comes down to durability, how you plan to finish the surface, and how careful you are with prep and safety. Do the work right, and you’ll avoid repeat repairs and a poor-looking finish.
First, assess the wall and your goal, then decide which material fits: if you want a very smooth, long-lasting surface on plaster walls, plan for careful mixing, consistent application, and thorough sanding before paint; if you’re repairing drywall joints or small areas, lean toward joint compound and follow the mixing, setting, and feathering steps in a clean, controlled sequence. Tackle the job in clear steps: prep the area, apply in thin, even coats, sand between coats, and test paint finish in a small corner before committing the whole wall.
Common mistakes to avoid include using plaster on drywall where it isn’t required, over-sanding and dulling the texture, and skipping proper prep or ventilation. Safety rules are simple: wear eye protection and a mask, keep the area well ventilated, cover furniture and floors, and test a small area first before committing to the full repair. Never rush the drying times or skip cleanup—moisture and dust can bite back later.
If you’ve got large cracks, water damage, active movement, or ceilings, or you’re unsure about the wall type, call a pro instead of guessing. When you handle the basics with care, you’ll finish with a solid repair and a paint-ready surface you can be proud of. Stay deliberate, stay safe, and move forward with confidence.
FAQ
How does durability compare plaster vs joint compound for repairs?
Plaster tends to be more rigid and less prone to shrinks if the base is solid. Joint compound can be durable when applied correctly, but it relies on the underlying surface and proper layering. Check product instructions and local rules for any max layer limits and compatible substrates.
What about sanding? Which is easier to sand and what should I expect?
Plaster dust can be tougher to sand and may require more effort to achieve a smooth edge. Joint compound generally sands easier and can feather into surrounding drywall, but it can crumble if damp or overheated. Wear a mask and use the right grit; follow manufacturer guidance for sanding limits.
Will the paint finish look different on plaster versus joint compound?
Plaster usually gives a very solid, traditional look with fewer pinholes if applied and cured properly. Joint compound can also look smooth with good finishing and priming, but it may show joints or punch holes more if the surface isn’t paired with a proper base. Use the recommended primer for the chosen material and check the label.
What is the typical application process for plaster vs joint compound?
Plaster requires a solid backing (like lath or a known plaster base) and multiple thick coats to build up the finish. Joint compound goes on in thinner layers over drywall and dries faster, with sanding between coats. Always follow the manufacturer’s instructions and local guidelines for substrate prep and drying/curing times.