Introduction
Remove curing compounds before coatings to ensure proper adhesion and a clean, durable finish.
The guide walks through how to test for residual film, choose practical stripping methods, and apply steps that balance effectiveness with surface safety, so you’ll know what to check and how to proceed in real-world applications.
Key takeaways
- Test cure film compatibility on sample areas before full surface stripping.
- Visual indictors include powdery haze, persistent sheen, and color separation.
- Use low-pressure water rinse to assess film looseness without damage.
- Select stripping method based on concrete porosity and odor control needs.
- Address cracks and joints with epoxy injections or sealant compatible with coatings.
- Document test results, rinse verification, and adhesion check before coating.
Table of Contents
- Introduction
- Key takeaways
- Why removing curing compounds matters
- Initial inspection and visual checkpoints
- Key specs and numbers that matter (without a datasheet)
- Methods to remove curing compounds and contaminants
- Step-by-step field procedure: test, strip, verify
- Addressing cracks, joints, and localized issues
- Safety, environmental, and waste-management protocols
- Cost, timeline, and choosing the right method
- Conclusion
- FAQ
Why removing curing compounds matters
Curing compounds left on the surface can interfere with adhesion and film formation. Residual film can trap solvents, cause pinholes, or create a milky sheen that signals poor cure release. Different coatings respond differently, so you may see milky halos with epoxy, pronounced pinholing with polyaspartic, or edge delamination around curing agents with urethane.
Testing and removal decisions hinge on observed failures and the coating type you plan to apply. Check the product label, manufacturer instructions, or data sheets for guidance, and note safety and ventilation needs when using removers or mechanical tools. Use practical checks to determine readiness before proceeding with coatings or targeted cleaning.
How curing compounds interfere with adhesion
Curing compounds form a barrier film on the surface after concrete curing. This film is designed to protect the concrete from moisture loss and ensure proper hydration. However, if not removed, it can cause issues when applying coatings.
The most common types of curing compounds are wax-based, acrylic, or silicone. These films create a physical barrier that prevents adhesion between the coating and the substrate.
Visually, you might see a shiny or glossy surface where the film is present. Adhesively, coatings may not stick well to the surface, leading to issues like poor film formation, pinholes, fisheyes, and eventually delamination.
When removal is required vs. when testing suffices
Not all curing compounds need to be removed before applying a coating. Some can be tested and left if they pass the tests, while others must be stripped off regardless.
Here are some decision rules:
- Immediate removal is required when the film is thick, visibly present, or fails adhesion tests (like tape pull test).
- Spot remediation may suffice if only small areas fail tests. Remove these spots and proceed with coating.
- Proceed with coating after testing if the surface passes all tests and manufacturer guidance allows it.
Initial inspection and visual checkpoints
The goal is to establish a baseline and spot suspected curing-compound films before stripping or testing. Visual cues guide where to focus more thorough checks or patch tests. This quick survey helps decide whether spot testing or full-surface assessment is needed.
Look for dull patches, color variance, and a chalky or powdery appearance. Note edge transitions around joints or form-release residues that may indicate surface contamination. Record these observations to map contamination density and plan the prep strategy.
Quick field checks: water and solvent tests
Before you start stripping, use these quick tests to confirm curing compound presence.
- Water Bead Test: Spray a light mist. If water beads up and doesn’t spread, film is present. If it wets the surface, it’s likely bare concrete or previously stripped.
- Isopropyl Alcohol Rub Test: Apply a small amount to a white cloth, rub firmly in a 2×2 inch area. If the film transfers to the cloth, it’s curing compound. If not, it’s probably just dirt or residue.
- MEK (Methyl Ethyl Ketone) Rub Test: Use this if isopropyl alcohol doesn’t work. Follow same steps as above. MEK evaporates quickly, so work fast.
- Avoid skipping these tests: They help you target stripping efforts and prevent unnecessary product waste.
Quick rule: If both tests fail to show film, consider retesting or consulting a professional before proceeding with coatings.
Measuring surface profile and roughness
Before applying any coating, ensure the surface has enough ‘tooth’ for good adhesion.
- Replica Tape: Press a piece of replica tape onto the surface, then peel off and examine under a microscope or compare to profile standards. Aim for 3-8 mils (0.003-0.008 inches) for most coatings.
- Profile Comparison Plates: Hold plates against the surface. Matching plate indicates suitable profile. If none match, consider light surface preparation or consult coating manufacturer.
- Avoid skipping this step: Insufficient profile can lead to poor adhesion and coating failure.
Quick rule: For best results, aim for a surface profile within the recommended range for your chosen coating.
Key specs and numbers that matter (without a datasheet)
The aim here is to identify the curing compound family and get a feel for film thickness using on-site cues. This helps choose an initial removal approach without pulling a full data sheet.
On-site tests include solvent responses, sheen changes after abrasion, and rough-thickness cues from simple tape tests. These results guide whether you should pursue chemical removal, mechanical profiling, or a targeted wipe. Use lab-oriented ideas only as a reference if you have access to a small test panel.
Recommended on-site tests and how to document results
Before you start stripping, do some quick tests. These help identify the curing compound and estimate film thickness.
Water Break Test (ASTM D2247): Pour water onto the surface. If it beads up or doesn’t spread evenly, you’ve got a water-repellent film like wax or silicone.
Solvent Wipe Test (ASTM D4752): Use common solvents – acetone, isopropyl alcohol, or methyl ethyl ketone. Apply with a cotton swab. If the film dissolves or wipes away easily, note which solvent worked best.
Record your findings in a simple table: Test Name | Result | Observations. This helps track progress and ensures everyone’s on the same page.
When to send samples for lab analysis
Sometimes, on-site tests aren’t enough. Here are times when you should consider sending samples to a lab:
Ambiguous Film: If your on-site tests give conflicting results or you can’t identify the film, send samples.
Liability Risk or Warranty-Critical Projects: For high-stakes jobs, lab confirmation provides peace of mind and protects both you and the customer.
Request these from the lab: Film identification (type, composition), FTIR analysis for polymer identification, and adhesion simulation to check how well your stripping method will work. Follow their instructions for sample collection and packaging.
Methods to remove curing compounds and contaminants
Set clear goals for surface readiness and avoid substrate damage. The surface should be open to coatings with no residual film that could block adhesion. Plan your method around keeping porosity and profile suitable for the chosen coating system.
Mechanical methods like scarifying or grinding change the surface profile and generate dust, while chemical methods rely on solvents or degreasers to dissolve residues. Hybrid approaches combine steps for tough films and may reduce downtime. Always consider safety, ventilation, and waste handling as you choose a sequence.
Mechanical methods: shot blasting, diamond grinding, and scabbling
These methods physically remove curing compounds by creating a new surface profile. They’re effective when you need to ensure pore openness for coatings.
Shot Blasting: Uses abrasive media (like steel grit or glass beads) propelled at high speeds. It creates a deep profile, up to 10 mils. Equipment is heavy and requires proper containment for dust control.
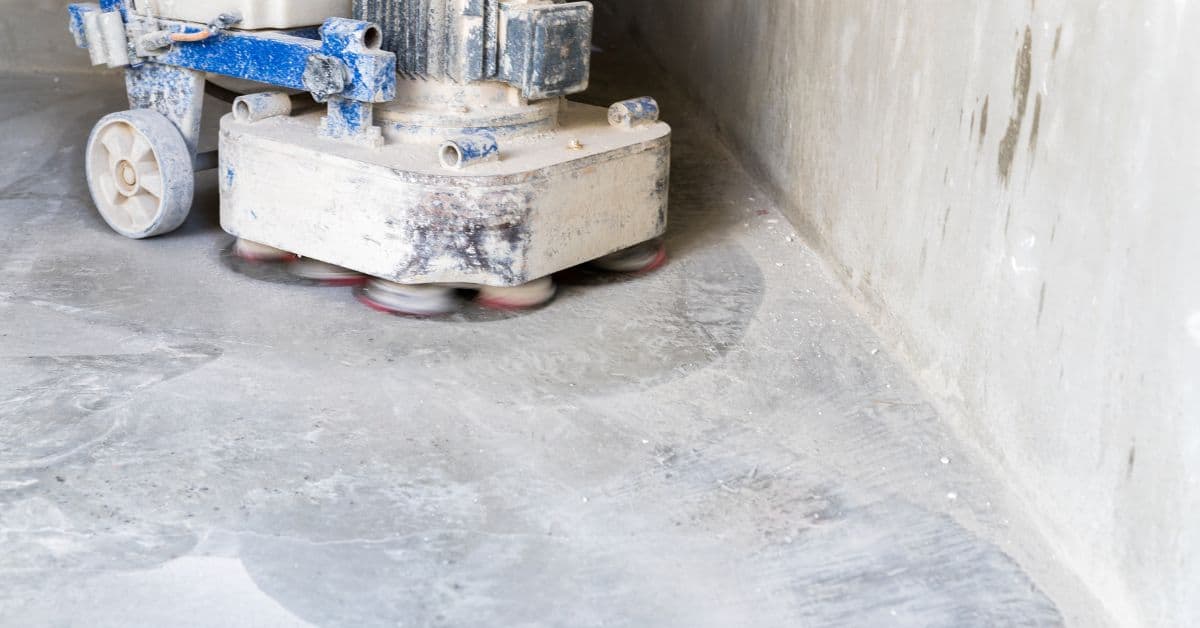
Diamond Grinding: Uses diamond-impregnated blades or discs to remove material. It’s gentler than shot blasting but still effective. Dust control is easier with vacuum attachments. Depth removal is around 5 mils.
Scabbling: Uses a hammer-like tool with teeth that chip away at the surface. It’s ideal for small areas and hard-to-reach spots. Depth removal varies, typically less than shot blasting or grinding.
Chemical and detergent stripping
Chemical strippers dissolve curing compounds, making them easy to wipe off. They’re safe for most surfaces but require careful handling.
Cleaners/Degreasers: These are mild solvents that remove light residues. They’re safe to use but may not be strong enough for tough films. Neutralize with water after application.
Striping Compounds: These are stronger, typically containing caustic soda or other harsh chemicals. They require neutralization and thorough rinsing. Always check compatibility with your coating before use.
Safety is paramount when using chemicals. Wear gloves, eye protection, and a respirator. Keep the area well-ventilated.
Low-pressure water blasting and hydrodemolition considerations
Water blasting uses high-pressure water jets to remove curing compounds. It’s eco-friendly but less aggressive than mechanical methods.
Pressures range from 5,000 to 40,000 psi. Check with your equipment supplier for safe ranges. Flow rates vary depending on the nozzle size. Water blasting can leave surfaces wet, so allow time for drying before applying coatings.
Hydrodemolition is a specialized form of water blasting using ultra-high pressures (up to 60,000 psi). It’s used for deep removal but requires expert operation and proper safety measures.
Water methods are appropriate when you want to minimize surface damage or dust. However, they may not be as effective as mechanical methods for tough films.