
Introduction
Intermittent leaks occur when weather, temperature shifts, or hidden damage align to reveal a problem.
The guide walks through practical steps, common situations, and simple tips to diagnose causes, reduce risk, and make responsible repair decisions.
You’ll learn how to assess when a leak is likely to reappear and what general actions to take to address the issue safely.
Key takeaways
- Inspect attic for moisture staining and dark streaks after rain or heavy dew
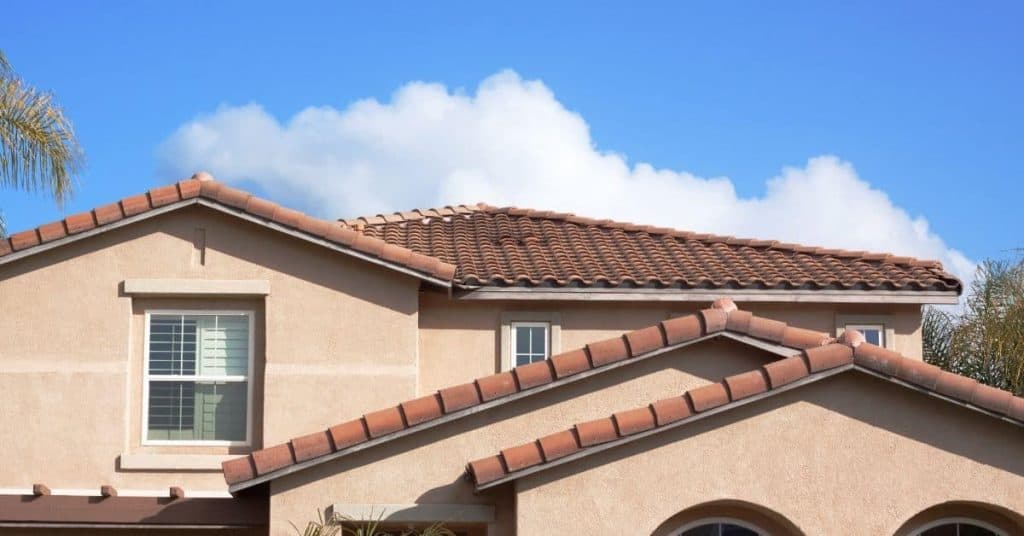
- Check roof flashing, shingles, and joints for loose or damaged areas
- Use a flashlight and mirror to trace water intrusion paths from ceiling
- Dry and document leaks during dry weather to compare with rainfall events
- Schedule professional assessment for recurring leaks after attempting safe DIY fixes
- Maintain a seasonal maintenance plan including roof clearance and gutter checks
Table of Contents
- Introduction
- Key takeaways
- How intermittent roof leaks happen
- Identifying signs of a leaky roof
- DIY methods to find the leak source
- Tools, materials, and safety precautions
- Basic DIY fixes for common intermittent problems
- Common DIY mistakes and how to avoid them
- When to call a professional and cost considerations
- Long-term prevention and maintenance plan
- Conclusion
- FAQ
How intermittent roof leaks happen
Intermittent roof leaks show up only when the weather and the roof line cooperate in just the right way. Seasonal storms, wind-driven rain, temperature swings, clogged gutters, and the way water moves across slopes and through valleys can all let a small defect appear as a leak only under certain conditions. A tiny gap or a buckled joint might stay dry most days, then suddenly reveal itself when rain intensity or wind direction changes, or when gutters overflow and redirect water to a vulnerable spot.
Understanding this matters because it guides what to check and when to check it. Look for how the roof geometry channels water, where valleys and transitions might concentrate flow, and whether flashing or penetrations move or fail to seal under pressure or heat. Also inspect gutters, downspouts, and any decking movement or thermal expansion that could open gaps, and use weather-correlated observations and attic moisture clues to separate true leaks from condensation or non-leak moisture.
Causes tied to weather and seasonality
The roof can be a ticking time bomb during heavy rain, especially if the downspouts are clogged or the gutters overflow. Wind-driven rain is another culprit, pushing water into small gaps where it wouldn’t normally go. In winter, freeze-thaw cycles create ice dams that back up water under shingles and cause leaks when temperatures rise.
Snow melt can also lead to intermittent issues. As snow melts and refreezes, icicles form at the eaves or in valleys, causing water to pool and eventually leak through small openings. Strong winds during storms can shift water from one side of the roof to another, revealing weaknesses that might not be apparent on calm days.
Temperature swings are a key factor too. When it gets cold enough for ice dams to form, warm air inside your attic melts snow on the roof’s surface. This creates standing water which then refreezes when temperatures drop again, pushing water under shingles and into your home.
Structural and material causes
The materials used in roofing play a critical role in how often leaks occur. Over time, these materials degrade due to UV exposure, temperature fluctuations, and physical wear.
- Aged shingles: Look for cracking or curling edges; replace them with high-quality asphalt shingles rated for your climate.
- Flashing failures: Check around chimneys and vents for gaps or rusted metal; use galvanized steel or copper flashing to prevent corrosion.
- Cracked underlayment: Inspect the felt paper underneath shingles for splits; install a synthetic underlayment that’s more durable.
- Inadequate slope: Ensure your roof has enough pitch to shed water effectively; consult with an architect or roofing expert if unsure.
Interior and secondary causes
Problems inside the attic can mimic intermittent leaks from outside. Plumbing vents, HVAC units, and other penetrations through the roof deck are common areas for issues.
Clogged or improperly vented plumbing fixtures can cause water to back up in pipes, leading to condensation and eventual leakage. Similarly, improper insulation around these penetrations allows warm air to rise into cold attics, causing ice dams that lead to leaks when they melt.
Attic condensation is another sneaky issue. When humid air meets cold surfaces like ductwork or vent pipes, it can form water droplets which drip down and appear as roof leaks. Make sure your attic has proper ventilation and insulation to prevent this buildup of moisture.
Identifying signs of a leaky roof
Look for ceiling and wall stains, mold or mildew, musty odors, peeling paint, and soft or sagging spots inside. Outside, inspect shingles for damage, missing granules, curling edges, and any lifted flashing around valleys, chimneys, vents, or skylights. Observe during or after rain to note leak timing and map patterns on ceilings.
Document where water travels and use chalk or tape to mark a leak line, then photograph or video for planning repairs. This helps you separate roof, plumbing, or HVAC sources and plan safe, effective fixes. Always prioritize safety: avoid unsafe roof work, use a sturdy ladder and a buddy, and check local rules for disposal and access.
Interior signs and how to document them
Start by checking your ceilings for any stains or discoloration. Look closely at walls too, especially around windows and doors where water might be seeping in. If you spot anything unusual, use a camera to take clear photos from different angles. Note the exact location with tape or chalk marks so you can track changes over time.
Pay attention to musty smells and mold growth, which often indicate hidden leaks behind walls or under floors. Soft spots on drywall or plaster are also signs of water damage. Document these areas carefully by taking detailed photos and noting the date and conditions when the leak occurred.
To better understand the timing of your roof leaks, observe during rain events. Map out where the water is dripping inside using a grid system if needed. This will help you trace back to potential entry points on the roof or other parts of your home’s structure.
Exterior and attic inspection checkpoints
Inspect your roof right after a rain event when wet spots are still visible. This is also good for checking gutters, downspouts, and flashing.
- Shingles: Check for missing granules or curled edges. Replace damaged ones to prevent leaks.
- Flashing: Look around chimneys, vents, and skylights for lifted or cracked pieces. Proper sealing is crucial here.
- Gutters: Clear out debris regularly to avoid overflow issues that can lead to roof damage.
- Valleys: Inspect where two roof planes meet. Water pooling here means a problem area.
- Roof sheathing: Check for soft spots or signs of rot, especially under shingles. Replace damaged wood immediately.
- Vents and pipes: Ensure all penetrations are sealed properly with flashing to prevent water intrusion.
- Attic insulation: Look for wet patches or condensation on the underside of roof sheathing. This can indicate a leak above.
Quick rule: Regular inspections save big headaches and costly repairs down the road.
DIY methods to find the leak source
DIY methods to locate a leak source start with safety and a clear plan: wear PPE, ensure ladder stability, and turn off power to attic spaces before you begin. Use a spray nozzle hose with adjustable patterns, leak-catching trays, and a moisture meter if available, and follow a simple pre-test checklist to avoid over-wetting or creating secondary damage. Reproduce the leak in controlled, incremental stages across key roof zones—drain peaks, flashing joints, chimney and vent penetrations—so you can observe exactly where dripping begins and how it travels through the system, then document each step for later comparison.
This approach matters because methodical testing reduces guesswork and helps you isolate the source without overloading the structure or the interior. It gives you a repeatable process you can follow during rain or after controlled wetting, guiding you from drip lines to potential flashing or deck failures. Keeping a leak log with dates, test conditions, and photos helps you verify progress, plan repairs, and decide when professional help is needed to address stubborn or safety‑risk leaks.
Step-by-step water test procedure
This sequence helps you systematically find the leak by applying water to your roof and observing inside for drips.
- Position a helper at ground level with a hose set to a fine spray. Start from the bottom of the roof, moving up slowly.
- Turn off power in the attic before testing. Use a ladder safely and wear protective gear.
- Spray water around drain peaks first, then move on to flashing joints and vent penetrations.
- Monitor inside for drips as you spray. Mark areas that show signs of leaking with chalk or tape.
- If no leaks appear after controlled testing, expand your search to other roof zones methodically.
Tracing inside drips to external entry points
Start by identifying drip patterns on ceilings or walls. Use a flashlight and inspect closely for stains or water marks.
Note the exact location of each drip spot with chalk or pencil marks from below. Then, go up into the attic to find corresponding roof features above these spots.
Check around chimneys, skylights, and vent pipes carefully. These are common areas for leaks due to improper flashing or sealant wear.
Tools, materials, and safety precautions
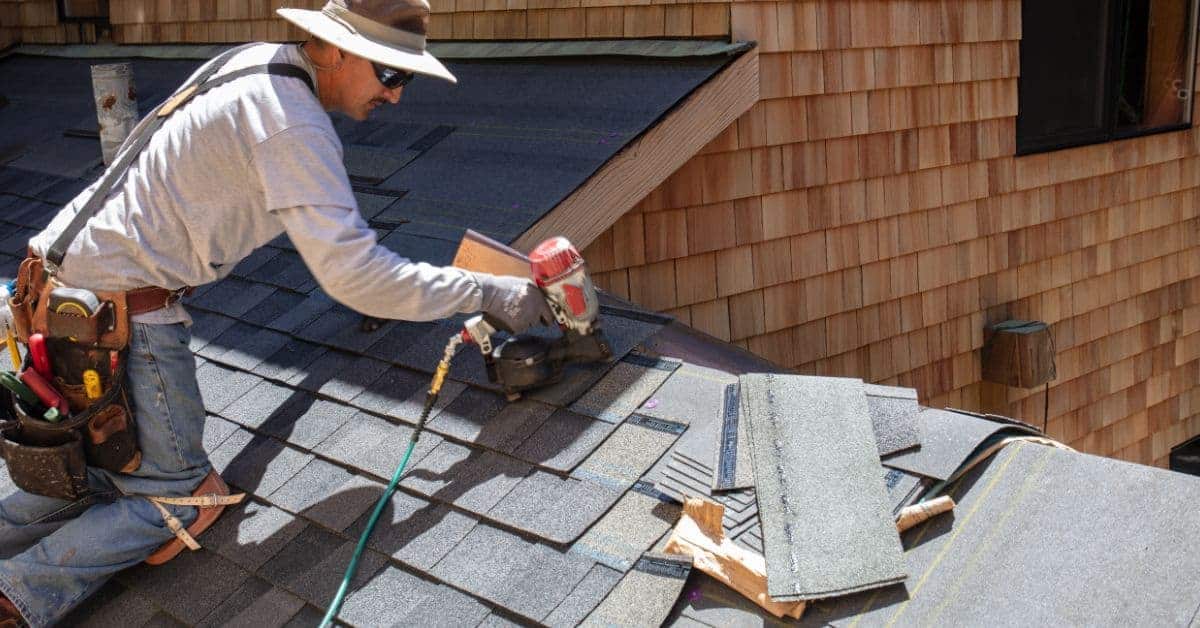
Key tools and common materials cover the basics you’ll actually use on a small roof job: pry bar, hammer, utility knife, roofing hatchet, tape measure, chalk line, ladder stabilizer or stand-off, cordless drill, and a caulk gun. You’ll also want roof cement, asphalt or roof sealant, shingles or replacement options, flashing tape, roofing nails, roofing cement, and some scraper or trowel for cleanup. For safety, wear sturdy work gloves, safety glasses, a hard hat, non-slip footwear, and a respirator or dust mask if you’re dealing with old, dusty or dusty-turned-materials, plus hearing protection when you’re running power tools; plan ladder setup with proper angle and three points of contact, and use a spotter or fall-arrest as needed on steeper pitches.
Understanding why this matters helps you plan and do quality work without creating new problems: a proper PPE and tool kit reduces injuries and rework, while the right materials and fasteners prevent leaks and loose shingles. Also, know your limits for weather and conditions—avoid work in rain, high wind, or extreme heat, check roof surface temperature and moisture, and stick to daylight hours with a plan to pause if conditions deteriorate. When you encounter fragile leaks, widespread damage, or flashing, structural decking, or long-term leaks, have a pro contact plan ready and know when to step back to avoid making the problem worse.
Tools and materials checklist
Before you start any roof repair, run through this quick checklist to ensure you have everything needed.
- Pry bar or flat bar: Essential for lifting shingles without damaging them. Check it’s rust-free and sharp enough to grip firmly.
If skipped: Risk of tearing up the roof. - Hammer: For driving nails into place. Confirm it fits comfortably in your hand.
If skipped: Nails won’t be secure, leading to leaks. - Utility knife: Cuts tar paper and flashing tape easily. Ensure blade is sharp and replaceable.
If skipped: Risk of tearing material instead of cutting cleanly. - Roofing hatchet: For trimming shingles or cutting through old roofing materials. Make sure it’s sharp and has a good grip.
If skipped: Inefficient work, risking injury from dull tools. - Tape measure: Accurate measurements are crucial for proper repairs. Check it’s calibrated correctly.
If skipped: Incorrect sizing of materials can lead to leaks or wasted supplies. - Chalk line: Marks straight lines on the roof for consistent work. Ensure it’s taut and clean.
If skipped: Inconsistent repair quality, risking future issues. - Caulk gun: For applying sealant precisely. Check it’s loaded with the right type of caulk.
If skipped: Sealant won’t be applied correctly, leading to leaks. - Ladder stabilizer or stand-off: Keeps your ladder from slipping on wet surfaces. Confirm it fits securely under the rungs.
If skipped: Risk of ladder sliding and causing injury.
Quick rule: Always double-check each item’s condition before starting work to avoid delays or accidents.
Safety rules before climbing a roof
Before you climb up, make sure your ladder is set at the right angle and stabilized with a stand-off. The base should be on solid ground, not mud or ice.
Always wear non-slip shoes and use a harness if working above 10 feet. Have someone spot you from below to catch any slips.
In wet conditions, wait until the roof is dry before climbing up. If it’s icy, don’t risk it—call in professionals who have proper equipment for winter work.

Basic DIY fixes for common intermittent problems
Basic DIY fixes cover safe, temporary to semi-permanent repairs you can do right now: sealing flashings and penetrations, replacing damaged shingles, clearing and reattaching gutters, patching small holes, and resealing where needed. You’ll want to set realistic expectations about how long these fixes last and which ones are meant to be temporary versus semi-permanent. Don’t chase perfection—aim for quick, weather-ready repairs that hold up enough to buy you time until a full fix can be planned.
This matters because proper planning, correct materials, and honest limits prevent bigger leaks or damage later. Check product labels and manufacturer instructions for cure times, compatibility, and safe use, and be mindful of local rules or conditions. Prioritize safety—map leak patterns, audit weather, and use stable ladders and PPE, then choose fixes that match the leak’s severity and the season.
How to reseal flashing and roof penetrations
To fix a leak around flashings, start by lifting the metal or rubber flaps carefully. Clean any old sealant off with mineral spirits or a solvent cleaner. Apply new roofing cement or butyl tape over the clean area, making sure it’s smooth and even.
For roof penetrations like vent pipes, cut away damaged material around the pipe, then apply fibered roof cement to create a strong base layer. Cover this with a rubberized membrane or flashing boot for extra protection. Test your repair by pouring water over the area; if it leaks again, you might need more sealant.
Remember, these fixes are temporary and won’t last forever—especially in harsh weather conditions like heavy rain or high winds. Keep an eye on them to see how they hold up before considering a full roof replacement.
Shingle and valley repairs for small leaks
If you find damaged shingles or curled edges, remove the old ones carefully to avoid damaging surrounding shingles. Place new shingles in their spot, making sure they align properly with existing rows.
In valleys where water collects, inspect underlayment closely for any damage. Replace it if necessary and reseal all tabs on both sides of the valley. This helps prevent water from seeping through small gaps during heavy rain.
Secure loose shingle tabs by applying roofing cement to their base. Make sure not to over-tighten them, as this can cause more damage or even lift other shingles nearby. A good repair should stop leaks but also look natural and blend in with the rest of your roof.
Common DIY mistakes and how to avoid them
Common DIY mistakes show up as symptoms on the surface, not where the leak starts. People reach for the obvious fixes—wrong sealants, bad surface prep, or over-tightened fasteners—while the real culprits sit behind flashing, in deck drainage, or at roof penetrations. In this section we call out those patterns and pair each one with a practical corrective move: pick the right sealant for the job, prep the surface properly, and recheck fastener and flashing details; also don’t ignore hidden deck or substrate issues that quietly undermine repairs.
Why it matters to you: tracing the leak to its source saves time, money, and repeated repairs. A clear corrective workflow helps you plan steps, choose materials, allow proper cure times, and schedule post‑repair checks. Use this as a checklist: identify the source, clean and dry, select materials, apply correctly, cure, and inspect. Keep safety front and center, watch for weather, and document your work so the next repair isn’t guesswork.
Misdiagnosis and temporary fixes that fail
When you see water stains on your ceiling or walls, it’s tempting to think the leak is right there. But most of the time, those marks are just symptoms telling you where the water ended up after entering from somewhere else. If you don’t find the real source and fix it properly, leaks will keep coming back.
DIY homeowners often make the mistake of sealing interior spots or applying quick patches to flashing without tracing the leak’s path all the way to its entry point on the roof. This can create a false sense of security while leaving your home vulnerable to more damage over time. The key is to trace each drip back to where it starts, whether that’s around chimneys, vents, skylights, or valleys.
Remember, every leak has a source. Take the time to find it and address it correctly. Use tools like flashlights and moisture meters to pinpoint wet spots on your roof deck. Once you’ve identified the entry point, clean it thoroughly before applying new sealant or flashing material. This ensures that any repairs will last longer and prevent future leaks.
Material and technique errors
The right materials are crucial for a lasting repair. Using the wrong type of sealant, nails, or flashing can lead to premature failure and more roof damage down the line.
- Sealant choice: Use high-quality sealants rated for your specific roofing material—like asphalt shingles or metal panels—and ensure they’re compatible with existing materials. Avoid silicone-based products on asphalt roofs as they can stain and weaken the bond over time.
- Nail placement: Properly space nails around roof penetrations to avoid splitting wood or damaging flashing. Over-tightening can also cause leaks by lifting up metal flaps.
- Flashing overlap: Ensure all flashing pieces extend beyond the edges of roof penetrations and valleys by at least 2 inches on each side for proper water runoff. Loose or improperly installed flashing allows water to seep in.
- Surface prep: Clean surfaces thoroughly before applying sealant, removing dirt, debris, and old sealants that can cause new material to fail prematurely.
- Curing conditions: Follow manufacturer instructions for curing times. Applying too soon after installation or during extreme weather can compromise the seal’s integrity.
When to call a professional and cost considerations
If you see visible structural damage, widespread rot, persistent leaks, or any unsafe conditions like mold or a compromised attic structure, stop DIY and call a pro. Assess quickly with simple checks and pause when risk is high. These thresholds help you decide when to bring in a roofer rather than guessing.
Costs vary by region and by whether you’re patching a small leak or needing a full replacement; ask for multiple local quotes. A professional leak diagnosis points to the real source and helps you plan repair and avoid repeating leaks. Plan to collect photos, measurements, and leak history from at least a few contractors and ask about warranty and timeline.
Red flags that require professional help
If you spot any of these issues while working on your home, it’s time to call in the pros:
Sagging roof deck or extensive rot: These are serious structural problems. Don’t try to fix them yourself; they need a professional eye and proper tools.
Multiple leak points or electrical wiring near moisture: Water damage can be tricky, especially when it involves electricity. It’s best to have an expert assess the situation to avoid further harm.
Comparing DIY vs. professional repair outcomes
When it comes to concrete repairs, going the DIY route can save money upfront but might cost more in the long run due to potential mistakes or missed issues. A pro will ensure your work lasts longer and looks better, thanks to their experience with tricky details like check base compaction. Plus, they offer warranties that cover future problems.
Professionals also spot hidden damage you might miss, which can save big bucks down the line. For instance, a small crack could be just the tip of the iceberg—there may be bigger issues beneath the surface that only an expert would catch and fix properly.
Long-term prevention and maintenance plan
A practical long-term prevention and maintenance plan centers on seasonal tasks to catch issues before they turn into leaks. It covers gutter cleaning, roof inspections after storms, trimming trees, replacing aging components, and attic ventilation control, with a simple cadence for checking in on things. Regular inspections help you spot wear and plan fixes before they cost more.
This approach matters because it builds a living record you can follow year to year, keeps drain paths clear, and reduces midseason surprises. You’ll benefit from clear reminders, a prioritization list for repairs and upgrades, and a sensible budget approach that targets the most vulnerable spots first. Keeping notes on findings and actions makes future maintenance faster and smarter.
Material selection and longevity considerations
Picking the right materials can mean the difference between a roof that lasts decades or one that leaks after just a few years. Here’s what to look for:
- Shingle type: Opt for high-quality asphalt shingles with Class A fire ratings and longer warranties. Avoid cheap imports prone to cracking.
- Underlayment quality: Use synthetic underlayment instead of felt paper; it’s more durable and water-resistant, reducing leaks from ice dams or wind-driven rain.
- Flashing materials: Choose galvanized steel or aluminum flashing for durability. Avoid thin metal that can rust quickly.
- Workmanship: Look for a contractor who uses proper techniques like overlapping shingles correctly and sealing all penetrations thoroughly.
- Slope and pitch: Ensure the roof has enough slope to shed water effectively; flat roofs are more prone to leaks due to standing water.
Visual checkpoints and record-keeping
Maintain a visual log of your roof’s condition by taking photos and noting any repairs or changes. This helps track issues over time:
- Roof surface: Check for missing, cracked, or curled shingles; replace as needed to prevent leaks.
- Gutters and downspouts: Clear debris regularly to ensure proper water flow away from the house. Clogged gutters can cause roof damage.
- Flashing around chimneys and vents: Inspect for gaps or rust; seal any openings that could let in rainwater.
- Attic ventilation: Ensure adequate airflow to prevent moisture buildup, which mimics leaks. Look for signs of condensation on insulation.
- Tree branches: Trim back trees so branches don’t scrape against the roof or block gutters from draining properly.
- Roof edges and valleys: Check for debris that can trap water, causing leaks; clean out regularly to prevent issues.
- Soffit vents: Ensure they are open and free of obstructions. Blocked soffits reduce attic ventilation, leading to moisture buildup.
Quick rule: Take photos and keep a log after each inspection or repair for future reference.

Conclusion
The bottom line: fix methodically and put safety first. When you control the leak and stop new water from getting in, your roof stays durable and your interior stays dry.
To move forward, run through this quick check in order: inspect the attic for active drips or damp spots, look for obvious roof damage and signs of aging, test suspected joints with a careful water check from the inside only after drying, then apply small, reversible fixes and monitor the area during the next rain. If a repair requires working on the slope, handling flashing, or accessing hard-to-reach spots, proceed with extreme caution and don’t skip safety gear or a spotter.
Common mistakes to avoid are obvious but costly: working on a wet roof or in cold conditions, using improper sealants or forcing a fix without fully identifying the source, and making irreversible changes before testing a temporary repair. Always isolate the area, test a small patch first, and never bypass safety devices or fall protection. If you’re unsure about the leak source or the fix could compromise structure, pause and reassess.
When to call a professional: if the leak is widespread, you can’t locate the source, a proper repair requires roof opening or flashing work, or the job involves structural damage or significant costs. Weigh the cost of DIY attempts against a professional repair, because a rushed or poor fix can cost more later. Stay steady, follow the plan, and you’ll protect the roof, the space below, and your budget.
FAQ
Why does my roof leak only after rain?
leaks often show up after rain because water finds the path of least resistance. a small gap or damaged shingle can let water seep in once there is pressure from rain. look for curled shingles, missing granules, or cracks in flashing to start locating the issue.
What should I check first when I see a leak?
start above the stain in the attic. check for loose nails, damaged underlayment, and gaps in the roof decking. run a quick visual scan along flashing and joints where the roof meets walls.
Are DIY repairs safe for a roof leak?p>
fix only what you can reach safely from the ground or with solid ladder setup. if the roof is steep, wet, or you don’t have proper tools, call a pro. cheap patches and quick fixes often fail and waste time and money.
How can I prevent leaks in the future?
keep gutters clear and downspouts working. inspect flashing and shingles every season, especially after storms. proper ventilation and attic insulation help, but don’t skip a full pro inspection after major weather.