

Introduction
Ceiling damage after a roof replacement is usually caused by moisture intrusion or installation issues.
The guide walks through signs to look for and practical steps to diagnose and fix damage so you can act confidently and safely.
Key takeaways
- Water intrusion from roofing work can cause hidden ceiling staining and drywall sag.
- Inspect for telltale signs: stains, buckling, bulges, or new cracks near joints.
- Document damage with photos, note dates, and keep roof work records.
- Prioritize safety: avoid electrical areas, use ladders correctly, and stop work if hazardous.
- Costs vary by extent, from minor repairs to drywall replacement and insulation.
- Prevent future damage with upfront moisture barriers, proper ventilation, and professional roof flashing.
Table of Contents
- Introduction
- Key takeaways
- Why ceiling damage can appear after roof work
- How to identify types and signs of ceiling damage
- Step-by-step diagnostic process (DIY + when to call a pro)
- Immediate mitigation steps after discovering damage
- Repair options and cost considerations
- Legal, insurance, and contractor responsibility
- Prevention and best practices before and during roof replacement
- Common mistakes homeowners make and expert tips
- Conclusion
- FAQ
Why ceiling damage can appear after roof work
Roof work introduces movement and weight shifts that can transfer through framing to the ceiling. Vibration from hammering, nail settlements, and worker traffic on the roof are common transmission paths. Drywall joints and ceiling fasteners can loosen, causing cracking and nail pops either immediately or as the structure settles. Attic conditions, such as moisture and insulation, interact with these forces to influence when and how damage becomes visible.
Disturbed flashing, improper roof penetrations, and moisture intrusion can worsen ceiling problems once work begins or finishes. Humidity swings and temperature changes in the attic can drive crack propagation or stain development even without active leaks. Look for immediate signs like new cracks or nail pops, and delayed signs such as stains, soft spots, or mold that appear after a few days or weeks. Disturbed vapor barriers and exposed fasteners in the attic often correlate with ceiling symptoms below.
Vibration and structural stress
When roofers are up there, they’re walking around, hammering nails, using nail guns. All that activity sends vibrations through the roof structure.
These vibrations travel down to your ceiling, putting stress on drywall, plaster, and joists. Over time, or with enough force, this can cause cracks in your ceiling, nail pops, or loose seams.
Immediate damage might show up as new cracks or nail pops right after the work is done. Delayed failure could happen weeks later as the structure settles and adjusts to the changes.
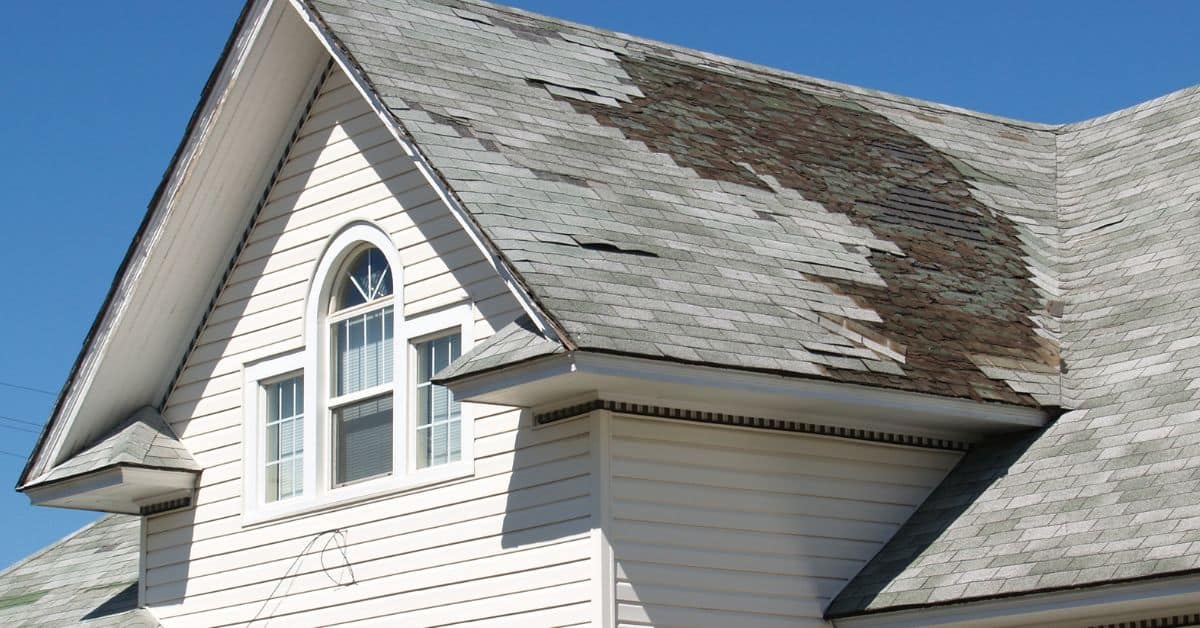
Water intrusion and disturbed flashing
When roofers remove old materials, they should reinstall or replace flashing, seals, and underlayment properly. If not, water can get in where it shouldn’t.
Moisture finds its way into your attic, then seeps through to the ceiling below. This can cause staining, sagging, or even rot over time. Humidity and temperature swings in the attic make things worse, causing cracks to spread or stains to grow.
Immediate signs might be water spots on your ceiling right after heavy rain. Delayed symptoms could include mold growth or soft spots that form weeks later as moisture builds up.
Contractor mistakes and accidental impacts
Even with the best intentions, contractors can make mistakes. Here are some common ones to watch out for:
- Overdriven nails: Nails driven too far into roofing materials can cause leaks or damage that shows up on your ceiling.
- Dropped tools: A falling tool can puncture your roof, leading to leaks and water damage on the ceiling below.
- Incorrectly cut vents: Poorly installed or sized vents can cause moisture buildup in the attic, leading to ceiling damage over time.
To avoid these issues, make sure your contractor is licensed, insured, and experienced. Regular inspections during and after the job can also help catch any problems early.

How to identify types and signs of ceiling damage
Ceiling damage shows up in two broad categories: visual signs like stains, discoloration, cracking, sagging, and bulges, and tactile cues such as soft spots or hollow sounds when knocked. Classify these signs by severity to guide your next steps. Immediate concerns demand urgent action, while other signs merit closer inspection soon.
In the attic and along the roof line, observe leaks, condensation, insulation displacement, vent blockages, and any signs of attic moisture intrusion that could affect the ceiling. If you notice electrical or water hazards, shut off power to the affected area and stop any work nearby. Keep a simple record of damage with photos and notes to support later professional evaluation.
Step-by-Step Process
Follow this clear, numbered sequence to identify types and signs of ceiling damage safely and efficiently.
- Prepare and ensure safety: Shut off power at the main panel for affected areas. If water is suspected, turn off water supply at the main valve. Wear appropriate PPE like gloves and safety glasses.
- Inspect visually from below: Look for stains, cracks, sagging, bulges, or nail pops in your ceiling. Mark severe signs with tape for later reference.
- Check tactilely: Gently press on the ceiling around marked areas. Feel for soft spots or hollow sounds indicating potential damage.
- Inspect the attic: Carefully climb into the attic, using a flashlight to check for wet insulation, rot, loose decking, or failed fasteners near affected areas.
- Document findings: Photograph marked ceiling signs and any attic issues. Log dates and details for future reference.
Visual symptoms and what they indicate
Understand these visual cues to assess damage severity:
Stains or discoloration often signal water intrusion. Hairline cracks may be minor drywall issues, but wide gaps could indicate structural movement.
Multiple small cracks or nail pops might suggest settlement or vibration from recent roof work. Bulges or sagging typically indicate moisture damage or structural failure.
Structural red flags seen in the attic
Inspecting your attic reveals hidden issues affecting ceiling integrity:
Wet insulation indicates roof leaks, while rot at rafters/trusses or loose decking signals structural compromise. Failed fasteners may lead to sagging ceilings.
Check for signs of moisture intrusion around vents, plumbing penetrations, or chimneys. Inspect insulation displacement and vent blockages that could cause heat buildup and damage.
When damage is cosmetic vs. structural
Distinguish minor repairs from major issues to plan your fix:
Cosmetic damage includes small drywall cracks or nail pops. These can often be patched and painted.
Structural concerns like sagging, bulges, or widespread cracking may require professional assessment. Roof leaks, rot, or failed fasteners typically need expert repair.
If you’re unsure about the cause or severity of damage, it’s best to err on the side of caution and consult a professional.
Step-by-step diagnostic process (DIY + when to call a pro)
Start with a safe, prioritized flow: secure the area, document damage, inspect the attic, assess the roof surface, and perform basic moisture checks. Use decision points to decide whether you can continue or need a professional. Treat safety as the first step before any hands-on checks.
Prepare a DIY checklist with tools like a ladder, flashlight, camera, moisture meter, tarp, and plastic sheeting. Follow a methodical documentation approach with photos, notes, and timestamps. Use attic and interior criteria to assess leaks, staining, mold risk, ventilation status, and any potential structural concerns that could require a pro.
Step-by-Step Process
The following is a clear, numbered sequence of practical steps to guide you through the diagnostic process for your ceiling damage after a roof replacement. This will help you understand the extent of the damage and when to call in professionals.
- Preparation: Gather tools (ladder, flashlight, camera, moisture meter, tarp, tarping supplies, plastic sheeting) and ensure safety precautions are taken before starting any inspection.
- Document Damage: Take photographs of the ceiling damage from various angles. Note down observations about the type and extent of damage.
- Attic Assessment: Carefully enter your attic, using a flashlight to inspect for signs of leaks, staining, mold risk, condensate, and check the attic ventilation status. Be mindful of any potential structural concerns like joist compression or sagging.
- Roof-Surface Evaluation: Inspect the roof surface for visible leaks, flashing integrity, shingle/underlayment condition, and any issues around roof penetrations. Use a non-invasive moisture meter to check for water presence.
- Moisture Testing: Perform moisture readings on drywall using a non-invasive meter or perform a simple drywall moisture test to determine if water is still present in the ceiling. If readings are high, consider calling a water-damage specialist.
- Temporary Containment and Stabilization: Use tarps or plastic sheeting to minimize further water intrusion. Record moisture trends over time to share with professionals.
- Final Checks and Decision Making: Review your findings, photographs, and notes. If you’ve found significant structural issues, dark manifolds, or extensive water damage, consider calling a structural engineer or your insurance company.
Simple tools and tests homeowners can use
Here are some non-invasive checks and safe attic entry tips using simple, affordable tools to help you diagnose your ceiling damage.
- Flashlight: Essential for inspecting dark spaces like the attic. Use it to check for signs of leaks, staining, or mold.
- Moisture Meter: A non-invasive tool that measures moisture content in materials. Check readings on both sides of suspected damaged areas. Rentable models are available at around $30-$50 per day.
- Probing Tool (e.g., screwdriver): Gently probe suspect areas to check for soft spots or damage without causing more harm. Be careful not to poke through drywall unnecessarily.
- Ladder: A sturdy, extendable ladder is crucial for safe roof surface inspection and attic access. Ensure it’s properly secured before climbing.
- Camera: Use a smartphone or dedicated camera to document damage with timestamps and notes.
- Tarp and Tarping Supplies: To temporarily contain water intrusion, use tarps and supplies like ropes, stakes, or weights to secure them in place.
- Plastic Sheeting: For interior use, plastic sheeting can help minimize further water damage until repairs are made. Secure it with tape or weights.
Evidence to gather for claims and contractor discussions
Collecting thorough, organized evidence will support your repair or insurance claims and help you discuss the issue with contractors. Here’s how:
Photograph all damage from various angles, ensuring timestamps are visible on photos. Note down observations about the type, extent, and timeline of damage.
Gather any relevant documents such as contracts, inspection reports, or communication with previous roofers. Keep these organized for easy reference.
Be thorough: The more evidence you have, the stronger your case will be when discussing repairs with contractors or making an insurance claim. Make sure to record both visible and hidden damage, as well as any structural concerns.
Immediate mitigation steps after discovering damage
Contain the problem at once by stopping the source of water intrusion if safe to do so, using tarps or plastic sheeting to limit further damage. Place buckets and towels to catch drips and prevent accidental spread. Locate the source only if you can do so without risking your safety or further damage.
Assess safety before any work: shut off power if there is standing water or electrical risk, and avoid areas with visible mold growth. Move valuables to higher ground and cover them to prevent secondary damage. Plan a drying strategy with fans and dehumidifiers and remove wet insulation or drywall only if it can be done safely.
Temporary leak containment and drying
First things first, stop the water from coming in. Grab some tarps or plastic sheeting and cover any holes in your roof. If it’s raining, get someone to help you do this safely.
Inside, place buckets and towels under leaks to catch drips. Keep an eye on them and empty as needed.
Now, let’s dry things out. Open windows if possible, or use fans to circulate air. If you have a dehumidifier, now’s the time to bring it out. Point fans towards open windows for best results.
Do not try to patch the roof yourself unless you’re confident and can do so safely. It’s better to contain the leak temporarily until professionals can assess.
Preventing secondary damage (mold, rot, electrical)
Water damage doesn’t just stop at your ceiling. It can lead to mold growth within 24-48 hours and structural rot if left untreated.
If you see any signs of mold, isolate the area immediately by closing doors and windows. Do not attempt to clean it yourself; call a professional mold remediation service.
As for electrical hazards, if you notice any sparking, short circuits, or flickering lights, shut off power to that circuit at your main panel. Avoid areas with standing water and do not touch electrical appliances until the area is dry and safe.
Lastly, if you have valuables in the affected area, move them to a drier location. Water can cause warping, rusting, or other damage over time.
Repair options and cost considerations
Repair options range from cosmetic drywall or paint touch-ups to targeted drywall replacement and structural reinforcement, up to a full roof rework if moisture history warrants it. Choose based on the extent of ceiling damage, moisture history, sag, and potential hidden rot in framing. Consider both short-term fixes and long-term reliability when weighing options.
Develop a cost framework that accounts for material costs, labor, scope-based pricing, access or removal fees, and any required permits. Compare bids not just on price but on material quality, workmanship guarantees, and timeline. Be mindful of moisture remediation and mold considerations as you plan the repair path.
Minor repairs (nail pops, hairline cracks, stains)
For minor ceiling damage, you can save money by doing the work yourself. Here’s how:
Nail pops: Fill holes with spackling compound, let dry, sand smooth, and paint.
Hairline cracks: Apply a thin layer of joint compound, let dry, sand, prime, and paint.
Stains: Identify the cause (moisture, mold), address it, then clean, prime, and paint. Expect to spend around 1-2 hours per repair and $5-$10 in materials.
Major repairs (structural repair, drywall replacement)
For major ceiling damage, you may need to hire a pro. Here’s what to expect:
Structural repair: If rafters or joists are damaged, they’ll need reinforcing or replacing. This adds $500-$2,000 to your bill and extends timeline.
Drywall replacement: Replacing sections costs around $1-$3 per sq ft for materials and labor. A full ceiling replacement can run $2,500-$7,500.
Factors like access, removal fees, and permits can increase costs. Always get a detailed quote.
Hiring specialists and getting quotes
When hiring pros, follow these steps to ensure you’re comparing apples to apples:
1. Get at least three estimates. Ask for a detailed scope of work, timeline, warranties, and references.
2. Compare bids line by line. Look at materials, labor rates, access fees, permits, and any contingencies.
3. Check insurance and licenses. Ensure they’re covered for liability and have the necessary permits to work in your area.
Legal, insurance, and contractor responsibility
Clarify contractor duty of care and the standard of care in roof replacement work, with examples of negligent versus compliant performance. Review warranty coverage for manufacturer versus workmanship warranties and note typical claim windows and what constitutes a valid claim after ceiling damage. Understand how these apply to your situation in case of disputes.
Map common insurance coverage points, including who files claims and what damages are typically covered. Document issues clearly and follow a dispute workflow that may involve mediation or small-claims processes. Gather evidence like photos, timelines, inspection reports, and contractor communications to support claims or investigations.
Assessing Contractor Liability
When ceiling damage occurs after a roof replacement, it’s crucial to determine if the contractor is liable. Here’s how:
1. Check for pre-existing conditions. Inspect your ceilings before work starts. Document any existing cracks or stains with photos and notes.
2. Request an inspection report. Ask the contractor to provide a post-work inspection report detailing their findings. This should include any noted damage, its cause (negligence or pre-existing), and recommended repairs.
3. Ask for a repair plan. If the contractor is at fault, they should provide a clear repair plan outlining what needs to be done, who will do it, and when. Hold them accountable to this plan.
Filing Insurance Claims and What to Expect
Understanding your homeowner’s policy is key to a smooth claim process. Here’s what you need to know:
1. Know your coverage. Review your policy to understand what’s covered (water intrusion, secondary damage, mold) and what deductibles apply.
2. Document everything. Insurers typically require photos, timelines, inspection reports, and receipts. Keep a written incident log for easy reference.
3. Act promptly. File your claim as soon as possible to avoid delays or denials. Provide clear evidence of the cause and extent of damage. Timing is crucial; don’t wait until secondary damage (like mold) appears.
Negotiating Repairs, Change Orders, and Holdbacks
Once liability is established, negotiate repairs with your contractor. Here’s how:
1. Negotiate a repair plan. Work with the contractor to agree on what needs fixing, who will do it, and when. Get this in writing.
2. Use written change orders. If additional work is needed, insist on a written change order detailing the scope of work, materials, labor costs, and any adjustments to the contract price.
3. Hold back payment until repairs are completed. Don’t pay in full until agreed-upon repairs are finished and you’re satisfied with the quality of work. This ensures the contractor completes the job as promised.
Prevention and best practices before and during roof replacement
Start with a pre-work attic and structure check to note moisture, prior leaks, and decking condition. Identify sagging areas or odors that signal hidden damage before work begins. This sets the baseline for preventing surprises during or after the project.
Protect and secure the workspace by stabilizing decking and insulation, installing temporary bracing, and planning fall and debris protection. Vet contractors, define protections in the contract, and assign clear responsibilities. Establish a site supervision routine with a designated point person for quick decisions and daily damage monitoring.
Pre-replacement planning and documentation
Before you start tearing off that old roof, take a moment to document the current condition of your ceiling or attic. This could save you headaches later on.
Snap some photos of any water stains, mold, or damaged insulation. These can help you and your contractor pinpoint where leaks might be coming from. It also protects you if there are any disputes about pre-existing damage.
Next up, get an itemized contract from your chosen roofer. This isn’t the time to go for the cheapest option without understanding what you’re paying for. An itemized contract lets you see exactly what materials and labor costs are involved. It’s also a good place to define warranty and repair obligations in writing.
On-site protection and safety measures
Before you start tearing off that old roof, let’s talk about keeping your site safe. We’ve all heard the horror stories, so don’t be the one telling them.
Walk boards and soft-soled shoes: You’re not a cat, so don’t walk on your roof like one. Use walk boards to get around safely. And wear soft-soled shoes – they grip better than hard-soled ones.
Vent care: Those vents are important, but they can be dangerous if you’re not careful. Make sure to protect them during the replacement process. If a vent gets damaged, it’s on you to fix it right away.
Long-term ventilation and material choices
Proper attic ventilation, quality underlayment, and suitable fasteners are key to preventing future moisture and movement-related ceiling problems. They work together to keep your roof durable and looking good.
- Attic Ventilation: Keeps your attic cool in summer, dry in winter. Look for balanced intake and exhaust vents. Common options: soffit vents (intake), ridge vents (exhaust).
Pro tip: Aim for at least 1 sq ft of venting per 300 sq ft of attic floor. - Underlayment: Protects your roof from moisture and wind. Choose synthetic or asphalt-saturated felt.
Cheap homeowner-grade underlayment is fine, but avoid thin, low-quality options that tear easily.
Pro tip: Overlap underlayment in layers to create a waterproof barrier. - Roofing Fasteners: Secure your roof to the deck. Galvanized or stainless steel nails are common.
Look for corrosion-resistant fasteners if you live near the coast.
Pro tip: Use the correct nail length – too short won’t hold, too long can puncture underlayment. - Roofing Nails: Hold your shingles in place. Choose ring-shank nails for better grip.
Avoid smooth nails that can slip out over time.
Pro tip: Use a coil roofing nailer if you don’t already own one – it’s faster and more accurate. - Drip Edge: Prevents water from getting under your shingles. Metal drip edge is best.
Avoid plastic drip edge, which can warp and crack over time.
Pro tip: Install drip edge before laying down underlayment.
Pro tip: Buy materials in small quantities to avoid waste. Store them properly to maintain quality – keep nails dry, underlayment flat and off the ground.
Common mistakes homeowners make and expert tips
Common errors include delaying inspection, skipping documentation, and relying on a single quote. These habits can hide or worsen ceiling damage after roof work. Develop a checklist to stay proactive and avoid missed cues.
Document symptoms and timelines, separate roof from HVAC or plumbing causes, and escalate when signs persist. Obtain multiple quotes with explicit scope and warranties, and ensure credentials for ceiling or concrete repair specialists are verified. Red flags include missing permits, improper flashing, cracks or hollow sounds, and repeated water intrusion after repairs.
DIY Misdiagnosis Pitfalls
Before you grab your tools, understand these common DIY mistakes that can lead to improper fixes and further damage.
- Assuming stains are old: Fresh leaks may look similar to old ones. Always check for new moisture or mold growth.
- Over-probing ceilings: Poking holes in your ceiling looking for leaks can cause more damage than good. Use a flashlight and inspect from below if possible.
- Incorrect patching methods: Slapping on joint compound or paint won’t fix the problem. Understand the root cause before applying any fixes.
- Ignoring HVAC/plumbing causes: Not all ceiling damage is due to roof leaks. Check other systems to rule out their involvement.
Take your time, be thorough, and if in doubt, consult a professional.
Red Flags When Evaluating Contractor Work
Don’t overlook these warning signs of poor roofing work. Your ceiling’s health depends on it.
Missing permits/inspections: Ensure your contractor has pulled the necessary permits and that inspections have been conducted. This ensures they’re following local codes and standards.
Inadequate flashing/drainage: Check around vents, chimneys, and skylights for proper flashing. Ensure all valleys and eaves have adequate drainage to prevent water backup.
Poor cleanup: A sloppy job site can indicate a sloppy work ethic. Make sure your contractor leaves the area clean and free of debris.
Conclusion
Ceiling damage after roof work can threaten safety, durability, and curb appeal. Quick, deliberate checks and fixes prevent costly hidden problems.
First, inspect for fresh stains, bulges, or sagging in visible areas; look for drips or moisture on walls and around light fixtures; trace any stain back toward the attic to see if water is still getting in; dry out the area with fans on a safe setting, and decide whether you can handle the repair or you need a pro. If you’re unsure, start with light probing in an unobtrusive spot, measure with a simple ruler, and document what you find with notes and photos before you tear into anything.
Two common mistakes to avoid are blasting heat on the area to dry it out and trying a quick patch without checking for ongoing leaks or hidden damage. Also avoid delaying diagnosis—water that sits leads to rot, mold, and bigger costs. Use safe-test steps first, keep power off around the area, and don’t mix paints or patches that aren’t made for water damage.
If you see active leaks, noticeable structural sag, mold growth, or electrical hazards, stop and call a professional. Otherwise, apply the learned checks and fixes methodically, keep notes, and progress with confidence. With the right actions, you protect safety, save money, and restore a solid, clean finish you can trust.
FAQ
What causes ceiling damage after a roof replacement?
Leaks, poor flashing, or rushed decking can let water seep in. Improperly sealed joints near vents or chimneys also causes drips. A damaged underlayment can soak up water and show up on the ceiling fast.
How can I tell if the ceiling damage is from the roof or something else?
Check for fresh stains after rain or a wet roof day. Look for warped drywall, peeling paint, or musty smell. If you find water spots near vents, pipes, or chimneys, it points to roof or flashing issues.
What fixes should I avoid and what should I do first?
Avoid DIY patches on a wet ceiling. First stop the leak if you can do it safely. Then dry the area, document the damage, and call a pro if the roof or flashing looks suspect.
When should I call a professional right away?
If you see active dripping, ceiling sag, or mold starting to form, call a roofer and a contractor immediately. Water damage can spread fast and crete bigger problems. A pro can assess roof, flashing, and interior damage and stop further leaks.