
Introduction
Water dripping from the roof signals a leak that needs diagnosis and a careful, practical fix.
You’ll learn how to identify common causes of roof leaks, assess interior damage, and follow a step-by-step approach to stop the drip and prevent future issues through practical tips and sensible home repairs.
Key takeaways
- Verify safety first: switch off power in affected areas before inspection.
- Document indoor signs with photos; note stains, damp spots, and odors.
- Inspect attic for persistent drips, mold, or insulation compression near leaks.
- Check exterior roof edges, flashing, and seals for gaps or rust.
- Perform controlled hose test: start low, gradually increase pressure to locate leak.
- Create temporary containment: tarps, buckets, and sandbags to divert water.
- Evaluate permanent fixes by roof type: asphalt, metal, or tile specifics.
Table of Contents
- Introduction
- Key takeaways
- Quick safety checklist before you start
- How to diagnose the leak from inside (attic and ceiling)
- How to inspect the roof exterior and common failure points
- Water-testing method to pinpoint the leak (controlled hose test)
- DIY temporary containment fixes to stop immediate indoor damage
- Permanent repair methods by roof type (step-by-step)
- Tools, materials, and material specs to have on hand
- Cost, time estimates, and decision guide: DIY vs hiring a contractor
- Conclusion
- FAQ
Quick safety checklist before you start
Before you climb, lock in a safety-first mindset and pause if weather looks rough or footing seems uncertain. Wear the right PPE and use a fall-arrest setup where the roof edge or slope demands it, with a helper stabilizing you. Follow ladder safety to the letter—secure the ladder, maintain three points of contact, and never stand on top rungs.
Plan your day with fall-prevention in mind, check for overhead hazards, and keep electrical risks in view. A solid spotter and a charged mobile device with a first-aid kit on site make all the difference when something goes off plan. If you’re unsure about the roof condition, mobility is limited, or damage is evident, skip the climb and consider ground checks or calling a pro.
Personal protective equipment and ladder best practices
Before you climb up, make sure your gear is ready and the ladder is set safely.
- Gloves on: Wear sturdy gloves to protect hands from sharp edges. Check for cuts or punctures while working.
- Non-slip boots: Use shoes with good traction. Inspect soles for wear and replace if needed.
- Harness ready: If the roof is steep, have a fall-arrest harness. Ensure it’s properly anchored before climbing.
- Ladder secure: Place ladder on solid ground at a 4:1 angle. Check stability by giving it a gentle shake.
- Extend beyond eave: Make sure the top of your ladder extends three feet past the roof edge for safety. Don’t stand on the last rung.
- Ladder tied off: Secure both sides to prevent tipping. Use straps or ropes to anchor it firmly.
- Three points contact: Keep hands free when climbing up and down. Always have three limbs touching the ladder.
- No top rung: Never stand on the very top of a stepladder. Use the second-to-last step instead.
Quick rule: Always wear PPE and set up your ladder safely to avoid falls.
When to stop and call a pro
If you encounter any of these issues, it’s best to step back and hire a professional.
- Sagging roof: Look for dips or unevenness. Call in if the roof is visibly drooping.
- Large leaks: If water damage is extensive or active, don’t risk further harm by tackling it yourself.
- High roofs: Steep pitches over 25 degrees require professional handling to avoid falls.
- Electrical hazards: Stay away from exposed wires. Call an electrician first if you see any.
- Inadequate mobility: If you have balance issues or limited range of motion, it’s safer to hire help.
- Icy conditions: Avoid climbing on slippery surfaces. Wait until the ice melts before attempting repairs.
- Limited visibility: Don’t work in poor light or bad weather. Postpone if you can’t see clearly.
- Serious damage: If there’s extensive shingle loss, broken tiles, or structural issues, leave it to pros.
Quick rule: When in doubt, step back and call a professional for safety.

How to diagnose the leak from inside (attic and ceiling)
Diagnosing a leak from inside means tracing visible stains in the attic and ceiling back toward the likely entry point, distinguishing active leaks from residual staining, and using a helper to help isolate the source without wrecking the area. Start by noting stains, damp patches, and any water trails along joists, then follow those trails toward a penetration in roofing, flashing, or attic connections. Use a helper to simulate moisture or observe flow from a controlled point so you can confirm the source before you start repairs, and document findings with photos and sketches.
This approach matters because roof leaks and interior failures can behave differently once light contacts them, and knowing the true path keeps you from chasing the wrong culprit. Document timing, weather, and routes to support repairs or insurance claims, and distinguish roof-related causes from plumbing, HVAC, or condensation so you know when to call a pro. Always check product labels or instructions when introducing moisture or testing the system, and follow local safety rules and disposal guidelines for any cleanup.
Step-by-Step Process
This sequence helps you systematically diagnose a roof leak from inside, ensuring safety and accuracy.
- Wear protective gear and check the attic for access points. Use a flashlight to inspect dark corners.
- Locate stained or wet insulation along joists. Follow water trails back to their source.
- Mark any stains on ceiling drywall with tape or chalk, noting direction of flow.
- If unsure about entry point, use a helper outside to spray roof sections while you watch inside for drips.
- Take photos and sketch the path of damage. Label each area clearly for repair or insurance claims.
Inspecting the attic and following wet insulation
Access your attic safely with a sturdy ladder and proper lighting. Look for water-stained or sagging insulation, which can indicate a leak.
Follow the path of wetness along the roof’s slope to find where it enters. Use a flashlight to inspect dark corners thoroughly.
Note: If you see standing water or significant damage, stop and call a professional immediately.
Ceiling and wall signs: stains, bulges, and drip points
Discoloration on the ceiling often marks where water has dripped. Look for dark spots or rings that indicate ongoing leaks.
Bulging paint or plaster cracks can also signal moisture buildup inside walls. These are clear signs of a leak that needs attention.
Note: Active dripping points will show you exactly where the leak is coming from, making it easier to trace back to its source on the roof.
Using a spotter and simple tests inside
Hire an assistant to spray water on suspected areas of your roof while you watch for drips from inside. This helps pinpoint the exact entry point.
Have your helper start with small sections, moving systematically across the roof. Watch closely for any signs of moisture entering through the ceiling or walls.
This method is effective and minimally invasive, allowing you to diagnose leaks without causing further damage.
How to inspect the roof exterior and common failure points
This exterior roof check focuses on shingles, flashing, vents, chimneys, valleys, gutters, and roof penetrations. Look for curling, cracking, missing granules, loose flashing, damaged sealant, and rusted metal; note if you see pooling water or improper drainage. Record minor versus major defects and take clear photos for each item.
This matters because early signs tell you where leaks may start and what repairs to prioritize. Use a simple checklist and document findings with notes and photos, then plan temporary steps if safe and call a roofer for major issues or anything you can’t safely reach. After weather events, recheck gutters, flashing, and vents for new damage and watch for changes in drainage or loose components.
Step-by-Step Process
This sequence helps you systematically inspect your roof’s exterior for potential leaks and damage.
- Prepare safety gear and tools. Check ladder stability, wear gloves, helmet, and harness if needed.
- Climb up safely to the roof edge. Start at the highest point moving down towards the eaves.
- Inspect shingles for cracks, curls, missing granules or loose nails. Note any damaged areas with photos or notes.
- Check flashing around chimneys, vents, and valleys for gaps, rust, or lifted edges. Look for deteriorated sealant too.
- Moving to the gutters and downspouts, ensure they are clear of debris and properly attached to fascia boards.
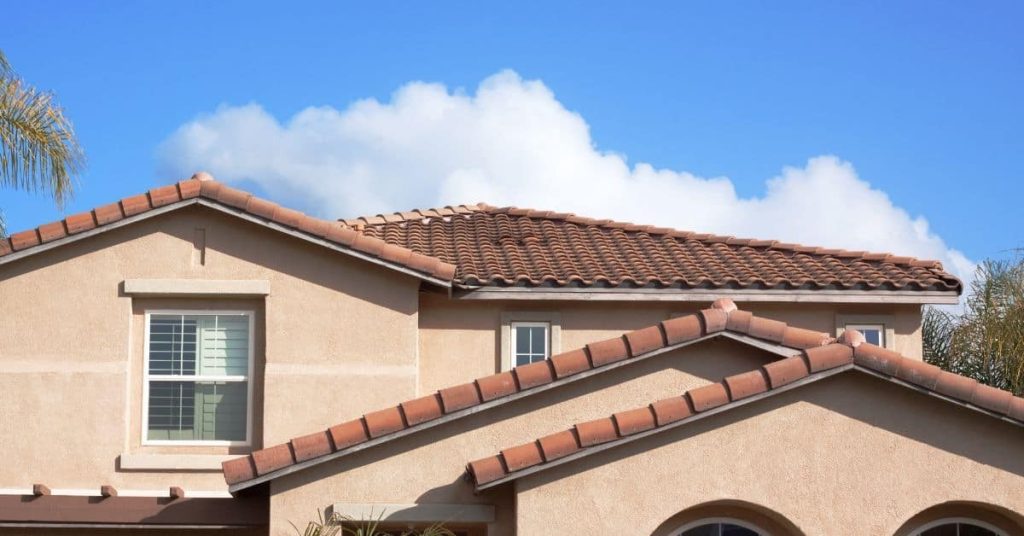
Checking shingles, seams, and fasteners
Missing or damaged shingles can let water seep into your home. Look for curled edges, cracks, or missing granules.
Popped nails or loose shingles are another sign of trouble. They need to be hammered down tight or replaced if severely damaged.
Note areas with multiple issues and document them clearly for future reference or professional assessment.
Flashing, chimneys, vents and roof penetrations
Inspect around chimneys, skylights, and vent pipes where water often finds its way in. Look for gaps or rust on metal flashing.
Check the sealant between different materials like brick and shingles. Deteriorated sealants can let moisture through causing leaks inside.
Pay special attention to valleys, where two roof planes meet, as water tends to pool here if not properly sealed or sloped away.
Flat roofs and low-slope areas (ponding and membrane issues)
Ponding water is a clear sign of improper drainage. Check for standing water that doesn’t drain within 48 hours.
Bubbles or blisters in the roof membrane can also indicate leaks. These are often caused by trapped moisture under the surface.
Inspect seams and joints for lifting edges, which allow water to seep underneath causing further damage over time.
Water-testing method to pinpoint the leak (controlled hose test)
The water-testing method uses a controlled hose sweep to locate the leak by systematically wetting roof sections while an interior observer watches for seepage. Start with clear safety steps, a weather-friendly window, and a stable observer position with protective gear. Plan the zones and boundaries, choose a dye or colorant if you’ll use one, and be ready to record every result as you go.
This approach matters because it gives you a repeatable, auditable process you can follow on any small roof area without guesswork. It ties coverage to a zone-by-zone sequence, keeps the flow path predictable, and uses a standardized log to capture times, tested zones, interior observations, and any drips or condensation, with photos or video footprints as evidence. If you hit weather limits, a compromised surface, or unclear results, you’ll know to pause, adjust the plan, or pursue alternatives like a smaller test or a professional assessment, and you’ll have a clear path into repair planning.
Setting up zones and communicating with your spotter
Divide the roof into manageable test zones. Each zone should be small enough to cover thoroughly but large enough for practical testing. Mark boundaries clearly so you know exactly where water is hitting.
Decide on a spray pattern—wide fan or narrow jet—and stick with it across all zones. A wide fan covers more area at once, while a narrow jet lets you pinpoint specific spots. Aim to cover each zone for about 5 minutes, then move on to the next one in sequence. This keeps the test method consistent.
Communicate clearly and frequently with your spotter inside the house. Use walkie-talkies or cell phones if needed. Have a code word like ‘hit’ when water starts dripping inside so you know exactly where it’s coming from on the roof. Keep track of time and zones tested in a notebook.
Remember, safety first. Wear proper gear, use secure ladders, and avoid steep or slippery sections. If conditions get too risky, stop testing and reassess later when safer.
Interpreting hose-test results and eliminating false positives
After spraying each zone, watch carefully for water inside. Sometimes it takes a while for moisture to seep through, so give it time before moving on. If you see no immediate drip but suspect an issue, wait another 15 minutes.
Distinguish between delayed seepage and unrelated indoor moisture. Check if the spot matches your test zone or is near one. False positives can come from condensation or existing dampness not related to your test.
If you’re unsure about a result, re-test that specific area again later with a different pattern or more water pressure. This helps confirm whether it’s truly leaking there or just another issue.
Once you’ve identified the leaky zones, take detailed notes and photos for repair planning. Prioritize areas based on severity and ease of access. Knowing exactly where to fix saves time and materials later.

DIY temporary containment fixes to stop immediate indoor damage
This section covers quick, practical containment steps you can take indoors and on the exterior to keep water inside the house from causing immediate damage. Use buckets or containers to catch drips, protect belongings, and reduce slip hazards, cut and support bulges in the ceiling safely, lay temporary tarps or plastic over roof edges and secure them to minimize wind lift, and seal small penetrations from the inside until a permanent fix is possible.
That approach buys you time and reduces the risk of further damage long enough to plan a proper repair. Keep PPE handy, power down affected circuits only if it’s safe, and avoid disturbing bulges or wet materials unless you know what you’re doing. Redirect water away from doors and outlets with temporary barriers, document leaks for later repair, and know when to call a licensed roofer or your insurer if you see large cracks, sagging, or persistent rain.
Interior mitigation: safe drip containment and ceiling stabilization
First things first, grab buckets or large containers to catch dripping water. Position them under the leak points to prevent water from damaging floors, walls, or furniture. If you notice a bulge in your ceiling, it’s crucial to stabilize it safely before it causes more damage. Use a sturdy ladder and wear protective gear like gloves and safety glasses.
To reduce weight from water pockets, carefully cut away the drywall if needed but make sure not to create holes that could worsen leaks. Support any sagging areas with wooden boards or braces to prevent collapse. If you’re unsure about handling ceiling bulges yourself, it’s best to call a professional right away.
Protect your belongings by moving them out of harm’s way and covering sensitive items like electronics with plastic sheeting. Keep an eye on electrical outlets near the leak area and turn off power if necessary for safety reasons. Document everything you find so you can track repairs later.
Exterior temporary fixes: tarps, roofing tape, and patching compounds
When water is dripping inside, your first move should be to cover the roof leak area with a heavy-duty tarp. Secure it tightly around edges using ropes or clips to prevent wind from lifting it off. High-quality roofing tape can also help seal small gaps temporarily until you can make permanent repairs.
For quick fixes on smaller penetrations like vent pipes or flashing, use a tube of roof patching compound or foam sealant. Apply these directly over the damaged area and smooth out any excess material to ensure it stays in place during rain.
Remember, tarps are only good for short-term protection against further damage. They won’t last through heavy storms or prolonged wet weather conditions. If you see large cracks or extensive roof damage, don’t hesitate to call a professional roofer immediately.
Permanent repair methods by roof type (step-by-step)
This section lays out step-by-step, type-specific repair work for asphalt shingles, metal, and common flat-roof systems, with a clear path from inspection to post-repair checks. You’ll see when a DIY fix is realistic and when a pro should handle complicated flashing or decking issues.
Knowing the right tools, materials, and safety gear helps you spot the real issue and not just patch the symptom. It also explains why careful diagnosis and proper follow-up checks matter, so you don’t chase leaks that come back after a rain.
Step-by-Step Repair Process
This sequence guides you through the steps to fix leaks permanently on your roof, ensuring safety and effectiveness.
- Inspect the area for damage. Use a ladder and wear gloves for protection. Mark the leak spot clearly with chalk.
- Clean the affected area thoroughly. Remove debris and old sealant using a wire brush or scraper. This ensures new materials adhere properly.
- Apply patching material as needed. For asphalt shingles, use roofing cement; metal roofs require neoprene patches; flat roofs need compatible membrane patches. Follow manufacturer instructions closely.
- Re-seal flashing and other vulnerable points with sealant or caulk. Ensure a tight fit to prevent water intrusion. Check for any gaps or bubbles.
- Replace damaged shingles, fasteners, or metal sheets as necessary. Use new materials that match the existing roof. Secure them tightly but avoid over-tightening which can cause damage.
- Clean up and inspect your work. Look for any missed spots or areas needing further attention. If unsure, consult a professional to double-check.
Asphalt Shingle Repairs (Replace Shingles, Seal Flashing, Reset Nails)
To fix asphalt shingles, start by removing the damaged ones. Lift adjacent shingles carefully to expose the roof deck and nail holes.
Use a hammer or pneumatic nailer to reset nails securely but avoid over-tightening which can split wood. Replace any missing or severely damaged shingles with new ones that match your existing roof.
Seal around chimneys, vents, and other penetrations using roofing cement or sealant. Apply a bead of caulk along the edges for extra protection against water intrusion.
Inspect flashings regularly for wear and tear. Re-seal them if necessary to prevent leaks from developing in these critical areas.
Metal Roof Repairs (Patching, Seam Re-Sealing, Screw Replacement)
To repair a metal roof, start by cleaning the area around the hole or tear. Use a wire brush to remove rust and old sealant.
Apply a patch of neoprene material over the damaged section. Secure it with screws coated in corrosion-resistant sealant for added durability.
Check all seams and fasteners regularly. Re-seal any gaps using a high-quality roof sealant designed for metal roofs to prevent water from seeping through.
Inspect screws periodically, especially those near edges or valleys where they are more prone to wear. Replace worn-out ones with new neoprene-coated screws to ensure long-term protection against leaks.
Flat Roof Repairs (Membrane Patches, Seam Welding, Drain Clearing)
To repair a flat roof, start by cleaning the area around the leak. Use a wire brush to remove debris and old sealant.
Apply a patch made of compatible material such as EPDM or TPO over the damaged section. Follow manufacturer instructions for proper application techniques.
Clean and re-seal seams using a high-quality roof sealant designed for flat roofs. Ensure all joints are tight to prevent water from entering.
Clear any debris from drains and scuppers to ensure proper drainage. Clogged drains can cause ponding, leading to further damage over time.
Tools, materials, and material specs to have on hand
You need a practical, on-hands list of tools and materials that covers the roof you’re working on, plus the key specs you should verify before you start. The essentials include roof-rated nails, sealants compatible with common roof types, flashing in the right materials, a tarp or drop cloth, a sturdy ladder, a pry bar, and a drill with the right bits, plus a tape measure, hammer, utility knife, and work gloves and safety glasses so you can work without improvising on safety later. Also check the sealant and flashing details for your particular setup, since one product label or datasheet will tell you whether a compound adheres to asphalt, metal, tile, or flat roofing and whether the flashing tape or metal flashing will handle your edge details and wind-driven water.
This matters because you’ll save time, reduce material waste, and avoid leak trouble by verifying compatibility, coverage, and installation basics before you cut or hammer anything in place. A clear inventory by roof type helps you pick the right corrosion-resistant nails, the correct length for your decking and substrate, and the proper sealant cure range, UV resistance, and flexibility so joints don’t crack with temperature swings. It also keeps you from mixing mismatched flashing or tape that won’t seal around vents, skylights, or penetrations, and it reminds you to have spare nails, screws, caulking, and a sturdy pry bar ready for field adjustments as leaks show up or new details come into play.
Recommended tools and short-term supplies
Having the right gear on hand is key to diagnosing leaks and making quick repairs. Here’s what you need:
- Ladder setup: Ensure your ladder extends at least 3 feet above the roof edge for safe access. Rent a sturdy extension ladder if needed.
- Work gloves: Protect your hands from sharp edges and rough surfaces. Look for durable leather or reinforced fabric gloves.
- Safety glasses: Essential to shield eyes from debris and splashing sealants. Wear them anytime you’re on the roof.
- Pry bar: Useful for removing old flashing or lifting shingles. Get a 16-inch pry bar with a comfortable grip.
- Drill/driver: For driving screws and drilling holes. Rent an impact driver if you don’t have one, as it’s handy for tough materials.
These tools will help you diagnose and fix leaks efficiently without overbuying.
Material compatibility and minimum quality notes
The right materials ensure your repair holds up to weather and roof conditions. Here’s what to look for:
- Sealant type: Choose a sealant compatible with your roofing material (e.g., silicone for metal roofs). Check the label for specific compatibility.
- Tarp thickness: Use heavy-duty tarps at least 18 mils thick to prevent punctures. Thinner tarps may tear easily in strong winds or from sharp edges.
- Flashing material: Opt for aluminum, copper, or galvanized steel flashing that matches your roof pitch and type. Avoid using thin metal sheets as they can rust quickly.
Mismatched materials can lead to cracking, staining, or weak bonds over time, so choose wisely.
Cost, time estimates, and decision guide: DIY vs hiring a contractor
This section helps you weigh cost factors, time, and a quick decision go/no-go for DIY vs hiring a contractor. You’ll see how roof type, leak severity, materials, and any structural work affect time and price, plus a simple checklist you can use. It also flags warranty and insurance implications so you don’t hurt yourself later.
Knowing when to DIY or pull in a pro saves money and avoids costly callbacks. Use the go/no-go criteria to check complexity and safety before you start, and plan for realistic scheduling and potential hidden issues. If you’re unsure about safety or hidden damage, err on the side of professional help or at least get a second opinion.
Budgeting for temporary vs permanent fixes
When dealing with a roof leak, the first step is often to contain the damage temporarily. This can be as simple as placing buckets under drips or using tarps and roofing tape on the exterior. The cost here is minimal—mostly in materials like plastic sheeting and sealant strips—which typically ranges from $20 to $50.
However, when it comes time for permanent repairs, costs can skyrocket depending on the extent of damage and type of roof. For asphalt shingles, you might need new shingles, flashing, and possibly underlayment. A small patch job could cost around $100-$200 in materials alone. If structural issues are involved, like replacing damaged decking or rafters, costs can easily exceed $500.
Remember, the longer you wait to fix a leak permanently, the more damage it may cause inside your home—leading to higher repair bills for drywall, insulation, and flooring. So while temporary fixes save money upfront, they’re just buying time before bigger expenses hit.
To budget effectively, start with a minimum of $200-$300 for basic materials if you plan on doing it yourself. If structural repairs are needed or the job seems too complex, set aside at least $1,000 to cover professional labor and additional supplies.
How to find and vet a roofing contractor if needed
If you decide the job is too big for DIY, finding the right contractor is crucial. Start by checking their licensing and insurance status—this ensures they’re legally allowed to work on your roof and won’t leave you liable in case of accidents.
Ask for references from previous clients who had similar projects done. Contact these past customers directly to get honest feedback about quality, timeliness, and professionalism. Also, request a detailed written estimate that breaks down costs by material and labor—this helps avoid surprises later on.
Avoid contractors who pressure you into quick decisions or refuse to provide a written contract with clear terms. Red flags include vague estimates, lack of insurance documentation, and reluctance to show proof of licensing.
Choosing the right contractor upfront saves time and money in the long run. Take your time researching options, ask plenty of questions, and don’t hesitate to walk away from anyone who doesn’t meet your standards.

Conclusion
Safety first and durability second. When you finish, you’ll have a clear plan to stop the damage now and fix it right so it doesn’t come back, preserving the look of your home and your wallet.
Start by confirming safety, then move through the steps in order: verify the inside diagnosis, inspect the roof exterior for obvious failure points, run a controlled hose test to pin down the leak, apply a temporary containment if water is still coming in, choose a permanent repair method by roof type, and gather the tools and materials you’ll actually use. Keep the plan simple, test in a small area first, and work step by step until you’re confident the leak is controlled and the area is protected.
Common mistakes to avoid include rushing the diagnosis, ignoring safety gear, and pushing past obvious signs of structural issue. Don’t skimp on a proper seal, don’t ladder onto a wet surface, and don’t mix makeshift fixes with permanent repairs. If you’re unsure about the roof structure, the slope, or the type of repair needed, stop and reassess rather than guessing and risking further damage.
If the leak involves major roof work, uncertain roof type, or you’re dealing with repeated failures after a temporary fix, it makes sense to call a contractor rather than press on. Use professional help when the task exceeds your comfort level, when weather windows are tight, or when safety concerns rise. With the right plan and careful steps, you can protect your home, finish confidently, and get back to normal quickly.
FAQ
What causes water to drip from the roof?
Usually a bad seal on flashing, loose shingles, or clogged gutters. Sometimes it’s a ridge vent or chimney flashing failing. Find the spot where the water is entering and start there.
Is a small drip really a big deal?
Yes. Small drips can turn into rot, mold, and expensive repairs fast. Fix it early or you’ll pay later in bigger damage.
Can I DIY fix without professional help?
If you’re handy and safety comes first, you can diagnose and do simple fixes. Don’t climb on a wet or icy roof, and don’t punch holes in the wrong place. When in doubt, call a pro.
What are the first steps to diagnose the leak?
Inspect gutters and downspouts for blockage. Check flashing around chimneys and vents. Look for missing or curled shingles and water stains on the attic roof deck.