
Introduction
A nail pop is when a nail pulls away enough to leave a raised spot on the wall. To fix it permanently, you need to reset or replace the fastener and secure the surrounding area properly. This isn’t just mud—it’s about reattaching the panel and preventing future movement.
Start by locating the nail and figuring out why it popped. Back it out or drive it in, then use a longer, appropriate fastener if needed and repair any damage behind the drywall. Finish with mud, sand, and paint after the patch dries and the surface is smooth.
Key takeaways
- Inspect visible nail pop, locate damage behind the drywall before repair.
- Cut and remove loose drywall, reattach with proper fasteners and backing.
- Seal gaps with fire-rated or latex compatible caulk; wear protection.
- Install a new nail and shim the stud to prevent future pops.
- Avoid overdriving nails; check for pockets, moisture, or settling behind sheetrock.
- Allow mud to dry fully and inspect repairs before paint or texture.
Table of Contents
- Introduction
- Key takeaways
- What a Nail Pop Is and Why It Happens
- Assessing the Damage: How to Inspect a Nail Pop Properly
- Tools and Materials Checklist
- The Permanent Repair Method: Step-by-Step
- Alternative Fixes for Common Situations
- Preventing Future Nail Pops
- Cost, Time, and When to Hire a Pro
- Conclusion
- FAQ
What a Nail Pop Is and Why It Happens
A nail pop is when the head of a fastener backs out and pushes the drywall surface away. It looks like a raised bump or small mound on the wall or ceiling. A simple surface crack is different, usually a hairline line without a raised area.
The physics involve framing movement and wood shrinkage or expansion. Drywall screws tend to hold more tightly than nails, but both can fail if the structure moves or moisture changes. Look for signs that help distinguish structural movement from cosmetic issues, such as new gaps near seams or hardware coming loose.
Causes: Framing movement and humidity
Nail pops happen when nails used to fasten drywall to studs get loose over time. This is mainly due to two factors – framing movement caused by seasonal changes and humidity.
As temperatures rise in summer, wood expands. When it cools down in winter, it contracts. This constant expansion and contraction cause the studs and joists to move slightly, enough to loosen the nails holding your drywall.
Humidity also plays a role. High humidity can cause wood to swell, putting pressure on the nails and causing them to pop out.
Causes: Fastener choice and installation
The type of fastener used and how it’s installed can also contribute to nail pops. Nails are the most common culprit, but improperly installed screws or staples can also cause issues.
Nails should be driven flush with the surface of the stud. If they’re driven too deep, they can split the wood. If they’re not deep enough, they can’t grip properly and will pop out over time. The same goes for screws – if they’re not countersunk properly, they can cause drywall to buckle.
Staples are less common but can still cause problems if they’re not installed correctly. They need to be driven in at the right angle and with enough force to grip the wood securely.
When it’s more than a nail pop (structural concerns)
Most nail pops are just cosmetic and can be easily fixed. However, sometimes they can indicate a bigger problem that needs to be addressed.
Large gaps between the drywall and the studs, repeated pops in the same area, or cracks radiating from seams could all indicate structural issues. These could be signs of settling, rotting wood, or even termite damage.
If you notice any of these red flags, it’s a good idea to have your home inspected by a professional. They can determine if there’s a bigger problem that needs to be addressed.
Assessing the Damage: How to Inspect a Nail Pop Properly
Start with a visual check of the bump, crack, and any nearby seams. Run your hand over the area to feel for loose drywall behind the surface. Light taps with a screwdriver can reveal loose areas as you listen for a hollow sound.
Check nearby studs for movement and inspect the adjacent joints and insulation. Look for moisture indicators that point to a water issue. Confirm that the drywall behind is intact by gently probing around the lift to see if it rips or crumbles.
Visual checkpoints and measurements
Before you start fixing, use this visual checklist to assess the nail pop’s extent.
- Bulge size: Measure the bulge. Small (<1/2 inch) can be DIY, larger needs pro help.
- Paint cracking: Check for cracks around the bulge. More cracks mean more damage.
- Loose nail movement: Gently press the area. If the nail moves a lot, it’s loose.
- Gap or displacement: Measure gaps between drywall and adjacent surfaces. Displacement (>1/8 inch) needs pro help.
- Nearby seams: Check for cracks at nearby seams. Multiple issues may indicate structural movement.
- Insulation visibility: If insulation is visible, the drywall has failed.
- Water stains: Look for water stains around or below the bulge. This could be a sign of hidden damage.
- Crack pattern: Check if cracks radiate out from the bulge. This can indicate underlying structural issues.
Quick rule: If you find any red flags, it’s time to call a pro.
Testing the fastener and substrate
Now that you’ve visually assessed the damage, let’s confirm if the nail is loose or the drywall has failed.
Press test: Gently press the bulge. If it feels soft or gives way, the drywall may have failed.
Tap test: Tap around the bulge with a hammer. A hollow sound indicates drywall failure.
Remove a nail: Try removing one of the loose nails. If it comes out easily and without resistance, the drywall has likely failed.
When to call a pro
While some nail pops can be fixed DIY, others require professional help. Here are clear signs it’s time to call a pro:
Structural movement: If you find cracks at multiple seams or large gaps (>1/8 inch), there may be structural movement.
Repeated failures: If you’ve fixed the same nail pop before and it keeps coming back, there’s an underlying issue that needs pro attention.
Mold or water damage: If you find mold around the bulge or water stains, this indicates hidden damage that needs immediate professional help.
Tools and Materials Checklist
Have a screwdriver or drill, drywall screws, and drywall anchors on hand. Include adhesive options appropriate for drywall if you suspect separation. You’ll also want joint compound, tape, primer, and paint for finishing the repair.
Keep sanding tools, a damp cloth, and safety gear like goggles and a mask ready. If your toolkit is limited, consider safe alternatives such as using screws with pilot holes or using a smaller patch rather than a full panel. Always check product labels and manufacturer instructions for compatibility with your wall type.
Fastener options and specs to use
Before you start driving in fasteners, make sure you’ve got the right ones for your job. This checklist will help you pick the best screws or nails for your drywall installation.
- Screws vs Nails: Screws are recommended over nails as they provide better holding power and are less likely to pop out over time. Check product labels or manufacturer instructions if unsure.
- Screw Length: Measure your stud depth (usually 16″ on center) and add the thickness of your drywall. Screws should be long enough to penetrate at least 3/4″ into the stud. Common lengths are 1-1/4″, 1-5/8″, and 2″.
- Head Type: Choose a head type that fits your needs – round, flat, or countersunk. For drywall, flat heads are common as they can be easily covered with joint compound.
- Coating: Check if screws are coated (e.g., zinc, yellow) for rust resistance. This is especially important in humid areas.
- Phillips or Square Drive: Choose a drive type that fits your screwdriver – Phillips or square drive. Square drive is less likely to strip but requires a specific bit.
- Avoid Stripping: To prevent stripping, use the correct driver size and don’t overtighten. If screws start stripping, check your technique and equipment.
- Nails (if using): If you must use nails, choose ring or spiral shank for better holding power. Ensure they’re long enough to penetrate at least 3/4″ into the stud.
- Pilot Holes: For screws longer than 2″, drill a pilot hole first to prevent splitting. Check your screw length before drilling.
Quick rule: Always check your drywall thickness and stud depth before choosing fasteners. Using the wrong size can lead to popped nails, stripped screws, or damaged drywall.
Patch materials and finishing supplies
Use this checklist before starting any patching or finishing work to ensure you have the right materials for a long-lasting result.
- Setting-type joint compound: Check label for “setting” type. Confirm it’s suitable for your project (drywall, plaster, etc.).
- Ready-mix joint compound: Ensure it matches the setting type used on the rest of the wall.
- Mesh or paper tape: Check width and mesh size (if applicable) match your joint width. Paper tape should be crepe-style for best results.
- Primer: Confirm it’s a drywall primer, suitable for paint adhesion. Check if it’s stain-blocking if needed.
- Paint (for finishing): Ensure it’s compatible with the primer and joint compound used. Check label for “drywall” or “interior latex” type.
- Sandpaper: Verify grits are 120-150 for final sanding, 80-100 for initial sanding.
- Joint tape (if using): Check width matches joint. Ensure it’s fiberglass or paper-based for best results.
- Corner beads: Confirm they match the wall finish (e.g., straight, L-shape) and are suitable for your corner type (inside/outside).
Quick rule: Always use materials designed for drywall when patching. Using other types can lead to poor adhesion, cracking, or peeling.
The Permanent Repair Method: Step-by-Step
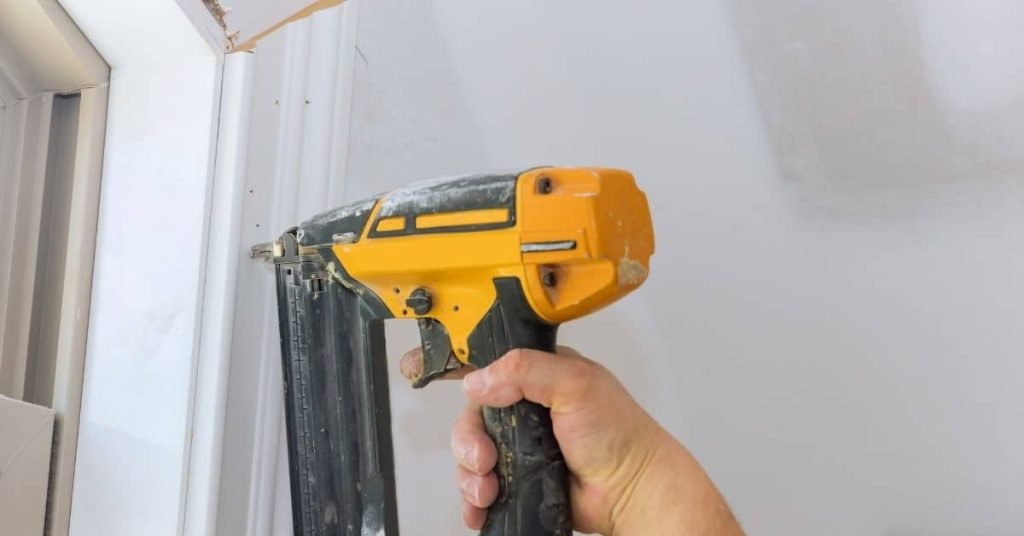
First, secure the drywall to the framing to stop movement. Drive screws at a slight angle into the stud behind the pop, working a few inches apart as needed. Remove any protruding material and replace fasteners with a proper screw pattern.
Apply a suitable amount of adhesive where gaps exist, then reattach the drywall surface. Finish with joint compound, tape, and sanding, followed by primer and paint to blend the repair into the surrounding area. Allow each stage to cure per product instructions before moving on.
Step-by-Step Repair Process
The following steps will guide you through a permanent repair of nail pops, ensuring your wall’s durability and longevity.
- Preparation: Gather tools and materials. Ensure the area is clear and safe to work in.
- Inspection: Re-inspect the nail pop. Check for any signs of structural damage or moisture issues.
- Remove Loose Fasteners: Use a claw hammer to gently tap out loose nails. Be careful not to damage the drywall further.
- Main Repair: Follow the steps below to secure the drywall, use adhesive if needed, and finish the surface properly.
- Cleanup: Once finished, clean up the area. Dispose of any debris appropriately.
Secure the drywall to framing
Locating studs is crucial for a solid repair. Use a stud finder or tap gently with a hammer to listen for the hollow sound of a stud.
Remove loose fasteners: If any nails are loose, use a claw hammer to gently tap them out. Be careful not to damage the drywall further.
Drive screws into solid framing: Using a drill and appropriate screw length (usually 1-2 inches longer than the drywall thickness), drive screws into the studs. Ensure you’re driving into solid wood, not just drywall. Space screws about every 6-8 inches along the stud for maximum support.
Screw pattern: For larger nail pops or areas where multiple nails have popped, consider using a staggered pattern for added strength.
Using adhesive and backing for hollowness
If the drywall feels hollow behind the nail pop, it’s likely not securely attached to the framing. In this case, using adhesive or installing backing strips can help.
Adhesive: Use a caulking gun to apply construction adhesive along the back of the drywall where it meets the studs. This will help bond the drywall to the framing and prevent future pops.
Backing strips/cleats: If the area is large or has multiple nail pops, consider installing backing strips or cleats. These are thin pieces of wood that can be screwed into the studs and provide additional support for the drywall.
When to use: Use adhesive or backing strips when the drywall feels hollow behind the nail pop. If the drywall is already securely attached, these steps may not be necessary.
Finishing: tape, compound, sanding, priming, painting
Taping: Apply joint tape over the repaired area. Ensure it’s fully embedded in the compound for a strong bond.
Compounding: Apply compound in thin layers, allowing each to dry completely before sanding. Feather the edges of each layer to avoid creating visible lines or ridges.
Sanding: Sand lightly between each layer and after the final layer. Use a fine-grit sandpaper (120-220 grit) for a smooth finish. Be careful not to sand too aggressively, as this can damage the drywall.
Priming and painting: Once the area is fully sanded and clean, apply a coat of primer. This helps prevent flash (uneven paint absorption) and ensures better paint adhesion. Allow the primer to dry completely before painting.
Alternative Fixes for Common Situations
For small isolated pops, a quick patch may be enough, but ensure the underlying cause is addressed. For large sagging areas, you may need to reinforce with additional fasteners or furring strips. In ceilings or textured surfaces, plan the texture match during finishing.
Pros and cons vary: quick fixes save time but may not last, while thorough repairs require more work but provide durability. Weigh temporary versus permanent outcomes and consider professional help for complex cases or structural concerns.
Repairing ceilings vs walls
When it comes to fixing ceilings and walls, gravity’s the boss. Here’s how you adapt:
Ceilings: Gravity pulls down, so your fix needs to hold up. Use longer screws or nails, spaced closer together for better support. Consider using a support method like furring strips or hat channels before attaching drywall.
Walls (vertical): Gravity’s not pulling as hard here, but you still need a solid base. Check base compaction and use appropriate fasteners. For large holes, consider using backing boards for extra support.
Matching Textured Finishes
Recreating textured finishes like splatter, knockdown, or orange-peel can be tricky. Here’s how to tackle it:
Splatter Texture: Use a hopper gun and a special splatter tip. Hold the gun about 6-12″ away from the wall, move steadily, and let the material do the work. Check your product label for recommended pressure and air settings.
Knockdown Texture: First, apply a base coat with a hawk and trowel. Let it set until it’s no longer sticky but still soft. Then, use a knockdown knife to press into the surface, creating the texture. Check base compaction before knocking down to ensure a smooth finish.
Orange-Peel Texture: Similar to knockdown, apply a base coat and let it set. Use an orange-peel roller or trowel to create the textured surface. Work in small sections to avoid overworking the material. Remember, practice makes perfect with these techniques.
If you’re struggling or unsure about your results, hire a texture pro. They have the experience and tools to get it right. It’s worth the investment to avoid a botched job that’ll cost more to fix than to hire a pro in the first place.
When replacement of drywall is the best option
Listen up, DIYer. Sometimes, spot repairs just ain’t gonna cut it. Here’s when you need to bite the bullet and replace that whole panel.
Extensive damage: If your wall or ceiling has more holes than Swiss cheese, it’s time for a replacement. Spot repairs will look like a patchwork quilt, and you don’t want that.
Moisture issues: Water damage is no joke. If you’ve got mold, warping, or soft spots, the panel’s gotta go. Ignore this, and you’re inviting more trouble down the line.
Repeated pops: If your drywall keeps popping like popcorn, it’s a sign of bigger issues – like settling or structural movement. A quick fix won’t hold; you need to replace that panel and address the root cause.
Preventing Future Nail Pops
Use proper fastening technique to avoid overdriving or underdriving screws and nails. Keep an eye on climate control and moisture management in the space to minimize wood movement. Insulation around the stud cavity helps stabilize temperature and humidity.
Choose compatible fasteners and adhesives during initial installation, and avoid overloading the wall with heavy finishes. Regularly inspect prone areas so you can catch movement before it worsens.
Best Fastening Practices for New Drywall
When hanging new drywall, using the right fasteners and technique is key to preventing nail pops. Here’s how:
Screw Spacing: Aim for 8-12 inches apart along studs, 6 inches apart at joints.
Depth: Drive screws just below the surface, not too deep or you’ll crack the paper. Not too shallow either, or they won’t hold.
Avoid Overdriving: Use a drill with a clutch set to stop driving at the right depth. Go slow and steady to avoid stripping screw heads.
Controlling Humidity and Movement
Wood expands and contracts with humidity changes, causing nail pops. Control this with:
HVAC: Keep your heating and cooling system running to maintain steady indoor humidity.
Dehumidifiers: Use them in damp areas like basements or bathrooms to keep humidity below 50%.
Ventilation: Ensure proper airflow, especially in kitchens and baths. Exhaust fans help prevent excess moisture.
Monitoring and Maintenance Plan
Regular checks and quick touch-ups can prevent nail pops from recurring:
Periodic Inspections: Check your walls every few months for any signs of popping or cracking.
Quick Touch-Ups: If you spot a small crack, fix it right away before it gets bigger.
Logging Repairs: Keep a record of where and when you’ve made repairs. This helps track trends and catch recurring issues early.
Cost, Time, and When to Hire a Pro
Expect DIY time to vary with the scope of the repair and your setup. Materials and effort will scale with the area that needs fixing. Consider the complexity of hidden framing or texture matching when planning.
If the issue involves significant structural movement or persistent moisture, getting a professional opinion is wise. For uncertain situations, check local contractor quotes and ask about their approach and guarantees before starting.
DIY Time and Materials Estimate
The quality of your materials can make or break a nail pop repair. Here’s what you’ll need and how long it might take:
- Drywall compound: Look for 100% acrylic, no-sand formulas. Avoid low-quality compounds that crack easily.
- Joint tape: Paper or mesh tape works well. Avoid fiberglass tape as it’s harder to sand.
- Screws: Use drywall screws, not nails. Look for coarse threads and a length that goes through the drywall into the studs.
- Primer: A good primer seals the surface and improves paint adhesion. Avoid water-based primers if you’re painting with oil-based paint.
- Paint: Match your existing color to avoid repainting entire walls or ceilings.
- Sanding screen: 120-grit sandpaper is usually sufficient. Avoid using too coarse a grit that can leave marks.
- Time: Inspecting and securing the nail takes about 15 minutes. Applying compound, taping, and sanding may take another hour or two. Painting adds another hour or more.
What Professionals Will Do Differently
A pro will start by assessing the structure to ensure there’s no underlying damage causing the pop. They might recommend full-panel replacement if the drywall is damaged beyond repair.
They’ll also match textures seamlessly, something DIYers often struggle with. Pros use specialized tools and techniques to achieve this.
If the pop is due to movement in the framing, they may suggest structural repairs or reinforcements before fixing the nail pop to prevent recurrence.
When to hire a pro: If you suspect underlying structural issues, if the texture is complex, or if multiple pops keep recurring despite your best efforts.
How to Find and Brief a Contractor
When hiring a pro, document the issue with photos. Describe any recurrence or patterns you’ve noticed.
Ask for references and check their work quality. A warranty on their labor is also beneficial in case the pop returns.
What to ask: Inquire about their process, especially if there are structural concerns. Ask how they’ll match the texture and ensure a seamless repair. Also, ask about prevention measures for future pops.
Conclusion
Nail pops are a warning sign, but with the right steps you can fix them for good, keeping the wall smooth, strong, and looking right. Stay practical, test as you go, and don’t skip safety or cure times.
First, inspect for proper cause, assemble the needed tools and materials, then follow the permanent repair steps in order: secure the area, reset or replace the fastener, patch and feather the damaged plaster or drywall mud, let each coat dry, sand smooth, and finish with a finish coat after ensuring no movement or bulge remains. Do the work in small, controlled passes, test the surface as you go, and never rush the cure. Use the strongest but simplest path for the patch, and verify the area is clean, dry, and supported during repairs.
Common mistakes to avoid are leaving a loose nail or screw in place, overdriving or underdriving the fastener, and skipping proper drying times or patching steps. Don’t work with wet materials, don’t skimp on safety gear, and don’t force a patch into a bad base with brittle or cracked backing. If you’re unsure about moisture, structural issues, or electrical or plumbing behind the wall, stop and reassess before proceeding; small, correctable mistakes are fine, irreversible damage is not. If you see sagging, large cracks, or signs of hidden damage, it’s time to call a pro.
If you’re confronted with significant water damage, active leaks, or a patch that won’t hold after careful repair, bring in a professional rather than pushing on. For everything else, you’ve got this—plan, proceed in small steps, and you’ll finish with a solid, durable result you can trust.
FAQ
How do I know a nail pop is ready for the permanent repair and not just a temporary fix?
Make sure the wood around the nail is dry and stable. If the drywall mud has cracked again after a few days, or if the nail sticks up, it isn’t ready yet.
What should I avoid while mudding, taping, or setting the nail pop repair?
Avoid forcing the nail back in or over-tightening screws. Don’t skim over cracks or pile on mud without letting it dry; it will re-poke through. Don’t neglect proper surface cleaning and priming before mud goes on.
How can I verify the repair is solid after finishing and painting?
Check for movement by pressing near the repaired area and listening for a crack. Look for any new nail pops or cracking seams after a few days of normal use. If it’s still wobbly or cracks reopen, reassess the underlying cause before redoing the fix.