
Introduction
Skim coating over textured plaster is applying a thin, smooth layer to even out high spots and create a flat surface. You’ll knock down the high spots, then skim with lightweight compound to blend the texture. Start by inspecting for obvious ridges and plan where you’ll feather edges.
Before you start, confirm you have the right materials and follow the manufacturer’s instructions and local rules. Work in small areas, knock down any peaks, then skim again to keep flatness consistent. If you see sags, ridges, or unevenness, rework the area and check with a straightedge or guide.
Key takeaways
- Assess plaster texture and height differences before skim coat; plan knockdown strategy.
- Inspect and repair cracks, bulges, and delamination with compatible patch materials.
- Gather tools: trowels, hawk, mud pan, sanding blocks, microfiber cloths.
- Mix skim coat per manufacturer instructions and test on small area first.
- Apply thin even coat, allow to set lightly, and knock down high spots consistently.
- Use straightedge or laser for flatness checks; mark high spots for correction.
- Wear eye/respiratory protection; ventilate area; clean spills promptly to avoid slip hazards.
Table of Contents
- Introduction
- Key takeaways
- Initial Assessment and Planning
- Tools and Materials Checklist
- Surface Preparation and Repairs
- Mixing and Applying the Skim Coat
- High-Spot Knockdown Techniques
- Flatness Checks and Measurement Methods
- Sanding, Finish Correction, and Prevention of New Highs
- Final Inspection, Priming, and Painting Prep
- Conclusion
- FAQ
Initial Assessment and Planning
Begin by evaluating the textured plaster for adhesion, moisture, cracks, and the extent of high spots. This helps you decide if skim coating is appropriate or if more extensive repair is needed. Look for loose finish, damp stains, and areas that delaminate with touch.
Verify any product labels, datasheets, or manufacturer instructions to confirm suitability for plaster substrates. Check local code or rules if moisture or ventilation impacts coating decisions, and document all observations before starting.
Visual inspection checklist
Before you start, use this checklist to assess your textured plaster. It’s quick and helps you spot issues early.
- Loose texture: Gently push on the texture. If it feels loose or crumbles, note it down.
- Delamination: Check for any areas where the texture is peeling off from the wall.
- Staining: Look for water stains or discoloration, which could indicate moisture issues.
- Mold: Inspect for any signs of mold growth, especially in damp areas like bathrooms.
- Cracks: Check for hairline cracks or larger ones. Note their size and location.
- High spots: Look for peaks, ridges, or seams that might need extra attention.
- Dust: If there’s a layer of dust on the texture, it could affect adhesion.
- Previous repairs: Note any areas where previous repairs have been made.
Quick rule: Don’t skip this step. It helps you plan your work and avoid surprises later.
Simple adhesion and moisture checks
Before skim coating, check the adhesion of the existing texture and for signs of moisture.
Adhesion test: Gently scratch the surface with a coin or a key. If the texture comes off easily, it might not adhere well enough for skim coating.
Moisture check: Look for any signs of water damage like stains, warping, or musty odors. Also, check if the wall feels cold to touch in some areas, as this could indicate moisture behind the plaster.
Mold check: If you suspect mold, use a black light to reveal it. Moisture and mold can affect your skim coat’s performance.
Mapping high spots and problem areas
Before you start working, mark out the high spots and problem areas. This helps you prioritize your work and ensures a smooth finish.
Use a pencil or a marker to draw circles around high spots, ridges, and seams. You can also use different colors to categorize issues – for example, red for high spots that need immediate attention, blue for cracks, etc.
Prioritize: Start with the highest points and work your way down. This helps you avoid making a mess of areas you’ve already worked on.
Document: Take photos or make notes to keep track of what you’ve done and where. This is especially helpful if you’re working in stages.
Tools and Materials Checklist
Assemble a DIY-friendly set of hand and power tools, mixing buckets, and a margin trowel. Include a drywall knife, sanding tools, and a clean mixing paddle. Have a level, straightedge, and a bucket mixer ready for consistent batches.
Choose joint compound or skim coats labeled for plaster, plus appropriate primers and sealers. Add safety gear like eye protection and a respirator, and always read product labels or manufacturer instructions to match substrates and conditions.
Recommended tools and why they matter
Before you start, make sure you have the right tools for the job. Here’s a quick checklist to ensure you’re well-equipped.
- 6-inch and 12-inch taping knives: For applying and spreading compound. The 6-inch is great for details, while the 12-inch covers larger areas quickly.
- Hawk: Holds the compound as you work, keeping your hands clean.
- Mixer: Essential for mixing compounds to a smooth consistency. A drill with a paddle attachment works well.
- Straightedge or level: To check and maintain flatness during application.
- 9-inch and 12-inch broad knives (for knockdown): For spreading and flattening the final coat.
- Sanding tools (sponges, poles, or orbital sander): To smooth out any imperfections after knockdown.
- Work lights: Good lighting is crucial for seeing what you’re doing, especially when sanding.
- Dust mask and safety glasses: Protect yourself from dust and debris during sanding and demolition.
Quick rule: Having the right tools makes your job easier and ensures a better finish.
Compound types and bonding primers
Choosing the right compound and primer is key to a successful skim coat. Here’s what you need to know.
- Ready-mix compounds: Pre-mixed, easy to use, but may have a shorter shelf life once opened.
- Setting-type compounds: Powdered form that you mix with water. Offers more control over consistency and working time.
- Bonding primers (PVA or acrylic): Enhances adhesion of compound to plaster, especially on textured surfaces.
- Additives (polymer fortifier, retarder): Improves durability and extends working time. Optional but helpful for larger projects.
Quick rule: For textured plaster, always use a bonding primer to ensure proper adhesion.
Safety and dust-control gear
Working with drywall compounds generates a lot of dust. Here’s how to protect yourself and contain the mess.
- Respirator or dust mask: Protects your lungs from airborne particles.
- Safety glasses: Shields your eyes from debris.
- Gloves: Keeps your hands clean and protected from compounds and dust.
- Drop cloths or plastic sheeting: Covers floors and furniture to contain dust and make cleanup easier.
- Wet sanding (optional): Uses water to control dust during final sanding. Requires proper extraction or containment.
Quick rule: Always wear appropriate PPE, and contain the work area to minimize cleanup and health risks.
Surface Preparation and Repairs
Clean the surface to remove dirt, dust, and grease. Remove loose texture and chips, and fill cracks and voIes to create a solid base. Profile the edges so the skim coat can transition smoothly to surrounding areas.
Mask adjacent surfaces and vacuum or wipe away dust as you go. Follow the product instructions for curing times and re-cleaning before applying the next layer, and verify any required repairs against local guidelines.
Removing loose texture and contaminants
Start by wearing safety gear – goggles, gloves, and a dust mask. Use a scraper or putty knife to gently remove any flaking texture. Be careful not to damage the underlying surface.
Vacuum up any debris. Then, use a damp cloth to wipe down the walls, removing any dirt or contaminants. Let it dry before proceeding.
Never power wash textured surfaces as it can cause further damage and create high spots.
Repairing cracks, delamination, and hollows
Inspect your walls for cracks, delaminated areas (where plaster is lifting), or hollow spots. Use a tap test – knock gently with a screwdriver handle; if it sounds hollow, you need to repair.
For small cracks, fill them with a suitable filler and let it dry. Sand smooth. For larger issues, open the crack or delaminated area, clean, and apply a flexible adhesive before skim coating.
Hollows can be filled with a lightweight aggregate mix or expanding foam before skim coating.
Priming and bonding steps before skim coating
A bonding primer or PVA is crucial for good adhesion. Use it when your substrate is porous, has a high suction rate, or is difficult to adhere to (like new plaster).
Apply the primer evenly with a roller or brush, following the manufacturer’s instructions. Let it dry as directed before skim coating.
Never use a primer if your substrate is already well-adhered and not porous. It can cause problems with adhesion instead.
Mixing and Applying the Skim Coat
Mix the skim coat to a workable, scoopable consistency that holds on a trowel without sagging. Avoid over-watering or thinning beyond recommendations. Stir until the mixture looks uniform with no clumps.
Apply full-coverage thin coats using proper trowel technique to avoid thick ridges or air pockets. Maintain a consistent pass, and consult the product instructions for recoat windows and cure times before the next layer.
Visual cues for proper mixing consistency
The perfect skim coat compound should look like thick, creamy peanut butter. It’s ready when it holds its shape but slowly drips off the trowel.
Here’s what to watch for:
Too thin: Runs off the trowel like soup. Add more compound or slow down your mixing water.
Too thick: Stands tall on the trowel, doesn’t spread easily. Add a bit of water and mix well.
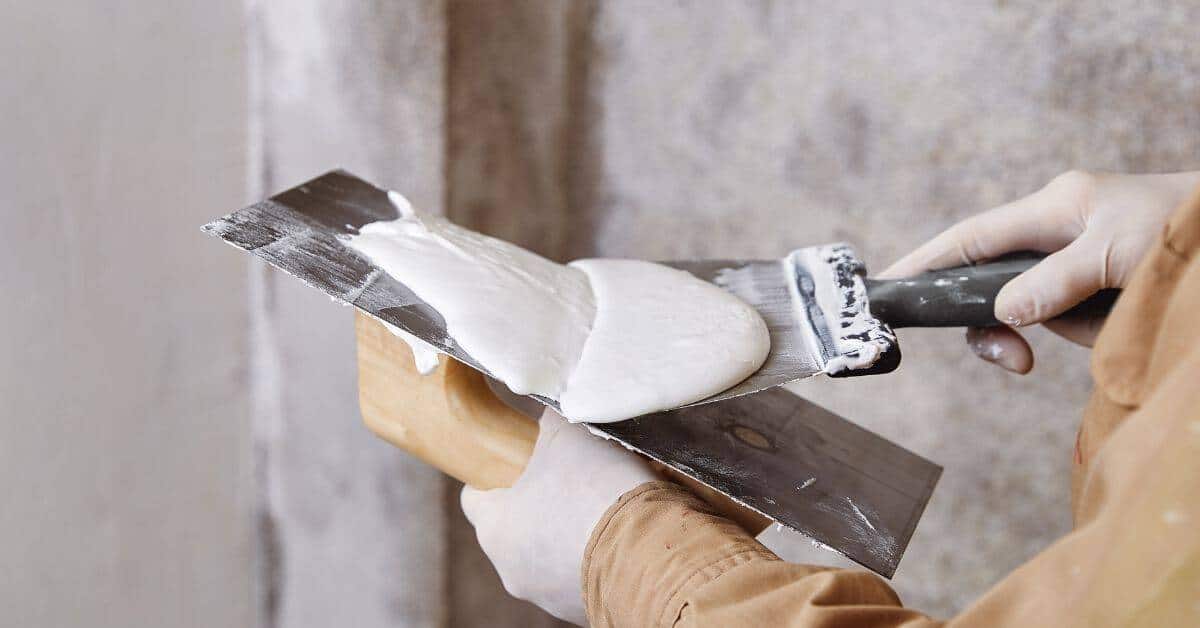
Trowel and knife technique for even coverage
Achieving an even layer is key to a smooth finish. Here’s how:
Start with a 6-inch trowel, spread the compound in wide, overlapping ‘M’ or ‘W’ strokes.
Use light pressure at first, then firm up as you get a feel for it. Aim for a thin layer – about 1/32 to 1/16 inch thick.
Once you’ve covered the area, switch to a 12-inch trowel. Use long, smooth strokes to spread and level the compound. Keep your wrist relaxed and let the trowel glide over the surface.
Feathering and working edges
Proper edge work prevents ridges that can become high spots after drying. Here’s how to feather:
As you approach an edge, use a 4-inch trowel. Start at the wall or ceiling line and spread the compound outwards in short, smooth strokes.
Gradually reduce pressure as you reach the outer edge. This ‘feathers’ the compound, creating a thin, blended layer that won’t ridge up.
For corners, use a corner trowel to create a sharp, clean line. Again, feather outwards to avoid ridges.
High-Spot Knockdown Techniques
Identify high spots by feel and sight across the surface, noting any ridges or bulges. Use a sharp blade or scraper to remove excess texture from elevated areas. Follow with a light knockdown pass to level the surface.
If needed, re-coat the affected areas after the first skim coat cures, ensuring compatibility with existing texture. Always verify tool and material compatibility by checking the manufacturer guidance.
Identifying true highs vs optical irregularities
Before you start scraping, it’s crucial to know what you’re dealing with. Some ‘high spots’ might just be shadows or sheen from the paint.
Use a low-angle light source or a flashlight to cast a clear shadow over the surface. True highs will cast distinct shadows; optical irregularities won’t.
Pro tip: Don’t rely on your eyes alone. Use a straight edge and a level to confirm true high spots.
Knockdown tool selection and technique
Choosing the right tool is key to removing highs without damaging your surface. Here are some options:
- Wide Blades (6-12 inches): Great for large, flat areas. Use a light touch and long strokes.
- Darbies (4-6 inches): Ideal for edges and corners. Apply gentle pressure, pull towards you.
- Sanding Blocks: For fine-tuning and smoothing. Use 120-grit sandpaper, light pressure.
- Specialty Scrapers (e.g., Stanley Surform): Good for tight spaces and detailed work. Go slow, use long strokes.
- Rentable Planes: For really tough spots. Be careful not to gouge; adjust blade depth as needed.
When to recoat versus sand down
Deciding whether to recoat or reskim depends on the severity of high spots and your timeline.
For minor highs (1/8 inch max): You can usually skim over them. Apply a thin, smooth coat, and feather edges well.
For major highs: It’s best to mechanically remove them first. Scrape, sand lightly, then re-prime before reskim coating. This ensures a smooth, even surface.
Pro tip: If you’re unsure, it’s better to take the time to remove highs properly now than to deal with visible imperfections later.
Flatness Checks and Measurement Methods
Check flatness with a straightedge or long level across the surface, looking for gaps or wobble. Use sight lines or a raking light to highlight irregularities. Employ simple templates or known-good references to gauge highs and lows.
Explain tolerances conceptually and decide if the surface meets your plan before proceeding. Review product instructions and local standards if you need concrete targets for flatness checks.
Using straightedges and sighting methods
Run a long, straight level or straightedge across your walls and ceilings. Start from the top and work down.
Look for gaps between the tool and the surface. If light shines through, that’s a high spot. If it doesn’t touch, that’s a low spot.
Shadows can also tell you about flatness. Hold your straightedge at an angle to the sun or artificial light. Shadows will reveal any bumps or dips.
Raking light and shadow line inspections
Use directional lighting to check your work during and after skim coating.
- Before knockdown: Check for any high spots. Light at a low angle will cast long shadows, making bumps stand out.
- After knockdown: Recheck with light at the same angle to ensure all highs are gone.
- After sanding: Use light to find any missed spots or new imperfections.
- Before priming: One last check for any remaining issues.
Quick rule: Always inspect with raking light before moving on to the next step. It’s quick and can save you from rework.
Simple templates and feel checks
Sometimes, your eyes and even a straightedge aren’t enough. Here are some low-tech methods to find local deviations:
- Fingertip feel: Run your fingers over the surface. You can feel bumps or dips that you might miss with just your eyes.
- Drywall tap: Gently tap the wall with a drywall hammer. A hollow sound indicates a low spot, while a solid thud means it’s flat.
- Small templates: Use small, flat objects – like coins or business cards – to check for high spots. If they wobble or don’t lay flat, you’ve got a problem.
Quick rule: Don’t rely on just one method. Use a combination of these checks to ensure your surface is truly flat.
Sanding, Finish Correction, and Prevention of New Highs
Use safe sanding techniques to blend the skim coat, avoiding gouges or circular scratches. Consider recoat options if sanding compromises adhesion or thickness. Work gradually to minimize dust and heat buildup.
Prevent new highs by maintaining even pressure and keeping the surface clean between passes. If in doubt, follow the guidance on sanding limits and recoat intervals from the product label or manufacturer instructions.
Sanding strategy and grit choices (conceptual)
The goal of sanding is to smooth peaks and blend transitions, not to remove material.
Start with a lower grit to knock down high spots. Then use a higher grit to refine the surface.
Pro tip: Always check your product recommendations for ideal grit sizes.
Dust management and cleanup
Contain dust with plastic sheets or damp rags at the job site’s edges.
Use a vacuum with a HEPA filter to clean up drywall dust. Wet mopping can help too, but avoid getting water on your skim coat.
Safety first: Wear a respirator and safety glasses during sanding and cleanup.
Preventing reappearance of texture or highs
Feather your skim coat edges to avoid ridges. Use a wider trowel for the final pass, working from multiple angles.
Control material application by using consistent trowel pressure and even strokes. Don’t over-apply or under-apply.
Remember: Over-sanding can create low spots, so be gentle and patient.
Final Inspection, Priming, and Painting Prep
Perform a final flatness and visual inspection, checking for uniform sheen and edge details. Choose sealers or primers compatible with skimmed plaster, considering porosity and adhesion. Clean and prepare the surface for topcoat application according to product directions.
Document any last-minute touch-ups or color-anxiety fixes before painting. Verify that primers are appropriate for plaster and skim-coated surfaces by consulting labels, datasheets, or manufacturer guidance.
Final visual and tactile checkpoints
Before you prime, give your skimmed plaster a final once-over. This ensures any issues are caught early.
- Sheen consistency: Check under raking light for consistent sheen. Inconsistencies may indicate high spots or uneven application.
- Smooth touch: Run your hand over the surface. Any rough patches need attention.
- No shadow bands: Inspect for any visible banding under raking light, which could indicate missed areas during knockdown.
- High spots: Feel for and mark any high spots that may have been missed.
- Low spots: Check for dips or low spots where the skim coat might be too thin.
- Cracks: Inspect for hairline cracks, which can widen over time.
- Dust: Ensure surface is clean and free of dust particles that could affect primer adhesion.
- Moisture: Check for any signs of moisture, as this can compromise the skim coat.
Quick rule: A thorough final check helps prevent issues from cropping up later in the painting process.
Primer selection and application notes
Choosing the right primer is crucial for a smooth, even topcoat on your skimmed plaster.
- Absorption: Use a primer that seals the substrate to prevent tannin bleed and evening out absorption rates.
- Adhesion: Ensure the primer promotes good paint adhesion.
- Sheen level: Match the sheen level of your primer to your topcoat for a consistent finish.
- Dry time: Consider the dry time, especially if you’re on a tight schedule.
- Coverage: Check the coverage rate to ensure you have enough product.
- Application method: Follow the manufacturer’s guidelines for application (roller, brush, spray).
- Temperature and humidity: Apply within the recommended temperature and humidity range for best results.
- Surface preparation: Ensure the surface is clean, dry, and free of contaminants before applying primer.
Quick rule: The right primer lays the foundation for a smooth, even topcoat.
Small-spot touch-ups after priming
After applying your primer, inspect the surface again. This time, you’re looking for tiny defects that need attention before painting.
- Missed spots: Check for any areas missed during the skim coat application or knockdown process.
- Light sanding: If there are minor high spots, lightly sand them down to ensure a smooth surface.
- Spot skimming: For small low spots, apply a touch of skim coat and let it dry before proceeding.
- Dust removal: Wipe the surface with a damp cloth to remove any dust from sanding or handling.
- Moisture check: Ensure there are no signs of moisture, which could compromise your topcoat.
- Primer adhesion: Gently scratch the primer with a nail to ensure it’s adhering properly.
- Sheen consistency: Check under raking light for consistent sheen. Inconsistencies may indicate issues that need addressing.
Quick rule: Addressing tiny defects after priming ensures a smooth, even topcoat with no surprises during painting.
Conclusion
Finish with a solid, flat skim that stays durable and looks right. The key is steady steps, careful checks, and prioritizing safety to avoid costly fixes later.
Verify that you’ve prepped and repaired the surface, mixed and applied the skim coat consistently, knocked down high spots in the right sequence, and rechecked flatness using practical measurements. Test in a small area first, then work methodically across the whole surface, and finish with the correct sanding, fill-in where needed, and a clean prime before paint.
Avoid these common traps: rushing the skim coat or knockdown, skipping surface prep, and faintly testing tools or ratios. Don’t work on damp or overheated plaster, and wear eye and skin protection. If you see ridges that won’t take a smooth finish, or the area keeps telegraphing through multiple coats, stop and reassess instead of pushing forward, and consider bringing in a pro if the substrate looks compromised or the finish won’t resolve with basic steps.
When it makes sense to call in a pro is when you encounter persistent cracking, water damage, or uneven backing that keeps showing through after multiple attempts. Stay patient, follow the checks in sequence, and you’ll land a solid base for priming and painting—your best path to a durable, professional-looking result.
FAQ
How do I identify remaining high spots before knockdown?
Run your hand over the surface and look for bright reflections in the light. Use a straightedge or level to scan across walls and ceilings. If you feel or see a peak, mark it and address it before knocking down.
What should I look for when choosing a skim coat mix for textured plaster?
Check the product label for suitability on plaster surfaces and recommended application methods. Look for instructions on coverage, pot life, and curing times. If in doubt, follow the manufacturer’s directions or ask the supplier for plaster-approved options.
How do I perform a proper knockdown without creating new highs?
Apply a thin, uniform skim over the high spots and let it set just enough to dull. Use a wide trowel to lightly flatten highs in a single pass. Avoid overworking areas and don’t push too hard across the surrounding texture.
How do I verify flatness after knockdown and before sanding?
Check with a straightedge across several angles of the surface. Look for light gaps or high lines and note irregular zones. If needed, re-skim the trouble spots and recheck with the straightedge.