
Introduction
Plaster cracks that keep coming back are usually signs of ongoing movement—either structural, thermal, or moisture-related—rather than a one-off surface failure. In plain terms: fix the movement first, then choose a flexible joint compound or mesh to bridge how much movement you expect and follow the product label for prep and cure times. Check framing, fastener tightness, and moisture sources before you patch so the repair sticks.
Practical options include flexible setting compounds, acrylic-based fillers, and reinforced mesh; each has different stretch and bonding properties so read the manufacturer instructions and test a small area if unsure. For larger or recurring cracks, consider cutting a small control groove, installing appropriate mesh correctly over a clean, keyed surface, or using a dedicated movement joint—if unsure whether a control joint is required, check local practice or consult a pro.
Key takeaways
- Diagnose recurring cracks by monitoring movement with a level and straightedge.
- Choose flexible joint compounds labeled for plaster to accommodate movement.
- Mesh options: select appropriate reinforcement and proper embedding to prevent failures.
- Use control joints or alternatives only where structural movement dictates.
- Follow step-by-step repairs; embed tape or fiberglass flush with wall plane.
- Safety: wear eye protection and dust mask; avoid overheating or overworking plaster.
Table of Contents
- Introduction
- Key takeaways
- Why Plaster Cracks Recur
- Movement Checks: How to Assess Ongoing Movement
- Types of Flexible Joint Compounds and How to Choose
- Mesh Options: Tape, Fiberglass, Lath, and Metal Reinforcement
- Control-Joint Alternatives and When to Use Them
- Step-by-Step Repair Methods for Recurring Cracks
- Cost, Durability, and Long-Term Planning
- Common DIY Mistakes and Troubleshooting a Failed Repair
- Conclusion
- FAQ
Why Plaster Cracks Recur
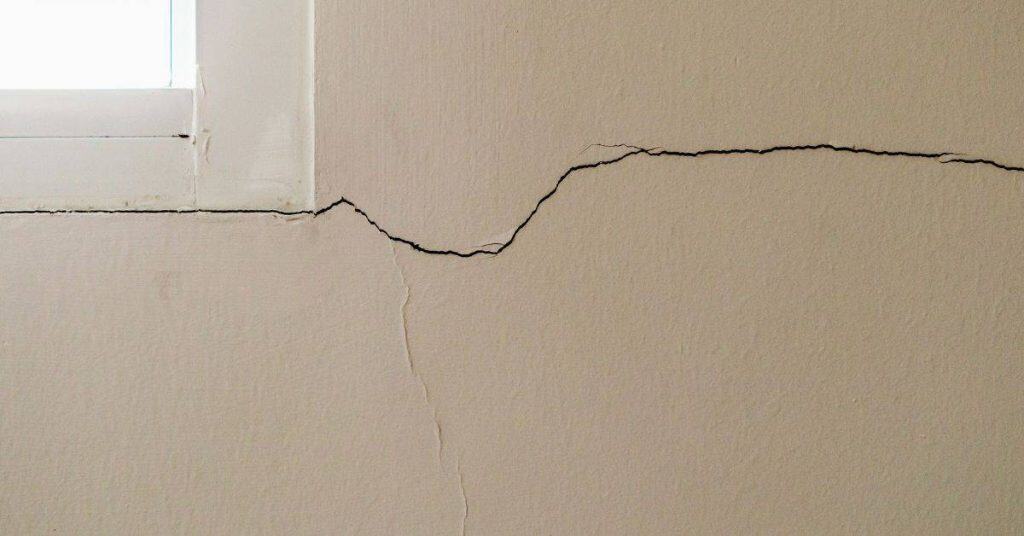
Not all cracks are the same: some are cosmetic hairlines while others are symptoms of ongoing movement. Look at the crack pattern, whether lines are even, offset, or widening, and note their location—corners, near windows and doors, or over joists often point to movement-driven failure.
Check the substrate condition carefully: inspect lath integrity, plaster bond, and any signs of delamination or hollow-sounding areas before repairing. Verify moisture sources, thermal cycling, and structural indicators like joist deflection or settlement; use a moisture meter, visual staining, and a short monitoring period to decide if the fix must address the substrate.
Common causes of recurring cracks
Plaster cracks that keep coming back often point to underlying issues. Here are some typical culprits:
Poor substrate bond: Inadequate preparation, or using the wrong material for backing, can lead to poor adhesion.
Hairline settlement: Small movements in the structure over time can cause cracks to reappear. This is common in older homes.
Ongoing movement: Structural shifts due to soil settlement, adjacent construction, or other factors can keep cracks opening up.
How to tell movement-driven cracks from surface-only cracks
Not all cracks are signs of serious problems. Here’s how to distinguish between active movement and stable, cosmetic cracking:
Crack patterns: Even, expanding, or offset cracks often indicate ongoing movement. Hairline cracks that don’t widen usually aren’t a concern.
Location: Cracks near windows/doors, corners, or over joists may suggest structural issues. Those in random spots are typically cosmetic.
Test with a penny: Place a penny in the crack. If it stays put, the crack isn’t active. If it falls in, there’s ongoing movement.
When a crack signals a structural problem
Some cracks warrant professional attention. Here are warning signs to look out for:
Wide cracks: Cracks wider than 1/4 inch (6 mm) may indicate serious issues, especially if they’re growing.
Diagonal cracks: These can signal structural problems, particularly in walls or foundations.
Cracking at multiple locations: Multiple cracks, especially if they’re aligned, could point to a larger problem. Document their location and progression before calling a pro.
Movement Checks: How to Assess Ongoing Movement
Separate active movement from stable surface cracking by observing whether cracks reopen, widen, or shift after temperature or moisture events. Simple indicators are recurring openings after rain, seasonal cycles, or visible vertical displacement—if in doubt, monitor rather than patch immediately.
Use repeatable DIY tracking: mark crack ends with a fine permanent marker or place a paper gauge, photograph to a calendar, and measure widths at fixed points with a ruler or calipers. Escalate to a pro if you see consistent widening over weeks, sudden changes after weather events, or other signs of structural shift—check manufacturer data or professional guidance for specific thresholds to act on.
Visual and Tactile Inspection Checklist
Before diving into measurements, perform a thorough visual and tactile inspection. This helps pinpoint areas of concern and guides your follow-up actions.
- Joints: Check for widening or separation. Feel for any give or movement.
- Beams and supports: Look for cracks at their ends, indicating possible settlement or uplift.
- Window openings: Inspect for diagonal cracking around frames, suggesting differential movement.
- Adjoining materials: Check for cracks at interfaces with other surfaces (e.g., walls meeting floors).
- Floors and ceilings: Feel for warping or sagging, which could indicate structural issues.
- Plaster surface: Inspect for hairline cracks, mapping their length and direction.
- Exterior walls: Check for signs of movement at corners, windows, and doors.
- Gutters and downspouts: Ensure they’re functioning properly to prevent moisture intrusion.
Quick rule: If you find any signs of ongoing deformation or widening joints, prioritize those areas in your monitoring efforts.
Monitoring Techniques and Record-Keeping
Regularly monitor cracks to track changes over time. This helps establish whether they’re active and guides your repair strategy.
Use crack width gauges to measure crack widths at multiple points, noting any opening or closing. Mark measurements on a floor plan or sketch for easy tracking.
Take photos every few days to a week, ensuring consistent angles and lighting. Use chalk marks or tape measures in the frame for scale. Keep photos organized with dates and locations.
Maintain a logbook noting crack widths, dates of measurement, weather conditions, and any other relevant observations. This helps identify patterns and triggers for movement.
When to Involve Professionals and What to Report
While DIY monitoring is crucial, knowing when to escalate saves time and prevents further damage. Here are some trigger points:
Crack widening: If a crack widens more than 0.5 mm within a month, consult a professional.
Sudden changes: If cracks suddenly widen or new cracks appear after rain, freeze-thaw cycles, or other environmental factors, seek expert advice.
Vertical displacement: If you notice any vertical movement (e.g., doors sticking, windows not closing properly), involve a professional immediately.
When reporting, provide detailed measurements, photos with dates and locations, and your logbook notes. This helps professionals diagnose the issue accurately and recommend appropriate fixes.
Types of Flexible Joint Compounds and How to Choose
Flexible joint compounds fall into broad families—latex/vinyl-based and elastomeric/polyurethane blends—each with different feel and elongation. Compare how well they bond to plaster, resist shrinkage, and tolerate water or humidity when used on your substrate.
Read the product data sheet for movement or elongation ratings and recommended joint sizes; don’t assume all flexible products perform the same. Choose based on expected substrate movement, prep needs, paintability, and compatibility with the patch system—test adhesion on a small area if you’re unsure and follow the manufacturer’s surface-prep instructions.
Compound types and their pros/cons
Flexible joint compounds come in various types, each with its own strengths. Here’s a quick rundown:
Polymer-modified compounds combine traditional materials like cement or gypsum with polymers for added flexibility. They’re great for small to medium cracks and can handle some movement.
Acrylic compounds are water-based, making them easy to apply and clean up. They offer good adhesion and flexibility but may not be suitable for high-movement areas or wide cracks.
Ready-mix flexible patch compounds come pre-mixed and ready to use. They’re convenient but can be more expensive. Choose based on the specific movement and crack size you’re dealing with.
Matching compound performance to expected movement
To choose the right compound, first understand your substrate’s movement. Then, check product literature:
Look for movement rating. This tells you how much movement the compound can accommodate without failing.
Check elongation percentages. Higher numbers mean the compound can stretch more before breaking.
Consider recommended joint movement ranges. This guides you on when to use each compound based on expected movement.
Application limits and compatibility with plaster substrates
Preparation and compatibility are key for successful application:
Surface prep: Ensure the substrate is clean, dry, and free of loose material. For lime plasters, remove any efflorescence.
Priming: Use a primer to improve adhesion and seal the surface. Some compounds come with their own primer; follow manufacturer guidelines.
Compatibility: Lime plasters can react with some compounds, causing discoloration or loss of adhesion. Gypsum plasters may require specific compounds to avoid shrinkage cracks. Always check compatibility before applying.
Mesh Options: Tape, Fiberglass, Lath, and Metal Reinforcement
Reinforcement choices range from paper or cloth tape and fiberglass mesh to paper lath and metal lath, each handling movement differently. Fine cracks and low-movement areas often suit fiber mesh or tape, while higher movement or re-bedding over poor substrate may need metal lath or welded mesh for strength.
Install mesh so it’s fully embedded in the base coat, with correct overlap and secure fastening to prevent slippage; follow manufacturer or product label installation guidance where provided. Consider substrate type, moisture exposure, and corrosion risk—select alkali-resistant fiberglass for cementitious surfaces and avoid fasteners or adhesives that can pull loose under cyclic movement.
Comparing tape and mesh types
When it comes to reinforcing plaster, you’ve got options. Let’s break down the main ones.
Paper Tape: Cheap, easy to use, but lacks strength for wide cracks or high movement areas. It’s best for hairline cracks and minor repairs.
Fiberglass Mesh: Stronger than tape, it’s great for wider cracks and moderate movement. However, it can be tricky to embed properly and may require additional support for large gaps.
Self-adhesive Products: Convenient with built-in adhesive, but they’re not always the strongest option. Reserve them for small repairs where strength isn’t a concern.
Metal Lath: The heavy-duty choice, it’s ideal for large cracks and high movement areas like corners or around windows/doors. It’s more expensive and labor-intensive to install but provides unmatched reinforcement.
Installation best practices for long-lasting repairs
Proper installation is key to a durable repair. Here’s how to do it right.
Embedment: Press the mesh or tape firmly into the mud coat, ensuring full contact with the substrate. Use a straight edge to scrape off excess material and create a smooth surface.
Layering: Apply multiple thin coats of plaster instead of one thick one. This helps distribute stress evenly and prevents cracking. Let each layer dry before applying the next.
Feathering: When repairing corners or edges, feather the mesh or tape out to avoid creating a weak point. This involves tapering the reinforcement gradually until it’s barely visible at the edge.
Follow these steps and your repairs will stand the test of time.
Visual checkpoints to confirm correct mesh installation
Before you apply the final coat, double-check that your mesh is installed correctly. Here’s a quick checklist:
- Wrinkle-free: Check for any wrinkles or creases in the mesh. These can cause stress points and lead to future cracking.
- Fully embedded: Ensure the entire mesh is pressed firmly into the mud coat, with no gaps or raised edges.
- No bridging: Make sure the mesh isn’t bridging gaps between the crack and the surrounding plaster. This can cause stress concentrations and lead to failure.
- Seam overlap: Check that seams are properly overlapped and embedded in the mud coat for strength.
- Fastener placement: Ensure fasteners (staples, nails) are evenly spaced and not too close to the edge of the mesh. They should be fully embedded and not visible on the surface.
- Alkali resistance: If using metal lath, ensure it’s alkali-resistant to prevent corrosion from the plaster.
- Substrate contact: Check that the mesh is in full contact with the substrate. Any gaps can lead to delamination and cracking.
- Edge support: Ensure corners and edges are properly reinforced, as these areas see high stress.
Quick rule: If it looks wrong, it probably is. Take the time to inspect your work closely before moving on to the next step.

Control-Joint Alternatives and When to Use Them
Traditional control joints work in many cases but can underperform where small, distributed movement or irregular substrates exist; alternatives include isolation strips, flexible beads, and scarfing techniques. Each alternative accommodates different movement patterns and can be less conspicuous when done correctly.
Follow proper surface prep and edge detailing for each method and consult product instructions for bonding and cure behavior before applying. Use the alternatives where movement is micro or diffuse, around fixtures, or where a full control joint would create an unwanted visual line; if movement persists after testing, revert to a formal joint strategy or professional assessment.
Isolation strips, flexible beads, and scarf joints explained
These alternatives to traditional control joints help mitigate movement transfer without creating unsightly seams. Here’s what they are:
Isolation strips are thin, flexible strips applied at the joint line before plastering. They create a weak plane that allows movement without cracking.
Flexible beads are similar but have a rounded profile. They’re great for areas with micro-movement or humidity swings.
Scarf joints involve cutting back the substrate at an angle, then applying compound and tape. This distributes stress across a wider area.
Pros and cons compared to traditional control joints
Each method has its pros and cons. Here’s how they stack up against standard control joints:
Pros
- Less visible seams.
- Better suited for movement-prone areas.
- Can be used with existing finishes.
- Easier to repair if needed.
Cons
- More expensive than standard joints.
- Requires more skill and precision.
- Not suitable for all substrates or movement types.
- May require additional prep work.
Choose these alternatives when you want a less intrusive, more flexible solution. They excel in areas with frequent movement but may not be the best choice for major structural shifts.
How to integrate alternatives into existing finishes
Retrofitting these methods into finished walls and ceilings requires careful planning. Here’s how:
First, inspect the area. Ensure there are no underlying issues causing movement.
Next, prepare the surface. Clean it thoroughly, remove any loose material, and ensure it’s dry.
Then, apply the chosen method. Follow the manufacturer’s instructions for isolation strips, flexible beads, or scarf joints. Ensure you bond well to the existing finish.
Finally, verify the installation. Check for any signs of stress or movement after application and during curing.
Step-by-Step Repair Methods for Recurring Cracks
Start every repair with a diagnosis: confirm whether the crack is cosmetic, structural, or moisture-related and note how often it reappears. Address underlying causes—fix leaks, improve drainage, or stabilize framing—before committing to a cosmetic patch to avoid repeat failures.
Prepare the substrate so it is dry, cleaned, and sound; remove loose plaster and determine whether furring, mesh, or new backing is required. Sequence repairs from opening and cleaning the crack, installing reinforcement if needed, applying compatible patch materials, then skim and finish—follow product cure and priming recommendations to minimize recurrence.
Step-by-Step Repair Process
This section guides you through a clear, numbered sequence of practical steps to repair recurring plaster cracks. It starts with preparation and safety checks, then moves on to the main work, and finishes with cleanup or final checks.
- Inspect the crack: Determine its type, cause, and extent. Check for movement, moisture intrusion, or settlement issues.
- Prepare the area: Ensure the plaster is dry, sound, and clean. Address any underlying moisture sources first. Test for loose plaster using a tap test.
- Widen the crack: Gently widen the crack using a chisel to create a V-shape. This helps the repair compound adhere better.
- Apply repair compound: Use a flexible joint compound suitable for your crack type and expected movement. Apply it evenly, following the manufacturer’s instructions.
- Install mesh or reinforcement (if needed): If the crack is structural or wide, install mesh or tape reinforcement before applying the final coat to strengthen the repair.
- Apply skim coat: Once the compound has cured according to the manufacturer’s guidelines, apply a thin layer of plaster to blend the repair with the surrounding surface.
- Prime and finish: Apply a primer suitable for your chosen finish coat. Then, apply the final finish coat, ensuring it matches the existing texture and color.
- Cure and touch up: Allow the final coat to cure according to the manufacturer’s guidelines. Perform any necessary touch-ups to ensure a seamless repair.
Tools and materials checklist
Use this checklist before starting your repair work to ensure you have all the necessary tools, PPE, and materials. Check labels to confirm product types and compatibility.
- Safety gear: Respirator, safety glasses, gloves, and ear protection for using power tools.
- Tools: Chisel, trowel, joint knife, tape measure, level, and a tap test hammer.
- Repair materials: Flexible joint compound (matching expected movement), mesh or tape reinforcement (if needed), plaster wrap (optional).
- Finishing materials: Primer, finish coat plaster, sandpaper (fine grit).
- Miscellaneous: Bucket, mixing paddle, drill for mixing compounds, drop cloths, painter’s tape.
- Pro tip: Always check the manufacturer’s guidelines on labels before buying products to ensure compatibility with your existing plaster and repair needs.
Quick rule: Never skip checking product labels. Incompatible materials can lead to poor adhesion, cracking, or other issues.
Repair procedure for hairline and structural movement cracks
This section outlines the repair process for hairline and structural movement cracks in plaster. Follow these steps for a long-lasting, effective repair.
For hairline cracks: Lightly widen the crack using a chisel. Apply flexible joint compound using a trowel or joint knife. Allow it to cure according to the manufacturer’s guidelines. Sand lightly and apply a skim coat to blend with the surrounding surface. Prime and finish with your chosen paint or plaster.
For structural movement cracks: Widen the crack as described above. Install mesh or tape reinforcement, following the manufacturer’s instructions. Apply flexible joint compound, ensuring it fills the crack completely. Allow it to cure, then apply a skim coat and finish with your chosen paint or plaster.
Note: If the crack is wider than 1/4 inch (6 mm), consider using a plaster wrap system for added strength before applying the compound.
Safety precautions and environmental controls
Follow these safety measures and environmental controls to ensure a safe, successful repair with optimal adhesion and curing.
Safety: Wear a respirator when sanding or mixing compounds to avoid inhaling dust. Use ear protection when using power tools. Ensure proper ventilation in the work area to prevent the buildup of harmful fumes.
Environmental controls: Maintain a consistent temperature between 50-70°F (10-21°C) during repair and curing for optimal adhesion and drying. Keep humidity levels below 60% to prevent moisture-related issues. If possible, avoid performing repairs in extreme temperatures or high humidity.
Pro tip: Always follow the manufacturer’s guidelines for safety precautions and environmental controls specific to the products you’re using.
Cost, Durability, and Long-Term Planning
Short-term cosmetic patches cost less up front but often return; movement-aware repairs usually require more prep or better materials and last longer. Consider inspections and fixes that target moisture control, load distribution, or substrate stabilization to cut repeated expense over time.
Base material choices and whether to DIY or hire a pro on the movement assessment: severe or progressive movement usually needs professional input. Build a simple budget that factors initial repair, likely mid-term touch-ups, and routine inspections so you can compare the lifetime cost of quick fixes versus more durable solutions.
Comparing Upfront Repair Costs and Lifecycle Value
When it comes to plaster repairs, you’ve got two main choices: quick cosmetic fixes or long-term movement-aware strategies. Let’s break down the costs.
Cosmetic patches, like joint compound or patch plaster, are cheap upfront. But they don’t address movement, so cracks keep coming back. That means more repairs and higher lifetime costs.
On the other hand, movement-aware repairs cost more initially due to materials like mesh reinforcement, epoxy injections, or structural reinforcement. But they last longer, reducing the need for frequent re-repairs. It’s like choosing between a cheap car that breaks down often and an expensive one that lasts.
Factor in labor too. Cosmetic fixes might take hours, but addressing movement could mean days of work. Plus, you’ll likely need to repair the substrate first, adding more cost. But remember, investing in proper reinforcement now saves money over time.
Preventive Measures to Minimize Future Structural Movement
Maintaining your plaster isn’t just about fixing cracks. It’s about preventing them too. Here are some long-term strategies:
Control humidity. Too much moisture can cause cracks. Use dehumidifiers, ensure proper ventilation, and seal any leaks to keep dampness at bay.
Proper flashing. Around windows and doors, install flashing to direct water away from the walls. This prevents moisture from seeping in and causing damage.
Fix substrate issues. Cracks often start with problems beneath the surface. Regularly inspect your walls for signs of movement or damage. Address any issues early to prevent them from worsening.
Maintenance routines. Inspect your plaster regularly, and address any minor cracks promptly. This can prevent small issues from turning into big, expensive repairs.
When Full Substrate Remediation is More Cost-Effective Than Repeated Patching
So, you’ve got recurring cracks. You could keep patching them up, but at some point, it’s like pouring money down a drain. Here’s when to consider tackling the root cause:
Cracks are widespread or worsening. A few hairline cracks might not seem serious, but if they’re spreading or getting wider, there’s likely an underlying issue.
Doors and windows aren’t square. Misaligned doors or windows could indicate structural movement. If this is the case, patching plaster won’t solve the problem.
Repairs are frequent and costly. If you’re constantly shelling out cash for repairs, it might be time to address the root cause. Repeated patching can end up costing more than a full substrate remediation in the long run.
Remember, preventive measures are always cheaper than fixes. So, consider addressing foundational or structural causes for a permanent solution. It’s like replacing a worn-out tire instead of just fixing the flat again and again.
Common DIY Mistakes and Troubleshooting a Failed Repair
Frequent DIY errors include patching over a wet or poorly keyed surface, skipping priming, and using brittle materials on moving substrates—these invite recurrence. Learn to spot early warning signs such as new hairline cracks near seams, paint blistering, or a hollow sound when tapped.
If a repair fails, re-evaluate moisture, substrate bond, and reinforcement choices before reapplying materials; sometimes the fix is re-priming, installing proper mesh, or selecting a more flexible compound. When unsure which material or method to use, check product data sheets or consult a pro to avoid repeating the same mistake.
Top DIY mistakes and how to fix them
To avoid recurring cracks, steer clear of these common DIY blunders.
- Skipping substrate priming: Priming seals the surface, preventing patch materials from sucking moisture. Always prime before repairing.
- Neglecting moisture considerations: Plaster can’t cure properly in damp conditions. Ensure the area is dry enough before starting repairs.
- Wrong compound choice: Using the wrong patch material for your substrate can lead to brittle, crumbling repairs. Choose a compatible repair compound.
- Insufficient reinforcement: Without proper reinforcement, cracks will keep coming back. Use mesh or fiber additives in your patch compound.
- Improper curing: Curing too fast or slow can weaken the repair. Follow manufacturer’s guidelines for optimal cure times.
Identify these mistakes early and correct them to prevent recurring cracks.
How to assess a failed repair and plan the next step
If your repair has cracked again, don’t jump into another fix just yet. First, diagnose why it failed.
Check for hairline cracks around joints, which could indicate active movement. Bulging plaster or delamination might suggest poor adhesion. Paint bubbling and moisture staining point to ongoing damp issues.
Once you’ve identified the cause, plan your next step accordingly. For active movement, consider alternative strategies like control joints or mesh reinforcement. If it’s a material or workmanship issue, re-priming, re-mortaring, or using a different patch compound might be needed.
When to call a professional versus continuing DIY
Knowing when to seek help can save you time, money, and frustration. Here are some indicators:
If cracks are recurring frequently, it might be a structural issue best handled by an expert. Similarly, if moisture problems persist despite repairs, you may need professional waterproofing services.
However, for minor hairline cracks or small areas of damage, DIY repairs can be effective and cost-saving. Just ensure you’ve got the right tools, materials, and knowledge to do the job properly.
Conclusion
These repairs work best when you treat movement as the controlling factor, not a one-time patch. If cracks keep reappearing, you’re dealing with ongoing movement, improper backing, or the wrong joint treatment, and that matters for safety, durability, and how the finish looks for years to come.
Do this next: check for ongoing movement by watching cracks over a few days, then confirm you’ve chosen the right reinforcement and joint compound for the wall type, verify you have solid backing or mesh, plan the repair steps in order and test a small area first, and finally recheck the area after a full cure before repainting. Read each step as a checklist you can follow in sequence, not as a single fix.
Common mistakes to avoid include skipping the movement check, using the wrong mesh or too-thick coats, skipping proper backing, and rushing repairs without safety gear or proper ventilation. Always wear eye protection and a dust mask, turn off power when working near outlets, and work in small areas you can control. Test repairs in a hidden corner first to learn how the material behaves before committing to the whole wall.
If movement is ongoing after multiple attempts, or you’re unsure about backing, joint choice, or the need for control joints, it makes sense to call a professional. When in doubt, prioritize safety and long-term performance over a quick fix, and stay focused on the plan: durable, well-supported plaster with appropriate joints will save time and money in the long run. You’ve got this—take it step by step and keep the scope realistic.
FAQ
What flexible joint compounds work best for plaster cracks, and how do I choose them?
Look for products labeled for plaster and for interior wall joints. Check the manufacturer instructions for recommended surface prep, cure times, and compatibility with your existing plaster and paint. If in doubt, verify with the product label or the supplier for suitability on your wall type.
How can I prevent cracks from reappearing after the repair?
Address the underlying movement first: recheck for ongoing movement and stop-gap the wall if needed. Use a proper mesh or reinforced joint system as recommended, and finish with a compatible compound and finish coat to reduce stress at the joint. Follow the product directions closely and avoid overworking the patch.
What are the correct techniques for installing mesh in plaster repairs?
Clean and dampen the area, embed the mesh firmly with an appropriate setting joint compound, and press out air pockets. Overlap edges if multiple sheets are used and secure with enough coat to hold it flat. Always follow the mesh manufacturer’s installation instructions and local guidance.
What are the control joints and their alternatives, and when should I use them?
Control joints are designed to accommodate movement and should be used at predictable expansion areas. Alternatives include using flexible patch compounds and mesh reinforcement or buttressing with wider finish coats. Check local guidance and product labels to ensure you pick the right method for your wall and climate.