
Introduction
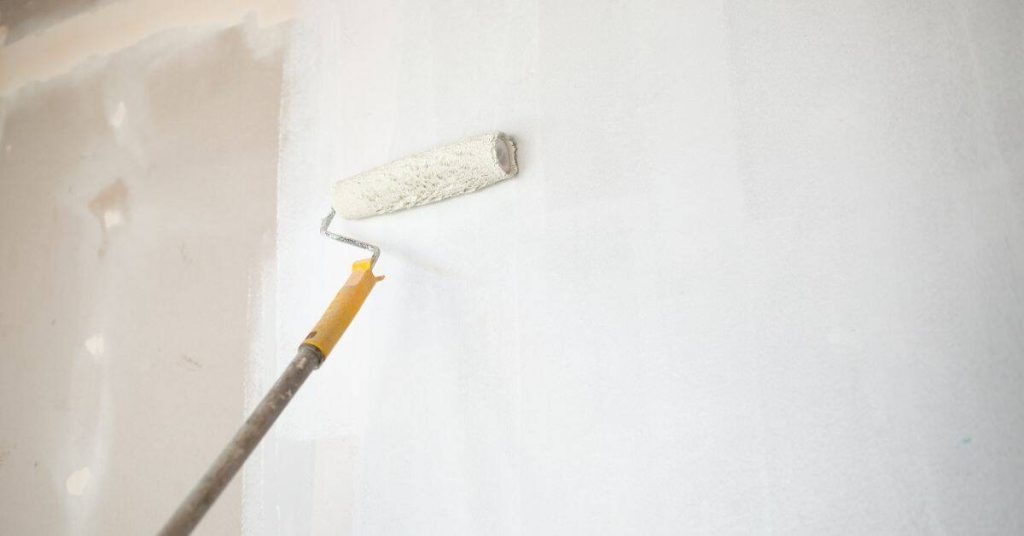
Picture framing is the darkened outline that appears around a painted wall when roller technique, wet edge control, or primer choice are handled poorly. In plain jobsite terms: it’s caused by overlapping passes that dry at different rates and by inconsistent paint load from the roller. I’ll describe practical ways to keep a consistent wet edge and primer strategy so your wall looks even.
Think like a foreman: plan your sequence, keep a full roller, and watch drying conditions so each pass blends into the next. If a product spec or drying time matters, check the manufacturer’s label and your local conditions to choose the right timing and primer approach.
Key takeaways
- Plan rolling patterns to keep wet edges continuous and reduce framing risk.
- Prep surfaces with even patching and priming for balanced absorption.
- Use compatible primers and paints to prevent patchy color development.
- Maintain proper ventilation, wear PPE, and avoid excessive humidity during coating.
- Mask edges and cut-in areas carefully to avoid new lines.
- Inspect drying times by touch, not clock, before re-coating.
Table of Contents
- Introduction
- Key takeaways
- What Picture Framing Is and Why It Happens
- Primer Strategy to Prevent Picture Framing
- Paint Selection and Finish Considerations
- Tools and Materials Checklist
- Surface Prep and Patching to Ensure Even Absorption
- Rolling Patterns and Technique for Continuous Wet Edges
- Managing Drying Times and Environmental Factors
- Cutting-In, Edges, and Masking Without Causing Framing
- Conclusion
- FAQ
What Picture Framing Is and Why It Happens
Picture framing is the visible border or banding that appears around painted areas where the finish looks different from the surrounding wall surface. It shows up as roller marks, sheen variations, or areas that leveled differently and catch light in a distinctive outline.
The underlying mechanics are simple: inconsistent application, uneven paint absorption, and drying differences change how the film forms and reflects light. Roller nap, overlap misses, and varying porosity all combine so edges dry or get rolled differently, producing that framed look.
Visual checkpoints to identify framing early
Use this checklist while painting to spot picture framing before it sets.
- Check roller marks: Uneven or wavy lines indicate inconsistent pressure or speed. Skipping this can lead to visible roller patterns after drying.
- Observe sheen differences: Glossy or matte spots suggest varying paint absorption. Ignoring this might result in a patchwork appearance.
- Feel for texture changes: Rough or smooth patches hint at improper overlap or missed spots. Overlooking these can cause uneven drying and visible framing.
- Inspect wet edges: Drips, runs, or gaps along walls’ edges signal improper application technique. Neglecting this may result in obvious framing lines after drying.
- Monitor drying time: Areas drying too fast or slow suggest inconsistent paint application. Disregarding this can lead to sheen differences and roller marks.
- Check for missed spots: Inconsistent coverage reveals skipped areas. Overlooking these can cause visible framing after painting.
- Observe primer lines: Visible primer under the paint suggests improper priming or sanding. Ignoring this might result in framing due to uneven paint absorption.
- Feel for temperature differences: Warm or cool spots on the wall can affect drying and cause framing. Overlooking these may lead to visible sheen differences.
Quick rule: Inspect your work frequently during painting to catch and correct framing early.
Common misconceptions painters make
Busting these myths can help you avoid picture framing:
Myth 1: More pressure fixes it. Too much force with the roller or brush can cause uneven paint application, leading to framing. Instead, maintain consistent pressure and speed.
Myth 2: Thinner paint solves the problem. Diluting paint doesn’t address the root causes of picture framing – inconsistent application, absorption, and overlap. It only makes the issue worse by reducing coverage and increasing drying time differences.
Myth 3: Sanding after painting fixes it. While sanding can help smooth out some imperfections, it won’t eliminate framing caused by uneven paint application or absorption. Address the problem at its source – during painting – for best results.
Primer Strategy to Prevent Picture Framing
Priming evens out substrate absorption, seals porous patches, and can block stains so the finish coat wets and levels more uniformly across the whole wall. Use a primer whose properties match the substrate and the topcoat—look for sealing and adhesion features that suit drywall, plaster, or previously painted surfaces.
Primer affecting final sheen and coverage is product-specific, so read the label or product data sheet for compatibility and recommended topcoats. If in doubt, follow the manufacturer’s guidance on primer-topcoat pairings and overcoat windows to avoid unexpected framing from interaction issues.
When to use primer vs. direct-to-surface paint
Primer’s not always necessary, but it sure helps in the right situations.
Use primer: When you’re painting new drywall, patched areas, or making a drastic color change. Primer seals porous surfaces and provides a uniform base for your topcoat.
But if you’re using a quality paint-and-primer-in-one product, you might get away without priming. It’s like killing two birds with one stone – just make sure it’s designed for your surface.
Spot-priming repairs and patched areas
Repairs and patches can be like little framing magnets. Here’s how to keep them in line.
After you’ve patched, feather primer over the area. This means apply it thinly, blending into the surrounding wall so there’s no stark edge that’ll frame later.
Use a small roller or brush for control. Work quickly before the primer dries. Then, when you paint your topcoat, those patches will blend right in.
Choosing primer features to match substrate
Not all primers are created equal. Here’s how to pick the right one for your surface.
Check the label for these key properties:
Adhesion: Ensures your primer sticks to the surface. Good for old paint, wallpaper, or other tricky surfaces.
Stain-blocking: Keeps tannins and other stains from bleeding through. Great for painting over knotty wood or stained walls.
Porosity-sealing: Seals porous surfaces like new drywall or concrete, preventing your topcoat from soaking in and looking patchy.
Paint Selection and Finish Considerations
Paint formulation and sheen strongly influence how forgiving a finish is: higher sheens highlight surface irregularities and roller lines, while flat or low-luster finishes hide them better. Choose a product with good leveling and flow characteristics noted on the technical sheet to minimize visible roller texture.
Also check coverage and solids info on the product documentation to pick a paint that builds an even film without heavy application in spots. If a particular sheen is required, plan your technique and surface prep to compensate for its reduced tolerance to imperfections.
Sheen and the illusion of framing
Higher sheens, like semi-gloss or gloss, reflect more light. This can highlight any imperfections on your wall, including roller marks and texture differences. That’s why you might see framing effects with these finishes.
Flat and low-luster paints, on the other hand, absorb light rather than reflecting it. This makes them more forgiving and less likely to show framing issues.
Tip: For walls with visible texture or minor imperfections, stick with flat or eggshell sheens to minimize the risk of framing.
Paint viscosity and flow/leveling
Some paints have additives that improve their flow and leveling properties. These help reduce lap marks, which can contribute to framing.
Check the product technical sheet for information on flow and leveling agents. Look for terms like ‘self-priming’, ‘stain-blocking’, or ‘excellent leveling’.
Paints with good flow and leveling properties are especially useful when painting over existing paint, wallpaper, or textured surfaces.
Remember: While these additives can help prevent framing, they’re no substitute for proper application techniques. Always follow best practices for rolling patterns and wet edges.
Tools and Materials Checklist
Gather the right rollers, frames, brushes, trays, extension poles, and PPE before you start to keep your workflow continuous and consistent. Match roller nap to the wall texture and choose brush types recommended for the paint base—waterborne or solvent—so tools lay the material evenly.
Include backup rollers and a clean tray to avoid contamination and keep a lint-free sleeve for finish coats. Check product recommendations for nap length and brush style on the packaging or technical notes to ensure compatible tool selection.
Roller nap and cover materials
Choose the right roller for your surface to avoid picture framing. Here’s a quick checklist.
- Nap length: 1/4″ – 3/8″ for smooth surfaces, 1/2″ – 3/4″ for textured ones. Too short won’t hold enough paint, too long leaves residue.
- Cover material: Synthetic (polyester/nylon) for most paints, lambswool for high-quality oils or stains. Cheap covers leave lint behind.
- Roller frame: 9″ or 18″ depending on your wall height and reach. Too small slows down work, too large is unwieldy.
- Avoid: Using a roller with the wrong nap length can cause streaking or patchy coverage.
Quick rule: Match nap length to surface texture for even coverage.
Brushes for cutting in and feathering
Use the right brush for clean edges and seamless blending. Here’s what to consider.
- Angled vs straight: Angled (45°) is great for corners and edges, straight is better for long, flat areas. Wrong shape makes cutting in tough.
- Bristle type: Synthetic-nylon or natural bristles. Nylon works with most paints, naturals are best for oils. Mixed types can cause streaking.
- Bristle length: 1″ – 2″ is standard. Too short won’t hold enough paint, too long drips.
- Avoid: Using a cheap brush with poor bristles can leave streaks and missed spots.
Quick rule: Choose the right brush shape for your cutting-in needs.
Extras: trays, guards, and extension tools
These extras help maintain a consistent paint supply and access high areas for smooth rolling. Here’s what to include.
- Tray: Deep well or liners for easy paint transfer. Wrong tray makes refilling messy.
- Guard: Sash guard or edger for protecting trim. No guard means sloppy edges.
- Extension pole: 18″ – 36″ for reaching high areas. Too short forces awkward stretching, too long is unstable.
- Safety gear: Gloves, goggles, and drop cloths. No protection means potential accidents and messes.
Quick rule: Use the right tools to maintain a smooth rolling rhythm and protect your workspace.
Surface Prep and Patching to Ensure Even Absorption
Proper prep—cleaning, sanding, and priming—reduces porosity differences that cause some areas to suck up paint faster and frame. Remove loose paint, scuff glossy spots, and feather out edges of repairs so texture and absorption are uniform across the wall.
When patching, fill defects flush and sand smooth so the patch has similar porosity to the surrounding substrate before priming. Verify patch compound and primer instructions for drying and compatibility to avoid a patched area showing differently under the topcoat.
Preparing new drywall vs. previously painted surfaces
New drywall needs a coat of primer to seal the porous surface and prevent tannin bleed.
Skim-coated surfaces require light sanding with 120-grit sandpaper to remove any texture and ensure even absorption.
Glossy existing finishes need deglossing. Use a liquid deglosser or lightly sand with 150-grit paper, then wipe clean.
Feathering patched areas to match surrounding substrate
After patching, let it dry completely. Then, lightly sand the edges with 120-grit paper to remove any texture and create a smooth transition.
Apply joint compound thinly over the patched area, feathering out towards the surrounding wall using a wide putty knife. This creates a seamless blend.
Sand lightly again after drying, ensuring the patch absorbs paint at the same rate as the rest of the wall.
Rolling Patterns and Technique for Continuous Wet Edges
Establish a working band and keep a continuous wet edge by rolling in overlapping passes while maintaining consistent roller speed and pressure. Lay out a system—work across a section in sequence—so edges are always blended into wet paint rather than onto a dried edge.
Backrolling or tipping immediately after rolling helps push out roller lines and equalize film thickness across overlaps. Practice a steady rhythm and check that your overlap strategy and amount of paint on the roller match the wall’s absorption to prevent lap marks.
Establishing consistent rolling rhythm and coverage
Start by dividing your wall into manageable sections. This helps maintain a steady pace and even paint load.
Use the full width of your roller to establish a band at the top of each section. Work from the top down, keeping your roller fully loaded but not overloaded.
Consistency is key. Maintain an even speed and pressure to avoid drying gaps that can cause framing.
Overlap and blending techniques
Leave a slight overlap, about half the width of your roller, when moving from one section to the next. This helps blend sections together seamlessly.
When rolling into an overlap, feather the edge by rolling through the wet paint on the previous section. This blends the two areas together, eliminating lap marks.
Don’t be afraid to roll over your cut-in lines slightly. This helps ensure a smooth transition between rolled and brushed areas.
Backrolling and cross-rolling explained
Backrolling involves rolling over an area you’ve just painted, going in the opposite direction. This helps level out any roller lines or unevenness.
Cross-rolling is similar but done at a 90-degree angle to your initial roll. It’s useful for breaking up any visible roller patterns and ensuring even coverage.
Both techniques help maintain a continuous wet edge, preventing framing. Use them sparingly though; too much backrolling or cross-rolling can cause the paint to become overworked and lose its leveling ability.
Managing Drying Times and Environmental Factors
Temperature, humidity, ventilation, and coat thickness all change drying speed and paint leveling; extremes can make paint skin over before adjacent areas are blended. Aim for conditions the manufacturer recommends and control airflow and ambient conditions where possible to keep drying even across the wall.
Too-fast drying increases the chance of visible framing because edges stop flowing before they’re blended, so consult the product’s stated drying and recoat windows for guidance. If conditions are outside recommended ranges, slow the drying with added ventilation control or wait for better conditions per the technical guidance.
Controlling temperature and humidity on the job
Keeping your room conditions stable is key to even drying. Here’s how:
Temperature: Aim for 65-80°F (18-27°C). Too hot or cold slows down drying, causing framing.
Humidity: Keep it between 40-60%. Low humidity speeds up drying too fast. High humidity slows it down and can cause mildew.
Use fans for ventilation, but not directly on the walls to avoid creating wind tunnels. Use your HVAC system to maintain these ranges. Avoid painting in direct sunlight as it heats up the surface unevenly.
Timing recoats and multiple thin coats
Patience is key when it comes to recoating. Here’s why:
Each coat needs time to dry properly before the next one goes on. This prevents framing caused by too-fast drying.
Thin coats: Apply thin, even coats instead of thick ones. Thicker coats take longer to dry and can cause framing or cracking.
Always check your paint’s recoat interval. It’s usually 4-6 hours for latex paints, but it varies by brand and type. If you’re unsure, do a test patch first.
Cutting-In, Edges, and Masking Without Causing Framing
Cutting in cleanly and feathering the brushed edge into the rolled area prevents a crisp border that can appear as a frame when sheens differ slightly. Use a steady, light brush stroke and keep the cut-in area small enough to blend into the rolling band while it’s still wet.
Masking tape can protect trim but can also create visible transitions; use low-tack tape and remove it at the correct time or hand-brush edges when a perfect blend is required. Follow the tape manufacturer’s removal timing and paint drying guidance to avoid leaving a contrasting line that looks like framing.
Brush technique for a feathered edge
When cutting-in, use a 1.5 to 2-inch angled brush. Dip it just enough to cover the bristles.
Start at the top of your wall, holding the brush at a 45-degree angle. Use short, light strokes, working from the wet edge outwards. This helps blend the cut-in area into the adjacent rolled section.
Key: Keep your strokes consistent and don’t overload your brush. You want to feather the paint onto the wall, not slap it on.
Using painter’s tape correctly (and when not to)
Painter’s tape is your friend, but it can also be your enemy if not used right. Use it for crisp lines where you want a hard edge.
Apply it firmly and smoothly, using your fingers or a plastic taping tool. But don’t leave it on too long – 24 hours max. Any longer, and the paint might seep under it.
When to avoid tape: If you’re going for a distressed look, or if you want a soft, feathered edge, skip the tape. Freehand your cut-in with a brush instead. It takes practice, but it’s worth it to avoid that framed look.
Conclusion
Keep the goal in sight: a smooth, durable finish that resists picture framing starts with control—prep, primer, and steady rolling to keep your edges wet and even. Do the work step by step, stay safe, and you’ll save time and avoid costly fixes later.
Inspect the wall, prime correctly, and choose a paint that suits the surface and room. Mix and test a small patch first, then roll in a steady pattern that maintains a continuous wet edge, moving methodically from section to section. Cut in and mask with clean lines, keep ventilation up, and respect drying times so you never trap problems behind a fresh coat.
Common mistakes to avoid are over-wetting the roller or surface, skipping patching where absorption is uneven, and rushing the process. Don’t skip primer or masking, and never skip drying checks. Wear eye protection and a mask when sanding or spraying, keep ladders solid and away from kids or pets, and test changes on a small area before committing to a full wall. If you must rush, you’ll pay later with crisp lines or uneven sheen—don’t do it.
If the patching is stubborn, the surface is tricky, or you’re covering a large area with tricky humidity or temperature swings, call a pro. For most DIY jobs, a careful plan and disciplined execution will get you a lasting finish with minimal risk. Stay deliberate, stay safe, and you’ll finish strong.
FAQ
What simple signs indicate you’re creating picture framing, and how can you stop it as you roll?
Look for sharp, dry edges along the wall where the paint stops. Roll slightly past the edge and use a wet-edge technique to blend as you move. Keep a steady, light pressure and don’t let the roller dry out before blending.
How should I approach rolling patterns to avoid visible edges at the end of a pass?
Use a parallel or random pattern that keeps the roller moving in one direction for a short stretch, then roll back the other way to blend. Work in small, overlapping sections and maintain a consistent feel with the roller. Don’t pause long enough for the edge to dry and stiffen.
What role does primer play in preventing picture framing, and how should I apply it with rolling?
Primer helps even out absorption so edges don’t dry darker or lighter. Apply primer evenly, then roll out the first color while the primer is still workable. If you’re re-coating, ensure the primer is fully dry before the next coat.
What mistakes should I avoid on the edges and corners to keep the surface uniform?
Avoid overloading the roller with paint and don’t back-roll too aggressively at the edge. Keep masking tight and remove it after the final pass while the surface is still workable. If you see a line forming, feather it with a light, continuous pass.