
Introduction
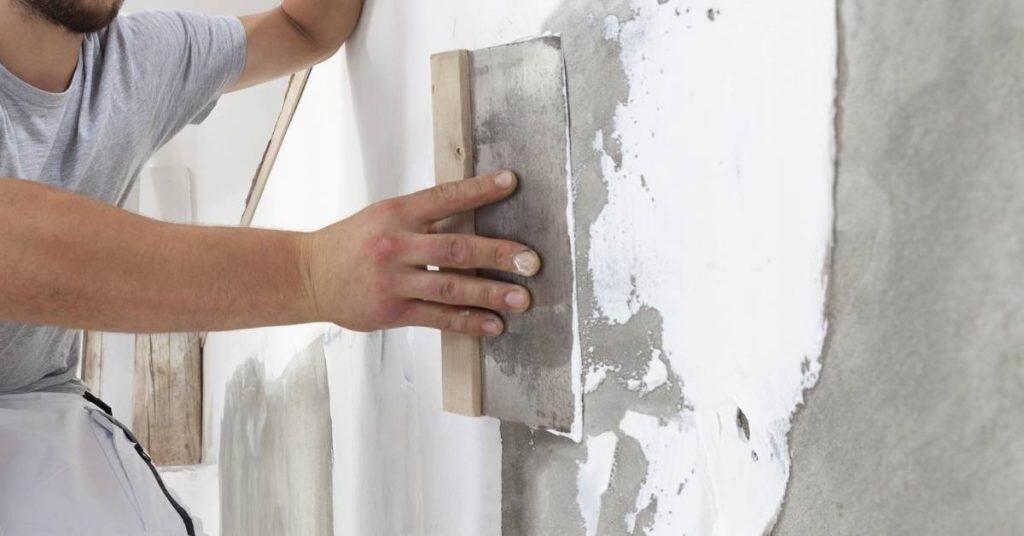
This is plaster on a wall with inlaid LED channels designed to hide lighting and keep cracks at the edges under control. It’s a hands-on project that blends masonry work with lighting details. You’ll mix, set, and shape plaster around recessed channels while planning for even lighting.
Plan the layout and follow straightforward steps to keep the channels flush with the surface. Always check the product label and local codes for wiring, bonding, and curing considerations. If anything feels off, go back to the manufacturer instructions and adjust accordingly to stay within safe options.
Key takeaways
- Plan substrate finish flush with plaster to prevent channel cracks.
- Use dedicated LED channels and proper mounting to avoid telegraphed cracks.
- Embed channels before plaster coats; protect from moisture and vibration.
- Shut power off when routing channels and wiring; secure junctions.
- Apply plaster with crack-control techniques at edges and channel rims.
- Use proper diffusion and light tuning after finishing; inspect for hotspots.
Table of Contents
- Introduction
- Key takeaways
- Project Overview and Design Goals
- Tools and Materials Checklist
- Planning Layout, Structural Interaction and Lighting Design
- Preparing the Substrate and Framing for Crack-Free Channels
- Installing LED Channels and Wiring (Mechanical Best Practices)
- Plaster Application Techniques to Avoid Cracks at the Channel
- Finishing, Paint, Diffusers and Light Tuning
- Visual Checkpoints, Troubleshooting and Preventive Maintenance
- Conclusion
- FAQ
Project Overview and Design Goals
This section lays out the purpose of a plaster accent wall with recessed LED channels. It frames the project scope and the visual target you want to hit at completion. You’ll also see why this approach matters for long-term crack resistance and edge durability.
We’ll weigh when this method fits a room and what compromises may come with it. Considerations include aesthetics, maintenance, and compatibility with existing walls and lighting plans. Realistic expectations help you decide if this path is right for your space.
Benefits and aesthetic possibilities
A plaster accent wall with inlaid LED channels brings clean lines and integrated lighting to your space. No more bulky light fixtures or visible wiring.
Visual appeal: The smooth, seamless look of plaster combined with the warm glow of LEDs creates a sophisticated ambiance. You can choose from various plaster finishes like smooth, textured, or Venetian plaster for a unique touch.
Functional advantages: Hidden hardware means no unsightly switches or controls marring your design. Plus, LED lights are energy-efficient and long-lasting, reducing maintenance and running costs.
Constraints and decision checklist
Before you start, consider this checklist to ensure a successful project. Use it when planning your plaster accent wall with LED channels.
- Substrate condition: Check for cracks, holes, or uneven surfaces that could affect the final finish. Confirm by: Visual inspection and tapping (hollow sounds indicate issues).
- Ceiling/floor movement: Movement can cause cracks over time. Confirm by: Observing any gaps between walls, floors, or ceilings.
- Moisture levels: High moisture can damage plaster and LEDs. Confirm by: Using a moisture meter; avoid areas with readings above 15%.
- Access for drivers: Ensure your space allows for safe operation of power tools. Confirm by: Measuring available workspace.
- Channel depth: Decide on the depth of your LED channels based on desired light spread and fixture size.
- Continuous vs segmented runs: Consider if you want one long run or multiple shorter segments. Confirm by: Measuring available wall space and planning your layout accordingly.
- Power source: Ensure there’s a nearby power source for your LED strips.
- Plaster mix: Choose a plaster mix suitable for your substrate and desired finish.
- LED strip type: Select between single-color, RGB, or tunable white LEDs based on your needs.
Quick rule: Always prioritize safety and proper planning to avoid costly mistakes and rework.
Tools and Materials Checklist
Start with a practical, prioritized list of essential tools and fasteners. Quality items that resist flex and vibration can cut crack risks at the edges. Gather LED channels, drivers, wiring, and plaster components before you begin.
Include tapes and finishing tools that produce clean joints and consistent textures. If you’re unsure about a product, check the label, data sheet, or manufacturer instructions. Where possible, verify compatibility with your substrate and lighting plan.
Recommended tools and fasteners
Before you start, make sure you have the right tools for the job. Here’s a checklist to help you.
- Tape measure: Essential for accurate measurements. Don’t skip this, or your channels won’t line up.
- Level: A 4-foot level is crucial for ensuring straight lines. No level means crooked channels.
- Plastering trowel (12″ and 6″): For applying basecoat and finishing plaster. Skip this, and your wall won’t be smooth.
- Screed: Needed for creating a flat surface. Without it, your wall will have dips and bumps.
- Plastering hawk: Holds the plaster while you’re working. Don’t skip this; it’ll make your job harder.
- Cordless drill (18V): For fixing channels and other tasks. Lower voltage means less power, leading to installation errors.
- Jigsaw with T-shank blade: For cutting channels to size. The wrong blade can cause cracks in the channel.
- Plastering float (48″): For smoothing the final plaster coat. Skip this, and your wall won’t be smooth.
- Plasticizer: To mix with your plaster for better workability. Don’t skip this; it’ll make plastering harder.
Quick rule: Invest in quality tools to reduce installation errors and ensure a professional finish.
Material types and what to look for
Choose the right materials to avoid compatibility issues and ensure a long-lasting finish.
- LED channels: Choose aluminum for durability. Profile types vary; pick one that fits your design goals.
- Diffusers: Check manufacturers’ datasheets for light diffusion levels. Too low, and the wall will look harsh; too high, and it’ll be dim.
- Plaster basecoats: Look for ones that bond well with your substrate. Poor bonding leads to delamination.
- Finishing plasters: Choose one suitable for inlaid channels. The wrong plaster can crack at the channel.
- Adhesives: Check compatibility with both your channels and substrate. Wrong adhesive means poor adhesion.
- LED strips: Ensure they’re compatible with your chosen channels. Incompatibility leads to installation issues.
- Power supplies: Match the voltage of your LED strips. Mismatch can cause damage or poor performance.
- Wiring: Use appropriate gauge for your power supply. Too small, and it’ll overheat; too large, and it’s a waste.
Quick rule: Always check manufacturers’ datasheets to ensure compatibility between materials.
Safety, access and permits
Your safety and compliance with regulations are crucial. Here’s what you need to check.
- Electrical safety: Turn off power at the main panel before working on wiring. Live wires mean shock risk.
- Working at height: Use appropriate ladders or platforms. Improper access means falls and injuries.
- Licensed electrician: Consult one for complex electrical work. DIY can lead to unsafe installations.
- Local permits: Check if you need electrical permits. Working without them can result in fines or forced removals.
- Personal protective equipment (PPE): Wear safety glasses, gloves, and a dust mask. Without PPE, you risk injuries and illnesses.
- Fire safety: Ensure your LED strips are fire-rated. Non-compliant strips pose a fire hazard.
- Building codes: Check local codes for plaster wall thickness and electrical work. Non-compliance can lead to penalties.
Quick rule: Always prioritize safety and comply with local regulations to avoid accidents and legal issues.
Planning Layout, Structural Interaction and Lighting Design
Map channel runs to follow room geometry and natural sight lines. Plan around expected settlement and seasonal movement to avoid long, uninterrupted distances. The goal is predictable performance and an even lighting result.
Align channels with framing stud bays or decoupled substrates to minimize stress transfer. Keep turns smooth and offsets deliberate to reduce points where stress can concentrate. Validate the lighting plan with a quick mock‑up if you can.
Channel routing, joints and expansion strategy
When planning your LED channel runs, remember: less is more. Keep them short to minimize stress on the plaster.
Route channels along walls, avoiding control joints. These are designed to accommodate movement, not your channels.
Introduce mechanical breaks or flexible joints every 8-10 feet. This lets the wall move without cracking the plaster.
Coordinating channel terminations is crucial. Make sure they align with structural elements like door frames or corners to accommodate building movement.
Lighting performance and power planning
Select LED strips based on your lighting needs. More lumens means brighter light, but it also generates more heat.
Size your drivers correctly. Too small, and they’ll overheat. Too big, and you’re wasting energy.
Place drivers in a cool spot, away from the LED strips to prevent overheating. Consult datasheets for recommended operating temperatures.
Check with an electrician for load calculations. They’ll ensure your circuit can handle the new load safely.
Preparing the Substrate and Framing for Crack-Free Channels
Inspect the substrate for soundness and moisture before you mount anything. Address loose areas and delaminated patches with appropriate repairs. A solid, stable base is key to keeping channels crack-free.
Use framing strategies that decouple plaster from structural movement where practical. Install backing or isolating layers if required by local practice. Check local instructions for how to treat edges around the channel openings.
Substrate Inspection and Remediation
Before installing channels, inspect your substrate to ensure a solid base for your plaster accent wall. Use the following checklist to identify common issues.
- Loose or damaged plaster: Tap the wall; if it sounds hollow or crumbles, repair with fresh plaster mix.
- Uneven surfaces: Use a straight edge and level to check for variations. Sand down high spots and fill low spots with joint compound.
- Dampness: Check for moisture using a damp meter. If present, address the source (e.g., leaks) before proceeding.
- Mold or mildew: Inspect for signs of growth. If found, clean and treat with an appropriate solution.
- Existing cracks: Fill and repair using a suitable crack filler.
- Inadequate substrate thickness: Ensure the wall is thick enough to support the plaster and channels. If not, consider reinforcing or rebuilding.
- Improperly prepared surfaces: Ensure all previous paint, wallpaper, etc., has been removed and the surface is clean and dry.
- Incompatible materials: Check for incompatible materials (e.g., metal on a plaster wall) that could cause corrosion or other issues.
Quick rule: Always address substrate issues before installing channels to prevent future cracking.
Framing, Resilient Mounts and Support Details
To prevent stress cracks in your plaster wall, use resilient mounting methods for your LED channels. Here’s how:
Use resilient clips or independent battens to mechanically isolate the channel from the substrate. This allows the channel to move independently of the wall, reducing stress.
Install backing boards behind the plaster if necessary, ensuring they are securely anchored but not rigidly connected to the channel.
Anchor channels using screws or bolts with rubber washers to absorb movement and prevent rigid stress points. Avoid using nails as they can split the channel over time.
Moisture, Vapor and Thermal Considerations
Protect your plaster accent wall and LED channels from moisture damage by addressing potential risks:
Install a vapor barrier behind the channel to prevent moisture from reaching the plaster. Use a material that allows vapor to escape but not enter, such as polyethylene sheeting.
Ensure adequate ventilation around channels and drivers to prevent condensation buildup. Leave small gaps or use vented enclosures for electronics.
Consider thermal expansion when routing channels. Use expansion joints every 8-10 feet to accommodate temperature changes and prevent stress cracks in the plaster.
Installing LED Channels and Wiring (Mechanical Best Practices)
Set and align the channels with consistent spacing and level checks. Secure them firmly to the prepared substrate to resist movement. Plan routing for wiring to minimize heat buildup and access issues.
Place drivers and power supplies where they won’t be disturbed by plastering or future repairs. Keep wiring protected and neatly tucked to avoid pinches at edges. Always follow manufacturer mounting guidance and local electrical rules.
Mechanical fixing, alignment and tolerances
Start by setting your channels. Use a spirit level to keep them straight and plumb. Recess or set flush for a clean look. Maintain consistent reveal widths between channels.
Tolerance: Keep gaps small, around 1/8″ to avoid stress concentration when finishing materials are applied.
Use shims if needed to maintain alignment and ensure a controlled gap at the edges of your wall.
Wiring, driver placement and thermal management
Route low-voltage wiring through channels. Keep it neat and away from sharp edges to prevent damage. Use connectors that can handle the current.
Driver Placement: Place drivers in accessible locations for future maintenance. Ensure they’re well-ventilated to manage heat.
Use aluminum channels as heat sinks if necessary, spacing them appropriately to allow for heat dissipation. Follow electrical codes throughout.
Sealing, service access and strain relief
Seal around channel ends with silicone or another appropriate sealant to prevent dust ingress. Ensure it’s compatible with your finish.
Service Access: Provide removable access to drivers for future servicing. This could be a small hatch or a removable panel.
Secure cable strain relief at the point where cables enter channels. This prevents load on the channel connection and ensures longevity of your setup.
Plaster Application Techniques to Avoid Cracks at the Channel
Apply plaster with a method that controls shrinkage at the channel edge. Use gradual buildup and appropriate joint details to bridge the channel without creating a stiff edge. Maintain a consistent thickness across the wall surface.
Detail the plaster edge with a property‑specific transition that reduces differential movement. Use curing or drying practices recommended by plaster products and the channel manufacturer. If unsure, consult product instructions and local guidance.
Edge detail: buffer, fillet and reinforcement
To prevent cracks at the channel edge, you need to create a flexible transition between the rigid channel and the plaster. Here’s how:
First, apply a thin layer of adhesive/skim coat over the channel edge. This helps bond the plaster to the channel.
Next, embed a fiberglass mesh or paper tape into this layer. This reinforces the plaster and helps distribute movement evenly.
Now, apply a soft buffer – like a compressible strip or flexible seal – along the channel edge. This absorbs any minor movements and prevents stress from concentrating at the edge.
Layering, drying and compatible materials
The right materials and application process can prevent cracks due to shrinkage. Here’s what you need to know:
- Scratch/levelling coat: Use a high-build, sandable plaster for the first coat. This provides a good key for the finish coats and helps hide any imperfections.
- Finish coats: Apply 2-3 thin finish coats with suitable drying time in between. This allows each coat to cure properly and reduces shrinkage-related cracking.
- Material compatibility: Ensure all materials – plaster, adhesive, reinforcement – are compatible. Incompatible materials can lead to weak bonds and increased risk of cracking.
- Avoid quick-setting plasters: These can set too quickly, leading to excessive shrinkage and cracking. Stick to medium or slow-set plasters.
- Proper curing: Allow each coat to cure fully before applying the next. This might take 24-72 hours depending on humidity and temperature. Rushing this process can cause cracks.
Techniques for thin reveals and crisp details
Creating thin, crisp light reveals without overworking the plaster or causing stress concentrations requires careful tooling. Here’s how:
Use a flexible trowel to tool the plaster along the channel edge. This helps maintain a thin reveal while preventing undercuts that can concentrate stress.
Feather the edges of your trowel strokes to blend the plaster smoothly into the channel. This reduces the risk of cracking due to abrupt changes in material thickness.
Be patient: Don’t rush through the tooling process. Overworking the plaster can cause it to dry too quickly, leading to shrinkage and cracking. Take your time to ensure a smooth, even finish.
Finishing, Paint, Diffusers and Light Tuning
Finish with sanding, priming, and paint choices that minimize edge stress in the plaster. Ensure diffuser mounting does not disturb the plaster edge or create hot spots. Aim for an even glow across the wall surface.
Plan light tuning to balance brightness and color across the field while respecting channel geometry. Verify diffuser fit and mounting method per product directions. When in doubt, reference the diffuser and channel instructions.
Sanding, primer and paint selection
The final sanding is crucial to avoid hairline cracks. Start with a fine grit (1200 or higher) to smooth out any imperfections without thinning the plaster edge.
Use a low-sag primer to seal the surface and prevent tannin bleed. This also gives you a consistent base for painting. Kilz Premium is a good choice as it’s flexible and dries quickly.
For paint, opt for a flexible finish like Benjamin Moore Aura or Sherwin-Williams ProClassic. These accommodate slight movement better than flat paints. Stick to satin or semi-gloss sheens for easy cleaning and durability.
Installing diffusers and final light testing
Mount diffusers gently, using mechanical fasteners that won’t stress the plaster. Drill pilot holes first to prevent cracking. Torx screws are recommended for their tamper-resistant design.
Ensure diffusers are evenly spaced and aligned with the LED channels. Verify uniform light distribution by turning on each channel one at a time, checking for any dark spots or hotspots.
Before final sign-off, test all drivers and dimming functions to ensure they’re working correctly. This includes checking for any flickering or humming noises that could indicate poor electrical connections or driver issues.
Visual Checkpoints, Troubleshooting and Preventive Maintenance
Establish a clear visual checklist to spot movement or cracking early. Look for small gaps, edge separation, or edge pickup around channels after seasonal changes. Document observations for future reference.
Outline stepwise troubleshooting steps for common issues and outline routine maintenance tasks. Follow manufacturer guidance and local codes when performing adjustments or re‑linging the system. Keep a simple log to track wear or movement over time.
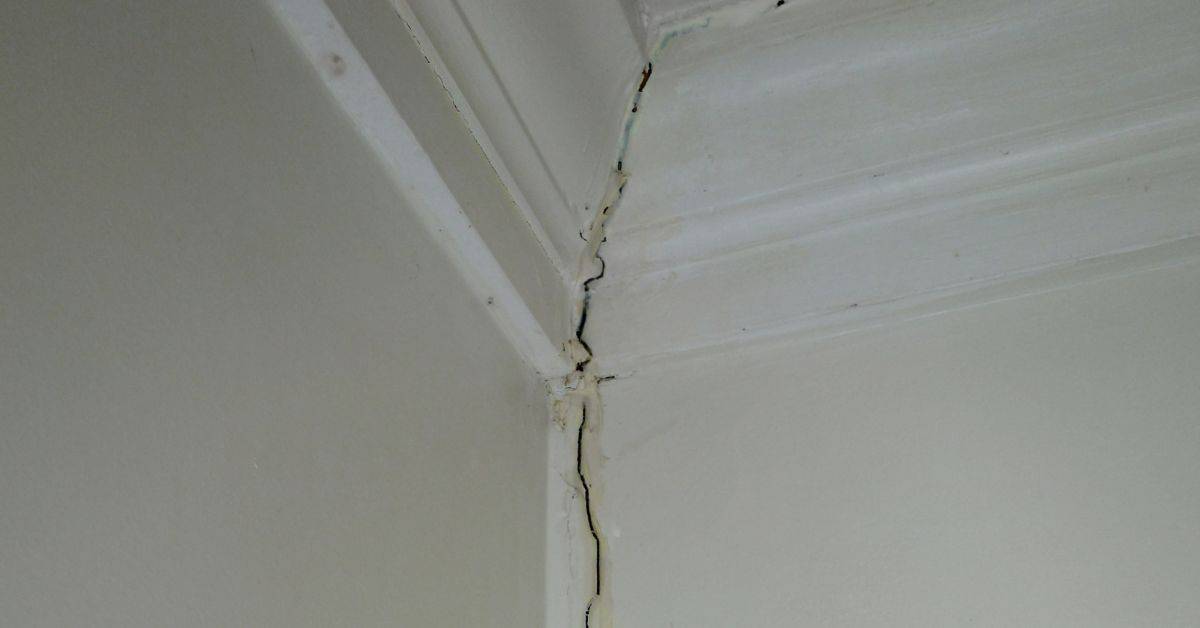
Early crack diagnosis and repair methods
Use this checklist to inspect concrete surfaces for early signs of cracking. Early detection helps prevent minor issues from becoming major problems that require expensive rework.
- Check for hairline shrinkage cracks: These are thin, usually less than 0.1mm wide, and typically run randomly across the surface. They’re often caused by drying too quickly or insufficient curing. To confirm, use a magnifying glass if needed.
- Look for structural cracking: Wider cracks (over 0.2mm) that follow a pattern, like around windows or doors, could indicate structural issues. Measure crack width and length to assess severity.
- Inspect corners and edges: Cracks here can indicate settlement or movement. Check if they’re consistent on both sides of the corner.
- Check rebar exposure: If cracks expose reinforcement, it’s a sign of serious structural distress. Inspect for rust, which indicates moisture intrusion.
- Feel for cold spots in winter: These can indicate areas where heat is escaping, suggesting potential cracking beneath the surface.
- Check for active movement: Gently push and pull on corners or edges to feel for any give. If there’s movement, it could indicate a structural problem.
- Inspect joints and control cracks: These are designed to accommodate minor movement. Check if they’re still functioning properly or if cracking has occurred outside of them.
- Check for signs of water intrusion: Discoloration, efflorescence, or mold can indicate moisture problems that may be causing cracks.
Quick rule: If a crack is wider than a credit card (about 0.5mm) or growing over time, it’s likely structural and should be inspected by a professional immediately.
Long-term monitoring and upkeep
Use this checklist every six months to ensure your concrete structures remain sound and safe. Early detection of issues can prevent costly repairs.
- Check fixings: Tighten any loose bolts or screws. Check anchorages for signs of corrosion or movement.
- Inspect joints: Ensure they remain clean and free from debris. Check for excessive movement or cracking.
- Monitor cracks: Look for new or widening cracks. Refer to the early crack diagnosis section if found.
- Check seal integrity: Inspect all sealed areas (e.g., expansion joints, control joints) for signs of deterioration or leakage.
- Examine rebar: If accessible, check exposed rebar for rust. Rust can indicate a moisture problem that needs addressing.
- Inspect drainage: Ensure all drains are clear and functional to prevent water buildup.
- Check ventilation (if applicable): For underground structures, ensure ventilation systems are functioning properly to prevent carbon monoxide buildup.
- Review structure for signs of settlement: Check doors and windows for misalignment, and look for sloping floors or cracks in walls.
Quick rule: If you notice any of these issues worsening over time, or if they’re severe from the start, don’t hesitate to consult a professional. Early intervention can save you money and prevent safety hazards.
When to call a pro and safety considerations
Use this checklist when you notice issues with your concrete that you can’t resolve yourself. It’s crucial to address these problems promptly to prevent further damage and ensure the safety of you and your property.
- Persistent Cracking: If cracks are growing or new ones appear, don’t wait. Check their width: hairline (less than 0.1mm) is minor, but wider cracks need professional attention. Ignoring them can lead to structural issues.
- Water Ingress: Check for water stains, efflorescence, or dampness. If found, locate the source and ensure it’s not due to a leaky pipe or other hidden issue. Water ingress can cause deterioration of concrete over time.
- Electrical Faults: If you notice sparks, flickering lights, or odd smells near electrical outlets or switches, turn off power at the main panel and call an electrician immediately. Electrical faults are fire hazards.
- Uneven Settling: Measure the level of your concrete surface at several points. If there’s a difference of more than 1/8″ over 10 feet, it could indicate settling issues that need professional attention.
- Discoloration: Check for stains or discoloration that won’t wash off. This could indicate contamination during mixing or placement, which can affect concrete’s strength and durability.
- Popping Sounds:** If you hear popping sounds coming from your concrete, it could be due to expansion caused by moisture or other factors. This needs professional assessment to prevent further damage.
- Concrete Dusting:** If your concrete is leaving a fine dust on surfaces, it might be a sign of deterioration. Check for flaking or crumbling, which are signs of serious problems that need immediate attention.
- Tripping Hazards:** Inspect your concrete for any uneven areas, holes, or other tripping hazards. These should be repaired immediately to prevent accidents.
Quick rule: If in doubt, check it out. Better safe than sorry when it comes to concrete issues. Always err on the side of caution and consult a professional if you’re unsure about any problems with your concrete.
Conclusion
Keep the wall crack-free and the lighting safe, and the finish will look sharp for years. When you respect the substrate, framing, and LED layout, you reduce call-backs and costly fixes, while the result stays true to plan.
Check in this order: confirm layout and clearances for all channels, verify electrical paths and code considerations, test fit the LED channels, mix plaster in small batches and apply using the crack-free technique, monitor joint alignment as you work, allow proper curing, then finish, paint, and tune the diffusion once the plaster is set. Go slow on the plaster at the channel edges, keep tools clean, and document any adjustments for future touch-ups.
Two common mistakes to avoid are rushing the plaster where channels meet and skipping substrate prep, which invites cracks or loose edges. Always protect wires and outlets during wiring, turn off power before work, and test a small area first to confirm bonding and cure. If the plan requires structural work beyond what you can safely manage, or you hit unexpected electrical or framing issues, stop and call a pro.
With careful checks and deliberate steps, you’re close to a durable, recessed lighting wall you can be proud of. Stay methodical, stay safe, and push forward with confidence, one measured pass at a time.
FAQ
What to double-check before embedding LED channels in plaster?
Make sure the channel faces are flush with the substrate and the edges are supported. Check the manufacturer instructions for the channel depth and any required backing. Look at local rules or the product label for any heat or mounting limits.
How can I prevent cracks where the channel sits in the plaster?
Run a solid backing and keep expansion gaps around the channel. Use appropriate plaster base material and follow a gradual build-up rather than dumping plaster over the whole area. If a crack shows, stop and verify the substrate and bonding before continuing.
What should I do if the plaster shrinks or settles around the channel?
Apply plaster in thin, even coats and let each coat firm up before the next. Use a bonding agent or primer if the substrate calls for it. If cracking starts, address the underlying substrate movement or joint details first.
How do I wire the LED channels safely while keeping crack risk low?
Run wiring in clean, protected paths and keep them away from edge cuts. Seal the channel ends or use grommets per the manufacturer’s instructions. Always follow your local guidelines for low-voltage wiring and finish with a plaster layer that won’t squeeze the cables.