
Introduction
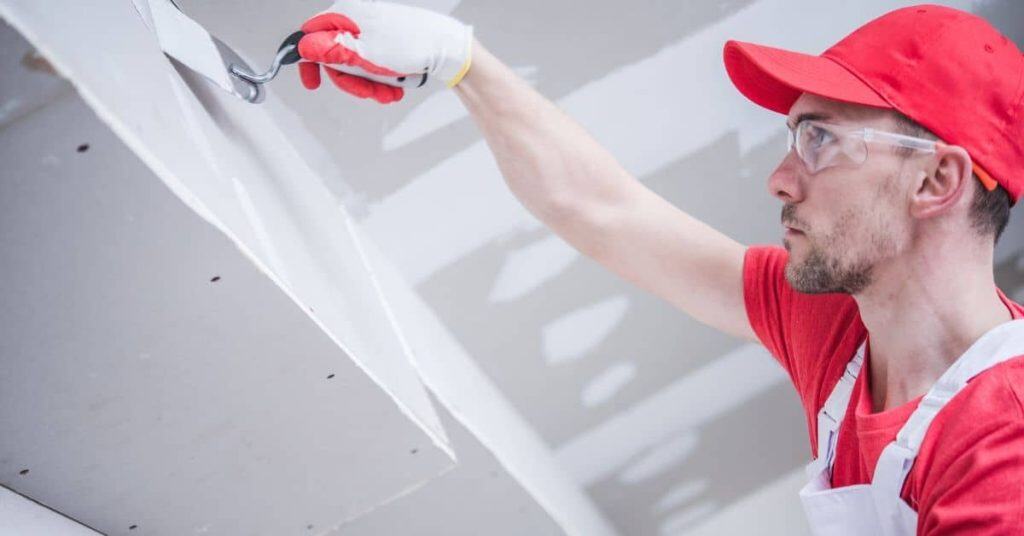
Finishing drywall around recessed lights means taping, mudding, and sanding careful edges so the lights sit cleanly in the ceiling. The goal is to avoid visible rings, hairline cracks, and shadow lines when the light is on. Check the fixture details and follow any manufacturer or local guidance rather than guessing.
Feather the mud wide and use thin coats so the joint blends with the ceiling, not the light housing. Let each coat dry fully and sand gently to keep a smooth surface without gouges. If you see seams near the trim, recheck alignment and use appropriate materials as directed by the label or instructions.
Key takeaways
- Turn off breaker and ensure power is off before any drywall work near cans.
- Inspect can housings for clearance, insulation contact, and potential heat concerns.
- Use correct-cut patterns to avoid rings and shadowing around edges.
- Apply thin coats and feather evenly to minimize seams and cracking.
- Choose trimless or flush-mount methods with compatible mud and tape.
- Recheck paint, texture, and lighting to prevent future shadow lines.
Table of Contents
- Introduction
- Key takeaways
- Why Rings, Cracks, and Shadowing Occur
- Planning and Inspection Before Finishing
- Tools and Materials Checklist
- Cutting and Installing Drywall Around Recessed Cans
- Taping, Mudding, and Feathering Techniques to Prevent Rings and Cracks
- Trimless and Flush-Mount Finishing Techniques
- Painting, Texture, and Strategies to Minimize Shadowing
- Troubleshooting and Long-Term Fixes
- Conclusion
- FAQ
Why Rings, Cracks, and Shadowing Occur
Recessed lights disrupt the drywall plane and create different stresses as the ceiling moves. Heat, vibration, and the weight of finishes can pull or push edges slightly. Poorly seated fixtures or mismatched trims can also trap movement and show halos.
Framing gaps and plaster joints near the can footprint can telegraph through the finish. The drywall edge near the opening often negotiates two different thicknesses and finishes. Understanding these behaviors helps you plan a smoother finish with fewer surprises.
Material movement and compound shrinkage
The right joint compound and application technique can prevent cracks and rings.
- Lightweight, fast-setting compounds: Use these for quick drying. Look for ’90’ or ‘120’ minute set times. Avoid overworking the compound to prevent excessive shrinkage.
- Premixed compounds: These are consistent and easy to apply. Check the label for ‘premixed’ or ‘ready-to-use’. Beware of settling if not used immediately after opening.
- All-purpose compounds: Versatile, but may require more sanding. Look for ‘all-purpose’ on the label. Watch out for over-sanding, which can weaken the joint.
- Substrate movement: Use flexible tape to accommodate minor substrate shifts. Choose tape rated for ‘newwork’. Avoid using rigid tapes that can’t move with the wall.
- Proper application: Apply compound in thin, even layers. Let each layer dry completely before sanding and applying the next. Don’t rush the process to prevent cracking.
Fixture, trim, and reflector issues
The fit of your fixture’s trim can affect the final look. Tight-fitting trims create a smooth, seamless appearance.
Reflectors should be clean and undamaged for even light distribution. Check for any dents or scratches that could cause uneven illumination.
Gaps between the fixture’s flange and ceiling can result in visible dark rings. Ensure your trim fits snugly against the ceiling surface.
IC-rated fixtures are designed to be fully or partially enclosed, reducing the risk of shadowing and discoloration from heat buildup.
Thermal and insulation effects
Heat from recessed lights can affect the ceiling surface. IC-rated fixtures are designed to operate safely when fully or partially enclosed by insulation.
Insulation contact with non-IC rated fixtures can cause discoloration or cracking due to heat buildup. Maintain a safe clearance between insulation and fixture housing.
Properly ventilated fixtures, like those with ‘airtight’ trims, help prevent excessive heat buildup and potential damage to the ceiling surface.
Insulation should be cut away from the fixture’s housing to allow for proper airflow and heat dissipation. Follow manufacturer guidelines for safe clearance distances.
Planning and Inspection Before Finishing
Walk the room with a flashlight and inspect around every can for gaps, wobble, and edge alignment. Check that the fixture is securely mounted and that the flange sits flush with the ceiling plane. Note any wobble or movement that could crack tape and mud later.
Coordinate with the lighting installer, drywall crew, and trim supplier to confirm the order of operations. Verify that the chosen trim, sealant, and finish will work with the fixture type. Document any irregularities before you start finishing work.
Verify housings, ratings, and clearances
Before you start mudding, ensure your recessed lights are safe and compatible with your drywall.
- Check housing type: Confirm it’s suitable for your application (new construction, remodel).
- Inspect IC rating: Ensure it’s marked ‘IC’ for insulation contact. Skip this if not needed.
- Confirm contact rating: Check if it’s rated for direct contact with drywall (CL, L).
- Measure clearances: Ensure they meet manufacturer requirements and local codes.
- Check for wires: Make sure all wires are properly connected and secured.
- Inspect trim style: Confirm it matches your intended finish (baffle, reflector, trimless).
- Verify housing depth: Ensure it’s flush with the drywall surface or slightly recessed.
- Check for damage: Inspect housings for any cracks, dents, or other defects.
Quick rule: Always consult local codes and product documentation to ensure safe installation.
Confirm alignment, cutout type, and trim style
Before cutting your drywall, confirm the following to avoid fit-related issues.
- Check housing position: Ensure it’s centered in the ceiling or wall.
- Inspect cutout type: Confirm it matches the housing (round, square, linear).
- Measure cutout size: Ensure it’s the correct size for your housing.
- Check trim style: Confirm it matches your intended finish and housing type.
- Inspect reflector type: Ensure it’s suitable for your lighting needs (open, closed).
- Check baffle direction: If using a baffle, ensure it’s facing the right direction.
- Inspect trim fit: Ensure trim fits snugly around the housing with no gaps or wobble.
Quick rule: Always double-check your measurements and cuts to avoid rework.
Coordinate with electrician and insulation installer
Before you start mudding, communicate with other trades to avoid issues later on.
- Confirm wiring: Ensure the electrician has finished their work and all wires are secure.
- Check housing placement: Confirm they’re installed correctly before you start mudding.
- Inspect insulation: Ensure it’s properly placed, not blocking airflow or heat from the fixture.
- Check for obstructions: Make sure nothing is blocking the housing or trim.
- Verify venting: Ensure there’s adequate ventilation around the fixture to prevent heat buildup.
- Confirm IC/CL rating: Ensure insulation and drywall are compatible with the fixture’s rating.
Quick rule: Clear communication with other trades prevents rework and ensures a smooth finish.
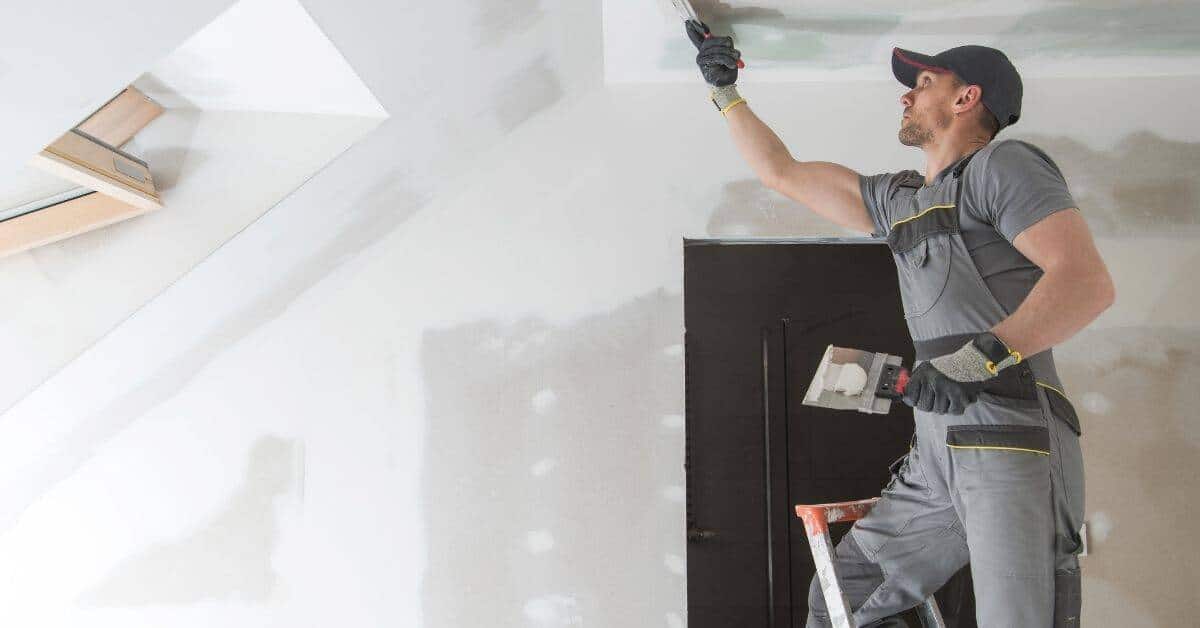
Tools and Materials Checklist
Keep a basic set of cutting tools, a rasp or drywall saw, and a rasp for clean edges. Have joint compound, setting-type mud if needed, and multiple grades of sandpaper ready. Include self-adhesive mesh or paper tape and compatible primers for the area around the fixture.
Stock trim options, compatible cans, and adapters should be on hand. Include sealant or caulk suitable for ceiling use and paintable finishes. Have a level and straightedge to check alignment as you work.
Drywall compounds and tapes
Before you start, ensure you have the right compounds and tapes to minimize shrinkage and cracks.
- Setting Compound: Use for first coat. It shrinks less than other compounds but takes longer to dry.
- Ready-Mix Compound: Faster drying time, use for second coat. Shrinks more, so apply thinly.
- Paper Tape: Cheaper, easier to handle. Use for first coat with setting compound.
- Mesh Tape: More durable, reduces cracking. Use for second coat with ready-mix.
- Joint Tape Width: Match tape width to joint size (3/4″ or 1″ wide).
- Compound Mix Ratio: Follow manufacturer’s instructions for correct mix ratio (usually 3 parts compound, 1 part water).
- Tape Priming: Prime tape before applying compound to improve adhesion and reduce cracking.
- Compound Application: Apply compound in thin layers. Thick coats increase shrinkage risk.
Quick rule: Use setting compound and paper tape for the first coat, ready-mix and mesh tape for the second. Keep layers thin to minimize shrinkage.
Trim systems, mud rings, and rosettes
Choose the right trim system to create a clean edge around your recessed lights.
- Recessed Trim Rings: Fit over existing trim. Hide small gaps, provide clean edge.
- Extension Kits: Extend housing depth. Use when cutout is too large or trim doesn’t fit.
- Decorative Rosettes: Add decorative touch. Can hide larger gaps or imperfections.
- Trim Style Matching: Ensure trim style matches other lights in the room for consistent look.
- Trim Size Compatibility: Check trim size fits housing and cutout diameter.
- Mud Ring Application: Apply mud ring around cutout before taping. Provides clean edge, reduces tape lifting risk.
- Rosette Installation: Install after final coat of compound. Ensure it’s level and centered.
Quick rule: Choose trim based on gap size, housing depth, and desired look. Use mud rings for a clean edge, rosettes for decoration.
Material specs and standards explained
Check these specifications to ensure your materials meet safety and durability standards.
- Product Datasheets: Check for housing, trim, and tape product datasheets. Verify they’re suitable for your project.
- Fire/thermal Ratings: Ensure all materials have appropriate fire ratings (e.g., UL 1598).
- ASTM Standards: Check if materials comply with relevant ASTM standards (e.g., C475, C635).
- Local Codes: Verify materials meet local building codes and regulations.
- Housing Rating: Ensure housing is rated for your project’s voltage and wattage.
- Trim/Adapter Ratings: Check trim or adapter ratings match housing rating.
- Compound Standards: Use compounds meeting ASTM C476 standards for durability.
Quick rule: Always check product datasheets, fire ratings, and compliance with relevant standards to ensure safety and durability.
Cutting and Installing Drywall Around Recessed Cans
Carefully mark the can outline on the drywall and cut with a sharp blade or drywall saw. Avoid tearing the gypsum near the edges to keep a clean interface. Test fit before fastening to confirm the edge sits evenly with the can flange.
Support the drywall edges and backers as you screw or nail, keeping the surface smooth. If needed, trim a small bevel so mud can feather without creating a hard line. Recheck alignment after the first tack is set.
Accurate hole layout and cutting methods
Start by turning off the power at the main panel. Mark the center of your drywall where the can will go, using a pencil and a straight edge.
For new construction, you can use a drywall saw or a jigsaw to cut out the hole. Make sure to wear safety glasses and gloves. Cut slowly and carefully to avoid overcutting.
For retrofit cans, trace around the existing housing with a sharpie. Use a drywall saw to cut along your line, but be careful not to damage any wires or the housing itself. You might need to use a reciprocating saw for the final cuts if the can is already installed.
Backing, blocking, and support for edges
Unsupported drywall edges around recessed cans can flex and crack over time. To prevent this, you’ll need to add backing or blocking.
For new construction, install 2×4 blocking behind the drywall before you hang it. This will provide solid support for your drywall edges. Make sure the blocking is securely fastened to the studs.
If you’re working on a retrofit, you can use patch beads or reinforcing rings. These are metal or plastic strips that you attach to the back of the drywall around the hole. They provide extra support and help distribute stress evenly.
Retrofit vs new construction differences
Working with retrofit cans can be more challenging than new construction housings because you have less access to the area behind the drywall. This means you might not be able to install blocking as easily.
For retrofit jobs, it’s often necessary to use mud rings or rosettes to finish around the can. These are decorative covers that fit over the hole and provide a finished look. They also help distribute stress evenly and prevent cracking.
With new construction, you have more options. You can install blocking for extra support, or you might be able to use a trim system that fits directly onto the drywall.
Taping, Mudding, and Feathering Techniques to Prevent Rings and Cracks
Apply tape over the joint around the can to control stress points. Use a setting-type mud for the initial coat if the joint is forgiving or if movement is a concern. Feather the edges with light passes to reduce a visible line.
Work in thin layers and let each coat dry fully before the next. Sand lightly and check for ridges that could telegraph through paint. Keep the finish dust-free to avoid finish defects around the fixture.
Selecting and applying joint compound
For the first coat around recessed lights, choose a setting-type mud. It shrinks less than all-purpose mud, minimizing cracks later on.
Mix it to a peanut butter consistency. Too runny, it’ll sag; too thick, it won’t spread right.
Setting mud needs to be applied thicker around can edges to hide the flange. But don’t overdo it – we’ll feather out later.
Tape selection and application sequence
Use paper tape for drywall. It’s cheaper, easier to work with, and does the job fine around cans.
Apply tape in this order: Tape, first coat (setting mud), fill (all-purpose mud), feather out.
Press tape firmly into the compound using a taping knife. Go back over it with the knife to remove any trapped air or ridges near the can flange.
Feathering, step coats, and sanding strategy
Feather out each coat far enough to hide the edge. The first coat should be thickest at the can edge, tapering out to nothing.
Apply a second coat of all-purpose mud, feathering it even further. This helps blend the compound into the wall.
Sand lightly between coats with a fine-grit sanding sponge. Don’t over-sand – you’ll create depressions and make more work for yourself.
Trimless and Flush-Mount Finishing Techniques
Use trimless methods to keep the ceiling plane continuous and minimize stress at the edge. Ensure the drywall edge is square and supported so mud doesn’t crack at the joint. Verify that the flush mount sits evenly without gaps.
Choose compatible edge treatments or trims that reduce shadow lines. If you’re not using a trim, blend the mud well into the ceiling surface to avoid a raised seam. Recheck under light to catch any potential shadowing early.
Creating tight blends and beveled edges
The key to a trimless look is blending the drywall seamlessly with the edge of your recessed light fixture. This involves creating smooth, continuous mud beads that mimic the fixture’s profile.
Start by applying a thin coat of joint compound along the edge of your drywall, tapering it out towards the fixture. Use a 6-inch knife for this step to create a smooth, even layer. This is your first ‘feather’ and should be barely noticeable.
For the second feather, switch to a 10-inch knife. Apply another thin coat of mud, starting at the edge of your first feather and tapering it out further. The goal here is to create a smooth transition from the drywall to the fixture.
Pro Tip: For an even smoother finish, you can use a cornice-style technique. Apply a small amount of mud along the edge of your second feather, then use a flexible putty knife to press it into a slight bevel. This creates a subtle, continuous edge that mimics the fixture’s profile.
Flexible joints and caulking options
Even with the best finish work, drywall can still crack over time due to minor settling or movement. To prevent this around your recessed lights, consider using flexible joint compounds or paintable sealants.
Flexible joint compounds contain additives that allow them to stretch and move without cracking. These are ideal for areas where movement is likely, such as near windows or doors. Apply these compounds in the same way you would regular joint compound, but be sure to use a flexible tape designed for these products.
Another option is to use paintable flexible sealants, often referred to as ‘caulk’. These are applied along the edge of your drywall after taping and mudding. They create a flexible barrier that can accommodate slight movement without cracking. Be sure to choose a caulk that matches the finish of your walls and can be painted over.
In some cases, you may also want to consider installing movement joints. These are intentional gaps left in the drywall that allow for expansion and contraction. They should be filled with a flexible sealant to prevent dust from collecting. This is typically only necessary in areas with significant temperature or humidity changes.
Using rosettes and decorative trims as a fail-safe
Even with the best planning, sometimes imperfections can occur. That’s where rosettes and decorative trims come in handy. These aren’t just for aesthetics; they can also help conceal minor cracks or gaps.
Shallow rosettes or escutcheons can be installed over the seam after taping and mudding. They should be applied with a flexible adhesive to allow for slight movement. Once the adhesive is dry, you can fill any gaps around the edge of the rosette with paintable caulk.
Decorative trims can also be used to cover up minor imperfections. These are typically installed after painting and can be mitered to create a seamless look. They’re a great way to add a finished touch to your drywall while also concealing any minor flaws.
Pro Tip: When using rosettes or trims, make sure they match the finish of your walls and fixtures. This will help ensure a cohesive, intentional aesthetic.
Painting, Texture, and Strategies to Minimize Shadowing
Match the paint sheen to the surrounding ceiling and adjust texture to minimize perception of rings. Lightly roll or spray to keep a smooth transition around the can. Keep a consistent approach across the surface to avoid obvious boundaries.
Ensure the fixture alignment is correct before painting and consider subtle texture variations that hide halos. If you see a shadow under lighting, verify that the trim and edge are fully flat and uninterrupted by finish excess.
Primer selection and paint sheen guidance
Start with a good primer to ensure even absorption of your topcoat. It helps hide any minor imperfections and gives you a uniform base.
When it comes to sheen, flat or matte finishes are best for minimizing visible rings around lights. They reflect less light, so halos aren’t as noticeable. But they’re harder to clean, so consider eggshell or satin if you need something more durable.
Stay away from high-gloss paints. They reflect too much light and can make shadows stand out even more.
Matching ceiling texture and touch-up workflow
To blend your repair into the existing texture, use a ceiling texture sprayer. It’s the best way to mimic factory-applied textures. Follow the manufacturer’s instructions for mixing and application.
Before painting, test your touch-up in a small, hidden area. Let it dry completely before inspecting. This helps you catch any issues early and make adjustments as needed.
Once painted, turn on the light fixture to check for shadows. Make sure they’re minimal or non-existent before moving forward with the rest of your project.
Fixture alignment, reflectors, and LRV considerations
The fixture’s reflector finish affects how light is distributed. A smooth, white reflector will give you a wider, softer glow. A textured or colored one might create more distinct shadows.
Bulb directionality matters too. If possible, align the fixture so the bulb’s main beam isn’t pointing directly at your wall repair. This helps reduce visible halos.
Consider the ceiling light reflectance (LRV). Lighter colors reflect more light, which can make shadows stand out. Darker colors absorb more light, but they might look dirtier over time. Test with the actual fixture installed to see what works best in your space.
Troubleshooting and Long-Term Fixes
Diagnose rings or cracks by rechecking the can fit and the surrounding drywall support. Inspect for movement in the ceiling or fasteners that could reopen a joint. Plan repairs that restore solid contact and proper surface continuity.
For persistent shadowing, consider adjusting trim, resealing joints, or re-taping with attention to edge stability. Maintain a routine check of can mounts and mud seams to catch issues before they become noticeable.
Repairing rings and hairline cracks
First, clean the affected area. Use a damp cloth to remove any dust or debris.
For rings: If the tape has pulled away, reapply joint compound, press the tape back into place, and feather it out. If there’s no tape issue, fill the ring with a small amount of compound, let it dry, then sand and refinish.
For hairline cracks: Lightly score the crack with a utility knife to help new compound adhere. Apply a thin layer of compound, let it dry, then sand and refinish.
Addressing persistent shadow halos
Start by checking your trim. If it’s loose or damaged, tighten or replace it.
For standing shadows: Replace the light fixture’s reflector if it’s dirty or damaged. Add a trim ring to increase the fixture’s size and reduce shadowing. Adjust paint color or texture to better match the ceiling for less contrast.
If all else fails, consider using a different type of light fixture that casts less distinct shadows.
Inspection schedule and preventive maintenance
When to use this checklist: After seasonal temperature or humidity shifts, or when you’ve made changes to trim or insulation.
- Check for gaps around fixtures: Feel around the fixture’s edge. If it’s drafty, recaulk or reinsulate.
- Inspect tape seams: Look for any signs of pulling away or cracking. Reapply compound if necessary.
- Examine paint and texture: Ensure there are no bubbles, cracks, or peeling. Touch up as needed.
- Verify fixture alignment: Make sure the light is level and centered in the ceiling.
- Test switch and outlet functionality: Ensure they’re working properly to prevent electrical issues down the line.
- Check for water damage: Look for stains or warping, which could indicate a leak.
- Inspect insulation around pipes and ducts: Ensure it’s intact and well-sealed to maintain energy efficiency.
- Verify that vents are clear: Remove any dust or debris from ventilation grilles.
Quick rule: Regular inspections help catch small issues before they become big problems. Don’t skip this step!
Conclusion
Finish work around recessed lights with a clean, even look by sticking to solid planning, careful cutting, and proper mudding and feathering. The payoff is durable joints, minimal rings, and lighting that reads true from every angle.
Proceed in order: confirm safety and power off before any cutting or installation; measure and mark around the cans, cut drywall with the correct clearance, fit and support edges, apply tape and mud in thin, feathered coats, let each coat cure, and test the light and appearance from several angles before painting or texture. Keep the work area clean, test a small patch first, and proceed methodically from rough cuts to final finish.
Avoid these mistakes: overworking joint compound or applying thick coats that dunk into the can openings, skipping backer or proper support around the cutouts, and rushing the drying times so the next coat lifts or cracks. Safety rules to live by: always shut off power at the breaker before touching any recessed can wiring, wear eye protection and a dust mask when cutting, and never force a fit or push mud into tight gaps. If a shadow or edge still looks uneven after the first set, back up and re-sand or add another thin coat rather than trying to fix it with a heavy coat.
If you hit stubborn obstacles like deep shadowing, odd can trims, or moisture concerns, it makes sense to bring in a pro rather than force a DIY fix. Stay deliberate, work in daylight or good lighting, and keep the goal in sight: a safe, flush finish that lasts. You’ve got this—move methodically, and the room will look finished and solid when you flip the switch.
FAQ
What finish method works best around recessed lights to avoid rings?
Use a flush or trimless approach with proper mudding and feathering around the can. Follow the manufacturer’s instructions for any special rings or bezels. Check local rules or product labels if you’re unsure.
How do you trim drywall around can lights without cracking?
Make clean, straight cuts with the right drywall saw or knife. Leave small gaps only if the can’s frame requires it, then tape and mud carefully to blend. Always follow label directions for joint compounds and cure times.
What painting steps minimize shadowing around recessed cans?
Prime evenly, then apply thin coats and blend at the edges. Use the same sheen level across the ceiling and walls to reduce contrast. If shadows still appear, check lighting angle and texture consistency per product instructions.
What safety checks should I do before mudding around recessed lights?
Turn off power and remove or cover the fixture if possible. Check for heat-rated housings and follow the fixture’s clearance specs on the label or datasheet. If unsure, consult the fixture instructions or a qualified pro.