
Introduction
Heat movement around radiators and pipes poses a significant risk to plasterwork. Cracks can form over time as these elements expand when hot water runs through them, pushing against the surrounding plaster.
This guide walks you through practical steps and expert tips for detailing your plaster to accommodate heat expansion and prevent future damage. You’ll learn how to apply margins, control movement, and choose finish methods that stand the test of time.
Key takeaways
- Heat expansion causes plaster to crack around radiators and pipes.
- Material properties like thermal conductivity affect cracking.
- Inspect at joints, corners, and where pipes meet walls.
- Temporary fixes buy time; long-term repairs address root cause.
- Use flexible joint compounds for durable crack repairs.
- Prevent future cracks with proper installation strategies.
- Check materials list before starting, ensure quality finish upon completion.
Table of Contents
- Introduction
- Key takeaways
- How Heat Movement Causes Plaster to Crack
- Materials and Properties That Affect Cracking
- Where and When to Inspect — Diagnosis Checklist
- Temporary Fixes vs. Long-term Repairs
- Step-by-step: Durable Repair Methods for Cracks Near Radiators and Pipes
- Design and Installation Strategies to Prevent Future Cracking
- Materials, Tools and Supplies Checklist
- Visual Checkpoints and Finish Quality Standards
- Conclusion
- FAQ
How Heat Movement Causes Plaster to Crack
Heat makes pipes and radiators expand and contract. That tiny movement pushes on plaster and render joints. Even a few thousandths of an inch per degree, repeated over cycles, adds up and cracks plaster.
On a job, that means hairline cracks and costly repairs if you ignore it. Give joints some room, brace pipes, and let plaster have movement joints or flexible seal. Staggered joints, proper insulation, and small gaps save you from bigger cracks down the line.
Thermal Expansion vs. Structural Movement
When you see cracks around pipes and radiators, it’s often due to thermal expansion and contraction. This happens because the metal in pipes and radiators heats up and cools down more than plaster does.
Structural movement is different. It can come from settling of the building or vibrations from machinery. These movements are usually bigger and affect larger areas compared to just around a pipe or radiator.
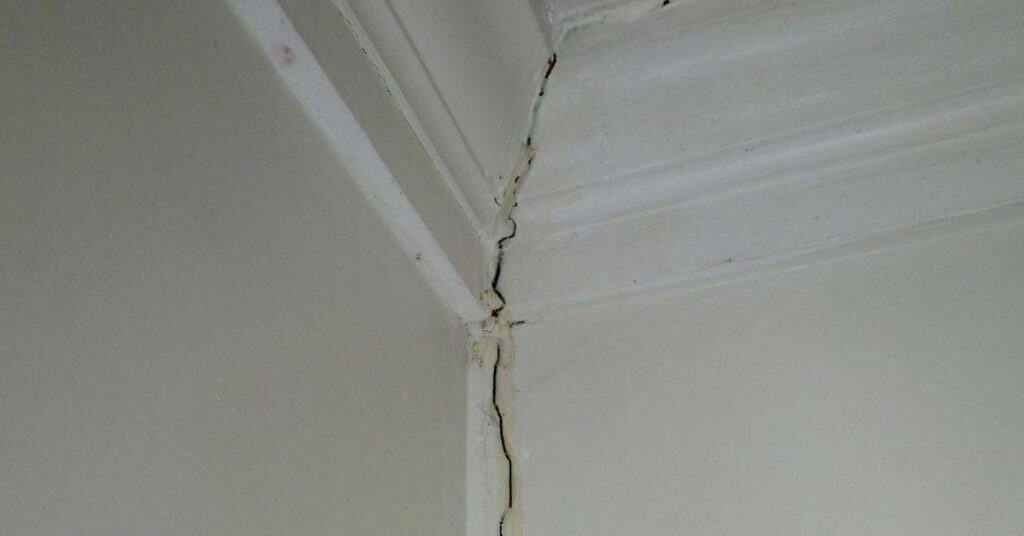
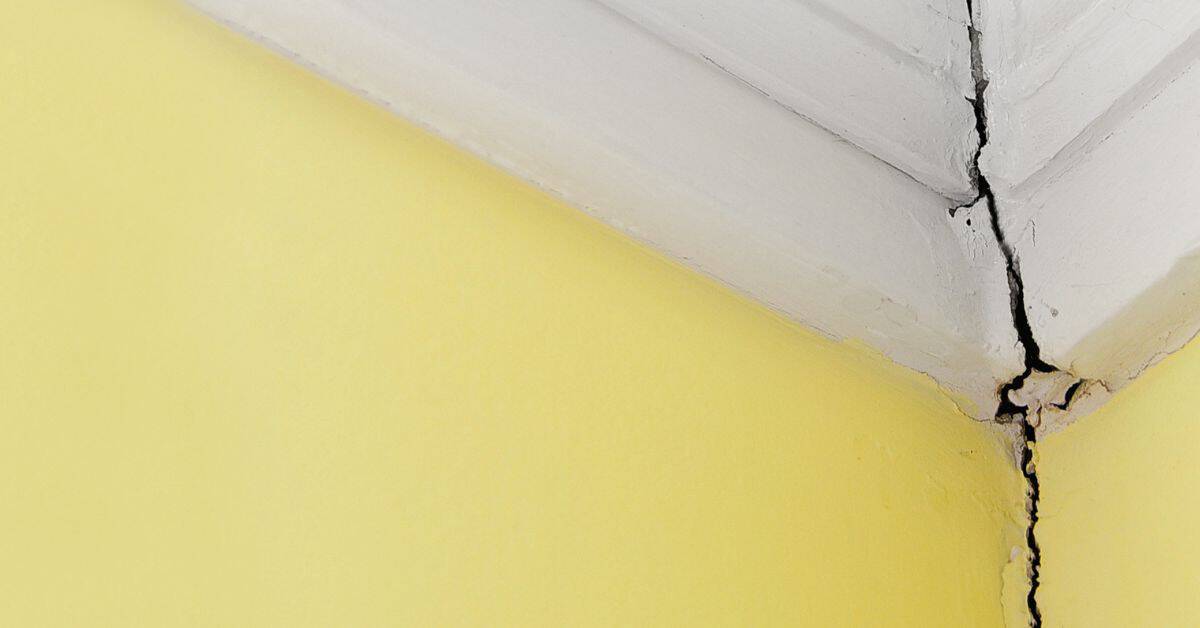
The key difference lies in how the cracks form. Thermal expansion causes small, hairline cracks that often appear near joints where pipes connect to walls. Structural movement tends to create wider gaps and stepped patterns across large sections of plaster.
Common Crack Patterns and What They Mean
Hairline cracks are usually the first sign that thermal expansion is at work. These tiny cracks appear around pipes or radiators when they heat up.
Radiating cracks spread out like a star from a single point, often where a pipe meets plaster. This happens because the pipe expands and pushes against the wall.
Vertical cracks tend to run straight down walls near pipes or radiators. They can indicate that the support for the pipe is failing, causing it to shift up and down with temperature changes.
Stepped cracks form in a stair-like pattern across plaster surfaces. This usually means there’s significant structural movement affecting large areas of your home, not just localized heating issues around pipes or radiators.
Materials and Properties That Affect Cracking
Your plaster mix and the backing drive crack risk. Lime plaster stays flexible, cement and gypsum are stiffer and crack more if the wall moves. Brick, block, or lath backing each behave differently, and paint or coatings that stiffen the surface can trap movement.
Stick with compatible combos and proper detailing to avoid headaches. On DIY jobs, mismatched plaster and backing or overcoated, rigid finishes are the sure path to cracks.
Pipe and Radiator Materials — Why They Matter
The materials used for pipes and radiators can significantly affect how your plaster holds up over time. Different metals expand at different rates, which means they put varying amounts of stress on the surrounding walls.
- Copper: Common in older homes, copper expands more than steel or plastic when heated, leading to higher pressure against plaster.
- Steel: More rigid and less prone to expansion compared to copper but still can cause cracking if not properly insulated.
- Plastic: Less likely to expand dramatically with heat, reducing stress on the plaster. However, it’s important to ensure a proper fit around pipes.
- Radiator Metals (e.g., cast iron): Cast iron radiators are heavy and can cause significant thermal expansion when heated, leading to cracks in nearby plaster if not properly insulated.
- PVC: Used for modern heating systems, PVC is less reactive to temperature changes but still needs careful installation around walls.
To avoid warped or weak stock, always ensure that the backing material behind your plaster can handle thermal expansion without cracking. Use flexible insulating materials between pipes and radiators and the wall surface.
Modern Flexible vs. Traditional Rigid Plasters
Flexible plasters, such as skim coats or fibrous plaster, are designed to absorb movement better than traditional rigid plasters like gypsum board. This makes them ideal for areas with pipes and radiators that expand and contract.
Rigid plasters can crack easily when there’s too much thermal expansion around heating elements. Flexible plasters offer more give, reducing the likelihood of cracks forming over time.
For example, using a fibrous plaster or a thin skim coat over rigid backing can help absorb small movements without breaking. This approach is especially useful in older homes with copper pipes and cast iron radiators that expand significantly when heated.
Where and When to Inspect — Diagnosis Checklist
Start by inspecting radiators and the pipes where they run. Do this both when the system is cold and when it’s hot. Look behind skirting boards and in alcoves for leaks, corrosion, and loose fittings.
Being methodical saves time, avoids bigger repairs, and keeps your heat steady. Know what to look for behind skirting and in alcoves so you don’t miss hidden leaks.
Visual Checkpoints and Measurements
Start by walking around the room, looking for gaps or cracks near pipes and radiators. Note any signs of water damage like rust marks or stains.
- Check for gaps wider than 1/8 inch between plaster and pipe.
- Note if there are visible cracks longer than a few inches.
- Look for bulges in the wall surface near pipes.
- Measure any separation at corners where walls meet.
- Inspect behind skirting boards for hidden gaps or moisture.
- Check inside alcoves and recesses for signs of movement.
- Note if there are cracks that run parallel to pipe lines.
- Look for areas where plaster has bubbled up.
- Measure the length and width of any visible cracks.
- Inspect around window frames near pipes or radiators.
- Check for signs of water damage on ceilings above.
- Note if there are any loose nails or screws in affected areas.
If you notice significant movement, it’s time to address the issue before further damage occurs.
When to Use Thermal Imaging or Moisture Meters
A thermal camera can show you where heat is moving through walls and ceilings, helping identify active movement. A moisture meter can detect leaks or rising damp that might be causing similar issues.
- Use a thermal camera if cracks appear larger when the heating system is on.
- Check for hot spots near pipes using thermal imaging.
- Look for cold areas indicating drafts or insulation gaps.
- Detect water leaks behind plaster with a moisture meter.
- Identify rising damp that mimics heat-related cracking.
- Measure the temperature difference between walls and ceiling.
- Check if there are consistent patterns of moisture in specific areas.
If you find significant thermal or moisture issues, address them promptly to prevent further damage.
Temporary Fixes vs. Long-term Repairs
Temporary fixes like flexible filler or silicone can cover a small leak for now, but they are not a real cure. Use them only when the problem is cosmetic or has low risk of returning. If water comes back or the fix feels loose, stop and switch to a real repair.
Think about how bad the leak is and whether it will repeat. For real problems, secure pipes, add movement joints, or re-plaster as needed. Skipping proper repairs saves time now but costs you in bigger repairs later.
Quick Cosmetic Repairs That Hold Short-term
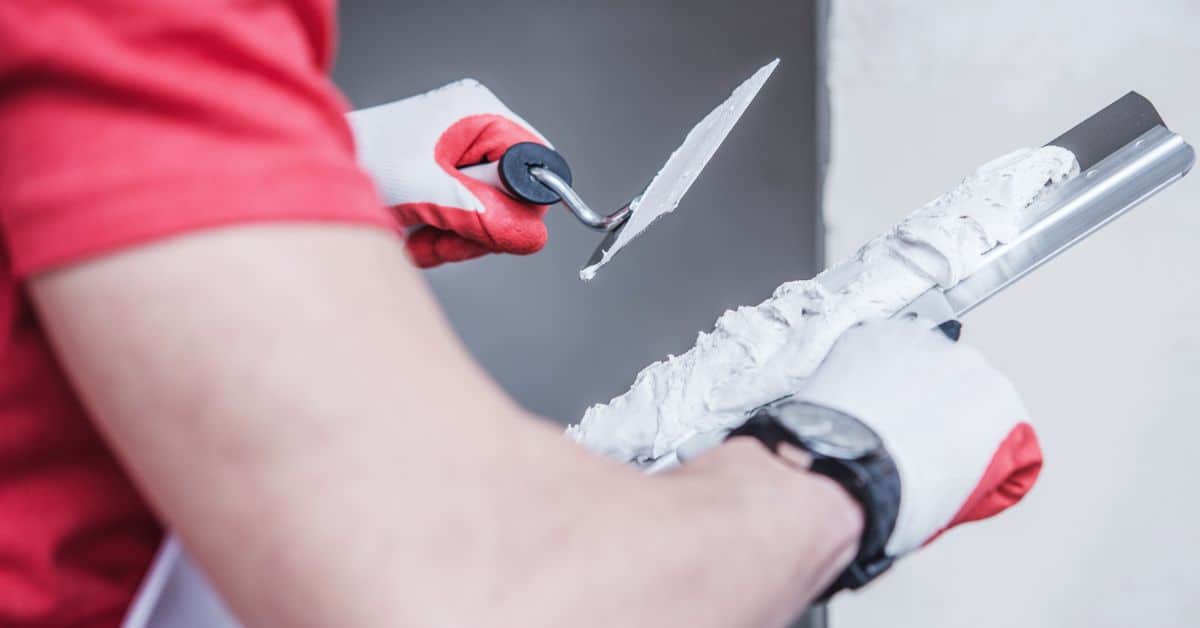
For small, surface cracks around pipes and radiators, a quick fix can buy you time until a proper repair is needed. Flexible fillers like silicone or acrylic caulk work well for these jobs. They expand and contract with temperature changes without breaking.
To apply the filler, clean the area thoroughly to remove dust and debris. Use a small putty knife to spread the filler into the crack. Smooth it out so it blends in with the surrounding surface. Once dry, you can paint over it for a seamless look.
When to Escalate to Structural Repair
If cracks are getting wider or showing up repeatedly in the same spot, it’s time to think about more serious repairs. This often means there’s a deeper issue like pipe movement or structural instability.
Signs you need to escalate include visible gaps around pipes that grow over time, loose mounting brackets, or signs of corrosion on metal parts. These indicate ongoing stress and potential future damage if left unaddressed.
In such cases, consider installing pipe supports or isolating joints with flexible materials designed for thermal movement. If the plaster itself is compromised, you might need to replace it entirely using modern plasters that handle heat better than traditional ones.
Step-by-step: Durable Repair Methods for Cracks Near Radiators and Pipes
Step-by-step Repair Process
Before you start, make sure the area is safe and ready for work. Here’s how to proceed:
- Turn off heating or cool down pipes.
- Remove loose plaster around cracks with a chisel.
- Scrape out debris and clean the surface thoroughly.
- Apply a bonding agent if needed, especially on old surfaces.
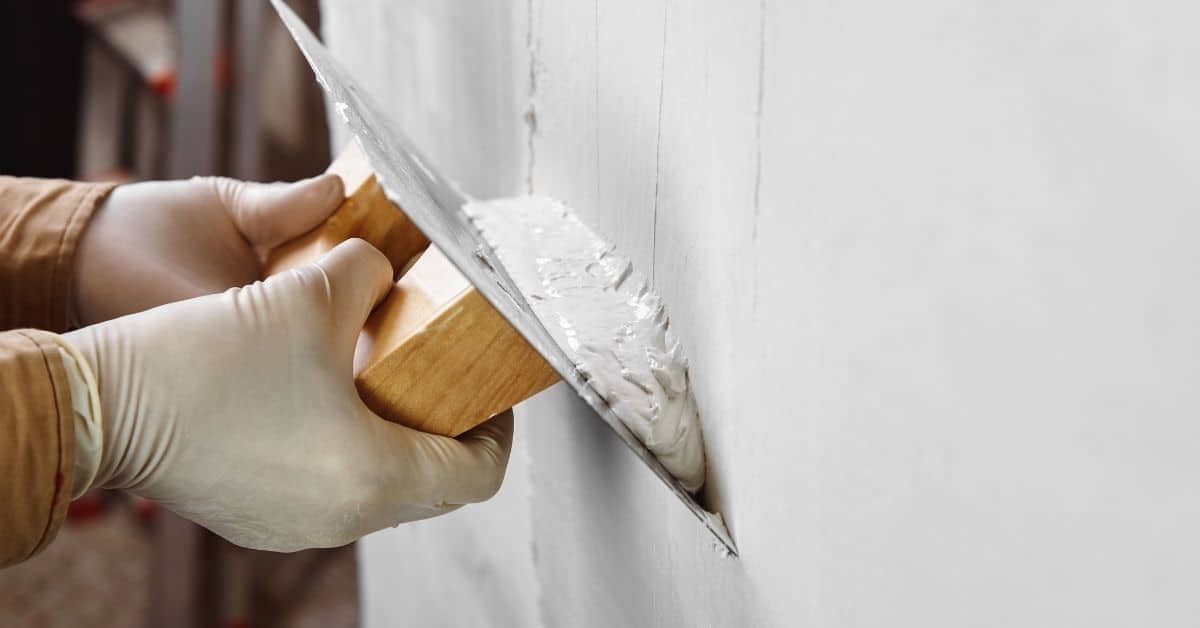
- Mix your plaster to a smooth consistency.
- Fill in gaps with plaster, working from bottom up.
- Use a damp sponge or brush to smooth out the surface.
- Add reinforcing mesh for larger cracks or areas prone to movement.
- Finish with a flexible topcoat or apply movement joints as needed.
Once done, inspect your work and touch up any rough spots.
Preparation and Safety (Shutting Down Heating, Access)
Before starting repairs, ensure the area is safe by turning off heating or cooling down pipes. This prevents accidental burns or scalding.
Drain any water from radiators if necessary to avoid leaks during work. Cover floors with plastic sheeting for protection against spills and debris.
Isolate pipework to prevent damage while working around them. Use protective covers on radiators to shield them from accidental knocks or scratches.
Replastering Technique That Accommodates Movement
To ensure durability, start by applying a basecoat of plaster that’s slightly thicker than usual. This helps fill gaps and provides a solid foundation.
For larger cracks or areas prone to movement, place reinforcing mesh over the area before applying your second coat. This adds strength and flexibility.
Finish with a flexible topcoat or use movement joints at regular intervals. These allow for expansion and contraction without cracking.
Design and Installation Strategies to Prevent Future Cracking
The key to preventing future cracks is sound installation. Plan for movement from the start by outlining movement joints and padding in the concrete deck, scheduling work around heating cycles, and staggering penetrations so that there is no single transfer path for movement.
Follow a practical sequence:
(1) confirm layout with movement joints every 8–10 feet
(2) install pipe supports and wall plates in dry, staged steps
(3) install expansion loops or flexible interfaces where pipes pass through concrete or thick plaster
(4) apply primer and basecoat
(5) finish with plaster in controlled temperature conditions.
Allow each stage to cure per manufacturer recommendations before proceeding. In heated spaces, avoid turning on radiators until plaster base coats have achieved sufficient set to minimize movement during early expansion.
If you skip supports or force rigid joints, movement travels into the wall and cracks show up. Expansion loops and flexible connections slow that transfer, saving you repairs and callbacks to the job. It sounds fussy, but it pays off with lasting walls and a cleaner finish.
Pipe Support and Fixing Guidelines
When installing pipes, it’s crucial to secure them with clips that are spaced correctly. A good rule of thumb is to space clips every 24 inches or so, but adjust based on the pipe size and material. Use rubber-lined clips or split sleeves to cushion the pipe from direct contact with concrete, reducing lateral movement. Plan clip spacing to align with anticipated plaster thickness and any finished floor level so that clips do not create pressure points on the plaster when the system moves. After plaster base coats have cured, re-check clip positions and tighten only as needed to prevent vibration without inhibiting expansion.
For radiator pipes, ensure they’re securely fastened to wall plates that can absorb some of the thermal expansion without transferring it all to the plaster. This helps prevent cracks by allowing the pipe to move slightly while keeping the plaster stable. Install expansion loops or flexible connectors where pipes pass through penetrations or near joints, and verify that loops are sized to accommodate anticipated movement without kinking or stressing couplings. Do not constrict a loop with rigid plaster or tight fittings.
Movement Joints and Flexible Interfaces
Incorporate vertical movement joints at regular intervals, typically every 10 feet or so, depending on your site specifics. These joints allow the concrete to expand and contract without stressing the plaster. Ensure joints are continuous behind plaster and filled with a low-modulus sealant that remains flexible over the life of the installation. Use backer rods where needed to control the depth of filler and prevent squeeze-out into plaster surfaces. At skirting boards, leave a small gap of about 1/8 inch around the perimeter to accommodate expansion. Use flexible sealants like silicone at pipe penetrations to keep water out while allowing for movement.
Coordinate movement joints with radiator placement and wall plates so joints are not directly under heavy pipe runs. If a joint location must pass near a radiator, install a small compensating loop or layout change to keep the joint away from the radiator edge and avoid differential movement across plaster. After plaster coatings are complete, verify that all movement joints remain free of fixed rigid elements and that sealants cure per product data sheets.
Follow a documented sequence: install supports and wall plates first, then set movement joints, then complete the plaster base and finish. Do not compress joints or sealants during installation; leave proper expansion space and allow the material to cure before applying heat. Plan to hold off turning on heating for at least 48–72 hours after initial plaster set, and follow the plaster manufacturer’s cure times and your local code requirements before full heat cycling begins.
Materials, Tools and Supplies Checklist
This checklist covers the tools, materials, and products you’ll need for inspection, temporary patching, and full repairs. Expect fillers like epoxy or Portland cement plasters, fiberglass or metal meshes, sealants such as silicone or polyurethane, and standard plaster mixes. Don’t skip PPE—gloves, eye protection, and a dust mask are non negotiable, and look for products with good bond strength, low shrinkage, and surface compatibility.
Having the right gear matters because it keeps the job from failing later. It helps you work faster, avoid call-backs, and stay safe on the jobsite. Choose materials with clear cure times, resistance to cracking, and compatibility with the substrate; poor choices here cost you time and money.
Tools for Diagnosis and Prep
You need the right tools to diagnose issues around pipes and radiators before you start repairing cracks.
- Thermal camera or infrared thermometer
- Multipurpose moisture meter
- Vacuum cleaner with HEPA filter
- Screwdrivers (various sizes)
- Chisels for cutting out old plaster
- Hammers and pry bars
- Tape measure and level
- Protective gloves, goggles, and mask
- Flashlight or work light
- Safety glasses and dust masks
- Dust sheets to protect floors
- Cordless drill and bits
Make sure you have all these tools before starting any repair work. This will help prevent movement issues from coming back.
Best Filler and Plaster Product Types
Selecting the right materials is crucial for a lasting fix around pipes and radiators. Here’s what you need:
- Flexible acrylic filler or mortar-grade patch compound
- Fiber-reinforced basecoat plaster mix
- Waterproof sealant suitable for concrete and masonry
- Breathable, crack-resistant finish coat
- Metallic mesh tape for reinforcement
- Vapor barrier membrane to prevent moisture intrusion
- Drywall compound or joint compound for small cracks
- Concrete bonding agent for better adhesion
- Silicone caulk for sealing gaps around pipes and fixtures
- Fiberglass mesh tape for added strength in critical areas
- Breathable paint primer to seal the surface before painting
Choose products that can handle movement and moisture without cracking. This will ensure your repairs last longer.
Visual Checkpoints and Finish Quality Standards
Visual acceptance means the repaired surfaces are crack-free, the finish is even, and the gaps around pipes are correctly sized. Look for clean paint, no drips, and consistent color. If it fails, fix it before you move on.
Good finish saves time and avoids leaks after commissioning. Repaint carefully, mask properly, and check joint gaps during final checks so you don’t have to redo work. Skipping this stage will bite you later with drafts, corrosion, and call-backs.
What to Look for During Curing and First Heating
After plastering around radiators and pipes, keep an eye on the area during curing. Delay full heating until the plaster is fully set, usually a few days.
- Check for any cracks or gaps forming near the pipe or radiator.
- Look for signs of stress like bulging or uneven surfaces.
- Inspect around movement joints to ensure they remain flexible and not sealed shut.
- Feel if there are any hot spots that might indicate a poor seal.
- Watch for plaster dust, which can signal weak areas.
- Ensure the gap between pipes and plaster is consistent and allows for expansion.
- Look out for signs of water leakage around pipe connections.
- Check if there are any loose or rattling parts that need tightening.
If you notice stress reappearing, address it immediately to prevent further damage.
Touch-up and Repaint Guidance
Before repainting the repaired area, ensure the plaster is fully cured and any movement issues are resolved. Choose a paint that allows for some flexibility.
- Use breathable paints to allow moisture to escape.
- Avoid using impervious finishes that can trap moisture.
- Prime the surface before painting for better adhesion.
- Ensure all cracks and gaps are sealed properly.
- Choose a paint color that matches the existing wall.
- Apply thin, even coats of paint to avoid sagging or peeling.
- Allow each coat to dry completely before applying another.
If you notice any movement issues reappearing after painting, stop and fix them immediately to prevent further damage.
Conclusion
Fixing plaster around radiators and pipes is about stopping heat-driven cracking now and building durability for years to come. Do it with careful prep, tested materials, and solid joints so repairs hold under heat, pressure, and seasonal movement.
First, check the area for active cracks, damp spots, and signs of heat or cold cycles, then plan a durable repair: isolate the radiator if needed, clean the edges, prime the surface, mix the repair material per instructions, apply in stages with proper curing, and finish so the repaired section blends and breathes with the wall. Start small, test a patch in a hidden spot, then expand to the visible area, and always recheck for movement after the first heat cycle of the season.
Common mistakes to avoid are using the wrong patching compound for heat movement, skipping surface preparation, and rushing curing times. Always respect heat sources: keep tools and materials away from direct heat, avoid loading fresh plaster too soon, and test a small area before full repair. If you’re unsure about the radiator shutoff, access clearance, or you see lingering damp, stop and reassess safety and access before continuing.
If the crack keeps reappearing after the right fixes and you notice leaking, corrosion, or persistent movement, call a professional. A pro can verify insulation, seal integrity, and proper radiator mountings to protect your walls. Stay practical, stay safe, and you’ll keep the room looking good and the system running reliably. You’ve got this—move step by step and you’ll finish strong.
FAQ
Why does plaster around pipes and radiators crack?
The primary culprit is heat. Pipes and radiators expand when hot water flows through them, exerting pressure on the surrounding plaster, which eventually leads to cracking.
Can I simply fill cracks with joint compound?
No, this is a common DIY mistake. Joint compound lacks heat resistance, so any filled cracks will likely reappear once the pipe or radiator heats up again.
How can I prevent plaster from cracking around pipes and radiators?
Use heat-resistant joint tape before applying your final coat of plaster. This flexible material moves with the pipe or radiator, preventing cracks from forming in the first place.
Why do some contractors overlook this issue until it becomes a major problem?
There could be various reasons: laziness, lack of knowledge, or even assuming homeowners won’t notice until after they’ve completed the job. To avoid this, ensure you hire a professional who understands heat movement’s impact on plaster and ask about their methods.