

Introduction
A leaking cold joint at slab-to-wall is water intrusion at the bond between a concrete slab and the wall caused by gaps or cracks near the joint.
This article explains why surface caulk often fails and what better repair approaches look like for DIY work. Identify leaks by looking for damp patches near the joint after rain or cycles of heating and cooling, and check interior signs of moisture. If you’re unsure whether the leak is from the roof slab or plumbing, consider timing, location, and nearby plumbing lines or fixtures.
Key takeaways
- Distinguish roof slab leaks from plumbing by tracing moisture paths and fixture proximity
- Surface caulk fails due to movement, moisture pressure, and inadequate substrate bonding
- Inspect for cracks, failed membranes, and drainage issues before patching any joint
- Emergency fixes include temporary seal and diverting water; wear PPE
- Durable interior fixes require vented backer, proper joint widening, and compatible sealants
- For exterior, install flashing and waterproof membrane at slab edge per manufacturer specs
Table of Contents
- Introduction
- Key takeaways
- What Is a Slab-to-Wall Cold Joint and How It Becomes a Leak Point
- Step-by-Step Diagnostics to Confirm a Cold-Joint Leak
- Why Surface Caulk Usually Fails at Slab-to-Wall Cold Joints
- Practical Repair Options — Emergency Fixes, Durable Interior Fixes, and Permanent Exterior Solutions
- Choosing and Detailing Waterproofing Systems and Flashing at the Slab-to-Wall Interface
- Structural and Drainage Causes That Must Be Fixed Alongside the Joint Repair
- DIY Vs Professional Repair — Decision Guide, Safety, and Permitting
- Cost, Expected Durability, and Maintenance Planning for a Permanent Solution
- Conclusion
- FAQ
What Is a Slab-to-Wall Cold Joint and How It Becomes a Leak Point
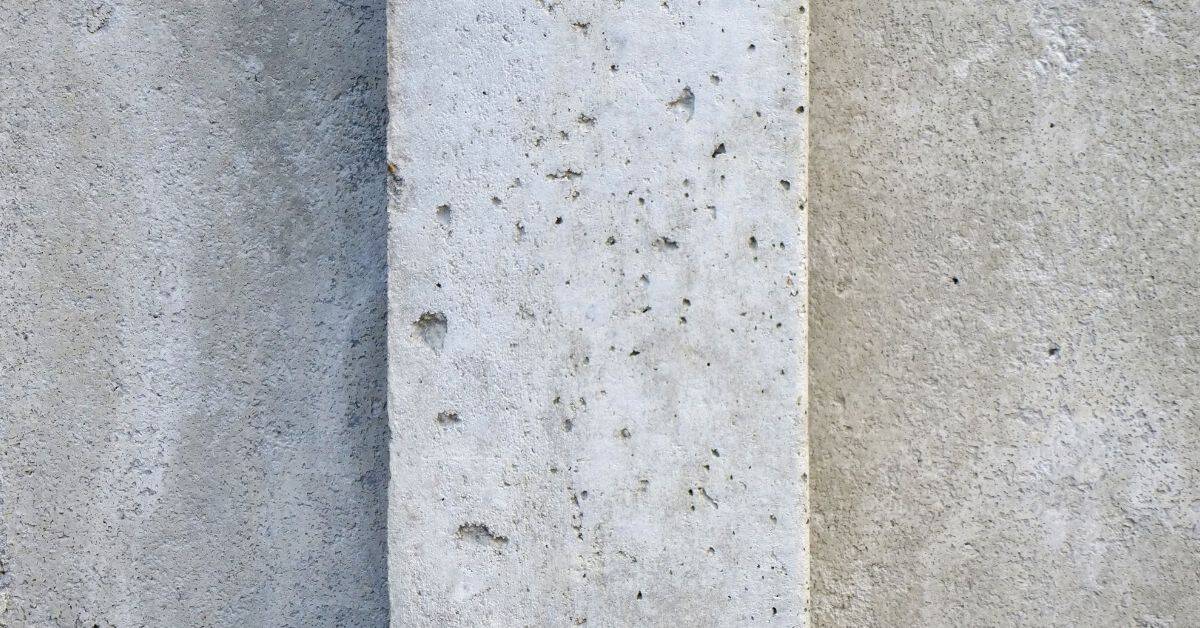
A slab-to-wall cold joint is the seam where a concrete slab ends at the wall, not a single, monolithic pour. It forms when the wall and slab are poured at different times or with different forms, so the joint isn’t part of one continuous structure. That separation creates a natural path for water under pressure and makes leaks more likely than in a true monolithic pour.
These joints form from shrinkage, form timing, settlement, and gaps that open with movement, which is why water can seep through. Surface caulk often fails here due to limited bond and ongoing movement. For a DIY approach, plan solid site prep, use movement-capable sealants or injection methods, and add flashing or membranes to keep water out and reduce pressure.
How cold joints form during construction or repair
Cold joints happen when concrete is poured in separate stages. This can be due to timing, seasonal pours, or construction sequencing.
For instance, a roof slab might be poured first, then walls are built on top later. The joint where these two meet is a cold joint.
The gap left between the initial pour and the subsequent one doesn’t have the same strength as a monolithic pour. This makes it susceptible to water entry.
Where to look — common slab-to-wall locations and visual cues
Cold joints at slab-to-wall intersections are common in roof edges, parapets, and cove joints. These areas see a lot of water pressure.
Look for staining, efflorescence, surface cracking, or recurring damp spots. These are signs of water intrusion.
Also, check where the slab meets the wall. This is often where cold joints hide.
Why cold joints behave differently than plain cracks
Cold joints are an interface between pours with poor bond. They’re wider and more irregular than hairline cracks.
Differential movement can cause these joints to open and close, unlike simple cracks that usually stay static.
This movement allows water under pressure to enter and cause leaks. It’s why cold joints need special attention.
Step-by-Step Diagnostics to Confirm a Cold-Joint Leak
Start with a clear, repeatable flow that helps you separate cold-joint leaks from cracks, capillary action, or grading issues. Begin with the least invasive checks: watch surface moisture during rain or after washing, trace a dye line or chalk along the slab-to-wall seam, and gently probe of the joint for softness or movement without forcing or gouging. Use simple tools like a moisture meter or infrared check to spot hidden seepage, and compare interior dampness patterns to exterior conditions to build a timeline of events.
Keep a practical cadence and document everything: photos, measurements, the weather context, and what products you tried. Look for clear signals like timing with rainfall, where dampness shows up, efflorescence or staining at the joint, and whether moisture persists after finishes are removed. If the signs are intermittent, inconclusive, or raise mold or structural concerns, escalate to a professional evaluation such as camera inspection, epoxy or sealant considerations, or exterior waterproofing assessment, always checking labels and local guidance before proceeding.
Step-by-Step Process
The following steps guide you through a practical diagnostic workflow to confirm if your slab-to-wall cold joint is the source of leaks.
- Preparation: Ensure safety first. Turn off power, gas, and water supplies. Wear appropriate PPE (personal protective equipment).
- Access the area: Remove any obstructions, like drywall or baseboards, to expose the cold joint.
- Main checks: Inspect visually. Look for dampness, efflorescence, or staining at the joint. Probing can help assess soft mortar.
- Weather check: Observe during rain. Note any changes in interior dampness patterns.
- Final checks: Clean up and document. Take photos, measure affected areas, note weather context, and record observations.
Surface Inspection Checklist and Simple Tests
Use this checklist when first inspecting the cold joint to narrow down the source of leaks.
- Visual check: Look for dampness, efflorescence, or staining at the joint. Skip at your peril: Missed signs may lead to incorrect diagnoses.
- Probe gently: Use a screwdriver or similar tool to probe mortar. Soft spots indicate potential issues.
- Compare wet and dry: Note differences in dampness patterns between rainy and dry weather.
- Check for movement: Gently push and pull on the wall near the joint. Movement could indicate structural concerns.
- Exterior grading check: Ensure exterior slopes away from the foundation to prevent water entry.
Quick rule: If you find signs of moisture or movement, proceed with further tests. If unsure, consider professional help.
Controlled Water Tests, Dye Tests, and Timing Observations
Targeted water tests and dye tracing can help confirm entry points and rule out plumbing issues.
First, safely perform a hose test. Use a garden hose to simulate rain. Observe where water enters the joint and if it matches interior dampness patterns.
Next, try dye tracing. Apply food coloring or a leak detection dye along the cold joint. After rainfall or controlled water entry, check for dye inside your home. If present, you’ve found an entry point.
Timing observations are crucial. Note when leaks occur relative to rainfall. Persistent leaks after dry periods may indicate plumbing issues rather than a cold-joint leak.
When to Use Professional Tools: Moisture Meters, Thermal Imaging, and Leak Detection
Professional tools can detect hidden migration paths or multiple entry points. Here’s when to consider them.
- Moisture meters: Pin-type meters measure moisture content in materials. Useful for confirming hidden seepage. Tip: Rentals are available at hardware stores.
- Thermal imaging: Infrared cameras detect temperature differences, indicating potential moisture migration. Ideal for finding hidden paths. Price cue: Rental costs vary; expect around $200-$300 per day.
- Leak detection: Electronic leak detection equipment uses ultrasound to pinpoint leaks. Essential when multiple entry points are suspected. Tip: Professional services may be needed for complex cases.
Why Surface Caulk Usually Fails at Slab-to-Wall Cold Joints
Water pressure and capillary action drive moisture through even tiny surface gaps, so thin caulk is only a superficial seal at slab-to-wall joints. Concrete shrinkage, thermal movement, and settlement keep opening and closing those gaps, which a thin bead can’t reliably accommodate.
Poor surface prep and damp, porous concrete wreck bond strength, so caulk peels, tears, or debonds fast. You’ll see edge pull-off, cracks, and pinholes as moisture migrates under the seal. That’s why DIY caulking may seem to work briefly, but it won’t be a lasting solution and you’ll be back for follow-up repairs.
Adhesion and substrate compatibility issues
Thin surface caulking often fails due to poor adhesion with the concrete substrate. Aged concrete, dust, or incompatible sealant chemistry can reduce bond strength and longevity.
Concrete surfaces need proper cleaning and preparation before applying any sealant. This includes removing loose material, dust, and contaminants that could hinder adhesion.
Incompatible sealants may not stick well to the substrate or might degrade over time due to chemical reactions with the concrete. Always choose a sealant suitable for your specific substrate and conditions.
Movement, thermal cycling, and repeated stress
Concrete structures move due to shrinkage, thermal expansion/contraction, and settlement. These movements cause opening and closing gaps at cold joints that thin surface sealants cannot accommodate reliably.
As temperatures fluctuate, concrete expands and contracts. This thermal cycling creates stress on the caulk, causing it to stretch and shrink repeatedly. Over time, these cycles weaken the caulk’s elasticity and adhesion, leading to failure.
Even small movements can cause micro-cracks or gaps in the caulk, allowing water to penetrate and compromise the seal. Stronger, more flexible sealants are needed to withstand these stresses.
Hidden moisture, trapped water, and secondary damage
Caulking can trap moisture behind the seal, hiding an active problem. This trapped water can accelerate corrosion of embedded reinforcement or cause membrane failure in adjacent areas.
Moisture trapped under a caulked joint can promote mold growth and deterioration of the concrete substrate over time. It may also lead to secondary damage, such as efflorescence (white salt deposits) on nearby surfaces.
Instead of just sealing the surface, consider addressing the root cause of moisture intrusion. This might involve improving drainage, reducing hydrostatic pressure, or using better waterproofing methods that allow trapped moisture to escape without causing further damage.
Practical Repair Options — Emergency Fixes, Durable Interior Fixes, and Permanent Exterior Solutions
Practical Repair Options are grouped into three paths you can work through in sequence: emergency fixes to block further intrusion, durable interior remedies that stop recurring problems without hiding symptoms, and permanent exterior solutions aimed at correcting the underlying drivers of damage. Each path targets a distinct failure mode—surface gaps and small interior cracks for quick containment, slab-to-wall joint movement and interior moisture pressure for deeper fixes, and substantial exterior water loading that demands a robust exterior approach—so pick the path that matches what you actually see. Start with a quick, temporary seal or barrier to slow leaks if needed, but treat it as a placeholder, not a substitute for a full repair plan or proper drainage improvements.
On site, map out your checks: crack width and movement, moisture source location, substrate condition, and whether interior drainage or exterior grading is contributing to the problem. The right choice depends on conditions and your goals for long-term performance, not just what seems easiest today, and you should check product labels and manufacturer guidance before committing. A practical sequence—diagnosis, temporary fix, durable interior repair, then exterior restoration if needed—keeps moisture from returning, makes exterior work more effective, and helps you plan the right combination of materials and steps.
Emergency and Temporary Measures
When a cold joint is leaking, you need quick solutions to stop the water. These aren’t permanent fixes, but they’ll buy you time.
Surface Cleaning: First, clean the area. Water won’t stick to a dry surface. Use a wire brush and compressed air if needed.
Backer Rod Insertion: For wide gaps, insert a backer rod. This foam material fills the gap temporarily, preventing water from seeping in.
Temporary Sealants: Apply a temporary waterproof sealant over the area. These are usually clear and peelable. Remember, these are just band-aids. Don’t delay a proper repair.
Interior-Facing Permanent Repairs
For long-term interior solutions, you’ll need to access the joint. Here’s what you can do:
Epoxy/Polyurethane Injections: For bonded cracks, inject epoxy or polyurethane. These adhesives fill and seal the crack from within.
Chase-and-Seal: If accessible, cut a chase (recess) along the joint. Fill it with a flexible sealant like silicone or polyurethane. This creates a barrier against water.
Membrane Additions: Apply an interior waterproofing membrane over the joint. These are typically self-adhesive and create a barrier. But remember, they won’t fix movement at the root.
Exterior Reconstruction and Membrane Replacement
The best way to stop leaks is to expose the joint and repair it from the outside. Here’s how:
Exposing the Joint: Cut back any finishes to expose the cold joint. You need to see what you’re dealing with.
Flashing and Joint Detailing: Install proper flashing and joint detailing. This could be a flexible sealant, or a preformed flashing system. It should bridge the gap between slab and wall, preventing water intrusion.
Membrane Replacement/Repair: If your exterior membrane is damaged, replace or repair it. This might mean stripping back old membranes and applying new ones.
Choosing and Detailing Waterproofing Systems and Flashing at the Slab-to-Wall Interface
Choosing a waterproofing system at the slab-to-wall interface means weighing external membranes, cementitious coatings, liquid-applied barriers, and sheet membranes for long-term performance, compatibility with common wall finishes, and maintenance needs. Focus on solid flashing details, proper drainage plane, kick-out flashings, and clean terminations that integrate with wall flashing to keep water out. Plan for continuous barriers or careful terminations, good substrate prep, and movement joints with compatible sealants.
Doing it right matters because bad detailing shows up as leaks, cracking, and moisture damage over time. This guide helps you spot common failures, decide when to DIY versus hire a pro, and set up practical checks like surface prep quality, seam sealing, substrate moisture, and a clean transition from exterior to interior waterproofing where needed. Use the label or instructions to confirm product limits and always tailor details to your substrate, climate, and the scale of the slab-wall interface.
System types: sheet membranes, liquid-applied membranes, and bentonite options
Choosing the right waterproofing system for your slab-to-wall interface is crucial. Here are three main types:
Sheet Membranes: These are flexible sheets made of polyethylene or other plastics. They’re easy to install but can wrinkle and tear if not done carefully.
Liquid-Applied Membranes: These are sprayed or rolled onto the surface, forming a seamless barrier. They’re great for complex shapes but can be messy to apply.
Bentonite Options: These use swelling clay to create a waterproof seal. They’re durable but may require additional protection from physical damage.
Proper termination, flashing, and mechanical anchoring details
Secure transitions at the slab-to-wall joint are vital to prevent leaks. Here’s how:
Mechanical Termination: This involves using metal anchors or clips to secure the membrane to the wall. It’s robust but requires precise installation.
Turn-Up Method: This involves turning the membrane up the wall and securing it with adhesive or mechanical fasteners. It’s simple but may not be suitable for all substrates.
Secure Flashing: Use flashing at corners, intersections, and other vulnerable points to direct water away from the joint. Ensure it’s securely attached and properly sealed.
Material compatibility and warranty/installation verification
Choosing compatible materials ensures a successful installation. Here’s what to check:
- Substrate Compatibility: Ensure the membrane adheres well to your slab and wall material (concrete, CMU, etc.).
- Primer Use: Some membranes require primers for proper adhesion. Make sure you have them.
- Installer Warranty: Check if the installer offers a warranty on their workmanship.
- Manufacturer Specs: Look at the membrane’s rating and specs to ensure it meets your needs (e.g., traffic, temperature range).
- Avoid Common Mistakes: Don’t skimp on prep work. Clean surfaces, remove loose material, and address any cracks before installing.
Structural and Drainage Causes That Must Be Fixed Alongside the Joint Repair
Waterproofing the joint helps, but it won’t hold if the slab is still shifting or the surrounding drainage is wrong. Look for signs of movement like cracks that aren’t straight, walls that aren’t plumb, or doors that stick, plus cracks around openings that show active movement.
Check grading, downspouts, and drainage paths to make sure water flows away from the slab and interior moisture paths are blocked. Plan an integrated repair that may include crack injections or joint facings along with better drainage and any needed structural work, then set a simple monitoring routine so you catch problems early.
Site drainage, roof slope, and gutter/downspout issues
Water loves to find the path of least resistance. If your site’s drainage is poor, it’ll force its way into those cold joints at slab-to-wall intersections.
Check your roof slope. If it’s flat or inadequate, water will pond and sit there, soaking into the joint over time. Make sure it slopes away from the building.
Inspect your gutters and downspouts. Clogged gutters let water overflow onto the slab. Downspouts that discharge too close to the foundation can saturate the soil and push water back into the joint.
Ensure exterior grading slopes away from the building at a minimum of 1 inch per foot for the first 6 feet. This helps prevent water from pooling around the slab and finding its way through those cold joints.
Settlement, differential movement, and reinforcement concerns
Foundation settlement or differential movement can wreak havoc on your slab-to-wall cold joints. Cracks form, joints widen, and water starts seeping in.
Look for settlement cracks. They’re usually diagonal and wider at one end. Stair-step cracks are another sign of differential movement.
Check if walls are misaligned or doors/windows are sticking. These signs indicate active movement that needs addressing before you seal the joint.
If your foundation has missing or corroded reinforcement, it can’t hold the slab in place. You might need to replace or supplement the reinforcement as part of your repair plan.
Penetrations, flashings, and adjacent details to inspect
Water can find its way through the smallest gaps. That’s why it’s crucial to inspect and address all nearby penetrations and flashings.
Check mechanical penetrations. Vents, pipes, or wires that pass through the slab-to-wall joint need proper flashing to prevent water intrusion.
Inspect parapet copings. If they’re cracked or improperly flashed, water can leak down into the cold joints below.
Don’t forget about adjacent details. Expansion joints, control joints, and other nearby features need to be in good shape and properly sealed to prevent water from finding alternative paths into your slab-to-wall joint.
DIY Vs Professional Repair — Decision Guide, Safety, and Permitting
This section helps you decide what you can DIY and what needs a licensed pro, with safety and permitting in mind. You’ll see a simple decision path for tasks like surface cleaning, crack routing for sealant, and basic patching versus more involved work like structural concerns or core drilling. It also outlines the safety gear you need and how to handle concrete dust and hazards before you touch the job.
Understanding permits, codes, and inspections helps you verify what work needs a permit and who should inspect it. The guidance covers tools, materials, prep steps, moisture checks, and the sequence from cleaning to sealing to curing so you know what to do and when to call a pro. If you see red flags like cracks that widen, water under pressure, or moving joints, it’s time to escalate.
When a Homeowner Can Safely Attempt Repairs
DIY repairs are possible when the damage is minor and doesn’t compromise the structure. Here’s what you can tackle:
Surface cleaning: Remove dirt, mold, or mildew using a wire brush and mild detergent.
Small gap sealing: If gaps are tiny (less than 1/4 inch), insert backer rod, then apply flexible sealant. Expect to reapply every few years.
Prep is key: clean surfaces, remove loose material, and let it dry before applying any product. Be realistic about your skills and the job’s complexity.
When to Call a Pro: Structural, Membrane, or High-Access-Risk Jobs
Some repairs are best left to professionals. Here’s when to pick up the phone:
Structural concerns: Active cracking, movement, or settlement indicates underlying structural issues that need expert assessment.
Membrane replacement: Replacing entire waterproofing membranes is complex and may require specialized equipment and expertise.
High-access risks: Roofs, high walls, or other hard-to-reach areas pose fall hazards. Always prioritize safety by hiring professionals for these jobs.
Trust your instincts: if a job seems too big, complex, or risky, it probably is. Don’t hesitate to call in the pros.
Safety, Fall Protection, and Permit Considerations
Safety comes first. Here’s what you need to know before starting repairs:
Fall protection: Use secure ladders, tie-offs, or safety harnesses when working at heights. Never take risks with your safety.
Electrical hazards: Be aware of any nearby electrical lines and avoid them during repairs, especially on roofs.
Permits and codes: Check local building codes and permit requirements before starting major repairs or changes to waterproofing systems. Some jobs may need inspection approvals.
Always prioritize safety over speed. Follow guidelines, use appropriate PPE, and don’t hesitate to consult professionals if you’re unsure about any aspect of the job.
Cost, Expected Durability, and Maintenance Planning for a Permanent Solution
Plan for a permanent fix by comparing life-cycle costs, including upfront repair vs full replacement, expected lifespans of chosen methods, maintenance frequency, and a simple way to compare options over 20–30 years. Look for bids that clearly spell out scope (how joints are remediated, surface prep, waterproofing, testing), warranties, permits, and response times. Don’t rely on promises alone—check the label or manufacturer instructions for what each method actually lasts and how it ages.
This matters because it sets realistic expectations for longevity, maintenance needs, and when to DIY or hire a pro. A solid plan helps you budget for reconditioning, exterior drainage checks, and record-keeping, so small issues don’t bubble into big leaks. Use a simple decision guide to weigh safety, tooling, and risks to structure, and to know when professional intervention is the safer, more durable choice.
How to compare repair proposals and warranties
When comparing quotes, don’t just focus on the bottom line. Dive into the details to ensure you’re getting a fair deal and quality work.
Scope: Ensure each bid covers the same work, including joint remediation method, surface prep, waterproofing, and testing. Inconsistencies here can lead to unexpected costs later on.
Warranties: Check both materials and labor warranties. A solid warranty shows confidence in their product and workmanship. Be wary of those offering none or very short ones.
Maintenance requirements: Understand what’s needed to keep the repair in good shape. Some systems may require annual re-coating, while others might need periodic joint cleaning. Factor these into your long-term budget.
Expected service-life factors and what to ask contractors
Don’t let price be the only deciding factor. Ask about expected lifespan, maintenance needs, and potential failure modes.
Service life: Inquire about typical service life under similar conditions. This gives you an idea of when you might need to redo the repair.
Maintenance needs: Find out what’s required to keep the system in good working order. Regular maintenance can extend the lifespan of your repair.
Failure modes: Ask about common failure points and signs of trouble. Early detection can prevent small issues from turning into big problems.
Maintenance checklist and inspection schedule to protect the repair
Regular inspections help catch potential issues early. Use this checklist as a guide:
- Annual Inspection: Check for cracks, gaps, or signs of water intrusion.
- After Heavy Rain: Inspect for any new leaks or standing water.
- Spring and Fall: Clean debris from joints and reapply sealant if needed.
- Every 3-5 Years: Consider a professional inspection to check for hidden issues.
Quick rule: If you notice anything unusual, don’t wait. Address it promptly to prevent further damage.
Conclusion
Repairing a slab-to-wall cold joint is about safety, durability, and avoiding costly mistakes, so stay focused and methodical as you work. The core idea is to diagnose correctly, choose a compatible repair approach, and finish with proper flashing and drainage to keep water out for the long haul.
First, assess and plan in practical steps: confirm the leak point, choose an interior or exterior repair path based on access, prepare the surface and drainage, test a small patch first, then apply the chosen method in the right order and monitor for changes over time. Do the work in stages you can manage without rushing, and document what you did so you can repeat or adjust as needed. safety first, test a small area before full-scale repair, and always plan before you cut or seal.
Common mistakes to avoid are rushing past drainage fixes, using the wrong materials for a cold joint, and wrapping up with cosmetic leaks that leave moisture behind. Don’t skip flashing or slope corrections, and never seal a joint with a surface caulk alone as a long-term fix. Work methodically, vent permits where required, and keep clear access to the joint to recheck after storms or freezes.
If the project involves structural or drainage fixes beyond simple patching, or you’re unsure about permitting or flashing details, it is wise to bring in a professional. When in doubt, stop and verify with a local code or building authority, and remember you gain durability when you address causes beyond the joint itself. With careful planning and steady execution, you can secure a solid, lasting seal and keep water out for years to come.
FAQ
How can I tell if a leak is from the roof slab itself or from plumbing nearby?
Look for water tracking along the slab surface, not just around fixtures. Check for dampness in ceiling areas or walls above the slab. If you see water after rain or when a nearby fixture is used, note the pattern and test with non-destructive methods before assuming it’s a roof-slab issue.
What options do pros use to locate a slab leak, and can I do any of that myself?
Professionals use moisture meters, infrared or thermal cameras, and sometimes cross-hole or acoustic tests. Some steps are DIY-friendly, like a careful visual inspection and using a moisture meter in accessible spots. For accurate results, follow manufacturer instructions and local rules, and consider hiring if you’re unsure.
How should I prepare the surface before patching or sealing a concrete roof slab leak?
Clean the area thoroughly and remove loose concrete and dust. Let the surface dry as much as possible and follow the repair product’s label for surface prep steps. If you’re unsure about the conditions (dust, moisture, or powdery surface), check the product instructions or reach out to the manufacturer.
What crack repair techniques work best on concrete roof slabs, and how do I choose?
For active cracks, use products designed for structural or non-structural crack repair as directed by the label. Epoxy or polyurethane injections can be options if the crack is stable and wide enough, but follow the product’s instructions and safety guidelines. If in doubt, consult the manufacturer instructions or local experts to avoid trapping moisture.