

Introduction
Cure-and-seal failures occur when a sealant or coating loses adhesion to the substrate, causing peeling, cracking, or bubbling. Common signs include edge lifting, staining, or gaps where the material no longer grips. Before you start stripping, check the current system’s compatibility and any manufacturer guidance for substrate prep and safety.
To strip without damage, use a plan that minimizes abrasion and preserves the substrate while removing the failed material. When choosing a replacement system, look for guidance on bond strength in the product label or instructions and confirm it suits your substrate, climate, and expected use. If you’re unsure, check the manufacturer’s instructions or local rules for recommended prep steps and performance expectations.
Key takeaways
- Identify cure-and-seal failure by surface peeling, whitening, or soft, gummy areas.
- Use chemical strippers with proper ventilation and PPE to avoid exposure.
- Choose a system with proper bonding claims, compatible substrates, and manufacturer guidance.
- Understand bond strength concepts and surface preparation essential for lasting adhesion.
- Follow installation methods strictly, including priming, cleaning, and curing conditions.
- Inspect periodically, repair promptly, and avoid harsh cleaners that degrade sealers.
Table of Contents
- Introduction
- Key takeaways
- Why Cure-and-Seal Systems Fail
- Diagnosing Failure: Visual and Field Test Checkpoints
- Safe Stripping Techniques That Avoid Substrate Damage
- Choosing a System That Truly Bonds: Sealer Types and Bonding Mechanisms
- Application Methods and Installation Best Practices
- Long-Term Maintenance, Troubleshooting, and Repair
- Costs, Environmental Impact, and Safer Alternatives
- Planning Guide, Common Mistakes, and Visual Checkpoints
- Conclusion
- FAQ
Why Cure-and-Seal Systems Fail
A cure-and-seal system works by sealing a cured surface and forming a protective film, but failures are common when adhesion, delamination, whitening, blistering, or a soft powdery surface appear. Each failure shows up differently on a DIY project and clues you into what went wrong.
Root causes fall into broad categories: improper surface prep, substrate moisture, incorrect product selection (film-forming vs penetrating), wrong system for the concrete type, and unfavorable jobsite conditions. Use a simple prep and substrate-check checklist to guide you, including cleaning, profiling or etching as needed, moisture tests, crack filling, and ensuring the slab has finished its cure. Diagnose with field tests for adhesion, watch for delamination or whitening, and note moisture meter readings to plan a rework if needed.
Common causes of failure
Cure-and-seal systems often fail due to a few common reasons. Here’s what you need to watch out for:
Contamination: Dirt, oil, or other contaminants on the surface can prevent the sealer from bonding properly. Always clean and prep your surface before applying any sealant.
Trapped moisture: Moisture trapped beneath the seal can cause it to blister or peel off. Check local weather forecasts and ensure your substrate is dry before sealing.
Incorrect sealer chemistry: Using the wrong type of sealer for your surface can lead to failure. Always check the product label and manufacturer instructions to ensure you’re using the right one.
Other causes like inadequate mixing or incompatible substrates are usually systemic issues that require professional attention. If in doubt, consult a pro before proceeding.
Symptoms to watch for
When a cure-and-seal system fails, it’s not always obvious at first. But if you know what to look for, you can catch problems early and save yourself some hassle.
First off, check the edges. If they’re peeling or lifting, that’s a sign of poor adhesion. This could be due to contamination during preparation, or maybe the concrete was too dry when you applied the sealant.
Flaking is another bad sign. It usually means the sealant didn’t bond properly with the concrete. This can happen if the surface wasn’t clean enough, or if the sealant wasn’t compatible with your concrete mix.
If your concrete feels tacky to the touch, that’s a sure sign something went wrong. This often happens when the sealant doesn’t cure properly, usually because it was applied in humid conditions or at too low a temperature.
Discoloration can also be a symptom of failure. If your concrete is turning yellowish or brownish, that could mean the sealant is breaking down under UV exposure. This is more common with some types of sealants than others, so always check the manufacturer’s recommendations for your specific product.
When to call a professional
You’ve read about why cure-and-seal systems fail and the signs to watch for. Now, let’s talk about when it’s time to bring in the big guns – a professional concrete specialist.
Here are some scenarios where you should definitely call a pro:
- Extensive delamination: If more than 10% of your concrete surface is peeling or flaking, it’s time to get help. This could be a sign of serious underlying issues.
- Structural substrate problems: If you suspect there are issues with the base – like poor compaction, unstable soil, or inadequate reinforcement – don’t guess, get it checked. A pro can do a thorough inspection and provide documented diagnostics before major work.
- Unclear contamination: If you’re not sure what’s causing the failure (like oil, chemicals, or salts), get a professional opinion. They have the tools and knowledge to identify the culprit and recommend appropriate treatment.
Remember, concrete is a tough material, but it’s not indestructible. If you’re in doubt, don’t risk making things worse – call a pro. It could save you time, money, and a lot of headaches in the long run.
Diagnosing Failure: Visual and Field Test Checkpoints
Start with a clear diagnostic workflow: an initial visual scan, non-destructive probing, and targeted field tests to separate curing/sealing failures from substrate problems. Keep notes and photos to document findings.
Visual checkpoints include coating wear, bubbling, whitening or efflorescence, discoloration, hairline cracks, texture changes, and moisture staining. Non-destructive probing covers gentle bond tests, hollow-sound taps, skim-coat softness, and reading moisture or relative humidity at multiple elevations. Quick field tests use small patches, adhesion strips, and short-term water-drop tests to observe penetration versus repellency. Use a decision tree to categorize issues and decide whether to strip, redensify, or pursue anchor-bond remediation, then outline next steps and a temporary plan based on results.
Visual Inspection Checklist
Before you start testing, use this checklist to document and map problem areas. It’s best done after a dry spell or rain.
- Edges and Seams: Check for delamination, cracks, or peeling at edges and seams. These are often the first signs of failure.
- Pattern of Failure: Note if failures follow a pattern (e.g., linear, radial) as this can indicate underlying substrate issues.
- Substrate Exposure: Look for any exposed substrate due to coating loss. This is serious and needs immediate attention.
- Surface Coating Wear: Inspect for excessive wear or thinning of the surface coating, especially in high-traffic areas.
- Bubbling: Check for bubbles under the coating, which could indicate trapped moisture or improper application.
- Whitening/Efflorescence: Look for white deposits (efflorescence) that may suggest underlying moisture or alkali contamination.
- Discoloration: Note any discoloration as it might hint at staining from contaminants or moisture.
- Hairline Cracks: Inspect for fine cracks, which can indicate stress on the coating or substrate movement.
- Texture Changes: Feel and observe texture changes that could signal underlying issues.
- Moisture Staining: Look for stains or dark spots that might suggest moisture penetration.
Quick rule: Skipping this step may lead to wasted tests on areas that don’t need it, or missing serious problems hidden under intact coating.
Adhesion and Bond Tests (DIY and Professional)
Before you start stripping, test the bond to ensure it’s safe and effective. Here are simple DIY tests and when to involve professionals.
- Scrape Test: Gently scrape at the coating with a plastic scraper or coin. If it lifts easily, adhesion may be poor.
- Knife Test: Insert a sharp knife under the coating at an angle and try to lift it. Be careful not to damage the substrate.
- Tap Test (Professional): Use a rubber mallet to tap the surface. A hollow sound may indicate delamination.
- Pull Tests (Professional): Request these from professionals or follow manufacturer/lab methods for quantitative results using specialized equipment.
Quick rule: Don’t skip tests or rely solely on visual inspection. Poor adhesion can lead to premature failure and costly rework.
Moisture and Contamination Checks
Before applying any new coatings, check for moisture and contaminants. Here’s a simple checklist to get you started.
- Visual Moisture Signs: Look for water stains, damp spots, or efflorescence (white deposits) that suggest excess moisture.
- Moisture Meters (DIY): Use a simple moisture meter to check for elevated moisture levels in the substrate. Be sure to calibrate it first.
- Relative Humidity Readings (Professional): Request these from professionals, as they require specialized equipment and interpretation.
- Efflorescence Test (DIY): Apply a small amount of clear sealer on a test patch. If it turns white or bubbly, there’s likely alkali contamination or excess moisture.
- Contamination Tests (Lab): For ambiguous results, send samples to a lab for quantitative analysis and specific recommendations.
Quick rule: Don’t apply new coatings over damp or contaminated surfaces. It’s like painting on wet paper—it won’t stick and will likely peel off.
Safe Stripping Techniques That Avoid Substrate Damage
Choose a conservative stripping method first, weighing mechanical, chemical, and thermal options for the specific coating and substrate. Look for signs that the chosen method may etch or weaken the concrete and plan to protect edges and nearby surfaces.
Test-patch methodology is essential: use small, representative samples, set acceptance criteria (no substrate discoloration, no edge lifting, complete coating removal), document results, and make a go/no-go call. Protect the substrate with masking, edge guards, moisture and air-flow control, dust containment, and appropriate PPE, then proceed with stripping and follow with neutralizing and cleaning before a bonding check.
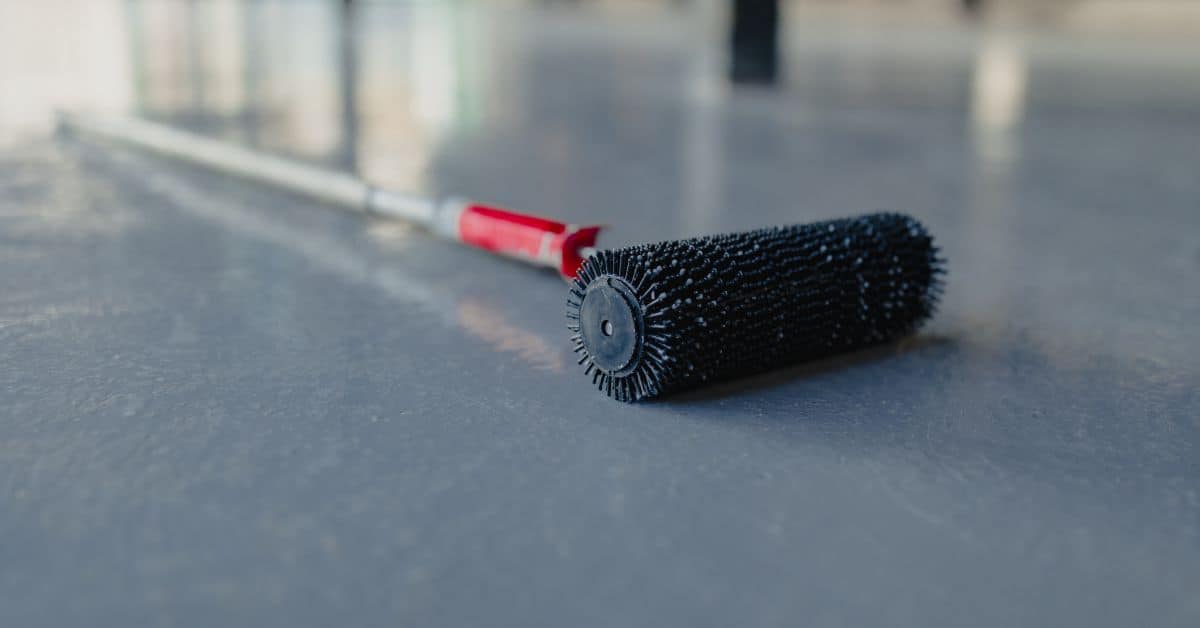
Tools, equipment, and PPE checklist
Before you start stripping, make sure you have all the right tools and safety gear. This list helps you match your tools to the substrate and sealer type.
- Floor scrapers: For mechanical stripping of loose coatings. Use a straight edge for even pressure.
- Grinders with appropriate discs: Diamond or metal bond discs for concrete, ceramic or metal bond for epoxy. Wear safety glasses and gloves.
- Heat guns: For thermal stripping. Keep the temperature below 400°F (204°C) to avoid substrate damage.
- Chemical strippers: Choose a stripper compatible with your sealer. Always test first!
- Vacuums: A wet/dry vacuum for cleanup. Keep dust levels low to protect your lungs.
- Safety glasses: Protect your eyes from debris and chemicals.
- Gloves: Chemical-resistant gloves for handling strippers.
- Respirator: For dust containment during mechanical stripping or when using solvents.
- Protective clothing: Long sleeves, pants, and boots to protect your skin from chemicals and debris.
Quick rule: Always wear appropriate PPE. Safety first!
Mechanical vs chemical vs thermal methods
Each stripping method has its pros and cons. The key is choosing the least aggressive one that works for your situation.
Mechanical: Pros – quick, no chemicals or heat. Cons – generates dust, can damage substrate if not done carefully.
Chemical: Pros – effective on many sealers, low dust. Cons – can take time to work, may emit VOCs, requires proper disposal of waste.
Thermal: Pros – can remove tough coatings. Cons – high heat can damage substrate, generates dust, requires careful temperature control.
Always do small test areas first to see what works best and doesn’t harm your substrate.
Step-by-step safe stripping workflow
This sequence helps you strip sealers safely, protecting your substrate and ensuring a successful outcome.
- Isolate the area: Mask off adjacent surfaces to prevent damage from chemicals or debris.
- Test patch: Do small test areas (6″ x 6″) using each stripping method. Check for substrate discoloration, edge lifting, and complete coating removal.
- Select your method: Choose the least aggressive method that worked on your test patches.
- Protect substrate/edges: Use edge guards to prevent damage from scraping or grinding. Manage moisture and air flow to keep substrate stable.
- Remove sealer: Follow your chosen method carefully, monitoring for signs of substrate damage.
- Cleanup: Neutralize any residual chemicals, then clean the surface thoroughly.
- Verify substrate integrity: Inspect the stripped area for any signs of damage before recoating. If you find issues, call a professional.
Choosing a System That Truly Bonds: Sealer Types and Bonding Mechanisms
Understand the main sealer families—epoxy, polyurethane, acrylic/film-formers, penetrating silanes/siloxanes, and cementitious/polymer-modified products—and in plain terms how each adheres to concrete. Focus on the basic bonding mechanism and how film formation interacts with the concrete pores without diving into technical specs.
Map interior versus exterior use and typical high-traffic performance based on practical experience, not numbers. Discuss common bonding challenges on cured concrete, such as porosity, moisture, and surface contaminants, and how different sealers address or struggle with these factors. Include surface-prep steps and compatibility considerations, then present a simple decision framework to choose penetrating, film-forming, or cementitious/polymer-modified options based on substrate condition, gloss desired, and maintenance needs.
Epoxy, polyurethane, and acrylic film-formers
Epoxies create tough, chemical-resistant films. They’re great for industrial floors and areas exposed to harsh chemicals.
Polyurethanes offer excellent abrasion and UV resistance. Ideal for high-traffic zones like walkways and garages.
Acrylics are easy to apply and breathable, making them suitable for interior spaces like bathrooms. They can be clear or colored.
Penetrating sealers vs surface film-formers
Penetrating silanes/siloxanes bond chemically, preserving texture. They’re ideal for driveways and patios, offering long-term protection without changing appearance.
Film-formers like epoxies, polyurethanes, and acrylics create a surface layer. This can affect reapplication and may alter aesthetics.
Penetrating sealers are harder to remove, making them better for long-term use. Film-formers can be stripped and reapplied as needed.
Key adhesion factors (prep, porosity, compatibility)
Proper surface prep is crucial. Concrete must be clean, dry, and free of contaminants.
Porosity matters. More porous surfaces need sealers that penetrate deep to bond effectively.
Compatibility testing ensures your sealer won’t react with existing coatings or primers. Always check before applying.
Application Methods and Installation Best Practices
Outline practical guidance on mixing, priming, and application tools, and connect them to environmental condition controls to avoid pinholes, bubbles, and lap marks. Emphasize following product instructions and validating with test sections before full coverage.
Cover primer and surface prep, moisture testing, cleaning, degreasing, and etching if needed, plus when to use a primer versus direct sealant. Discuss mixing, thinning, pot life, batch management, and how to keep colors even. Explain tool choices, working widths, overlap patterns, and how to prevent common defects. Include environmental controls, timing, safety, cleanup, and recommended cure windows to guide re-entry after curing.
Surface preparation and priming essentials
Proper surface prep is key to a successful cure-and-seal job. Profiling removes loose material, cleaning degreases, and etching opens pores for better adhesion.
Test for moisture before starting. Excessive moisture can ruin your sealant. Clean and degrease the surface using a suitable cleaner. If needed, etch concrete with an acid solution to improve absorption.
Priming seals pores, improves adhesion, and enhances final appearance. Use a primer if substrate is porous, previously sealed, or has been cured for less than 28 days. Always follow product instructions and perform test adhesion checks after prep.
Application techniques: rollers, sprayers, squeegees, and trowels
Choose application tools based on sealer viscosity and substrate. For thin sealers, use a short-nap roller or brush. Thicker materials may require a squeegee or trowel.
For broadcast systems, use a squeegee to spread the material evenly. With rollers, work in small sections, overlapping slightly to avoid lap marks. Spray application can provide even coverage but requires proper ventilation and PPE.
Avoid overworking the sealant as it can cause entrapped air or excessive thinning. Work at a steady pace to maintain consistent coverage and minimize streaking.
Cure monitoring and verification
Monitoring cure progress ensures your sealant reaches full performance. Check for tack-free surface after recommended open time. Lightly touch the surface to feel its hardness.
Perform simple adhesion checks by applying and removing a piece of duct tape or using a pull-off adhesion tester. If the sealant pulls away from the substrate, it’s not fully cured yet.
Consult product data for final cure criteria. Some sealers may take up to 7 days to reach full cure. Never apply a second coat until the first is fully cured to avoid trapping moisture and causing failure.
Long-Term Maintenance, Troubleshooting, and Repair
Provide a practical maintenance cadence and help readers pick enduring sealer types or hybrids that simplify upkeep. Include a simple inspection schedule so wear signs are caught early.
Offer a clear patching versus full removal decision framework to minimize disruption and cost while preserving bond integrity. Describe localized repair techniques, compatible new coatings, and mechanical options like brushing or light abrasion when appropriate. List surface prep steps before any intervention and keep thorough records of dates, product batches, and warranty terms for ongoing monitoring.
Routine Maintenance Schedule and Visual Checkpoints
Inspect your concrete surface regularly to catch potential issues early. Use this checklist every 6 months.
- Surface Wear: Look for dulling or discoloration. This could indicate sealer breakdown, requiring re-sealing.
- Joint Integrity: Check joints for cracks or crumbling. If so, repair immediately to prevent water intrusion.
- Drainage: Ensure water drains properly. Standing water can damage the sealer and substrate.
- Moisture Intrusion: Inspect for signs of moisture, like efflorescence or damp spots. These may require professional diagnosis.
- Cracking: Check for microcracks. Seal small cracks promptly to prevent water intrusion and further damage.
- Peeling: Look for peeling sealer. This could indicate a bonding issue, requiring repair or re-sealing.
- Cleanliness: Keep the surface clean. Dirt and debris can trap moisture, damaging the sealer.
- Documentation: Take date-stamped photos of the surface condition for trend analysis.
Quick rule: Regular inspections help prevent small issues from becoming big problems.
Common Repairs: Patching Delamination and Re-sealing
When you find damaged areas, follow these steps to repair them without full removal.
First, remove any unsound material using a chisel or grinder. Be careful not to damage the surrounding substrate. Then, feather the edges to create a smooth transition between the old and new surfaces.
Clean and dry the substrate thoroughly. Use a concrete cleaner if necessary, then rinse and let it dry completely. Select a compatible repair product or system that matches your existing sealer for best results.
Apply the repair material according to the manufacturer’s instructions. For small areas, you might be able to re-seal instead of patching. Always test in an inconspicuous area first to ensure compatibility.
When to Strip and Replace vs Repair
Before deciding whether to repair or replace your sealer system, consider these factors:
Extent of Damage: If damage is extensive, full replacement might be more cost-effective than repeated repairs.
Substrate Health: If the substrate is compromised, a new sealer system may be necessary to protect it. However, if the substrate is sound, repair may be sufficient.
Cost: Consider both immediate and long-term costs. Full replacement might have higher upfront costs but could save money in the long run by preventing repeated repairs.
Performance Goals: If your performance goals have changed (e.g., you need better slip resistance), a new system might be necessary.
Costs, Environmental Impact, and Safer Alternatives
Explain the main cost drivers, including material type, application approach, labor time, equipment, waste handling, and any required inspections. Emphasize that exact numbers depend on local conditions and chosen products, so verify with suppliers and permit authorities.
Discuss environmental impact in practical terms: VOCs, emissions, runoff controls, dust management, and energy use. Compare safer, lower-toxicity options like breathable sealers or low-odor mixes and note the trade-offs in durability and maintenance. Include disposal steps, waste minimization, and a decision framework to balance cost with safety and sustainability.
Cost comparison and budgeting tips
The cost of curing and sealing concrete isn’t just about the product. Labor, prep work, waste handling, and downtime all play a part.
Material selection: Epoxies and polyurethanes are usually pricier but offer better durability. Acrylics are cheaper but may not last as long.
Labor: Prep work like cleaning and priming can add to labor costs. Complex application methods also require more skilled (and thus, expensive) labor.
Waste handling: Disposal fees and recycling costs can sneak up on you. Plan for these by minimizing waste and reusing materials where possible.
Downtime: Curing time means your project is shut down. Plan for this in your schedule, especially if it’s a high-traffic area like a driveway or walkway.
Environmental, health, and disposal considerations
Curing and sealing concrete isn’t just about the here and now. It’s also about what happens to your health and the environment.
VOCs: Some sealers emit volatile organic compounds (VOCs) that can be harmful if inhaled. Choose low-VOC or no-VOC products where possible.
Solvent use: Solvent-based sealers are tough to clean up and can pose health risks. Water-based alternatives are usually safer and easier on the environment.
Disposal practices: Follow local regulations for disposing of sealant containers, slurry, and cured residues. Minimize waste by using only what you need and reusing materials where possible.
Lower-impact alternative sealing materials
Choosing the right material can make a big difference in your project’s impact on the environment and its long-term performance.
- Water-based sealers: These are usually low-VOC, easy to clean up, and safe to use. They’re great for indoor use but may not be as durable outdoors.
- Silane/siloxane penetrants: These form a chemical bond with the concrete, making them highly resistant to water and chemicals. They’re also low-VOC and non-toxic.
- Mineral-based consolidants: These use natural materials like lime or silicate to strengthen and seal concrete. They’re eco-friendly but may not offer the same level of protection as synthetic sealers.
- Avoid: High-VOC products, solvent-based sealers, and anything that claims ‘total’ waterproofing (which can trap moisture and cause damage).
Planning Guide, Common Mistakes, and Visual Checkpoints
Offer a practical pre-project planning checklist with clear goals, site condition assessments, staging, roles, and measurable success criteria. Include a plan for permitting and standards reviews early in the process.
Detail planning for materials and workflow, including cure-and-seal system choices and step-by-step sequences, prep requirements, cure windows, and delay contingencies. Add a pre-install visual and measurement checklist, moisture tests, porosity mapping, and a detailed punch list with acceptance criteria. Highlight risk mitigation and common mistakes to avoid, such as moisture entrapment, improper prep, over-wetting, contamination, and weather-related issues, plus a plan for documenting visuals and maintaining records to defend the installation.
Pre-project planning checklist
Before you start any cure-and-seal project, use this checklist to ensure a smooth and successful installation.
- Assess site conditions: Check temperature, humidity, and ventilation. Wrong conditions can lead to poor curing and weak bonds.
- Test moisture content: Use a moisture meter to check substrate’s moisture level. Excess moisture causes delamination.
- Evaluate surface porosity: Inspect for open pores that may absorb too much sealer, leading to poor performance.
- Check existing coatings: Identify and note any old coatings that need removal or consideration during prep.
- Map cracks and substrate condition: Document all cracks and substrate issues for targeted repair and acceptance criteria.
- Establish staging and access: Plan where materials, tools, and waste will be stored to maintain a clean, safe work area.
- Allocate roles: Assign tasks clearly to prevent confusion and ensure everyone knows their responsibilities.
- Set measurable success criteria: Define clear goals for cure time, bond strength, and sealing performance. Review these regularly.
- Prepare documentation packet: Gather permits, codes, standards, warranties, and safety regulations to streamline approvals and defend the installation.
- Insufficient prep: Skipping proper surface cleaning, decontamination, or etching can lead to poor adhesion and weak seals.
- Skipping test patches: Not testing products on a small area first may result in incompatible materials causing failure.
- Wrong product selection: Using the wrong cure-and-seal system for your substrate and conditions can lead to poor performance or failure.
- Poor environmental control: Incorrect temperature, humidity, or ventilation can cause curing issues, weak bonds, or poor seal performance.
- Over-wetting or under-drying: Applying too much or too little product can lead to improper curing and weak seals.
- Contamination: Dirt, dust, or other contaminants on the surface can prevent proper adhesion and cause failure.
- Rushed windows: Not allowing sufficient cure time between steps can result in weak bonds and poor seal performance.
- Moisture entrapment: Trapping moisture under the seal can cause delamination, bubbling, or other failures.
- Before work: Photograph the entire area, focusing on problem spots. This sets a baseline for acceptance criteria.
- During prep: Document surface cleaning, decontamination, etching, and priming stages to verify proper preparation.
- After priming: Check for even coverage and no missed spots before proceeding with the cure-and-seal system.
- During application: Photograph the application process, ensuring even coverage and proper technique.
- After curing: Inspect for any issues, such as bubbling, discoloration, or weak spots. Document these for repair or follow-up.
- Final inspection: Once complete, photograph the entire area to document successful installation and support warranties.
Quick rule: A thorough pre-project plan saves time, money, and prevents costly mistakes.
Common mistakes and how to avoid them
Learn from others’ errors to ensure a successful cure-and-seal project.
Quick rule: Recognize common mistakes before they happen to avoid costly rework.
Visual checkpoints and photo documentation guide
Regular visual checks and thorough photo documentation ensure quality control and support warranties.
Quick rule: Regular visual checks and thorough photo documentation protect your investment and provide evidence of quality workmanship.
Conclusion
Getting a cure-and-seal system to bond properly and stay cleanly without harming the substrate matters for safety, durability, and curb appeal. The right approach means planning, testing, and choosing methods that avoid damage now and costly fixes later.
First, test in a small area and document how the surface responds to stripping, bonding, and sealing. Check for adhesion, substrate integrity, and any changes to color or texture. Then proceed in a measured sequence: verify the substrate is sound, select a compatible sealer and bonding system, apply using the recommended method, and monitor the area during and after treatment. Finish with a simple maintenance schedule and annual checks to catch trouble early.
Common mistakes to dodge include rushing the process, skipping field tests, or using aggressive methods that reveal underlying damage. Always wear proper safety gear, ventilate well, and work in stages. If you see soft spots, peeling, or solvent odor that won’t fade, stop and reassess rather than forcing a fix. avoid irreversible damage by staying within tested products and procedures, and plan to call a professional if the substrate shows signs of structural failure or if the project scope goes beyond your comfort level.
FAQ
What are the telltale signs of cure-and-seal failure you can spot in the field?
Look for peeling, flaking, or hazy film that won’t cure evenly. If water beads poorly or wipes off easily, the surface may have degraded. Try a simple adhesion test on a small area if you’re unsure.
How do I strip without risking damage to the substrate?
Use a stripper that matches the coating type and follow the label directions. Test on a small area first and avoid aggressive mechanical means that can gouge concrete. Neutralize and rinse thoroughly after stripping before any new coating goes on.
How do I pick a replacement sealer or coating system that actually bonds well?
Check the product label or datasheet for substrate compatibility and bonding claims. Look for clear prep requirements and real-world user notes. If in doubt, compare options based on your concrete type and follow manufacturer instructions.
What tools and steps should I use for resealing, and how do I apply it correctly?
Use brushes, rollers, or low-pressure spray equipment as recommended by the manufacturer. Clean, dry, and properly prepared surfaces before application, and apply in even coats with the specified film thickness. Follow the product’s recoat window and cure guidance exactly as written.