
Introduction
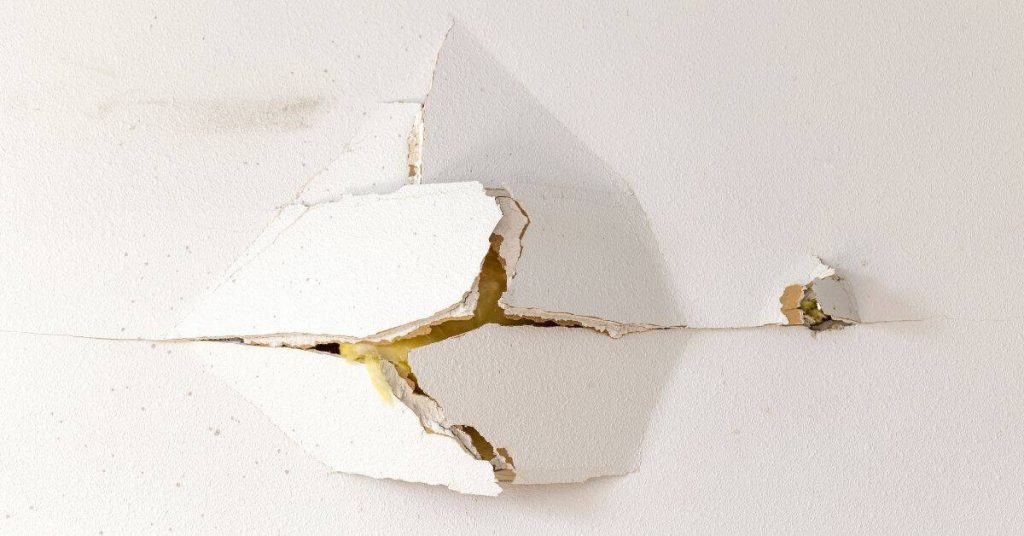
A failed patch that sounds hollow is a plaster area with voids that likely needs back-cutting and reattachment. In plain terms, you’ll check why it came loose and decide whether to trim the patch back or start fresh. This is a real-world, DIY job you can handle with basic tools and a patient approach.
To fix it, you’ll identify hollow spots, cut back around the edges, and expose solid material. Then you rebond or resecure the patch using appropriate materials, following the product label and local rules for set time and finish. If in doubt, check the manufacturer instructions and your local guidance, and adjust the plan to protect the wall surface.
Key takeaways
- Use a gentle tap test and visual signs to locate hollow spots.
- Decide between patch removal or repair based on detachment extent and backing.
- Carefully cut back damaged plaster and identify solid depth before reattachment.
- Choose reattachment methods that match substrate and allow proper moisture guidance.
- Wear eye protection and dust control; contain debris to protect occupants.
- Document measurements and conditions to compare before and after repair outcomes.
Table of Contents
- Introduction
- Key takeaways
- Quick Overview: What a Hollow-Sounding Patch Means and the Goal of Repair
- Identifying and Diagnosing a Hollow Patch
- Safety, Containment, and Pre-Repair Planning
- Cutback Rules and Safe Removal Techniques
- Reattachment Options and Repair Methods
- Materials, Compatibility, and Tools Checklist
- DIY Vs Professional Repair and Cost/Decision Factors
- Step-by-Step Repair Plan, Mistakes to Avoid, and Case-Study Guidance
- Conclusion
- FAQ
Quick Overview: What a Hollow-Sounding Patch Means and the Goal of Repair
A hollow patch sounds like a drum when you tap it or feel a dull spot behind the surface. The goal is to identify what’s failed, then plan a repair that stops further movement and moisture intrusion. Expect simple patches to suffice sometimes, but deeper issues may require substrate work or backing replacements.
What you’re listening for are voids, loose edges, and inconsistent tones that hint at a lack of adhesion. Common causes include poor initial bonding, substrate deterioration, or hidden moisture movement. The repair sequence should be removal, prep, reattachment, and a properly feathered finish.
Defining Hollow Patches, Delamination, and Failed Repairs
A hollow-sounding patch indicates a problem beneath the surface. Here’s what these issues mean:
Hollow or Dead Sound: Tapping on the patch reveals a dull, hollow sound instead of a solid thud. This suggests voids or separation between the patch and the substrate.
Delamination: The patch has separated from the underlying surface (substrate). This could be due to poor adhesion or moisture issues.
Failed Repairs/Adhesive Problems: The original repair didn’t stick properly, leading to separation. This might be caused by incompatible materials, inadequate keys, or improper application.
Typical Failure Modes and Root Causes
Understanding the cause helps determine the repair approach. Here are common issues:
Incompatible Patch Materials: Using the wrong material for your substrate can lead to failure, e.g., using joint compound on plaster.
Poor Adhesion: Insufficient bonding between the patch and substrate due to inadequate preparation or application.
Moisture Intrusion: Water penetration weakens adhesion and causes delamination. It may also indicate a larger leak issue.
Structural Movement: Settlement, expansion, or contraction can cause patches to fail, suggesting deeper structural concerns.
Identifying and Diagnosing a Hollow Patch
Start with the visible condition: cracks, patches, and texture changes guide where to test further. Use a non-destructive approach to map hollow zones without destroying the patch. Differentiate hollow patches from normal variation or settled substrate by reliability of the test results.
On-site tools include tapping, a rubber mallet, a sounding rod, a moisture meter, and a simple pin test with care. Document findings with scale photos and sketches to map hollow areas and suspected causes. Decide whether reattachment or a full rebuild is warranted based on substrate integrity and patch performance.
Tap, map, and mark: simple auditory and visual tests
Start by tapping the patch with a small ball-peen hammer or rubber mallet. Listen for changes in sound that indicate hollowness. Mark these areas clearly with chalk or paint.
Systematically tap along lines and around edges to map out the extent of the hollow area. Remember, not all variation is hollowness; some may be normal substrate texture.
Once mapped, use a straight edge to draw boundaries for cutback. These will guide your repair plan.
Probing, moisture checks, and layer identification
Use a sharp probe or awl to gently poke the patch. Listen for changes in sound and feel for resistance that might indicate hidden layers or voids.
Check for moisture using a moisture meter. Active moisture can cause delamination and hollowness. If present, address the source before proceeding with repairs.
If you suspect multiple layers (like veneer plaster or lath), probe carefully to identify them. This helps plan cutback depth and ensures you’re working with a sound substrate.
When a hollow area indicates structural or moisture problems
Large areas of delamination, sagging ceilings, or repeated failures may signal underlying issues. These could be structural, like damaged framing or settling, or moisture-related, like leaks or condensation.
Mold growth is another red flag. It indicates persistent moisture and potential health hazards.
If you encounter these signs, stop work and consider hiring a professional inspector. They can assess the extent of damage and recommend appropriate action.
Safety, Containment, and Pre-Repair Planning
PPE and ventilation are the first line of defense: respirators, goggles, gloves, hearing protection, and temporary containment. Implement dust control measures to protect occupants and surfaces nearby. Plan for a clean, contained work zone before you start.
Map utilities, verify access routes, and note any hidden hazards. Create a pre-repair diagnostic checklist covering hollow sound, moisture hints, and substrate condition. Outline a step-by-step plan with material choices, sequencing, safety contingencies, and cleanup procedures.
Personal protective equipment and dust control
The first line of defense against hazards is personal protective equipment (PPE) and proper dust control.
- Respirator: Use a half-face respirator with P100 filters to protect from dust and debris. Key: Ensure it fits properly. Tip: Rentals available, around $50/day.
- Eye protection: Wear safety glasses or goggles to shield eyes from particles. Key: Choose impact-resistant for added safety.
- Gloves: Use work gloves to protect hands from cuts and chemicals. Key: Opt for durable, flexible materials like nitrile.
- HEPA vacuuming: Use a HEPA vacuum to clean up dust. Key: Connect it to your respirator’s air supply if possible. Tip: Rentals around $30/day.
- Containment: Seal off work area with plastic sheeting to contain dust and protect other areas. Key: Use tape that sticks well but won’t damage surfaces.
Protecting surrounding finishes and checking utilities
Before you start, protect nearby finishes to avoid collateral damage. Use painter’s tape and plastic sheeting to cover floors, walls, and fixtures.
Check utilities: Before cutting back the patch, locate any electrical or plumbing lines behind the wall to avoid accidental damage. Use a stud finder and trace any visible lines.
If you’re unsure about any lines, contact your local utility company for a free mark-out service. They’ll send someone to mark the exact locations of underground utilities.
Always assume there are live wires or pipes until proven otherwise. Work carefully and use appropriate tools to minimize risks.
Planning checklist and documentation
Before starting the repair, use this checklist to ensure you’re prepared and have all necessary information documented.
- Photos: Document the hollow patch’s condition before work begins. Why: To compare progress and assess final results.
- Materials list: List all materials needed for the repair. Tip: Include quantities to avoid mid-project runs.
- Tools: List required tools, including any rentals. Why: To ensure nothing is missed and to budget accordingly.
- Cure-time scheduling: Plan when you’ll apply the patch relative to other tasks or occupancy. Key: Allow enough time for proper curing.
- Local preservation/permit checks: Check if any local regulations require permits or special considerations. Why: To avoid fines and delays.
- Substrate condition: Note the condition of the underlying substrate. Tip: If it’s damaged, plan to repair that first.
- Moisture intrusion: Document any signs of moisture intrusion. Why: To address the root cause during repair.
- Access routes: Map out clear access routes for materials and equipment. Tip: Consider narrow hallways or stairs.
- Safety contingencies: Plan for potential safety issues, like live wires or unstable structures. Why: To minimize risks and respond quickly if needed.
- Cleanup procedures: Plan how to clean up dust and debris. Tip: Include a final walkthrough to ensure everything is spotless.
Quick rule: Review the checklist daily to stay on track and catch any issues early.
Cutback Rules and Safe Removal Techniques
Identify the failure boundary by listening for sound changes and probing for crumbly edges. Document any moisture or debonded areas you uncover. This guides how far to cut back and what to leave behind.
Shape the cutback with feathered, beveled edges to encourage a solid bond, and avoid cutting into sound lath or framing. Outline a method for outlining, scoring, and removing the patch with appropriate tools while controlling dust and vibration. Plan for backer support if needed after exposing sound material.
How far to cut: principles for a clean, secure perimeter
The goal is to reach solid substrate. Cut back to sound plaster or full-thickness edge.
Remove any feathered or poorly adhered skim. This ensures a stable base for reattachment.
Minimum edges: Aim for at least 2-3 inches of clean, sound material around the perimeter.
Cutting methods and tool recommendations
Choose tools that give you control and precision.
- Utility knife: Inexpensive, easy to use. Use a sharp blade, change it often.
- Oscillating multi-tool with flush-cut blade: Gives you clean cuts, less dust. Rentable, around $50/day.
- Cold chisels: For deep cuts. Requires skill to avoid overcutting.
- Vacuum attachment: Essential for dust control. Keeps your workspace clean.
- Scoring tool or marker: Helps guide your cut, prevents overcutting.
Common cutting mistakes to avoid
These mistakes can lead to re-failure. Avoid them for a lasting repair.
- Feathering into sound material: This weakens the substrate, leading to further failure.
- Leaving loose keys: Loose keys cause poor adhesion and eventual delamination.
- Creating unsupported thin edges: Thin edges can break off or re-fail after patching.
- Overcutting into lath or structure: This compromises the structural integrity of your wall.
Take your time. Measure twice, cut once. It’s better to leave a bit too much than risk overcutting.
Reattachment Options and Repair Methods
Assess substrate integrity to decide between reattachment and a full rebuild. The choice hinges on moisture presence, backing condition, and how well the surrounding wall accepts a new patch. The root cause should drive the approach.
Consider adhesive injection, mechanical fastening, or backing and rebuilding as options. Each method has its place depending on moisture, patch size, and desired durability, so align the plan with what the substrate can support long term.
Adhesive injection and glue-size methods
Low-pressure adhesive injection is your first line of defense when dealing with hollow-sounding patches. It works best on small to medium-sized areas where the substrate is still sound but has lost its bond.
Epoxy, polyurethane, or appropriate plaster adhesives can be used. They penetrate deep into the substrate, re-establishing a strong bond. But remember, they won’t work miracles. If the substrate is crumbling or too weak, they won’t hold.
Application is simple but precise. Drill small holes, inject the adhesive, let it cure. But be careful not to overfill. Excess adhesive can push out and create a mess.
Curing times vary by product, so follow the manufacturer’s