
Introduction
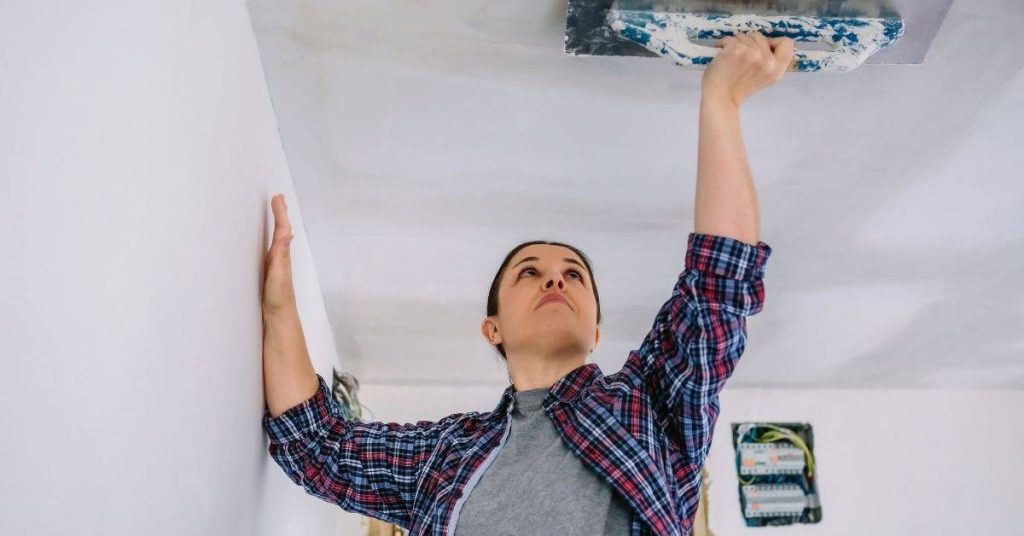
Fixing plaster cracks at ceiling medallions means cutting relief gaps to stop old stresses and then rebuilding the substrate so the medallion sits on sound plaster, not cracked or loose bits. Start by exposing the damaged area cleanly, check the lath condition and how the medallion is attached, and decide whether to repair lath or replace it based on what you find. Work deliberately and keep the medallion supported while you cut and remove damaged plaster.
After the relief cuts and any lath work, condition the substrate so new plaster will key and stay put; that may include cleaning, re-fastening, or installing replacement lath. Apply a proper scratch coat and let it cure before finishing, and follow product labels or manufacturer instructions for mix, set times, and compatibility with the medallion material. If you’re unsure about structural attachments or electrical/ceiling fixtures nearby, check with a pro or local rules before proceeding.
Key takeaways
- Inspect ceiling medallion cracks for alignment, moisture, and prior repairs before opening.
- Secure area, cover furniture, and wear eye protection and dust mask during work.
- Identify loose lath and cracks; plan scratch coat over stabilized patches.
- Stabilize the edge before rebuilding; avoid adding stress to medallion.
- Match texture with surrounding plaster using controlled sanding and testing.
- Monitor for new cracks and moisture after repair; schedule periodic checks.
Table of Contents
- Introduction
- Key takeaways
- Causes and Diagnosis of Cracks Around Ceiling Medallions
- Safety, Site Prep, and Inspection Before Repair
- Tools and Materials Checklist
- Stress Relief Cuts: Purpose and Placement
- Stabilizing the Edge and Repairing or Replacing Lath
- Rebuild Strategy — Scratch Coat, Brown Coat, and Finish
- Finishing, Sanding, Texture Matching, and Painting
- Costs, Common Mistakes, and Long-Term Monitoring
- Conclusion
- FAQ
Causes and Diagnosis of Cracks Around Ceiling Medallions
Start by separating likely causes: structural movement, poor original installation or adhesion, moisture intrusion, and incompatible repair materials. Visually map cracks and note whether they radiate from fasteners, follow joint lines, or widen over time.
Use targeted checks: probe for hollow plaster, inspect medallion fasteners and mounting method, and look for staining or other moisture evidence. Document results with photos, note seasonal movement, and decide whether cuts or a full rebuild are needed after verifying product and substrate specs.
Identifying crack patterns and what they mean
Crack patterns around ceiling medallions can tell you a lot about the cause of the problem. Here’s how to read them:
Radial cracks starting from the center or edges of the medallion often indicate structural movement. The medallion is moving with the substrate, causing tension and cracking.
Hairline cracks, on the other hand, are usually a sign of surface failure. They’re typically caused by poor adhesion or drying shrinkage. If they’re widening, it might be a sign of ongoing movement.
Stair-step cracks following joint lines suggest that the plaster is failing along its weakest points due to settling or moisture damage.
Determining cosmetic vs structural problems
Not all cracks around ceiling medallions require a major repair. Here’s how to tell if it’s just cosmetic or something more:
First, check the width and depth of the crack. Hairline cracks are usually cosmetic. Wider cracks, especially those that are deep, may indicate structural issues.
Next, look at the crack progression. If cracks are getting wider or longer over time, it’s a sign of ongoing movement and requires further investigation.
Finally, check for any signs of movement around the crack. If the medallion is wobbly or there’s visible movement when you push on it, it’s likely structural and needs immediate attention.
Safety, Site Prep, and Inspection Before Repair
Assess overhead hazards and plan for safe access, a clear escape route, and a work limit if plaster or hardware is unstable. Put on appropriate PPE—head protection, eye protection, a NIOSH-rated dust respirator, disposable coveralls, gloves, and hearing protection when cutting or drilling.
Contain dust with plastic sheeting and a HEPA-capable vacuum, and plan for temporary removal or securement of light fixtures and wiring per manufacturer or electrical guidance. Systematically inspect plaster thickness, lath condition, fasteners, and medallion attachment, taking photos and labeling parts for reassembly.
Personal protective equipment and safe working methods
Before you start working on your ceiling, make sure to equip yourself properly. This checklist helps ensure your safety.
- Hard Hat: Protects against falling debris or impact injuries.
- Safety Glasses/Face Shield: Shields eyes from dust and small particles.
- NIOSH-rated Dust Mask/Respirator: Filters out harmful airborne particles.
- Disposable Coveralls: Keeps your clothes clean and protects against chemicals in plaster or paint.
- Gloves: Protects hands from cuts, scrapes, and chemical exposure.
- Hearing Protection: Shields ears from loud noises like drilling or sanding.
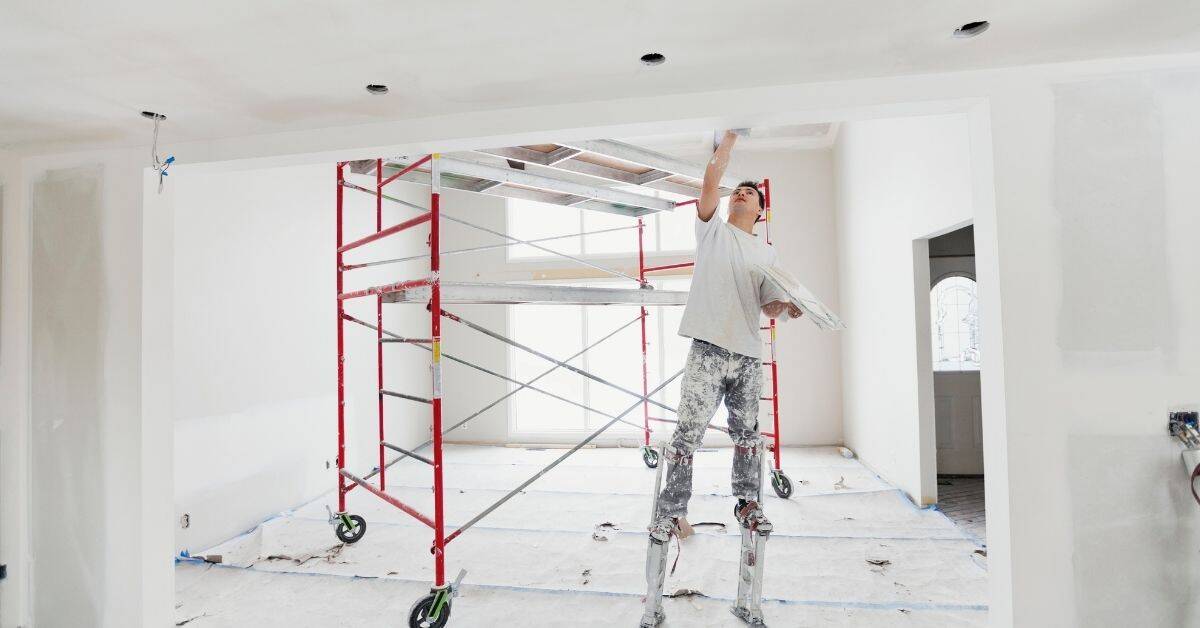
- Stable Ladder/Scaffolding: Provides a secure platform for working overhead.
- Fall Protection (if required): Prevents falls and injuries, especially when working at heights above 6 feet.
Quick rule: Always prioritize safety. Never compromise on PPE or secure work positions.
Detailed inspection checklist
Before you start repairing, inspect the area thoroughly to understand the extent of damage and plan your repairs accordingly.
- Plaster Thickness: Check for consistent thickness. Inconsistencies may indicate delamination or missing plaster.
- Lath Condition: Look for cracks, breaks, or rusted nails/screws that could compromise structural integrity.
- Fastener Integrity: Ensure all fasteners are secure and none are missing. Loose or missing fasteners can cause plaster to fall off.
- Medallion Attachment: Check how the medallion is attached. Look for screws/nails, their condition, and any signs of movement.
- Corrosion: Inspect for rust or other corrosion on nails/screws that could weaken them.
- Loose Lath: Tap the lath with a hammer. A hollow sound indicates it’s loose and needs reattaching.
- Failed Keys: Check if the medallion is securely attached to the lath using keys or other methods. If not, repair or replace them.
Quick rule: A thorough inspection helps prevent surprises and ensures you have all necessary materials for the repair.
Tools and Materials Checklist
Gather cutting tools (utility knife, oscillating tool or drywall saw), measuring aids, stable ladders or scaffold, corded or cordless drill, and PPE. Include plastering tools—trowels, hawk, margin trowel, mixing bucket, paddle mixer or drill mixer, sanding blocks, and a damp sponge for finish work.
Prepare anchoring and substrate materials: screws/anchors suited to the backing, metal or wood lath, mesh reinforcement, and corrosion-resistant fasteners if moisture is possible. Choose appropriate plaster types and bonding aids for the substrate—confirm compatibility via product data sheets and consider softer lime-based or slow-setting options where movement tolerance is desired.
Material specs and why they matter
Use this checklist to ensure you’re using the right materials for your repair job. The wrong plaster or adhesive can lead to more cracks down the line.
- Plaster type: Choose a lime-based or slow-setting plaster for stress-relief regions, gypsum plasters for quick set in other areas.
- Setting time: Check product labels to ensure compatibility with your repair timeline. Too fast or too slow can cause issues.
- Adhesion: Ensure the plaster bonds well to existing surfaces. Use bonding agents or slurries where needed.
- Workability: Consider admixtures to improve workability, especially for complex repairs.
- Lath material: Inspect and replace damaged metal or wood lath as needed. Ensure it’s compatible with your chosen plaster.
- Anchors/screws: Use appropriate screws/wood screws, masonry anchors, or toggle bolts based on your ceiling type and condition.
- Corrosion resistance: For damp conditions, use corrosion-resistant options to prevent future damage.
- Patch plasters: Have patch plasters, bonding coats, skim coats, and plaster patching compound on hand for rebuilding medallions.
Quick rule: Always double-check product labels and compatibility to avoid future problems.
Optional reinforcement and specialty supplies
For tough repair jobs, consider these additional supplies to reinforce your work and prevent further damage.
- Bonding agents: Use for difficult-to-bond surfaces or when repairing with different plaster types.
- Mesh reinforcement: Apply mesh or reinforcing fabric to strengthen repairs, especially in high-stress areas.
- Temporary supports: Use for large medallions or when rebuilding sections. Prevent sagging and cracking during the repair process.
- Vibration-damping compounds: Apply to reduce vibration-induced cracks, especially in high-traffic areas.
- Specialty plasters: Consider using historic lime-putty repairs for maintaining authenticity in older homes.
Quick rule: Don’t hesitate to use additional supplies when needed. They can save you time and money in the long run by preventing future repairs.
Stress Relief Cuts: Purpose and Placement
Stress relief cuts are made to stop existing cracks from tracking and to allow controlled movement during rebuild so the new work does not re-crack. Select placement based on crack geometry and medallion edge, choosing curved or partial cuts to interrupt stresses without cutting into structural anchors.
Cut depth and shape matter: use shallow, radius or step-cut patterns that stop short of lath or framing and limit full-depth removal of plaster keys. Mark, make cuts with dust control, monitor any movement, and document before proceeding to patching so the chosen repair method matches the cut strategy.
Determining where to cut
The first step is finding the right spots for your stress relief cuts. You’re aiming to protect good plaster while isolating the damaged areas.
Look for visual cues like cracks and hairline fractures. They often radiate from the medallion’s edge or follow its perimeter. Use a flashlight at an angle to help spot them if needed.
Feel around too. You’re looking for any give or softness in the plaster, which could indicate hidden damage. Be gentle; you don’t want to create new cracks.
Rule of thumb: Place your cuts about 1-2 inches away from the medallion’s edge and along the main crack paths. This should help interrupt the crack progression without compromising the medallion itself.
Safe cutting methods and stopping points
Safety first, buddy. Before you start cutting, make sure there are no electrical components or other hazards behind the plaster.
Use a utility knife with a sharp blade. A #11 blade works well for this job. Make sure it’s secure in the handle to prevent accidents.
Hold the knife at an angle, about 45 degrees, and use gentle pressure. You’re not trying to cut all the way through; just score the surface.
Stopping points: Never cut more than halfway through the plaster’s thickness. You want to avoid damaging the lath or any underlying finish. Also, stop short of any structural anchors like nails or screws. They’ll help keep your cuts from widening over time.
Stabilizing the Edge and Repairing or Replacing Lath
Start by assessing whether lath can be reseated or requires replacement; probe for rot, corrosion, or lost keys and note backing condition. If studs are not available, plan for alternate backing such as furring strips, short blocking, or a cementitious backer and select appropriate fasteners.
Reseat loose lath, install replacement strips as needed, and fasten with corrosion-resistant screws or nails into solid backing; use temporary shims to keep the plane even with the medallion edge. Test-fit the medallion on the secured substrate, choose compatible fasteners or adhesive per product guidance, and label parts and sequence for reattachment.
Repair methods for compromised lath
If your lath is damaged, you’ll need to repair it before proceeding. Here’s how:
Splicing in new lath: Cut new lath strips to match the size of the missing or damaged sections. Overlap them by at least 2 inches and secure with corrosion-resistant nails or screws.
Fasten loose strips: Tighten any loose lath using a nail set or screwdriver, ensuring it’s flush against the studs or backing.
Create a backing: If original wood is missing, use 1×3 or 1×4 furring strips as a new backing. Secure them to the existing lath or wall with screws every 6 inches.
Reanchoring the medallion
To secure your medallion, you have several options:
Mechanical fasteners: Use corrosion-resistant screws or nails to attach the medallion directly to the lath. Ensure they’re long enough to penetrate at least 1 inch into solid backing.
Backing plates: For added support, use metal or plastic backing plates. Secure them with screws that pass through both the medallion and the plate.
Structural adhesives: If mechanical fasteners aren’t possible, use a construction adhesive rated for plaster/wood. Apply it evenly on the back of the medallion before pressing it against the lath. Allow it to cure according to the manufacturer’s instructions.
Rebuild Strategy — Scratch Coat, Brown Coat, and Finish
Prepare the substrate by removing loose material and cleaning dust; address any lingering moisture or movement issues before plastering. Apply a keyed scratch coat using a bonding agent compatible with the existing substrate to establish a reliable base for the brown coat.
Follow with a brown coat to level and bring the surface to plane with surrounding plaster, then finish with a thin skim coat feathered to match the ceiling. Observe cure and humidity guidance on product data sheets, test bonding after set, and recheck medallion alignment before final texture or paint.
Substrate conditioning and mixing guidance
Before applying any new coats, condition your substrate. This means wetting dry lath or plaster edges to prevent suction that could weaken your repairs.
Use a conditioner if recommended by the manufacturer. Follow their instructions for application and working times.
Mixing is crucial. Follow manufacturer guidelines for mixing ratios and working times. This ensures your mix has enough time to set properly without drying out too quickly.
Applying coats and ensuring mechanical key
Start with the scratch coat. Use a bonding agent to ensure it sticks well to your lath. Apply it thick enough to fill any voids but not so thick that it slumps.
For the brown coat, build up thickness gradually. This helps achieve a flat, even surface. Use a straight edge to level as you go.
When skimming for texture match, feather edges to blend with surrounding plaster. Work quickly and smoothly to avoid leaving marks or ridges.
Finishing, Sanding, Texture Matching, and Painting
Confirm repairs are dry and firm before sanding; do a light moisture/probe check for soft spots around the medallion. Sand with low- to medium-grit only as needed, feathering edges gently to avoid thinning the new plaster or damaging the medallion edge.
Match existing texture with the appropriate tool and technique—stipple, swirl, or light knockdown—then prime with a breathable, stain-blocking primer suitable for plaster. Test paint sheen and color on a small patched area and consider minor joint reinforcement or sealant where hairline cracks are likely to reappear.
Sanding vs. Sponge Finishing
When it comes to finishing your plaster repairs around ceiling medallions, you’ve got a few options: sanding, damp-sponge finishing, or feathering edges.
Sanding is best for larger repairs where you need to smooth out rough spots. Use low-grit to medium-grit sandpaper, and be gentle around the medallion edge to avoid damaging it.
Damp-sponge finishing works well for small touch-ups or when you want a smooth, seamless look. Wring out your sponge so it’s just damp, then gently rub the repaired area in circular motions until it blends with the surrounding plaster.
For blending edges, feathering is key. This involves lightly sanding or using a damp sponge to gradually reduce the thickness of the repair material towards the existing plaster, creating a smooth transition between the two.
Priming and Paint Tips for Ceilings and Medallions
Choosing the right primer and paint is crucial to making your repairs invisible. Start with a stain-blocking, breathable primer designed for plaster. This will seal your repairs, reduce future crack visibility, and provide a uniform base for painting.
When it comes to paint, match the sheen of your existing ceiling – usually egg-shell or satin for ceilings. Test your color and texture on a hidden area or small patch first to ensure it blends seamlessly after a full coat.
To reduce the visibility of past repairs, consider using a paint with built-in primer or applying an extra coat of paint to the repaired areas. This can help disguise any slight differences in texture or sheen.
Lastly, communicate curing times to avoid trapping moisture and ensure proper ventilation during finishing. This will help prevent future cracks and maintain the longevity of your repairs.
Costs, Common Mistakes, and Long-Term Monitoring
Costs depend on material needs, extent of lath repair, medallion removal, and time; itemize materials, rental tools, and any specialty fasteners before starting. Avoid common DIY errors like skipping moisture checks, using incompatible bonding agents, or rushing cure times, all of which can force rework and drive costs up.
Make a budget checklist and pre-inspection plan to minimize surprises and decide when professional help is warranted. Set up a simple monitoring routine—seasonal inspections, photos, and a log of crack width or movement—to catch reoccurrence early and plan maintenance.
Common pitfalls and how to avoid them
Here are some common mistakes DIYers make when fixing plaster cracks at ceiling medallions. Avoid these to ensure a successful repair.
- Using hard, fast-setting patching plaster: This can cause more damage than good. Use slow-setting, malleable plaster for best results.
- Skipping substrate conditioning: Moisture and contaminants on the surface can affect bonding. Clean and condition the surface before applying new plaster.
- Failing to secure the medallion: Before making cuts or applying new plaster, ensure the medallion is securely attached to prevent further damage.
- Ignoring lath repair: Damaged lath can lead to recurring cracks. Inspect and repair lath as needed before applying new plaster.
By avoiding these common pitfalls, you’ll increase the likelihood of a lasting repair.
When to call a pro and how to document recurrence
While DIY repairs can save you money, there are times when it’s best to call in a professional. Here are some signs to look out for:
Persistent movement: If cracks continue to widen or new cracks appear after repair, it may indicate a structural issue that requires professional attention.
Electrical/structural concerns: Any signs of electrical issues or structural damage should be addressed by a licensed professional immediately.
To keep track of repairs and monitor for recurrence, take photographs of the area before and after repair. Date these photos and keep them in a log with notes on any maintenance actions taken. This will help you identify trends and make informed decisions about future repairs.
Conclusion
Taking a careful, step-by-step approach to crack repairs around ceiling medallions protects safety, preserves the look, and keeps the structure durable for years. Stay focused on the repair sequence, protect surrounding plaster, and test each stage before moving on.
Check in this order: verify the area is safe and supported, prep the site and remove loose material, apply the stress relief cuts only where prescribed, stabilize the edge and repair or replace any damaged lath, build up the scratch coat, brown coat, and finish, then sand, texture match, and paint. Proceed methodically, work in small sections, and verify each layer is firm before applying the next.
Avoid these common mistakes: rushing the coats or skipping the edge stabilization, which leads to future cracks; using a too-thin finish that shows texture or color mismatch; and ignoring safety gear or dust containment. Follow simple rules: test a small area first, wear eye protection and a dust mask, cover floors, and never force material or overwork the plaster—let it grab and cure to avoid hairline cracks.
If the plaster is sagging, the medallion is loose, or you see widespread cracking beyond a simple hairline, call a professional. When in doubt, prioritize safety, and know that a solid rebuild plan yields a durable finish and a lasting look. You can do this—step by step, and one day at a time.
FAQ
How do I repair holes and cracks in lath and plaster around a ceiling medallion?
Widen the crack slightly with a putty knife to expose clean edges. Press in a appropriate patching material and embed a mesh or lath patch if needed, then feather the edge smooth with a trowel. Let it set before applying the scratch coat.
What should I do to rebuild loose or missing lath before patching?
Carefully remove loose material and expose solid substrate. Install new lath or repair existing strips as needed, then secure firmly. Re-check for level and allow a stable base before moving to scratch coat.
How do I condition the substrate before patching a ceiling medallion area?
Clean dust and paint flakes off; dampen dusty surfaces slightly to reduce suction. If you have chalky plaster, prime or pre-wet to improve adhesion of patching material. Don’t oversaturate; work in small, even patches.
What’s the proper approach to applying a scratch coat and subsequent troweling coats?
Apply a thin, even scratch coat to key the surface. Let it set to a firm but workable texture, then apply a brown coat or follow with the next layer as needed. Use consistent pressure to blend edges and build a uniform thickness across the patch.