
Introduction
Lime putty is hydrated lime that has been slaked and aged into a smooth, creamy paste, while hydrated lime (powder) is the dry product you mix on site; putty gives a softer, more workable mortar and powder is quicker to store and use. For a DIY plaster job, choose putty when you want long open time and easier feathering, and choose hydrated lime powder if you need convenience and faster turnaround—check product labels and manufacturer instructions for exact handling.
Putty-based mixes tend to produce a more flexible, breathable plaster that can tolerate slight movement, whereas plasters made from freshly slaked or directly mixed hydrated lime can set firmer but may be less forgiving; test a small patch and follow manufacturer guidance. Using lime is a low-embodied-energy choice compared with some cement-rich mixes, but if environmental impact matters to you, check sourcing and production info before buying.
Key takeaways
- Choose lime putty for traditional plastering with improved workability on historical walls.
- Hydrated lime offers quicker set and easier mixing for modern plaster applications.
- Lime putty develops strength slowly through lime carbonation and lime-putty bonds.
- Environmental benefits include lower embodied energy when replacing cement-based plasters.
- Ensure proper storage to prevent drying or premature hardening of lime products.
- Wear eye protection and gloves; handling lime can irritate skin and eyes.
Table of Contents
- Introduction
- Key takeaways
- Definitions and How Each Product Is Made
- Material Specs, Consistency and Storage
- Workability: Mixing, Trowelability and Finishing
- Strength, Setting Mechanisms and Long-Term Performance
- Curing Times and Environmental Effects
- Moisture Management and Water Retention
- Health, Safety and Handling Precautions
- Cost, Sustainability and a Practical Decision Checklist
- Conclusion
- FAQ
Definitions and How Each Product Is Made
Lime putty is the aged, plastic paste produced by hydrating quicklime with water and allowing the paste to mature; you will handle it on site as a soft, earthy cream. Hydrated lime is sold as a dry powder or damp slurry created by calcining limestone then slaking and grinding to a controlled moisture—expect a free‑flowing powder unless bought pre-slurried.
Basic production steps differ: putty is formed by large-scale slaking and weeks-to-months of aging, while hydrated lime comes from calcination, controlled rehydration and milling; both may be blended with pozzolans or air‑entraining agents for plaster use. On site expect chemical changes—hydration, then carbonation for putty and hydraulic/pozzolanic set for some hydrated limes—so verify the product data sheet or label for hydraulic content, recommended maturation and compatibility with existing plasters.
What is lime putty?
Lime putty, also known as ‘fat’ lime, is a long-slaked, viscous lime product. It’s made by hydrating quicklime (unslaked lime) in water and storing it for several weeks to months.
Plasticity is key here. Lime putty’s long soak time allows calcium hydroxide particles to swell and interlock, giving the mix its workability and longevity. It’s like a thick, earthy cream when you handle it on site.
The lengthy ageing process also means lime putty has a longer working life once mixed with sand or other aggregates. This gives DIY homeowners more time to apply and finish their plasters.
What is hydrated lime?
Hydrated lime, on the other hand, is a dry, processed calcium hydroxide powder. It’s produced by controlled slaking of quicklime and then grinding it with a specific moisture content.
Convenience is its main advantage. Hydrated lime comes ready to use, needing only mixing with water before application. No long soak times here!
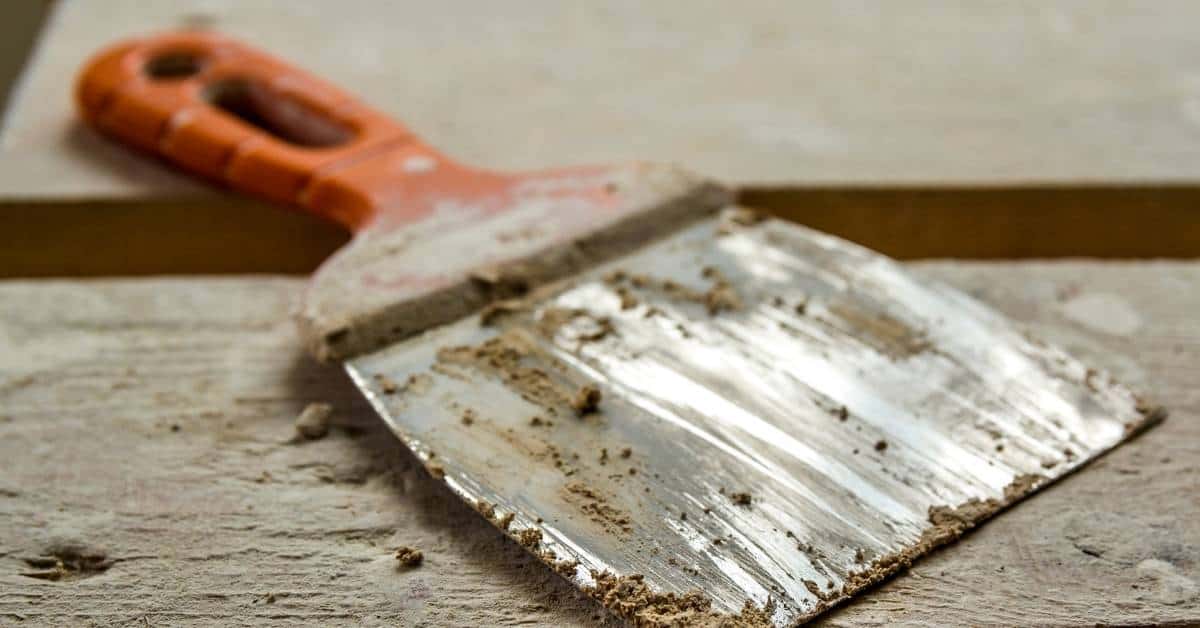
You’ll find hydrated lime in a dry powder form on site, unlike the creamy texture of lime putty. This makes it easier to store and handle, but it does have implications for workability and setting behavior.
How production differences change performance
The way these limes are made affects how they behave in your plaster mix. Let’s break it down:
Particle size matters. Lime putty has larger, interlocking particles due to its long soak time. This gives it better workability but slower setting.
Hydrated lime has smaller, more uniform particles. It sets faster and is easier to mix, but may lack the plasticity of lime putty.
Moisture content also plays a role. Lime putty comes with a higher moisture content due to its ageing process. This can affect how it mixes with other ingredients and how it cures.
Lastly, additives react differently in each lime type. Pozzolans, for instance, may work better in lime putty due to its longer working life. Air-entrainers might be easier to incorporate into hydrated lime because of its dry, powdery form.
Material Specs, Consistency and Storage
Putty arrives as a plastic, spreadable mass with significant water content; hydrated lime is typically a fine powder or factory slurry that requires rehydration—these forms change workability, set behavior and finish quality. Check the product data sheet or label for lime type (non-hydraulic vs hydraulic), suggested mixing ratios and any listed additives or pozzolans before buying.
Storage matters: keep putty in sealed, water-filled tubs to prevent skinning and dry powder in moisture‑proof bags or buckets to avoid lumps and dust; temperature swings and exposure to air or rain degrade performance. On site decide if aging or re-slaking is needed, perform a small readiness test (visual texture, smear test) and follow manufacturer instructions for safe handling and shelf life.
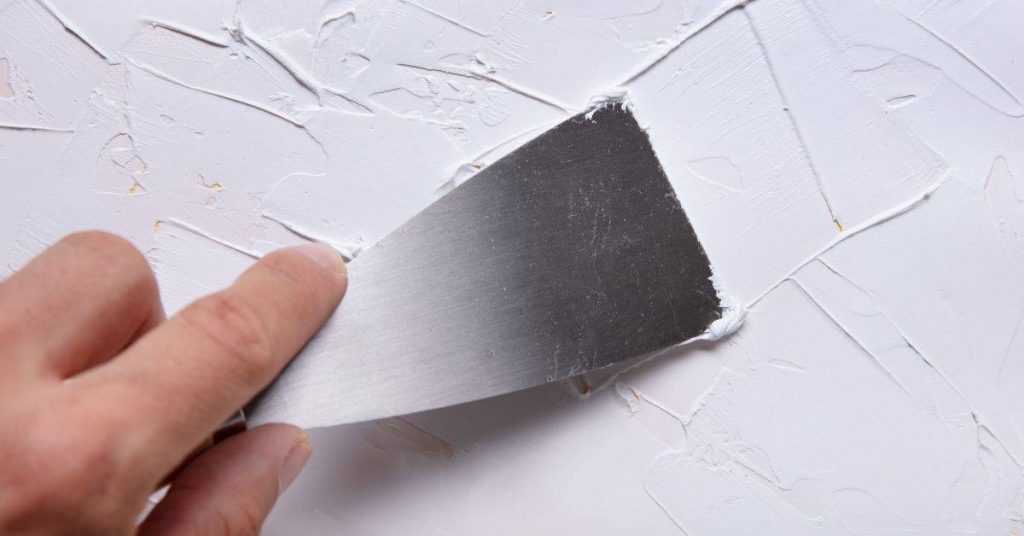
Texture and handling characteristics
Lime putty, being an aged, plastic paste, has a smooth, creamy texture that’s easy to mix and apply. It’s ready for use right out of the container, making it great for base coats.
Hydrated lime, on the other hand, comes as a fine powder or pre-mixed slurry. The powder needs slaking (rehydration) before use, while the slurry can be used immediately but may have a shorter working time.
The paste-like putty provides better trowel feel and easier application for finish coats due to its consistency. Powdered hydrated lime might feel drier and require more water or additional mixing to achieve desired workability.
Shelf life and storage recommendations
Proper storage is crucial for maintaining the performance of both lime putty and hydrated lime. Here’s how:
Hydrated lime (powder) should be stored in a cool, dry place away from moisture and heat sources. Keep it sealed to prevent absorption of humidity, which can cause clumping or premature setting.
Lime putty, being a moist product, needs to be covered tightly to prevent drying out or contamination. Store it in a cool area, avoiding temperature swings that could cause separation or cracking.
What to check on datasheets and standards
Before purchasing, review the product datasheet to ensure you’re getting the right lime for your project. Here’s a quick checklist:
- Lime type: Check if it’s NHL (Natural Hydraulic Lime) or lime-putty formulation.
- Calcium hydroxide content: Higher content means better bonding and strength.
- Additives/pozzolanic materials: Some limes have additives for specific purposes. Ensure they won’t interfere with your project.
- Recommended mixing ratios: Follow these to achieve desired workability and finish quality.
- Shelf life: Check when the product was manufactured and its expected shelf life.
- Impurities: Low impurity levels ensure better performance and longevity.
- Safety notes: Follow safety guidelines for handling, mixing, and disposal.
- Regional standards: Check if the product meets local or national standards for lime products.
Quick rule: If unsure about any data, consult your supplier’s technical support.
Workability: Mixing, Trowelability and Finishing
Compare core workability points by testing water demand, plasticity and open time: lime putty mixes tend to be more plastic with longer re‑temper windows, while hydrated lime mixes can be stiffer and quicker to lose plasticity depending on fines and additives. Before full‑scale work, consult the product label or technical sheet for recommended mixing guidance and plan trial mixes on sample panels to check trowelability and finish behavior.
Mixing technique affects outcome: pre-wet or mature putty gently with a paddle, add sand slowly and note feel; for hydrated lime add powder to water slowly, keep dust down and measure water per test mixes. Use test patches to time coats and tooling—observe tackiness, re-tempering limits and edge feathering—and adjust tools and technique (trowel angle, finishing float) based on those on-site trials.
Mixing ratios and practical techniques
First off, don’t just dive in with your shovel. Read the concrete supplier’s guidelines. They know their stuff.
Now, you’re gonna want a good mix for workability. Aim for a slump of around 4-6 inches. Too much water and it’ll be too soupy; not enough and it won’t spread right. So, start with the recommended ratio from your supplier (usually 1:2:3 or 1:3:5 cement:sand:gravel).
But here’s where you gotta use your noggin. Every job’s different. Check your base compaction – if it’s loose, you might need more water. If it’s tight, less is better. Do a small test mix first to see how it behaves.
Remember, you can always add water on site, but you can’t take it out. So, start dry and add as needed. And for Pete’s sake, don’t be adding random stuff like dish soap or sugar. It won’t help, and it might just make a mess of things.
Trowelability and finish quality
When it comes to trowelability and finish quality, the type of lime you use makes a big difference. Lime putty is your friend here – it tends to give a smoother, more cohesive finish right out of the bag.
Hydrated lime mixes can be trickier. They might feel grainy if not mixed well or if the sand-to-lime ratio is off. Check your mix design and make sure you’re following it to a T. Too much lime, and you’ll end up with a rough finish.
Here’s what you do: After spreading your mix, use a straight edge trowel to smooth it out. For a really smooth finish, you might need to go over it a few times. But be careful not to overwork the surface – that can bring up too much lime and make it grainy again.
Remember, the key to a good finish is in the prep work. Check base compaction, ensure your mix is right, and take your time with the trowel. It’s worth the extra effort to get that smooth, professional-looking finish you’re after.
Layering workflow (scratch, float, finish)
The key to a solid concrete surface is building it up in layers. Here’s how:
Scratch coat: This is your base layer. It’s usually thicker and less smooth than the final coats. Apply it when the base is well-compacted. Check local rules for ideal moisture content before applying.
Float coat: Once the scratch coat has started to set (check manufacturer’s instructions), apply your float coat. This smooths out the surface and prepares it for the final finish. Work quickly but carefully, as concrete sets fast.
Finish coat: The top layer is where you want that smooth, professional look. Apply it when the float coat is still slightly plastic (check trowelability). Use a steel trowel to strike off any excess and smooth out the surface. Then, use a bullfloat to level it out.
Strength, Setting Mechanisms and Long-Term Performance
Lime putty mainly gains strength by carbonation as atmospheric CO2 converts calcium hydroxide to calcium carbonate over time, producing gradual hardening; hydraulic or pozzolanic hydrated limes gain set through chemical reactions with water and additives, giving earlier strength. Check the product technical data or manufacturer instructions for hydraulic class or pozzolanic content to understand early strength expectations and long-term behavior.
Practically, choose putty for flexibility and gradual strength that tolerates movement, and hydraulic or pozzolan-stabilized hydrated limes where earlier set or higher early strength is needed. On site manage substrate compatibility, layering and curing: watch for visual set cues, avoid overloading thin coats, and keep humidity controlled during early hardening to reduce cracking and ensure durable bond.
Carbonation vs hydraulic/pozzolanic set
Lime putty mainly gains strength through carbonation, a slow process that happens over time when it’s exposed to atmospheric CO2. This makes lime putty ideal for long-term durability but means early strength is low.
Hydraulic limes, on the other hand, set quickly due to hydraulic reactions with water. They also gain additional strength from pozzolanic reactions with silica in the mix. This gives them higher early strength and better resistance to wet-dry cycles.
Pozzolans added to lime putty can speed up setting and improve early strength, but they don’t replace the long-term benefits of carbonation.
Compressive and tensile considerations for repairs vs new work
For new work, like fresh renders or plasters, both lime putty and hydraulic limes can be used. The choice depends on desired finish, not strength.
For repairs, especially structural ones, consider the existing substrate’s strength. If it’s weak, use a stronger hydraulic lime to match or exceed its strength. For decorative finishes with low load-bearing needs, lime putty is fine.
Always verify project requirements before choosing your lime type. Don’t rely on guesswork; ask for advice if unsure.
Influence of additives (pozzolans, fibres, stabilizers)
Adding pozzolans to lime putty speeds up setting and improves early strength. They also reduce shrinkage cracking. But too much can make the mix brittle.
Hair or fibre additions increase tensile strength and flexibility, helping resist cracking from movement. They’re useful in renders subject to substrate movement.
Small cement additions (less than 10%) can stabilize lime mixes for improved early strength and workability. But be careful; too much cement can cause excessive heat during setting, leading to cracking.
Curing Times and Environmental Effects
Curing mechanisms differ: putty relies heavily on carbonation which is slower in cool, low‑CO2 or very humid conditions, while hydrated and hydraulic limes develop strength through internal reactions that can be less dependent on atmospheric CO2. Because performance varies with temperature and humidity, consult the product label or technical sheet for manufacturer guidance and adapt curing controls to local climate.
On site protect fresh plaster from rapid drying, wind, direct sun and freezing; use misting, damp hessian or breathable coverings as appropriate and monitor surface tackiness and color change as practical indicators of progress. Adjust protection methods seasonally—reduce wind exposure on hot dry days and shield from frost in cold weather—to maintain workable plasticity and steady strength gain without trapping harmful moisture.
Temperature and humidity impacts
Cold temperatures, around 5–10°C (40–50°F), slow down the setting and carbonation of lime plasters. This means your cure time will be longer in cool weather.
Hot temps above 25°C (77°F) can speed up drying, reducing plasticity and making it harder to work with. Optimal working times are usually between 10–25°C (50–77°F).
High humidity helps interior plasters cure better by providing moisture. Exterior applications need less humidity but still require some to prevent cracking.
Low humidity can cause rapid drying and prolonged curing, so keep an eye on your RH levels – aim for 40-60% indoors and 50-70% outdoors.
Methods to control or accelerate cure
To slow down curing, protect your plasters from wind and sun. Use tarps, plastic sheeting, or damp burlap to keep them moist.
Misting can help maintain moisture levels but be careful not to oversaturate. Test first if using accelerants like calcium chloride – too much can cause cracking.
To speed up curing, increase ventilation once the initial set is complete. This helps remove excess moisture and prevents trapped moisture from causing issues.
In cold climates, consider heating the substrate or applying lime putty in warmer months when temperatures are consistently above 10°C (50°F). Always adapt your methods to suit local conditions.
Visual and tactile signs a coat is ready
A coat is ready for the next application when it’s surface dry. This means you can’t see any standing water or feel any dampness on top.
The plaster should also have lost its initial plasticity – it shouldn’t be tacky to touch. If it still feels soft, wait a bit longer before proceeding.
Perform a firm key test by lightly scraping the surface with a trowel. If material comes off easily, it’s not ready. When you can barely remove any plaster, it’s time for the next coat or finish.
Also look for signs of carbonation – a whitish haze on the surface indicates that curing is underway and it’s safe to proceed.
Moisture Management and Water Retention
Lime putty mixes generally retain water longer and present a longer open time, which helps feathering and suction control on porous backgrounds; hydrated lime mixes often drain moisture quicker or require staged coats to control suction. If substrate suction is unknown, perform a simple dampness/suction test and check the product data sheet for recommended dampening or priming procedures.
For damp or porous substrates, pre-wet in controlled bursts or apply a damp key coat to prevent rapid drawdown and pinholing, but avoid saturating the background to the point of trapping moisture. Manage coat build-up in stages, watch for excessive shrinkage or efflorescence signs, and adjust mix moisture or curing to balance reworkability with bond strength based on observed behavior.
How each material holds and absorbs water during application
Choosing between lime putty and hydrated lime for your plaster depends on how they handle moisture. Here’s what you need to know about their water absorption and retention.
- Lime Putty: Has innate water content, providing better work time and slump control. Look for a smooth, creamy consistency. Avoid adding too much water as it can cause slumping and weak bond.
- Hydrated Lime: Needs added water to create a usable mix. It has lower initial moisture retention but can be adjusted with water content. Be careful not to overwater, leading to cracking or staining.
Preventing shrinkage, cracking and delamination
Moisture management is key to preventing defects in your plasterwork. Here are some best-practice steps:
Use suitable backing coats: Apply a base coat that can handle moisture and provide good adhesion.
Gradual drying: Allow each coat to dry slowly and evenly to reduce cracking. Don’t rush the process with heat or fans.
Correct aggregate grading and reinforcement: Use aggregates of varying sizes to improve compaction and reduce shrinkage. Reinforce areas prone to cracking with fibers or mesh.
Visual checkpoints for moisture and drying progress
Monitoring your plaster’s drying process is crucial to ensure a strong, durable finish. Use this simple checklist:
- Uniform color change: As the plaster dries, it should change color evenly. Any dark or wet spots may indicate trapped moisture.
- No glossy wet spots: A matte surface indicates that the plaster is drying correctly. Glossy spots suggest excess moisture.
- Slight surface firmness: Gently press the surface with your finger. It should feel slightly firm, not soft or spongy.
Quick rule: If you notice any of these issues, allow more time for drying or adjust your application technique accordingly.
Health, Safety and Handling Precautions
Both forms are alkaline and can cause skin or eye injury; powder hydrated lime adds inhalation and dust risks while putty reduces airborne dust but still causes caustic contact. Read the safety data sheet or product label for first-aid specifics and follow the listed PPE recommendations before starting work.
On site use chemical‑resistant gloves, splash goggles, long sleeves, and a suitable respirator for dusty work; employ low‑dust methods such as wet mixing and keep lids on containers when not in use. For eye or skin exposure, flush with plenty of clean water and seek medical advice if irritation persists; have an emergency wash plan and numbers accessible to the crew.
PPE and Safe Mixing Practice
When working with lime putty or hydrated lime, safety is paramount. Start by wearing the right gear:
Chemical-resistant gloves, splash goggles or a face shield, long sleeves and pants, and non-slip footwear are essential. A breathable respirator or P100 dust mask protects against inhaling fine particles.
For mixing, keep it low-dust:
Pre-wet lime putty before handling. When adding hydrated lime powder to water, do so slowly and use a whisk or slow mixer to minimize dust. Keep lids on containers when not actively mixing.
Dust Control and Respiratory Risks
Powdered hydrated lime poses a significant dust risk, which can lead to inhalation hazards. Here’s how to manage it:
Wear a breathable respirator or P100 dust mask. Use extraction systems if available, and keep work areas damp to reduce dust dispersion.
Mixing should be done in well-ventilated areas. If possible, use a dedicated mixing area away from living spaces to prevent dust accumulation.
Remember, even small amounts of dust can cause irritation. Take these precautions seriously to protect your respiratory health.
Storage, Spill Response and First Aid
Store lime putty and hydrated lime properly:
Keep them in labeled, moisture-proof containers. Store away from acids and moisture sources to prevent contamination or reactions.
If a spill occurs, neutralize it immediately using a solution of water and vinegar (1:1 ratio).
For skin contact, wash with plenty of water and remove contaminated clothing. For eye exposure, flush with clean water for 15 minutes. If you inhaled dust, move to fresh air immediately.
Seek medical attention if irritation persists. Keep emergency contact numbers handy.
Cost, Sustainability and a Practical Decision Checklist
Material and labor tradeoffs matter: putty requires aging time and handling that can increase labor hours, while hydrated lime powder may be cheaper to buy but needs careful water control and dust management—verify local availability and supplier guidance. Check manufacturer instructions and local supplier notes on recommended mixes and any added pozzolans to understand lifecycle and labor impacts for your project.
Consider lifecycle and sustainability: carbonation of lime over time reabsorbs CO2, and local sourcing reduces transport footprint; weigh maintenance cycles and expected durability against upfront labor. Use a short checklist on site—confirm substrate type, desired finish, climate, local supply and curing capacity—and consult product data sheets or a mason if a choice remains unclear before committing to a full batch.
Material and labor cost factors to consider
Before you start, use this checklist to understand the costs involved in using lime putty or hydrated lime for your plastering project.
- Product price: Check unit prices per bag. Lime putty is usually cheaper.
- Transport cost: Consider delivery fees if you can’t pick up locally.
- Mixing time: Hydrated lime mixes faster, saving labor time.
- Skilled labor: Lime putty may require more skilled workers for mixing and application.
- Special tools: Check if you need any specialized equipment for mixing or curing.
- Rework costs: Poorly mixed or applied plaster can lead to cracks, requiring rework.
- Batch size: Lime putty batches are smaller due to its longer setting time.
- Water addition: Hydrated lime absorbs more water, affecting mix ratios and labor time.
Quick rule: Consider your budget, available labor, and project timeline when deciding between lime putty and hydrated lime.
Environmental footprint and durability tradeoffs
Assess the environmental impact and expected lifespan of your plaster with this checklist.
- Embodied energy: Lime putty has lower embodied energy than hydrated lime due to less processing.
- CO2 sequestration: Both types absorb CO2 during curing, but lime putty’s longer cure time allows more absorption.
- Transport distance: Minimize transport distances to reduce emissions and support local industry.
- Expected lifespan: Lime plasters last longer than gypsum plasters, with lime putty often outlasting hydrated lime.
- Maintenance needs: Lime putty is more durable and requires less maintenance over time.
- Repointing/repatching: Lime putty’s better crack resistance reduces repointing needs.
- Climate suitability: Both are suitable for most climates, but lime putty is better in hot, dry regions due to slower cure time.
- Local sourcing: Sourcing locally reduces your project’s carbon footprint.
Quick rule: Prioritize longevity and low environmental impact by considering embodied energy, CO2 absorption, and local availability.
Quick decision checklist (when to choose which)
Use this concise checklist to decide between lime putty and hydrated lime for your project.
- Desired finish: Lime putty provides a traditional, textured look; hydrated lime offers a smoother finish.
- Timescale: Hydrated lime sets faster, ideal for tight schedules. Lime putty takes longer but allows more working time.
- Substrate condition: Lime putty is better for damp or unstable masonry due to its greater flexibility and slower cure time.
- Climate: In hot, dry regions, lime putty’s slower cure time prevents rapid drying and cracking. Hydrated lime is suitable in most other climates.
- Budget: Lime putty is usually cheaper but requires more skilled labor for mixing and application.
Quick rule: Match your project’s needs with the appropriate lime type based on desired finish, timescale, substrate condition, climate, and budget.
Conclusion
Choosing the right lime putty or hydrated lime isn’t guesswork; it’s about workability, long-term strength, and managing moisture so the finish stays true and durable. Safety matters because wrong mixing or poor curing can show up as cracks, sticking issues, or damp spots that bite back later.
First assess the project scope and match material specs, check storage temps, prep surface, mix to the right consistency, test trowel feel on a hidden patch, perform a small trial area, then plan curing and moisture control.
Common mistakes to avoid are skipping testing and small-area trials, over-wetting the mix or rushing finishing, and using a lime product that doesn’t match your climate or substrate. Follow basic safety rules: wear appropriate PPE, work in a ventilated area, keep tools clean, and don’t mix on uneven or unprepared surfaces. Start with a controlled test and don’t proceed until you’re confident the mix behaves as expected.
If you’re dealing with large surfaces, structural cracks, ongoing dampness, or unfamiliar environmental conditions, consider a pro for guidance or execution. Stay methodical, document your results, and you’ll finish with a surface that lasts and looks right, without wasting time or resources.
FAQ
How do workability differences between lime putty and hydrated lime affect plastering?
Lime putty tends to remain workable longer, which can help with traditional methods and slower graining. Hydrated lime bag mixes dry faster and can feel stiffer when applied, so adjust your mix and trowel timing accordingly. Always check the product label or manufacturer guidelines for recommended mixing practices.
Do lime putty and hydrated lime differ in plaster strength and long-term performance?
Both can perform well, but historical lime putty plaster often has different curing dynamics than modern hydrated lime mixes. Expect variations in early hardness and crack patterns depending on the mix and binder content. Verify with product instructions and local guidance for your climate and substrate.
Are there historical or environmental considerations when choosing lime putty vs hydrated lime?
Lime has a long heritage in masonry; many DIYers choose it to match historic looks and breathability. Environmentally, lime products are generally low in embodied energy, but production methods vary. Check manufacturer data and local sustainability guidance when evaluating options.
What are common mistakes to avoid when choosing between lime putty and hydrated lime?
Avoid mixing in too much water or using the wrong binder for your plaster application. Don’t ignore curing conditions or substrate compatibility, and don’t rely on casual advice. Always follow the product instructions and local rules, and test a small area first.