
Introduction
Hydrated lime is a dry powder added to concrete to adjust texture and binding. In DIY mixes, it can improve workability and long-term texture, but it also changes setting behavior. Check the product label and local guidelines before use.
It can influence finish quality and how smoothly you can trowel or pour. Lime affects strength development indirectly by changing how the cement hydrates, so don’t expect the same early strength as plain mixes. Always follow manufacturer instructions and local rules, and test a small batch to gauge workability and finish.
Key takeaways
- Definition of hydrated lime: a non-hydraulic binder derived from limestone.
- Heed workability changes: adding lime can improve cohesion and reduce slump locally.
- Finish quality: lime alters surface texture; plan for longer finishing windows.
- Strength development: lime affects microstructure and early strength; check formulation guidance.
- Safety: wear PPE; avoid dusty mixing and follow manufacturer labeling.
- Compatibility: compare with fly ash or limestone filler for suitability.
Table of Contents
- Introduction
- Key takeaways
- What Is Hydrated Lime and Key Material Properties
- How Hydrated Lime Affects Fresh Concrete — Workability and Finishing
- Effects on Hardened Concrete — Strength, Durability, and Microstructure
- Proportioning and Mixing Guidance for Practical Use
- Compatibility and Comparison with Other Additives (Fly Ash, Limestone Filler, Etc.)
- Application Methods and Common Use-Cases in Construction
- Environmental, Cost, and Sustainability Considerations
- Safety, Quality Control, Common Mistakes, and a Planning Checklist
- Conclusion
- FAQ
What Is Hydrated Lime and Key Material Properties
Hydrated lime is calcium hydroxide, formulated for ready-to-use concrete work. It is distinct from lime putty and hydraulic limes, and it comes in common commercial forms such as powdered hydrated lime, lime putty, and hydraulic variants. Check the product label or data sheet to confirm the form you’re using.
Important material properties for concrete include particle size distribution and surface area, fineness, pH level, solubility in water, and purity with carbonate content, plus bulk density. These factors influence workability, water demand, air voids, and early versus long-term strength. Understand how each property may interact with your cement and aggregate choices.
Hydrated vs Quicklime and Lime Putty
Hydrated lime is calcium hydroxide (Ca(OH)2), produced by slaking quicklime (calcium oxide). Quicklime is highly reactive, so it’s not used directly in concrete. It needs to be fully hydrated first.
Lime putty, on the other hand, is a creamy mixture of hydrated lime and water. It’s slower to react but offers better workability for masonry applications.
For concrete, powdered hydrated lime is typically used due to its consistent particle size and ease of handling. Hydraulic limes (like NHL 3.5 or 5) can also be used in concrete but offer hydraulic properties similar to cement.
Physical and Chemical Properties That Matter
The alkalinity of hydrated lime (around pH 12.5) influences the concrete’s overall alkalinity, affecting its resistance to sulfate attack and steel corrosion.
Its fineness, measured as Blaine fineness, impacts water demand and workability. Finer particles increase water demand but improve finish and early strength.
The particle shape of hydrated lime is typically angular, which improves its ability to fill voids in concrete. This reduces porosity and enhances durability.
Standards, Grades, and Material Specifications
Choosing the right hydrated lime grade is crucial for your concrete’s performance. Always confirm local or project specifications before use.
- Purity and Carbonate Content: Look for high purity (95% Ca(OH)2 min) with low carbonate content to avoid weak spots in the concrete.
- Moisture Content: Check moisture content to ensure it’s within specified limits. Excess moisture can cause issues during curing.
- Particle Size Distribution: Ensure the lime meets the required particle size distribution for your application.
- Bulk Density: Confirm bulk density to calculate accurate batch weights and avoid over- or under-ordering.
- Compatibility with Cement Type: Check if the lime is compatible with your chosen cement type. Some limes may react differently with different cements.
How Hydrated Lime Affects Fresh Concrete — Workability and Finishing
Hydrated lime modifies paste rheology by altering viscosity and yield stress, changing how the mix flows and settles. It interacts with cement and water at the particle level to influence cohesion and stiffness. Observe the mix with simple hand feel and test the slump as you adjust lime content.
In fresh concrete, lime can improve cohesion and reduce excessive bleed, but it may also affect surface tack and finish readiness. It can delay or accelerate finishing operations depending on dosage and temperature. Use small trials to gauge timing and surface response before scaling up.
Effects on Slump, Cohesion, and Pumpability
Adding hydrated lime to your concrete mix can improve its workability. Here’s how:
Slump: Lime reduces the water demand of cement, making the mix less stiff. This increases slump, allowing for easier placement.
Cohesion: Lime improves paste cohesion by filling voids between cement particles and improving bonding with aggregates. This reduces segregation and excessive bleeding.
When adjusting your mix, monitor slump loss over time. Lime can accelerate setting, so you’ll need to finish the concrete sooner.
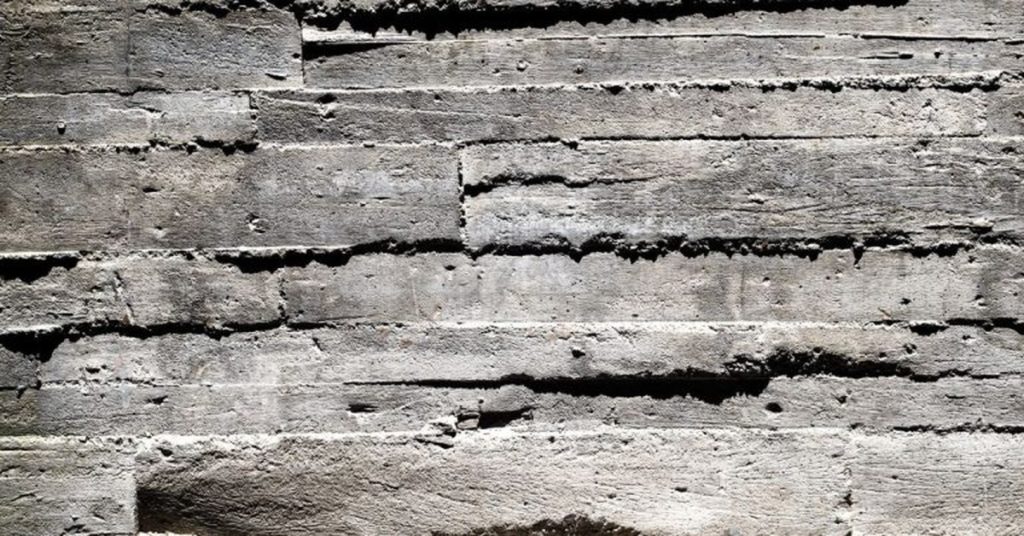
Impact on Surface Finish, Edge Definition, and Troweling
Hydrated lime can enhance your concrete’s surface finish. Here’s why:
Smoother Surfaces: Lime improves the mix’s flow and compaction, helping to create smoother surfaces with fewer voids.
To maximize results, use a vibrating screed for initial leveling. For edges, use a wood or metal float to strike off excess material and define the edge.
For troweling, start with a sponge float to remove any remaining laitance. Then, use a steel trowel for final finishing. Lime-containing mixes may require more passes to achieve a smooth surface due to their increased tackiness.
Interaction with Water Content and Admixtures in Fresh Mixes
When adding hydrated lime, you’ll need to adjust other components of your mix. Here’s how:
Water: Lime reduces the water demand of cement. So, reduce the water content by about 5-10% when using lime.
Superplasticizers: Lime can interact with superplasticizers, reducing their effectiveness. To maintain desired slump, you may need to increase the dosage of your superplasticizer. Always do trial mixes to verify compatibility.
Air-entrainment: Lime can interfere with air-entraining agents. If using lime in an exposed aggregate or decorative concrete mix, ensure proper air content is maintained to prevent pop-outs and scaling.
Effects on Hardened Concrete — Strength, Durability, and Microstructure
This section covers how lime-containing mixes behave in hardened state, including compressive and tensile behavior, durability, and microstructure. Lime additions influence pore connectivity and hydration products that shape long-term performance. Verify expectations against your specific mix design and test data.
Strength and modulus can shift with lime content, and permeability or shrinkage may respond accordingly. Durability mechanisms such to freeze–thaw resistance and chloride ingress can be affected by porosity changes. Use testing to confirm balance between workability and performance for your project.
Influence on early-age and long-term strength development
Hydrated lime’s impact on concrete strength isn’t immediate. Early on, it might slightly lower compressive strength due to dilution of cement paste. But don’t worry, this is temporary.
Long-term benefits are significant, though. Lime improves curing by keeping moisture in the mix longer. It also packs particles tighter, boosting strength over time. Testing is crucial here – don’t guess, measure.
Expect modest early-age impact (around 5-10% reduction), but long-term gains can reach 20-30%. Keep lime dosage between 2-8% for optimal results.
Durability: permeability, carbonation, and sulfate resistance
Lime reduces concrete’s permeability by filling microvoids and capillary pores. This slows down water and gas penetration, improving durability.
Carbonation resistance improves too. Lime buffers pH, slowing down the carbonation process that weakens concrete. But beware – high lime dosages can increase porosity, making it less effective at lower levels.
Sulfate resistance is a mixed bag. Lime forms calcium silicate hydrates (CSH) that resist sulfate attack. Yet, high lime contents can lead to ettringite formation, causing expansion and cracking. Balance is key – stick to 2-5% lime for best results.
Microstructure and bond with cementitious phases
Lime alters concrete’s microstructure, reducing capillary porosity. This tightens the paste, improving strength and durability. It also promotes better particle packing, enhancing mechanical properties.
Paste-aggregate bond improves with lime. Lime fills microvoids at the interface, creating a stronger bond. But be careful – high dosages can lead to microcracking due to volume expansion during hydration.
Shrinkage and cracking risk decrease with proper lime usage. By filling voids and improving particle packing, lime reduces autogenous shrinkage. Just watch out for excessive drying shrinkage at higher dosages.
Proportioning and Mixing Guidance for Practical Use
Set practical inclusion-rate ranges based on your concrete application, balancing workability with strength and durability goals. Use quick-reference guidelines that you can verify against your project specs. Always cross-check with label instructions or manufacturer data when planning dosages.
Adjust water demand and the sequence of lime addition to keep consistency across batches. Define a modular mix design with base recipes, lime-adjusted variants, and how to pair with SCMs or retarders. Plan iterative trials and record results for each mix, then scale with confidence.
How to decide inclusion rates and trial plan
Including hydrated lime in your concrete mix isn’t a one-size-fits-all affair. To find the right rate, start with controlled trial batches.
Replacement or addition rates vary based on project needs. For workability boosts, consider 1-5% replacement of cement by weight. For durability gains, try 2-10%. But remember, too much lime can hurt strength.
Conduct lab tests to validate your trial batches. Check slump, flow, and plastic density for fresh properties. For hardened, test compressive strength, modulus of elasticity, and porosity.
Mixing sequence and on-site handling tips
The order of addition matters with hydrated lime. Start with your aggregates in the mixer. Then add cement, followed by half the mix water.
Now, slowly sprinkle in your hydrated lime. Spread it evenly over the surface to avoid lumps. Let it soak for a bit before adding the rest of your water.
Finally, add any admixtures and the remaining water. Mix well until you reach your target slump. Be mindful of dust – wear a mask if needed.
Test methods and acceptance criteria to use
To ensure your lime-adjusted mix meets standards, run these tests:
Fresh properties: Slump test for workability. Air content test for entrained air. Check both against project specs.
Hardened properties: Compressive strength at 7 and 28 days. Modulus of elasticity for stiffness. Porosity tests like water absorption or mercury intrusion to check durability.
Set acceptance criteria based on these test results. If your mix passes, proceed with confidence. If not, adjust and retest until it does.

Compatibility and Comparison with Other Additives (Fly Ash, Limestone Filler, Etc.)
Hydrated lime serves different roles compared to fly ash, limestone filler, or silica fume, particularly in workability and porosity. Consider how lime’s filler-like effect complements or contrasts with other additives. Always verify with product specs and standards relevant to your region.
When mixing with cement types and superplasticizers, observe compatibility and performance trade-offs. Lime may be favored for certain finishes or historic restorations, whereas other additives provide different strength or durability benefits. Use testing to confirm a suitable combination for your project.
Hydrated lime vs fly ash: roles and performance differences
Hydrated lime and fly ash both enhance concrete, but they work differently. Fly ash is a pozzolan – it reacts with water and cement to form extra strength over time. Lime buffers pH, improves workability, and helps with air entrainment.
Fly ash reduces heat of hydration, extends set time, and boosts long-term strength. It’s great for mass concrete pours and high-strength mixes. Dosage ranges from 15% to 30% by cement weight.
Lime, on the other hand, improves early workability, aids in air entrainment (resistance to freeze-thaw), and enhances surface finish. It’s ideal for mortars and lean concretes. Use 2% to 5% by cement weight.
Combining them can yield benefits – lime boosts early strength while fly ash builds long-term strength. But beware, too much lime can delay set time with fly ash present.
Lime vs limestone filler and cement replacement
Limestone filler isn’t like lime or fly ash. It’s a fine powder that fills voids, improving particle packing and reducing porosity. Lime, however, plasticizes and buffers pH.
Limestone filler replaces 5% to 20% cement by weight, enhancing durability and reducing permeability. It’s excellent for lean mixes and toppings.
Lime, while also a filler, has more impact on workability and finish. For mortars or where better finish is needed, lime is preferable. But it doesn’t replace as much cement as limestone filler.
Avoid using both together – they compete for space in the mix. Choose one based on your needs: use limestone filler for strength and durability, lime for workability and finish.
Synergies and conflicts with chemical admixtures
Chemical admixtures can interact with hydrated lime. Here’s what to watch out for:
Superplasticizers: Lime reduces their effectiveness, so you might need more. Test first to avoid overdosage.
Retarders: Lime can accelerate set time, counteracting retarders. Adjust dosages accordingly or consider alternative retarders.
Air entrainers: Lime aids air entrainment, but too much lime can cause excess air. Monitor air content and adjust lime dosage if needed.
Always test compatibility before using. ASTM C618 guidelines cover fly ash, but no standard exists for lime-containing mixes. Trial batches are your best bet.
Application Methods and Common Use-Cases in Construction
Identify scenarios where hydrated lime adds value, such as new concrete mixes, repair mortars, plastering, or lime-rich finishes. Focus on how lime affects workability, finish quality, and long-term durability. Confirm that the chosen lime form suits the intended application by checking references on the product label.
Detail practical dosage ranges, timing, and mixing sequences to ensure uniform distribution. Discuss batch methods, pre-mixed mortars, and consistent agitation to prevent clumping. Align use with substrate readiness, curing needs, and inspection criteria for finish texture and shrinkage control.
Mortars, plasters, and architectural finishes
Hydrated lime improves the workability of mortars and plasters, making them easier to spread and apply. It increases the open time, giving you more time to finish the surface before it sets.
Finish quality is enhanced with lime as it promotes a smoother, more uniform appearance. For architectural finishes like trowel-applied stucco or exterior insulation finishing systems (EIFS), hydrated lime helps achieve that desired look.
Lime also improves the bond between the mortar or plaster and the substrate, ensuring better adhesion and long-term durability.
Precast, cast-in-place, and repair mortars
In precast concrete production, hydrated lime aids in filling complex forms by improving the flow of the concrete mix. It also helps achieve a smooth surface finish.
For cast-in-place applications, lime enhances workability, making it easier to place and consolidate the concrete in hard-to-reach areas or around rebar.
In repair mortars, hydrated lime promotes better cohesion and adhesion, ensuring the patch stays put and integrates well with the existing structure. It also helps control shrinkage, reducing the risk of cracking.
Pavement and soil stabilization contexts
In base treatment for pavements, hydrated lime is used to stabilize the subgrade. It improves compaction, increases strength, and reduces plasticity, preventing rutting and other pavement distresses.
For asphalt modification, lime enhances the adhesion between the aggregate and the asphalt binder, improving the longevity of the pavement.
In soil conditioning, hydrated lime is used to treat expansive soils. It reacts with the soil’s clay particles, reducing swell potential and improving stability. Before using lime in these contexts, always test your soil or consult a geotechnical engineer to determine the appropriate dosage.
Environmental, Cost, and Sustainability Considerations
Evaluate lifecycle factors, including embodied energy and potential durability benefits from lime use. Clarify the boundaries of any environmental claims and compare with alternative binders. Rely on standardized assessments and project-specific data when drawing conclusions.
Consider sourcing, regional availability, and transport impacts that influence cost and reliability. Document certifications or traceability as part of sustainability claims and ensure testing supports performance expectations for your environment.
Carbon footprint and lifecycle impacts
Hydrated lime’s embodied carbon is lower than Portland cement. It takes less energy to produce, reducing CO2 emissions. But transport distance can increase its net impact.
Less cement means less CO2. Using hydrated lime reduces the need for cement, lowering your mix’s overall carbon footprint.
The longevity of your concrete also plays a role. Hydrated lime improves durability, potentially extending your structure’s lifespan and reducing maintenance-related emissions.
Cost drivers and economic trade-offs
The upfront cost of hydrated lime varies. It might be more or less than cement, depending on your region.
Handling costs matter. Lime is often easier to handle on-site due to its powder form, reducing labor costs.
Improved durability can lead to long-term savings. Less maintenance and repair work means lower lifecycle costs.
Model these factors in your bid. The potential reduction in cement usage could offset any higher lime cost.
Regulatory, sourcing, and circularity aspects
Verify your supplier’s traceability. Ensure the lime meets relevant standards (e.g., ASTM C207).
Reclaimed or byproduct lime can be cheaper and more sustainable. Check if it’s available in your area.
Regulatory constraints vary. Some regions have limits on lime content, so check local codes.
Circularity is key. Using waste materials like slag or fly ash with hydrated lime reduces landfill waste and further lowers embodied carbon.
Safety, Quality Control, Common Mistakes, and a Planning Checklist
Outline safety precautions for handling hydrated lime, including PPE, storage, ventilation, and emergency procedures. Refer to the material’s MSDS and follow site-specific safety rules. Keep moisture-controlled conditions to minimize dust exposure.
List QC checkpoints for mixing and placement, such as lime purity, label verification, and accurate lime-to-cement ratios. Use a planning checklist to organize material sourcing, compatibility, workability window, delivery timing, storage, and on-site testing with acceptance criteria.
Safe handling, PPE, and spill response
Before you start working with hydrated lime, ensure you’re well-prepared to minimize risks.
- PPE: Wear gloves, goggles or face shield, impermeable clothing, and a respirator where dust is present.
- Dust control: Keep work area damp, use local exhaust ventilation, and avoid dry sweeping.
- Storage: Store in a cool, dry place away from heat sources and incompatible materials.
- Spill response: Contain spills immediately using absorbent material or sand.
- Skin contact: Rinse thoroughly with water if skin contact occurs. Seek medical attention if irritation persists.
- Eye contact: Rinse immediately with plenty of water for at least 15 minutes, lifting the upper and lower eyelids occasionally.
- Inhalation: Remove person from exposure area, keep them at rest in a well-ventilated area. Seek medical attention if symptoms persist.
- Emergency procedures: Have first-aid kit readily available and know emergency contact numbers.
Quick rule: Always prioritize safety over speed when handling hydrated lime.
Common mistakes and troubleshooting guide
Even with careful planning, issues can arise. Here’s how to identify and fix them.
- Overdosing: Check lime-to-cement ratio. Too much lime can cause delayed setting or premature stiffening. Reduce lime dosage if needed.
- Poor dispersion: Ensure lime is thoroughly mixed into the concrete. Inadequate mixing can lead to inconsistent results and weak spots.
- Admixture incompatibility: Check compatibility with other admixtures before use. Some combinations can cause setting issues or reduced strength.
- Inadequate curing: Monitor curing process closely. Insufficient curing can result in low strength gain and increased permeability.
- Rebound in workability: Check slump consistency. If it drops quickly, increase water content slightly to maintain desired workability.
- Efflorescence or white bloom: This is usually due to excess lime at the surface. Reduce lime dosage and ensure proper finishing techniques are used.
- Laitance: Check finish techniques. Excessive laitance can indicate over-troweling or insufficient curing. Adjust finishing techniques as needed.
- Bond or finish pull-off: Inspect surface for signs of delamination. This could indicate incompatibility with aggregates or improper mixing. Recheck materials and procedures.
Quick rule: Regularly inspect your concrete and address any issues promptly to prevent further problems.
Project planning and QC checklist (step-by-step)
Before starting your project, follow this checklist to ensure a successful outcome.
- Scope and constraints: Clearly define project scope and any limitations that may affect lime usage.
- Material sourcing: Source hydrated lime from reputable suppliers. Check Material Safety Data Sheets (MSDS) for safety information.
- Compatibility check: Ensure lime is compatible with existing cement and aggregates. Conduct trial mixes if necessary.
- Predict workability window: Estimate the time frame during which concrete will maintain desired workability.
- Scheduling delivery: Plan delivery of materials to coincide with mixing and placement times.
- Storage plan: Arrange for temporary storage if necessary. Keep lime dry and cool until use.
- On-site testing plan: Develop a plan for testing concrete at various stages, including slump tests, air content tests, and compressive strength tests.
- Acceptance criteria: Establish clear acceptance criteria for each test. Adjust mix design as needed to meet these criteria.
Quick rule: Regular on-site testing is crucial to ensure concrete meets desired performance standards.
Conclusion
Hydrated lime can improve workability, finish, and long-term performance, but it only pays off when you use it right and test as you go. The core idea is simple: confirm materials, mix carefully, test a small batch, and monitor curing and appearance to avoid costly fixes later.
Start by checking the basics in order: verify the lime is suitable for repointing or concrete blending, confirm the proposed proportion with practical guidelines, mix a small trial batch, observe how it handles in the plastic state, test finish and tool marks, and note any changes in strength or density as it cures. Keep notes on the exact mix ratio, moisture level, and curing conditions, and stick to the plan for future pours. Always wear proper safety gear, work in a well-ventilated area, and clean up lime dust promptly to prevent irritation or slips.
Two common mistakes to avoid are overloading the mix with lime or skipping quality control steps, which can weaken the set or cause finish issues. Never guess with proportions or skip a small-batch test, and never mix lime into a batch without rechecking the overall workability and compatibility with other additives. Safety rules are simple: wear eye protection and a dust mask, avoid breathing lime dust, keep damp hands and surfaces to control dust, and wash hands after handling. If you’re facing a large structural apply, high humidity or freeze–thaw exposure, or uncertain material compatibility, call a professional rather than pushing on alone. Stay practical, stay measured, and stay focused on a solid, well-documented plan—your finish will look better, and your concrete will hold up longer.
FAQ
What exactly is hydrated lime and how is it different from lime putty or cement?
Hydrated lime is a dry powder made from limestone that has been reacted with water. It behaves differently from lime putty and cement in terms of setting and workability. Always check the product label or datasheet to understand its properties and recommended uses.
How does hydrated lime affect workability in concrete mixes?
Hydrated lime can improve the cohesion and plasticity of fresh concrete, making it easier to work and finish in some mixes. It can also reduce sudden stiffening, but results depend on the mix design and local aggregates. Verify with the manufacturer’s instructions for your specific mix.
Does hydrated lime improve finish quality?
It can help with a smoother, more uniform surface in some cases, especially with traditional finishing techniques. Finish quality also depends on consolidation, tooling, and curing practices. If you’re unsure, test a small batch and follow producer guidance.
How should I mix hydrated lime with concrete?
Follow the manufacturer’s mixing guidance and your mix design. Do not improvise ratios without checking the label. If in doubt, consult the product instructions and local rules before proceeding.