

Introduction
Smaller aggregate size reduces voids and bugholes and makes finishing easier.
For DIY projects, pick an aggregate that fits the form and follow the bag label and manufacturer guidance. If in doubt, check local rules or guidance from the mix supplier before deciding.
Consolidation and slump are about how well the concrete fills tight spaces and stays uniform. Use appropriate methods and equipment to consolidate—when in doubt refer to the equipment manual and start with gentle vibration. Always verify the chosen aggregate size with the bag label or the supplier for your climate and form size.
Key takeaways
- Consolidation reduces air voids and bugholes; plan vibration timing and technique.
- Slump explains workability; adjust aggregate size with form geometry and finish demands.
- Methods of consolidation include manual poking and mechanical vibration, choose accordingly.
- Types of vibrating equipment: internal vibrators, external convectors, and ride-on units as applicable.
- Match vibrator specs to form size; placement spacing affects finish and voids.
- Safety warning: clamp or secure formwork before vibration; avoid fractured forms.
Table of Contents
- Introduction
- Key takeaways
- Why Aggregate Size and Consolidation Matter
- Material Specs and Standards Explained
- Mix Design and Workability for Small-Form Pours
- Selecting Vibration Methods for Small Forms
- Matching Vibrator Specs and Placement to Form Geometry and Aggregate
- Techniques to Reduce Bugholes and Surface Voids
- Planning, Testing, and Troubleshooting
- Safety, Costs, and Project Considerations
- Conclusion
- FAQ
Why Aggregate Size and Consolidation Matter
Aggregate size influences how the mix packs in small forms. You’ll see how packing density, air entrapment, and the likelihood of voids or bugholes relate to finish quality. The link to consolidation is real: larger aggregates can hinder reach into tight spaces without proper vibration.
Voids and bugholes weaken early strength and spoil the surface beneath formwork or overlays. They also complicate finishing in small pours. When selecting aggregate for DIY pours, think about form dimensions, reinforcement, and the desired surface quality; adjust size choices accordingly.
How voids and bugholes form
In small forms, aggregate size plays a big role in how air gets trapped. Here’s why:
Large particles leave bigger gaps between them. Air can get trapped in these interparticle voids. In tight forms, it’s hard for this air to escape.
When you vibrate the concrete, air bubbles can also get trapped. These are your bugholes. Larger aggregates make it harder for air to rise and escape during vibration.
Formwork itself can trap air too. If the form isn’t tight or has gaps, air can get sucked in as you pour. This forms more voids and bugholes.
Benefits of reducing aggregate size in small forms
Smaller aggregates pack tighter, letting you consolidate better. This means less air gets trapped, so fewer voids and bugholes.
With smaller aggregates, it’s easier to vibrate out air bubbles. You’ll have a smoother surface with fewer defects. This makes grinding and polishing easier too.
Fewer voids mean better early strength. Your concrete will set faster and be stronger sooner. This is especially important in small forms where you want quick turnaround times.
Reducing rework is another big benefit. With smaller aggregates, you’ll have fewer surface defects to fix later. That means less time and money spent on repairs.
Material Specs and Standards Explained
Before pouring, check the standards that apply to your project: general concrete specs and any local codes. Look for how aggregate size, composition, and test procedures interrelate with small-form pours. Align expectations with the project’s requirements and inspector expectations.
Understand the aggregate specifications: nominal maximum size, gradation, cleanliness, moisture handling, and how shape affects void reduction and finish. Review mix paperwork such as the JMF or batch tickets and ensure traceability from quarry to pour. Verify on-site tests like slump, air content, and yield against the project criteria.
Aggregate gradation and particle shape
The way aggregate particles fit together, called gradation, affects your concrete’s workability and finish. For small forms, you want a fine-to-medium gradation to minimize voids.
Think of it like packing marbles into a jar. Fine aggregate (sand) fills the gaps between larger particles, reducing void space. A well-graded mix packs better, needing less water for the same slump.
Particle shape matters too. Angular particles interlock and pack tighter than rounded ones. This reduces segregation and improves finish quality. But beware – very angular particles can make concrete harder to place in small forms due to increased friction.
Maximum aggregate size guideline for small forms
Rule of thumb: the largest aggregate should be no more than one-third the smallest dimension of your form. For example, if you’re pouring a 6″ thick slab, use #8 or smaller stone (nominal max size 0.75″).
ACI 301 and ASTM C33 provide guidelines for maximum aggregate size based on form dimensions. But remember, these are minimums – you can often go finer for small forms without sacrificing strength.
Test different sizes if you’re unsure. A range of #8 to #16 (0.75″ to 1.25″) is commonly used in small forms. Consult with your supplier and local standards for the best fit.
Mix Design and Workability for Small-Form Pours
Water content, paste volume, slump, and aggregate size together determine flow and workability in tight spaces. Practical flow targets depend on your form dimensions and finishing method. Consider how consolidation needs change with size and configuration.
Aggregate size directly affects voids and surface finish in confined forms; finer aggregates can reduce bugholes but may require more effort to consolidate. Explain the paste-to-aggregate ratio and how it affects finish quality, bleed, and early strength. Use a simple on-site framework to pick slump and size based on form details and finishing goals.
Using admixtures and plasticizers
In small forms, maintaining flowability without increasing water content is crucial. This is where admixtures like superplasticizers or viscosity modifiers come in handy.
Superplasticizers reduce the water demand of concrete, allowing for a lower water-cement ratio while still achieving desired workability. This helps minimize segregation and voids, especially in tight forms.
Viscosity modifiers, on the other hand, increase the viscosity of the cement paste without affecting its flowability. They help prevent bleeding and improve consolidation, reducing the risk of bugholes and honeycombing.
Remember: Always follow manufacturer guidelines for dosage rates to avoid overuse, which can lead to delayed setting times or reduced strength.
Adjusting paste-to-aggregate ratio
The paste-to-aggregate ratio significantly impacts the finish quality and durability of small-form pours. Increasing the fines or paste content can help fill small gaps, improving surface finish.
However, be mindful of the trade-offs. Higher paste content increases shrinkage potential, which may lead to cracking over time. It also adds cost, as fines are typically more expensive than coarse aggregates.
To strike a balance, consider trial mixes. Start with a standard paste-to-aggregate ratio (e.g., 0.45 for normal-weight concrete) and adjust incrementally based on visual checks of the fresh mix’s flowability and finish quality in small test forms.
Tip: Don’t be afraid to experiment, but keep records of your mix designs to avoid trial-and-error on larger pours.
Selecting Vibration Methods for Small Forms
The goal is to reduce voids and bugholes while avoiding surface blemishes in small, confined spaces. Internal and external vibration have different reach and effects in thin sections. Choose based on form access and consolidation needs.
Compare internal versus external vibrators in practical terms: how they work, where they fit in tight forms, and what they cannot do. Consider form size, access, embedment depth, and the risk of over-vibration. Use a simple plan to guide duration, staggering versus continuous vibration, and surface protection during the pour.
Internal vibrators: pros and limits
Internal vibrators are like little jackhammers, consolidating concrete from within. They work by shaking the aggregate, helping it settle into tight spaces.
Pros: Great for small forms with limited access. They can reach deep into narrow sections, reducing voids and bugholes.
Limits: Insertion access is crucial. You need room to stick the vibrator in. Head size matters too; it must fit through formwork openings.
External and localized vibration options
For thin or intricate forms, external vibrators are your friends. They sit on top of the form, transmitting vibrations downwards.
Form-mounted vibrators: Ideal for small, flat surfaces like topping slabs. They’re easy to set up and move around.
Handheld/tabletop vibration: Great for tiny forms or intricate details. These vibrators sit on the form, transmitting vibrations through direct contact.
Vacuum/deairing alternatives: For thin slabs, consider vacuum/pressure methods to remove air and ensure full compaction without over-vibrating.
Matching Vibrator Specs and Placement to Form Geometry and Aggregate
Match vibrator choice to form geometry such as wall thickness and vertical spacing to avoid over- or under-consolidation. Thicker or thinner sections change how long you apply vibration and where to place it. Field notes about the form help calibrate duration.
Specify frequency and amplitude in relation to aggregate size and slump, and choose the power source and head size accordingly. Electric, pneumatic, and hydraulic options each have trade-offs for small forms. Plan placement to reach void-prone zones and document results for future pours.
Placement, spacing, and timing for small forms
When working with small forms, precise vibrator placement is crucial to avoid segregation and maximize air escape. Here are some practical rules:
Insertion Spacing: For small forms (thickness under 6 inches), insert the vibrator every 12-18 inches vertically. This ensures even consolidation.
Vibration Duration: Vibrate each section for 10-15 seconds, then move on to avoid over-vibrating and causing segregation. Thicker sections may require longer duration.
Sequencing: Start vibrating at the bottom of the form and work your way up. This allows air to escape as you go, reducing voids.
Common equipment selection mistakes
Even with the right vibrator specs, poor equipment selection can lead to bugholes and segregation. Here are some common mistakes:
- Wrong Head Size: Using a head too large for your form can cause over-vibration, leading to bugholes. Too small, and you won’t reach all the concrete.
- Over-Vibrating: Vibrating for too long in one spot can cause segregation, with heavier aggregates settling at the bottom.
- Insufficient Radius Coverage: For curved or ribbed forms, ensure your vibrator head can reach all areas. A flexible head may be needed.
- Ignoring Form Geometry: Thicker sections need longer vibration time. Neglecting this can lead to under-consolidation and voids.
- Not Field-Testing: Always test your setup with a small batch before pouring the entire form. This helps catch any issues early.
Techniques to Reduce Bugholes and Surface Voids
Pre-pour planning includes selecting an appropriate aggregate size for your form, achieving the target slump, and using suitable admixtures to control air. Review the form geometry to anticipate hidden pockets. Plan for a uniform surface and consistent workflow.
During pouring, choose the right vibration and apply it correctly to deaerate without over-compacting. Use continuous lifts and protect the surface from wind and evaporation. Finish timing and techniques should close surface pores without tearing, with a plan for texture if needed.
Form preparation and release practices
Start with rigid, clean forms to minimize voids. Use tight-fitting plywood or steel forms, ensuring they’re square and true.
Release agents are crucial. Choose ones that won’t trap air or leave residue. Apply evenly, avoiding over-application which can cause bugholes.
Pre-wetting forms isn’t always necessary but can help if your mix is dry or you’re using a powder release agent. Tack coats aren’t recommended as they can trap air and lead to voids.
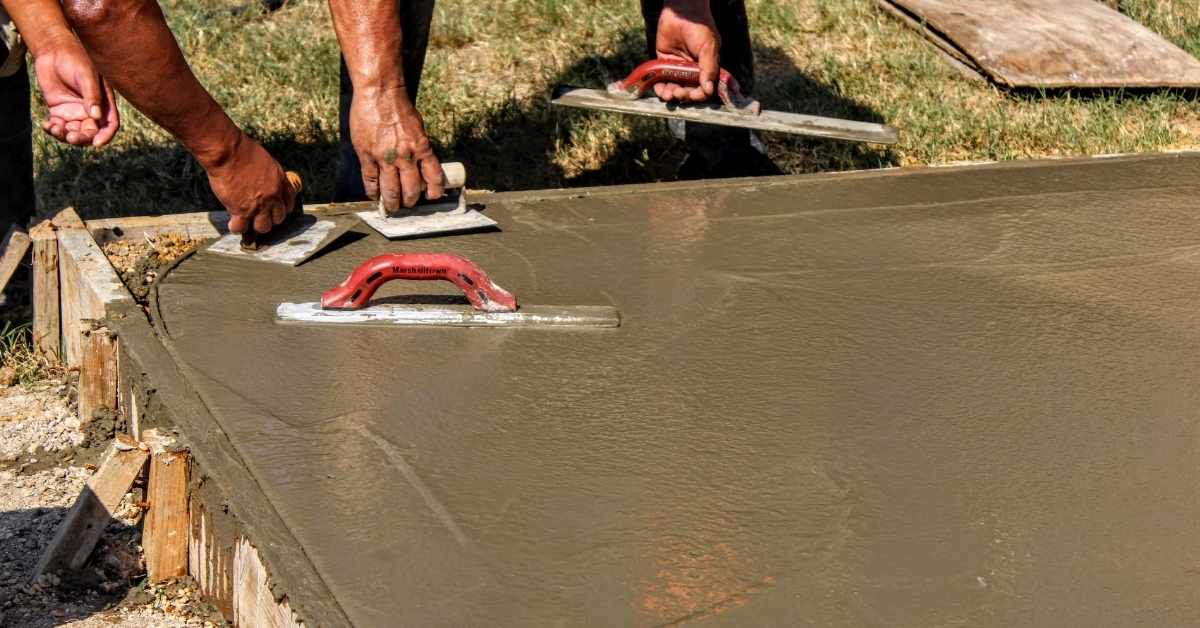
Surface finishing and remedial treatments
After demolding, brushing or rubbing the surface can help close minor voids. Use a stiff-bristled brush or rubber float to work the concrete’s surface.
Grout coats can fill small voids and improve appearance. Apply within 24 hours of pouring, using a consistency similar to pancake batter. Let it sit, then remove excess with a trowel.
Topical pore fillers are another option. They’re typically applied after the surface has cured, filling minor voids and enhancing appearance. Follow manufacturer’s instructions for best results.
Planning, Testing, and Troubleshooting
Set acceptance criteria for aggregate size, void content, and consolidation method before mockups. Include target slump, air content, and finish benchmarks to guide decisions. Use mockups to validate the approach.
Plan trial batches that replicate form geometry and consolidation technique. Create a testing matrix to compare different sizes or blends and moisture levels. Build a troubleshooting playbook that maps issues to causes and corrective actions for faster fixes on pour day.
Visual checkpoints and acceptance standards
Before each production pour, inspect test panels to ensure they meet your project’s specific quality standards.
- Bughole frequency: Count the number of bugholes per square foot. Too many may indicate improper aggregate size or consolidation.
- Honeycombing: Check for large, interconnected voids. These can cause structural issues and should not exceed your project’s acceptance level.
- Surface texture: Inspect the surface for dusting, laitance, or other defects. A smooth, even finish indicates proper consolidation and aggregate size.
- Form leakage: Check for leaks around forms. This can cause bugholes and should be addressed before production pours.
- Void density: Measure the density of voids in the concrete. High void content may indicate improper aggregate size or consolidation.
- Slump consistency: Ensure slump remains consistent throughout the pour. Changes can affect finishability and strength.
- Air void spacing: Check for proper air void spacing. Too many or too few can cause issues with durability and freeze-thaw resistance.
- Surface quality: Inspect the surface for any defects, such as cracks or delamination. These should be addressed before production pours.
Quick rule: Always document your project’s specific acceptance levels to ensure consistency and quality throughout the pour.
Troubleshooting common failures
During testing, you may encounter various issues. Here are some quick diagnostics and corrective steps:
Many small pinholes: This often indicates trapped air. Adjust your vibration method or consider using an air-entraining admixture to reduce this issue.
Large voids near embedments: Poor vibration or blockages by reinforcement can cause this. Ensure proper vibrator placement and use external vibrators if necessary. Also, check for any obstructions caused by the embedment itself.
Excessive laitance: This is often due to excessive water content in the mix. Reduce the water-cement ratio or consider using a plasticizer to improve workability without adding more water.
Surface dusting: This can be caused by improper finishing techniques or insufficient curing. Ensure proper finishing and curing procedures are followed.
Safety, Costs, and Project Considerations
Safety first for vibration work: wear PPE, establish safe zones, and secure forms. Know how to shut equipment off quickly and manage hazards from kickback or overheating. Keep emergency procedures clear on site.
Discuss cost and schedule tradeoffs: how aggregate size affects material costs, labor time, and form removal. Compare energy use and equipment rental against manual methods. Consider project-specific factors like form size, finish tolerances, and curing impacts when choosing consolidation methods.
Safety precautions and PPE
Working with vibrating equipment requires careful safety measures. Start by wearing the right personal protective equipment (PPE). This includes:
Hard hat to protect against falling debris, safety glasses or goggles for eye protection, and earplugs or earmuffs to reduce vibration exposure.
Follow local regulations and use safe handling procedures for electrical or air-powered equipment. Secure forms properly to prevent kickback or tipping. Always follow lockout procedures before starting any work.
Cost and schedule tradeoffs
Choosing the right aggregate size and vibration method can impact your project’s budget and timeline. Here are some factors to consider:
Renting or purchasing vibration gear: Renting may be cheaper upfront, but buying could save you money in the long run if you have multiple projects. Consider the total cost of ownership.
Material costs: Smaller aggregates or admixtures can increase material costs. However, they often reduce rework and voids, which can offset the higher initial expense.
Labor time and consolidation: Larger aggregates may require more labor time for consolidation and form removal. Smaller aggregates might need longer curing times but could save on labor due to easier finishing.
Conclusion
Choosing the right aggregate size for small forms is about durability, finish, and safety. Do it right, and you reduce voids, cut finishing time, and protect the structure from costly repairs down the line.
Verify mix specs and workability for your form, select a small-form vibration method that fits the geometry, run a test patch in a quiet corner, and adjust the slump, consolidation, and placement sequence before any full pour. Keep the steps simple: confirm aggregate size, confirm vibration method, confirm placement order, and confirm surface finish expectations, then proceed in a controlled, repeatable rhythm.
Common mistakes to avoid include overworking the surface, using the wrong vibration intensity for the form size, and rushing the pour without a plan for consolidation. safety first means PPE on, testing in a small area first, and never pushing concrete into tight voids with blunt force. Don’t skip planning or the post-pour inspection—the tiny defects show up later and cost more than time now.
If the form geometry is unusual, or you’re mixing new materials or large variations in aggregate, call in a pro or consult the mix supplier before proceeding. When in doubt, stop and verify. Stay deliberate, keep records of what you tested, and you’ll finish strong with a solid, clean result you can trust.
FAQ
Why consolidate concrete and how do I do it for small forms?
Consolidation pushes air out and helps the mix fill every corner. Use a vibrator or manual rod for tight forms, and work in small lifts to avoid undoing finished surfaces.
What is slump and why does it matter for small forms?
Slump is how flowy the concrete is. For small forms, you want a mix that flows enough to fill voids but doesn’t slosh out of the form; check the label or manufacturer guidance for the right range before you pour.
What are the best vibrating options for small forms and how do I pick?
Handheld vibrators and tamping tools are the common choices. Pick based on form size and geometry, then follow the manufacturer instructions for speed, duration, and safe operation. If in doubt, choose a unit that’s smaller than your form and learn on a test slab.
How do I choose aggregate size for small forms?
Smaller forms need finer aggregate to reduce voids and finish faster. Check the project guidelines and ask the supplier or read the mix label for recommended sizes for your form type. If you’re unsure, use the smallest practical size that meets your form and strength needs and test a sample.