
Introduction
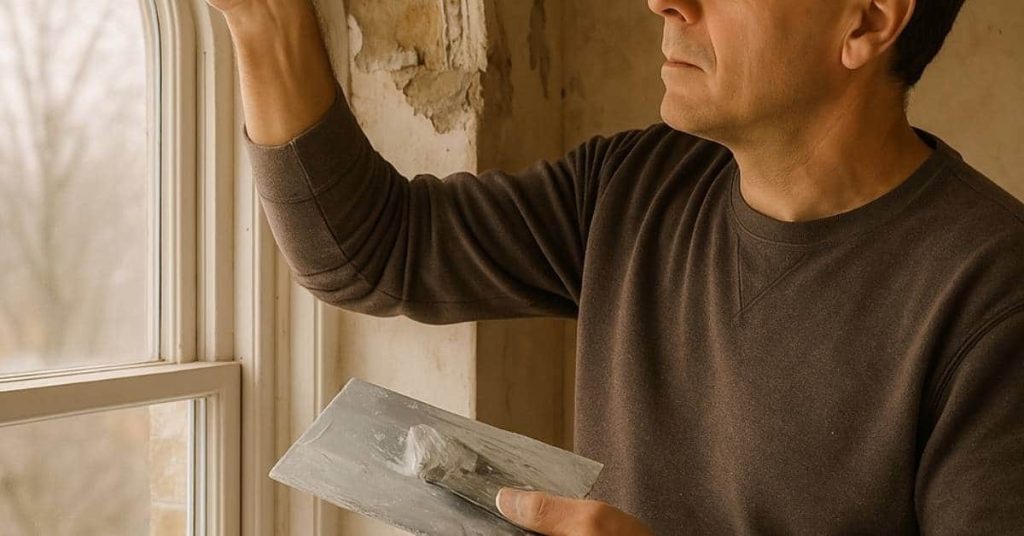
Repairing plaster around window casings means removing loose material, backing up the returns, and filling and finishing so the casing meets the wall with straight returns and crisp corners. This is a hands‑on job that starts with good surface prep and the right tools—check product labels for compatibility and drying times before you buy. Keep your tape, knives, and sanding light and work in short sections so edges stay sharp.
Start by knocking out soft plaster, clean the gap, and pack backing where needed before applying patching compound; follow manufacturer instructions for curing. Use a thin skim, feather the edges, and protect the casing with tape when painting to keep lines clean, and avoid overworking wet plaster or heavy sanding that will round the corners. If anything seems unsure—adhesion, compound choice, or local finish standards—check the product instructions or ask a pro.
Key takeaways
- Inspect window casing for cracks; prioritize loose plaster and returns alignment before patching.
- Use sharp-edged putty knife and painter’s tape to define crisp edges.
- Clean dust, remove flaking plaster, and dampen surfaces to improve adhesion.
- Apply plaster skim or patch material in thin layers, matching casing returns.
- Tape technique: press tape along edges, smooth with knife; avoid gaps.
- Wear eye protection and dust mask; keep workspace ventilated during repairs.
Table of Contents
- Introduction
- Key takeaways
- Assessment and Project Planning
- Safety, Hazardous-Materials, and Workspace Setup
- Tools and Materials Checklist for Plaster-to-Window Repairs
- Surface Preparation Before Taping and Plastering
- Techniques to Rebuild Straight Returns and Crisp Corners
- Choosing and Applying Painter’s Tape for Plaster Repairs
- Painting, Timing, and Removing Tape for Sharp Lines
- Troubleshooting, Common Mistakes, and Maintenance Tips
- Conclusion
- FAQ
Assessment and Project Planning
Walk each window opening and inspect the plaster and casing methodically: check the straightness of returns, the crispness of inside and outside corners, any cracks, delamination, moisture staining, and evidence of prior patches to establish the likely repair footprint for that opening.
Document findings with photos, quick measurements, and simple sketches that note reveal dimensions, casing profile, plaster thickness, and exact trouble spots on a room map; use that record to decide whether a local patch or a full surround replacement is needed and to sequence work across multiple windows.
Inspecting existing plaster and casing
Start by examining the plaster around each window casing. Look for signs of damage such as:
Delamination: Peeling or flaking plaster, often with visible cracks at the edges.
Loose plaster: Sections that move or give when gently pressed. This could indicate rot behind the plaster.
Moisture stains: Discoloration or dark spots on the plaster, which may suggest water intrusion and potential mold growth.
Repair vs replacement: decision checklist
Before deciding whether to perform spot repairs or full surround replacement, consult this checklist:
- Localized damage size: Small cracks or chips can usually be patched. Larger areas may require replacement.
- Overall plaster integrity: Check for widespread cracking or crumbling. If found, consider replacing the entire section.
- Moisture history: Repeated water issues suggest a larger problem that might not be fixed by spot repairs alone.
- Complexity of returns: Intricate patterns or severely damaged corners may warrant full replacement for consistency.
- Plaster thickness variation: Significant differences in thickness can make patching difficult and may indicate a need for replacement.
- Previous repairs: Multiple patches might be a sign that replacement is more appropriate.
- Rot or mold: If present, affected areas should be replaced to prevent further damage and health risks.
- Casing condition: Damaged casings may require replacement along with the plaster.
Quick rule: If in doubt, lean towards replacement. It’s often more cost-effective and ensures a consistent finish.
Planning multi-window projects
When dealing with multiple windows, efficient planning is key to minimize disruption and maintain consistency:
Estimate workload: Group repairs based on shared wall planes or elevations. This helps manage access and material deliveries.
Stage repairs for drying/curing: Plan your repair sequence so that plaster has adequate time to dry and cure between coats or stages of work. This prevents moisture buildup and ensures a strong bond.
Coordinate material purchases: Order materials in bulk, if possible, to ensure consistency across windows. Keep track of what you have on hand to avoid running out mid-project.
Safety, Hazardous-Materials, and Workspace Setup
For older homes, treat suspect finishes cautiously: determine whether testing for lead or asbestos is needed or whether to assume presence and follow containment and disposal rules; check the product label or a testing lab for next steps and local building department guidance for permits.
Set up a contained, well-ventilated work zone with plastic barriers, drop cloths, and a controlled exhaust path or negative-air arrangement, don appropriate PPE (respiratory protection, eye and skin protection, gloves), and plan safe labeling and disposal that meets local regulations while scheduling tasks to limit dust and exposure.
Lead/Asbestos Considerations
Before you start any work on older homes, it’s crucial to consider the presence of hazardous materials like lead paint and asbestos. These materials were commonly used in construction before they were banned or heavily regulated.
Lead Paint: If your home was built before 1978, assume there is lead paint present until tested otherwise. Have a certified professional perform a lead test. If positive, consult with an abatement specialist before proceeding with any work.
Asbestos: Asbestos was used in plaster finishes and other building materials up until the 1970s. If your home has old plaster, consider it may contain asbestos. Again, have a professional test for asbestos. If present, encapsulation or abatement by certified professionals is necessary before any work can commence.
Personal Protective Equipment and Ventilation
Protecting yourself from dust and potential hazards is paramount. Here’s what you’ll need:
- Respirator: A half-face respirator with P100 filters is recommended for plaster work. Ensure it fits properly by performing a fit test.
- Gloves: Wear heavy-duty, non-latex gloves to protect your hands from dust and any hazardous materials.
- Eye Protection: Safety glasses or goggles are essential to shield your eyes from dust and debris.
- Ventilation: Use a HEPA vacuum for cleanup. For larger jobs, consider renting a negative-pressure fan to control dust.
- Clothing: Wear long sleeves, pants, and a hat to minimize skin exposure. Consider disposable coveralls for added protection.
Containing Dust and Protecting Finishes
Keeping dust contained and protecting your home’s finishes is key to a successful project. Here are some tips:
Masking: Use painter’s tape and drop cloths to protect floors, furniture, and other surfaces from dust and debris.
Plastic Sheeting: For larger projects or when working in multiple rooms, use plastic sheeting to create a barrier. Seal the edges with tape to contain dust.
Negative-Pressure Fans: If you’re using power tools that generate a lot of dust, consider renting a negative-pressure fan. These fans create a contained workspace and help control dust levels.
Tools and Materials Checklist for Plaster-to-Window Repairs
Gather corner-specific tools—corner trowels, angle and rounded corner tools, finishing trowel, wide putty knife, hawk, mixing bucket and paddle, rasp or sanding block, damp sponge, utility knife, and a spray bottle—for working tight returns and forming crisp inside/outside corners.
Include consumables like pre-mixed patch or setting plaster, bonding agent, fiberglass mesh or paper tape, patching plaster for larger gaps, paintable caulk, painter’s tape, and surface-protection materials; choose rental or beginner-grade tools for occasional DIY work and pro-grade trowels and bulk mixes if you expect to do several openings.
Essential hand and finishing tools
Before you start, ensure you have the right tools to create smooth, crisp plaster returns around your windows.
- Finishing trowel: 6-12 inches for spreading and smoothing plaster. Skips: Poorly finished repairs.
- Plaster corner trowel (magnetic or regular): 4-6 inches for corners. Skips: Uneven, jagged returns.
- Angles/rounded corner tool: For creating crisp inside and outside corners. Skips: Irregular, rounded-off corners.
- Wide putty knife: 2-4 inches for filling small gaps. Skips: Incomplete fills leading to cracks.
- Hawk: Holds plaster while you work. Skips: Messy, inefficient application.
- Mixing bucket and paddle: For mixing plaster. Skips: Lumpy, inconsistent patches.
- Adjustable rasp or sanding block: For light sanding before finishing. Skips: Rough surfaces that show through paint.
- Damp sponge: For cleaning dust and smoothing edges. Skips: Dusty, uneven finishes.
- Utility knife: For removing damaged plaster. Skips: Incomplete removal leading to poor adhesion.
Quick rule: Invest in quality tools for professional-looking results.
Fasteners, beads, and reinforcement
Protect your repairs and maintain crisp edges with these essential fasteners and reinforcements.
- Metal corner bead: For protecting outside corners. Skips: Damaged corners from cleaning or moving furniture.
- Paper tape (drywall tape): For reinforcing inside corners. Skips: Cracking, crumbling inside corners.
- Corner clips: For holding paper tape in place. Skips: Sagging, uneven tape leading to poor adhesion.
- Fiberglass mesh tape: For reinforcing large gaps or cracks. Skips: Inadequate reinforcement causing further damage.
- Paintable caulk or siliconized acrylic caulk: For sealing edges and creating clean lines. Skips: Gaps, uneven edges leading to water intrusion or dust collection.
Quick rule: Use the right fasteners for the job to ensure lasting repairs.
Plaster compounds, bonding agents, and primers
Choose compatible plaster patch products and bonding agents to ensure strong adhesion and a smooth finish.
- Pre-mixed patch compound or plaster patch: For small repairs. Skips: Inconsistent texture leading to visible patches.
- Setting-type plaster or bonding agent: For adhering new plaster to existing surfaces. Skips: Poor adhesion causing peeling or cracking.
- Patching plaster (for larger gaps): For filling deep voids. Skips: Inadequate fill leading to cracks or uneven surfaces.
- Primer: For preparing surfaces and promoting paint adhesion. Skips: Poor paint adhesion, flaking, or peeling.
Quick rule: Match your plaster compounds to the existing surface for seamless repairs.
Surface Preparation Before Taping and Plastering
Prepare surfaces to prevent tape failure and delamination by removing loose plaster, dust, flaking paint, and oils, wiping with a damp cloth, and allowing the substrate to dry before proceeding so tape and new plaster will adhere to a clean, stable surface.
Lightly key smooth or glossy areas with appropriate grit to create a mechanical bond, vacuum the dust, control ambient and surface moisture (repair leaks and use dehumidification if needed), and apply a compatible primer or bonding agent on very porous surfaces before taping and plastering.
Cleaning, removing loose plaster, and profiling
Start by wearing gloves to protect your hands. Use a stiff-bristled brush or scraper to remove any loose plaster, flaking paint, or dust from the surface around the window casings.
Wipe the area with a damp cloth to remove oils and fingerprints. Let it dry completely before moving on. If there are any surface irregularities, use joint compound to fill them in and create a smooth profile for your patching work.
Safety note: Be careful not to gouge the surface or damage the underlying structure while removing loose material.
Addressing moisture and rot around casings
Check for any signs of moisture around the window casings. Look for water stains, warped wood, or musty smells, which could indicate a leak or condensation issue.
If you find rotten trim, replace it immediately to prevent further damage. Ensure that the substrate is dry before proceeding with your patching work. If necessary, use a dehumidifier to reduce moisture levels in the area.
Tip: Use a moisture meter to confirm that the surface is dry enough for plastering (ideally below 16% moisture).
Priming and bonding preparations
Before applying new plaster or tape, ensure the surface is primed or bonded properly to improve adhesion. Porous surfaces may require a compatible primer to seal dust and enhance adhesion.
For very dry surfaces, use a sealer to balance absorption before applying tape. This helps prevent tape from lifting due to uneven suction.
Important: Always follow the manufacturer’s instructions when using primers or bonding agents to ensure the best results.

Techniques to Rebuild Straight Returns and Crisp Corners
Start by defining the target profile and corner geometry that matches surrounding plaster thickness and casing returns, then remove loose material, dampen the substrate as appropriate, and apply a bonding plaster or agent to ensure the new layers adhere properly.
Use a multi-pass approach—scratch, base, final skim—employ corner beads or ribs where needed, build corners with corner tools or guides to hold a true line, feather out successive thin layers, check alignment with a straightedge during each pass, and finish to blend texture before final priming and painting.
Rebuilding returns: bench method and molding fit
To rebuild straight window returns, first set a clean backer or strip along the casing. This establishes your depth.
Start by applying a thin layer of plaster or patching compound onto the backer using a trowel. Work from top to bottom, ensuring an even spread.
Tip: Use a straightedge to check for level and adjust as needed.
Once set, apply subsequent layers, building up to match the thickness of the surrounding wall. Keep each layer thin and allow it to set before applying the next.
Creating crisp inside and outside corners
For sharp internal corners, use a corner trowel. Apply plaster along one side of the corner, then press the trowel into the corner, pulling it towards you to create a clean edge.
For external corners, apply plaster to both sides of the corner, then use your trowel to push the plaster into the corner and smooth it out. Work quickly before the plaster sets.
Tip: Use corner beads for added support and crisp edges on outside corners.
Allow each layer to set before applying the next. Check with a straightedge to ensure your corners remain sharp.
Feathering, sanding, and blending to match adjacent surfaces
To blend new work into original surfaces, feather the edges of your final skim coat. This involves thinning the plaster as you approach the existing wall.
Once set, lightly sand the area using a fine-grit sandpaper. Work in small circular motions, following the direction of the texture if applicable.
Tip: Use a damp cloth to wipe away dust and check your progress.
Apply a thin layer of matching texture or paint to the feathered edge, blending it into the surrounding surface. Allow it to dry completely before applying any final coats.
Choosing and Applying Painter’s Tape for Plaster Repairs
Select tape based on the condition of the plaster and trim—choose lower-adhesion tape for delicate or flaky surfaces and a stronger option where adhesion is needed, and always verify residue risk on a hidden spot before committing to the whole opening.
Prepare the edge by cleaning and deglossing, press tape firmly along casings with a consistent hand, handle corners by pre-bending or folding the tape for a tight seal, and use thin primer or taped edge techniques to reduce bleed while planning the removal timing to avoid lifting fresh plaster or paint.
Types of tape and which to use on plaster
When it comes to painter’s tape, not all are created equal. For plaster repairs around window casings, you’ll want a low- to medium-adhesion tape.
Crepe paper tapes, like green or blue painter’s tape, offer good adhesion but may leave more residue behind. They’re great for flat surfaces and long runs.
Low-residue film tapes are designed to leave less mess. They’re ideal for delicate plasterwork and trim, where you don’t want to risk damaging the surface during removal.
Preparing the surface for reliable tape adhesion
Before applying tape, ensure your plaster and trim surfaces are clean and dry. This is crucial for a strong bond.
Start by cleaning the area with a damp cloth to remove dust, oils, or any loose plaster. Let it dry completely. Then, use a deglosser or sandpaper to lightly abrade the surface, helping the tape adhere better.
Press down firmly along the edge of the tape using your fingers or a putty knife. This ensures a good seal against textured or uneven surfaces.
Lining and pressing tape for long runs and awkward angles
For straight, clean lines, use a lightweight guideline to mark the edge where you’ll apply your tape. This helps keep your line true.
When applying tape along returns or at awkward angles, pre-bend it slightly to help it conform to the shape. Use a putty knife or roller to press down firmly on the edges, ensuring they’re well-sealed and won’t lift.
Avoid bulky folds at corners. Instead, use corner clips or carefully hand-fold the tape for crisp lines.
Painting, Timing, and Removing Tape for Sharp Lines
Plan paint application around plaster cure: prime porous fresh plaster before topcoats when needed, choose the painting sequence that suits the project (cut-in edges first versus walls first), and allow the substrate to reach the recommended condition for paint adhesion per product instructions.
Use appropriate tape, press edges firmly, cut in with a steady hand, and remove tape at the advised moment—often just before full cure or while the paint is slightly tacky—peeling back at a low angle to protect crisp lines without pulling paint or fresh plaster.
How paint and plaster drying affect removal timing
The key to sharp lines is removing the tape at just the right moment. Both plaster and paint need time to cure, but they don’t take the same amount.
Plaster takes longer – usually 24-72 hours before it’s fully cured. Paint, on the other hand, dries much faster – typically within a few hours for touch-dry and 24 hours for full cure.
Here’s what you do: Let your plaster cure for at least 24 hours. Then, apply your paint. Once the final coat is just touch-dry (not completely dry), that’s when you want to remove the tape. This way, you’re not disturbing the paint or pulling it off with the tape.
Proper tape removal technique
Removing tape correctly is crucial for keeping your lines crisp. You want to peel slowly and at a low angle, like you’re opening a present.
Here’s how: Wait until the surface is slightly tacky but not completely dry. Then, start from one corner and pull the tape off at a 45-degree angle. Go slow – too fast can cause tearing or lifting.
If you’re using painter’s tape, it might help to warm the tape first with a hair dryer on low heat. This makes the adhesive more pliable and easier to remove.
Fixes for common tape-removal problems
Even with the best technique, sometimes things go wrong. Here are quick fixes for common issues:
Nibbling: If you see small bits of paint or plaster coming off with the tape, it’s too early to remove it. Let everything cure a bit longer and try again.
Feathered edges: If your lines are wavy or uneven, you might have over-wetted the paint or didn’t let it dry enough before taping. To fix, lightly sand the area with fine-grit sandpaper, then touch up with a small brush.
Small chips: For tiny chips, use a spot primer to seal the area, then touch up with your paint. If it’s larger, you might need to retape and repaint that section.
Troubleshooting, Common Mistakes, and Maintenance Tips
Recognize common failure patterns—paint bleed, wavy returns, chipped corners, or ghosting—and link them to likely causes such as poor masking, insufficient prep, improper skim technique, lingering moisture, or wrong product choice so you can target the corrective action.
Prevent recurrence by firm masking, correct surface prep, thin multi-pass skims, proper curing before painting, and a simple maintenance routine of touch-ups, re-caulking, and light sanding as needed; when in doubt about a product or tolerance, check the manufacturer instructions or local guidance before proceeding.
Common mistakes and how to avoid them
Here are some pitfalls you’ll want to steer clear of when working on your plaster window casings.
- Wrong tape: Using the wrong type of painter’s tape can lead to poor adhesion or peeling. Always use a high-quality, low-tack tape designed for plaster.
- Inadequate surface prep: Skipping proper cleaning and drying before applying tape results in weak adhesion. Ensure surfaces are clean, dry, and dust-free.
- Overworking edges: Over-sanding or over-applying plaster can cause edges to crumble or become wavy. Keep sanding light and apply plaster thinly.
- Improper drying time: Rushing the drying process can lead to cracks or warping. Allow each layer ample time to cure before proceeding.
By avoiding these common mistakes, you’ll keep your repairs looking sharp and professional.
Repairing small failures after finishing
Even with careful work, minor issues can crop up. Here’s how to tackle them:
Hairline cracks: Lightly sand the area, apply a thin layer of spackling compound, let it dry, then sand smooth and paint.
Paint touch-ups: Use a small artist’s brush or toothpick to apply touch-up paint directly to the affected area. Allow it to dry completely before inspecting and touching up again if needed.
Loose tape edges: Carefully re-press the loose edge with your finger, using a light dab of spackling compound if necessary. Allow it to dry, then lightly sand and paint.
Long-term maintenance and seasonal checks
Regular upkeep will keep your plaster window casings looking their best for years to come. Here’s what to do:
Periodic inspections: Once or twice a year, check your casings for any signs of cracking, peeling paint, or moisture damage. Address any issues promptly.
Re-caulking or re-filling gaps: Inspect caulk lines annually. If they’re cracked or missing, remove the old caulk, clean the area, and apply new caulk.
Light sanding: Gently sand any rough edges to keep them smooth and paint-ready.
Repaint cadence: Every 3-5 years, depending on your climate and sun exposure, give your casings a fresh coat of paint. This helps prevent edge deterioration and bleed-through.
Conclusion
Keeping the returns straight and the corners crisp around a window casing is about careful planning, solid prep, and disciplined timing. Do the work safely and you’ll get durable results that look built-in, not patched.
First, verify you have safety gear and a clear plan, inspect the returns and window frame, gather your tools and materials, mask and protect nearby surfaces, clean and lightly dampen the area, apply painter’s tape as guides, mix and apply plaster in thin coats, let each coat set before the next, remove tape while the surface is still workable, touch up any small flaws, and finish with the paint step per the plan. If you do a dry run on a hidden area, you’ll see where issues might appear before you commit to the main surfaces.
Common mistakes to avoid include skipping surface preparation, overlapping tape or applying it too loosely, applying plaster too thick or too thin, and rushing the set time or removal. Stay safe by wearing eye protection and a dust mask when sanding, ventilate the room, and never mix unknown substances or ignore manufacturer timings. Always test in a small area first and work with even pressure to prevent wavy lines and chipping.
If you uncover lead paint, extensive structural damage, or hazardous materials, or if corners are badly damaged beyond basic repair, call a professional. When in doubt, defer to experience and avoid risking costly mistakes. Stay steady, plan well, and you’ll finish with returns that stay straight and lines that stay sharp. You’ve got this.
FAQ
What tools and materials are best for painting or plaster repairs around window casings?
Use a stiff putty knife, a finishing knife, and quality painter’s tape suited for delicate edges. Have patch compound or plaster ready, plus skim-coat or lightweight filler if needed. Always read the label for use instructions and drying times.
How should I prep the surface before starting repairs near a window?
Suck up dust, loose material, and old paint around the casing. Dampen the area lightly if the plaster is dusty, then prime patches if recommended by the product you’re using. Check that the edge is stable and the casing sits square before applying any patch material.
How can I get clean lines and sharp corners around the window casing when plastering or painting?
Mask the edges with painter’s tape that backs off cleanly. Apply patch material flush to the edge, then feather the joint slightly away from the casing. Once dry, lightly sand the transition and remove the tape carefully for a crisp edge.
When should I remove painter’s tape for the sharpest edge, and what mistakes should I avoid?
Remove tape while the finish is still just shy of fully cured for best edge transfer. Avoid pulling tape at a sharp angle or after the material has fully set to prevent peeling or tearing. If you see bleed-through, re-tape and patch rather than forcing a hard edge.