
Introduction
Creating clean inside corners in plaster means achieving sharp, smooth 90-degree joints on interior walls. Use either corner tools or careful hand technique to control the mud. Check that the edge stays true and adjust as you go.
Corner tools can speed up a straight edge, but technique matters for a crisper look. With hand work you control feathering and corner shape in small, deliberate steps. If unsure, check the product label, manufacturer guidance, and any local rules before you start.
Key takeaways
- Plan corner geometry and substrate condition before applying plaster for clean corners.
- Use corner tools to chase a straight, sharp inside edge consistently.
- Maintain moist plaster and avoid overloading the edge to prevent drips.
- Hand technique requires steady hand, small strokes, and frequent checks for gaps.
- Safety: wear eye protection and keep plaster away from skin to prevent irritation.
- Compare: corner tools speed efficiency but may need touch-ups with hand work.
- Inspect corners visually from multiple angles to detect flat spots early.
Table of Contents
- Introduction
- Key takeaways
- Why Inside Corners Matter in Plaster Work
- Tools and Materials Checklist
- Preparing the Corner and Substrate
- Using Corner Tools: Step-by-Step Technique
- Hand Technique for Inside Corners: Step-by-Step
- Comparison: Corner Tools Vs Hand Technique
- Common Mistakes and How to Avoid Them
- Visual Checkpoints and Quality Control
- Conclusion
- FAQ
Why Inside Corners Matter in Plaster Work
Inside corners set the tone for the whole wall. Crisp edges reduce shadow lines and help finishes lay down true. A poor corner can crack, misalign, or telegraph through paint.
Attention to corner integrity affects durability and looks. When corners aren’t square or well supported, you’ll see misalignment and gaps that slow work and require rework later. Fixing corners early keeps the finish cleaner and longer lasting.
Visual and functional impacts
Clean inside corners create a crisp, professional look that can make a room feel more finished. They reflect light evenly, reducing the appearance of shadows or inconsistencies.
Functionally, clean corners protect your walls. Dirt and damage tend to collect in rough or misaligned corners. A smooth corner is easier to clean and less likely to show wear and tear.
Poorly done corners can catch dirt, making them harder to keep clean. They also provide weak points where damage can start – a small crack here can lead to bigger problems later on.
Common causes of poor corners
The most common culprit is using the wrong tool for the job. A trowel designed for outside corners won’t give you a clean inside corner.
Inconsistent pressure while applying the plaster can also lead to poor results. Too much or too little pressure can cause ridges, hollows, or misaligned corners.
Working with wet plaster is another common mistake. Plaster that’s too wet won’t hold its shape and will slump, leading to poor corners. On the other hand, if it’s too dry, it won’t stick properly and can crumble.
Irregularities in the substrate – the surface you’re applying the plaster to – can also cause problems. Any bumps, dips, or misalignments will show up in your corner. Make sure your surfaces are smooth and even before you start.
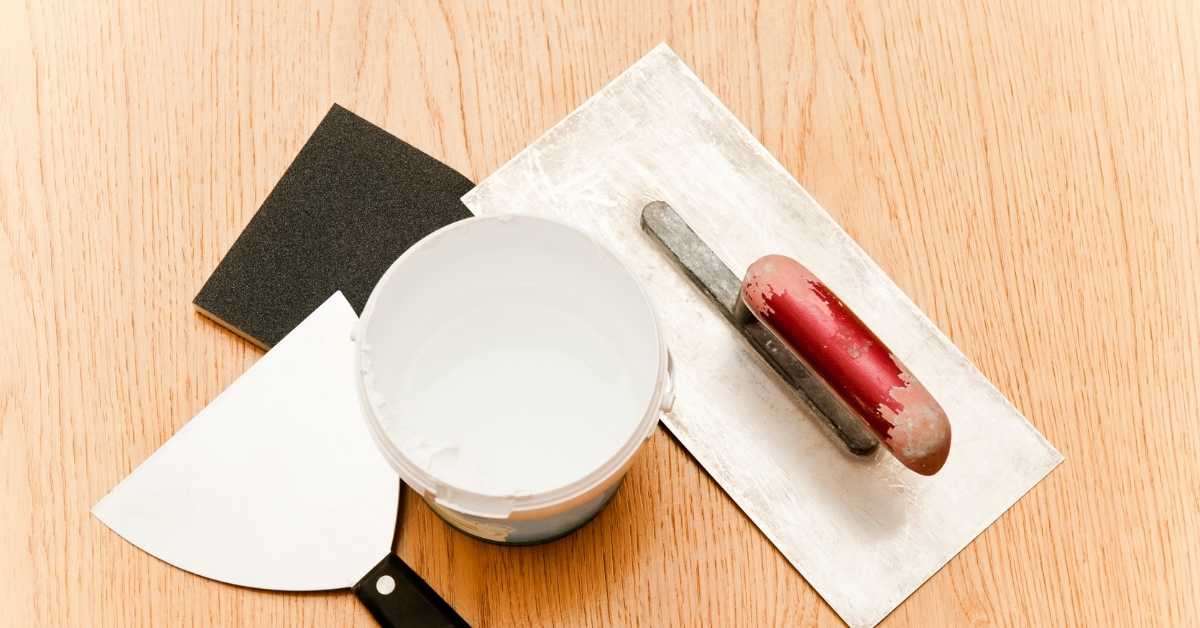
Tools and Materials Checklist
Assemble the key corner tools, including a professional corner trowel or corner float, and a flexible blade for hand work. Have a straightedge handy to verify alignment and a level for overall squareness. Keep a hawk, margin trowel, and mixing tools ready for prep work.
For materials, gather plaster or joint compound, bonding agent or scratch coat, and corner beads if used. Budget options exist with basic tools and simpler products, while pros may choose premium compounds and alloy tools. Always check product labels or instructions for compatibility with your substrate.
Recommended corner tools and why to choose them
Before you start mixing concrete, make sure you have the right tools for corners. This checklist helps ensure you’ve got what you need to create strong, durable corners that won’t crack or crumble.
- Corner Trowel (1/4″ – 3/8″): Check it’s the right size for your job. Confirm by measuring its width and comparing with your corner dimensions.
- Corner Bead: Ensure it matches your wall thickness. Check the label or manufacturer instructions to confirm.
- Inside Corner Tool (90°): Verify it’s a 90-degree angle for right-angle corners. Test it on scrap material before using.
- Jointing Knife (1/4″ – 3/8″): Make sure it matches your corner trowel size. Check by comparing the blade width with your trowel.
- Tape Measure: Confirm it’s at least as long as your longest corner. Measure to be sure.
- Level: Ensure it’s suitable for your wall height. Check its length against your wall.
- Straight Edge (2′ – 4′): Make sure it’s long enough for your corner. Measure and confirm.
- Gloves & Safety Glasses: Verify they’re in good condition. Inspect for tears or cracks before using.
Quick rule: Always check your tools against the job at hand to ensure they’re suitable. The right tool makes all the difference in a strong, durable corner.
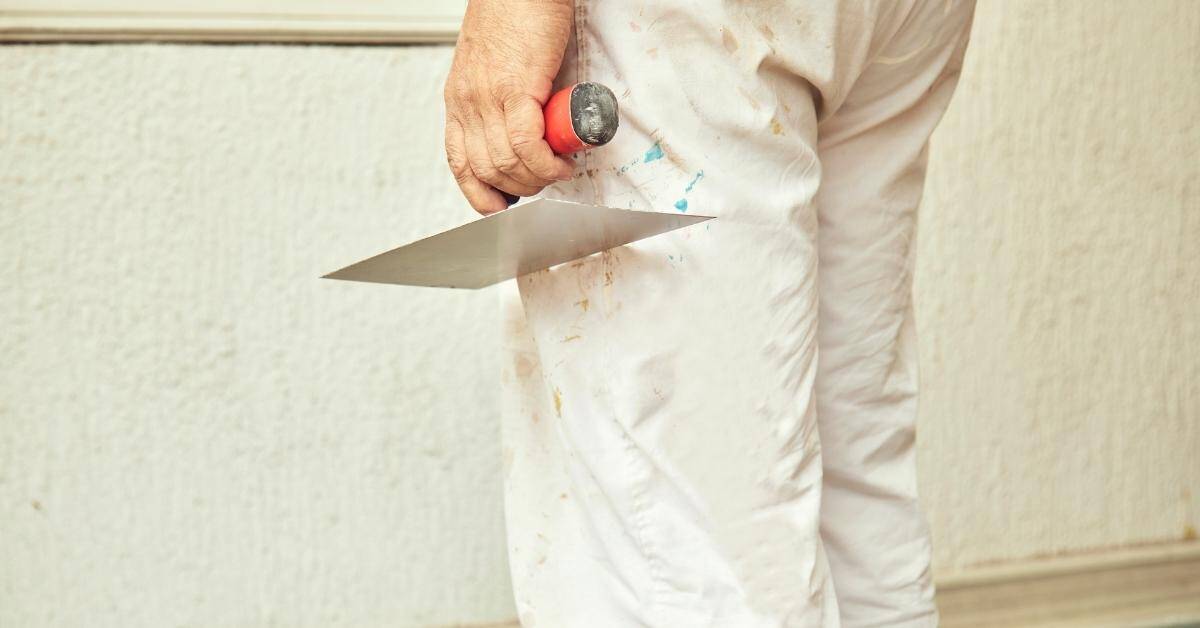
Hand tools and consumables
Before starting your concrete work, ensure you have the right hand tools and consumables. Use this checklist to verify each item on site.
- Hawk (float): Check size (12″ – 48″, typically). Ensure it’s in good condition with no warping or cracks.
- Trowel: Verify sizes (6″ – 30″, usually). You’ll need a mix of sizes for finishing. Check edges for sharpness and straightness.
- Joint knives: Ensure you have sizes suitable for your slab thickness (1/4″ – 2″). Check blades for cleanliness and sharpness.
- Sponges: Grab a pack of various sizes (6″ x 9″ to 18″ x 24″) for edging and cleaning. Check they’re in good condition with no holes or tears.
- Mixing tools: Verify you have shovels, rakes, and a mixing hoe. Check handles for strength and tool heads for cleanliness.
- Plaster types: Choose between traditional cement-based plaster or modern polymer-modified versions. Check product labels for suitable applications and environments.
- Setting times: Check manufacturer’s instructions for the chosen plaster type. Plan your work schedule accordingly to avoid premature setting.
- Safety gear: Don’t forget safety glasses, gloves, and protective clothing. Check all gear is in good condition before starting work.
Quick rule: Always check your tools and consumables before starting work to avoid expensive rework due to damaged or unsuitable items.
Preparing the Corner and Substrate
Start with a clean, dust-free corner. Inspect for squareness and repair any damage before applying mud. Dry fit beads or corners to confirm fit and alignment.
Apply bonding agent or scratch coat as recommended. Measure and verify level and plumb relationships to prevent rework. Prep time spent here saves headaches in finish work later.
Checking and correcting substrate irregularities
Before you start, inspect your corner for any high or low spots. These can cause issues with your final finish.
To find them, use a straight edge like a level or a long ruler. Hold it against the wall at the corner and look for gaps. If there’s a gap, that’s a low spot. If the straight edge doesn’t sit flat, that’s a high spot.
For small low spots, you can fill them with joint compound, feathering out to blend with the surrounding surface. For high spots, use a sander or a scraper to level it down. If it’s really bad, you might need to apply a scratch coat.
Pro tip: Use shims under your straight edge to check for low spots. If the shim fits without any gaps, you’re good to go.
When to use corner beads or reinforcement
Corner beads and reinforcement aren’t always necessary, but they can help create clean corners and prevent cracking. Here’s when to use them:
Use metal corner beads when you’re taping and joint compounding your corners. They provide a rigid edge for your tape to stick to, helping prevent bubbling or peeling.
Use plastic corner beads when you want a rounded corner. They come in different radii sizes to give you the look you want.
For corners that see a lot of wear and tear, like in high-traffic areas or where furniture might bump against the wall, use corner reinforcement mesh. It adds extra strength to your corner.
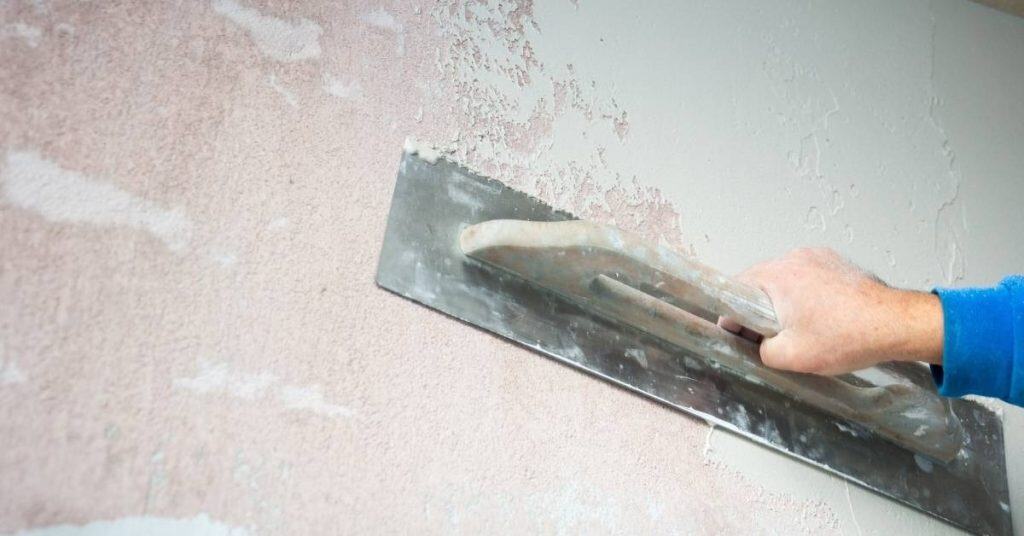
Using Corner Tools: Step-by-Step Technique
Load the tool with a uniform amount of mud and keep it consistent as you work. Maintain a steady angle to the corner and apply even pressure along the edge. Smooth passes should feather the joint without digging into the substrate.
Move in deliberate, overlapping strokes and check alignment as you go. Allow appropriate set time per stage and resist rushing the float and finish. If in doubt, consult the tool manufacturer instructions or local rules for curing times.
Step-by-Step Process
The following steps guide you through using corner tools to create clean inside corners in plaster.
- Safety first: Put on gloves and safety glasses. Check your tool’s condition before starting.
- Load the tool: Apply joint compound onto the trowel or hawk, ensuring it’s not too much or too little.
- Main stroke: Hold the tool at a 45-degree angle to the wall. Apply even pressure and move in consistent, smooth strokes from top to bottom.
- Smoothing pass: After the main stroke, use a lighter touch with less compound. Smooth out any ridges or hollows.
- Float and finish stages: Timing is key here. Float after 15-20 minutes for a smooth surface. Finish with a final light pass after another 15-20 minutes.
- Cleanup: Wipe the tool clean, remove any excess compound from the corner, and dispose of waste properly.
Positioning and movement tips
Proper hand positioning is crucial for a smooth finish. Hold the tool with your dominant hand at the top, fingers spread for control.
Keep your strokes consistent – always move from top to bottom. This ensures even coverage and prevents ridges.
Never overwork the plaster. Too many passes can cause it to dry unevenly or create hollows.
Troubleshooting tool-based corners
Even with the right tools, issues can arise. Here’s how to troubleshoot common problems.
- Tool marks: Lightly sand with a fine-grit sanding sponge. Wipe off dust and reapply compound if necessary.
- Hollows: Reapply compound, using less this time. Feather the edges to blend it in.
- Feathered edges: Use a wider tool or apply more compound at the edge during your main stroke.
- Dry spots: Moisten the area with a damp sponge before reapplying compound.
- Uneven drying: Ensure proper ventilation and avoid applying too much compound in one pass.
Hand Technique for Inside Corners: Step-by-Step
Start with a clean fillet along the corner using a margin trowel. Spread and pack material steadily to fill gaps without creating ridges. Control the amount of mud to avoid squeeze-out.
Finish with a controlled burnish to seal the corner and create a smooth edge. Pay attention to tactile cues—drag should feel even and the corner should read true under light. Verify any timing guidelines against product instructions as needed.
Step-by-Step Process
The following steps guide you through creating clean inside corners by hand, ensuring a professional finish.
- Prepare the corner and substrate as described earlier. Safety first: wear gloves, goggles, and a dust mask.
- Using a joint knife, spread plaster along both sides of the corner, creating a ‘V’ shape with excess at the top.
- Pack the plaster into the corner using a trowel or hawk. Press firmly to remove air pockets and ensure a tight fit.
- Throw a clean fillet by holding the trowel at an angle and running it along the corner, pushing excess plaster outwards. This creates a crisp edge.
- Burnish the corner using a steel float or trowel. Work quickly to smooth out any imperfections before the plaster sets.
- Let the plaster set for 15-30 minutes, then lightly sand and wipe clean with a damp sponge.
- Inspect your work. If you’re not satisfied, don’t hesitate to call a pro for advice or help.
Achieving a tight joint by hand
Creating a tight joint in an inside corner by hand involves packing and striking off plaster to form a crisp edge without specialized tools.
Start by holding your trowel at a 45-degree angle to the corner. Press firmly as you run it along the corner, pushing excess plaster outwards. This action helps create a tight joint.
Next, use a straight edge, like a level or a piece of wood, to strike off any remaining excess plaster. Work quickly and smoothly to avoid leaving marks.
Tip: Keep your trowel clean and dry for best results. A damp or dirty trowel can leave streaks or create a weak bond.
Finishing and blending by hand
After creating the joint, it’s time to blend your corner into the adjacent surfaces for a seamless look. This involves floating, sponging, and making a final pass.
First, use a steel float or trowel to float the plaster. Hold it at an angle and run it along the wall and ceiling, smoothing out any imperfections. Work quickly before the plaster sets.
Next, dampen a clean sponge and gently wipe over the corner and adjacent surfaces. This helps to blend the plaster and remove any remaining streaks or marks.
Tip: Be gentle when sponging. Too much pressure can remove plaster and leave indentations.
Finally, make a final pass with your trowel, running it lightly over the corner and adjacent surfaces to ensure a smooth, even finish.
Comparison: Corner Tools Vs Hand Technique
Corner tools often speed up initial shaping and produce consistent edges, especially on straight runs. Hand technique offers flexibility for irregularities and tight spots that tools can’t reach. Evaluate your space and comfort level when choosing a method.
Cost and learning curve vary by approach; tools may require an initial investment, while hands-on work relies on skill and patience. Always compare results side by side and consider best-use scenarios from your jobsite experience and manufacturer guidelines.
Pros and cons checklist
Use this checklist to decide between corner tools and hand technique. It’ll help you weigh the pros and cons for your specific job.
- Speed: Corner tools are faster but may require practice to maintain speed.
- Finish quality: Hand technique offers better control for high-end finishes, while tools provide consistent results.
- Learning curve: Tools have a shorter learning curve; hand technique takes more time and practice.
- Cost: Corner tools require an initial investment but can be reused. Hand technique only needs trowels and hawks.
- Accessibility: Tools reach tight corners better, while hands can get into awkward spaces.
- Consistency: Tools provide consistent results; hand technique may vary with each corner.
- Cleanup: Tools require cleaning after use; hand technique means less cleanup but more waste from trowel changes.
- Skill level: Tools are beginner-friendly, while hand technique requires more skill and experience.
Quick rule: If speed and consistency are your top priorities, consider corner tools. For high-end finishes and tight spaces, opt for the hand technique.
Which method for which project
Choose your approach based on these factors:
Small projects or DIY jobs: Hand technique might be best. It’s cost-effective and allows for more control over the finish.
Large-scale projects or professional work: Corner tools can save time and provide consistent results, making them ideal for larger jobs.
Tight spaces or awkward corners: Tools can reach tight spots better, but hands might be needed for very narrow gaps.
High-end finishes or specific design standards: Hand technique offers more control and flexibility to meet exacting finish requirements.
Common Mistakes and How to Avoid Them
Overworking the corner can seal air pockets and cause cracking later. Avoid rushing the initial fill; allow adequate setup between passes and follow timing guidelines from the product label. Choosing the wrong tool for the corner can create alignment issues.
Prevent rework by checking squareness often and cleaning between steps. If cure times aren’t respected, you risk weak joints and finish problems. Refer to manufacturer instructions or local code requirements for specifics.
Timing and cure-related issues
Working on corners too wet can cause sagging and loss of detail. Too dry, it’ll crack and crumble.
The sweet spot? When the plaster’s just starting to set, usually 15-20 minutes after mixing. This is when you want to do your final corner work.
Be patient. Let it cure a bit before sanding or painting. Rushing can cause damage.
Repairing imperfect corners
Cracks, gaps, or uneven edges? Here’s how to fix:
For small issues, use a corner repair compound. Apply, let it set, then sand and paint.
Big problems? Remove the bad plaster, clean the area, let it dry, then reapply new plaster or use a mesh tape for support.
Remember, prevention’s better. Work carefully first time around to avoid repairs later on.
Visual Checkpoints and Quality Control
Use a light source to inspect for shadow lines and crispness along the corner. A straightedge across adjacent walls helps confirm true corner geometry. Feel the edge with gloved fingers to assess uniformity.
Perform simple tests such as gentle tapping to check for hollow spots and ensuring a uniform sheen after finish passes. Document any deviations and recheck after cure, using product instructions as your guide for acceptable tolerances.
How to inspect and sign off a corner
Before signing off on any inside corner, follow this checklist to ensure quality work.
- Check for straightness: Use a level or straightedge. Tolerance: 1/8″ per 8′ for small projects, 1/16″ for professional contracts.
- Inspect crispness: Feel the corner with your fingers. It should be sharp and clean.
- Look for voids or hollow spots: Tap gently with a hammer. Any hollowness indicates a problem.
- Check for proper joint width: Should be 3/8″ to 1/2″. Too wide or narrow can cause issues.
- Inspect substrate prep: Ensure it’s clean, dry, and free of debris. Poor prep causes problems later.
- Check for proper tool use (if applicable): Tool marks should be minimal, not visible in finished corner.
- Look for cracks or chips: These can worsen over time if not repaired.
- Confirm cure time: Wait at least 24 hours before inspecting and signing off.
Quick rule: Always double-check your work. A few extra minutes now saves hours later.
Photo guide descriptions to include
Documenting each stage of the process helps troubleshoot issues and train others.
- Substrate prep: Show clean, dry surface ready for plaster. Include any priming or sealing done.
- Tool positioning (if applicable): Snap a pic before starting to show tool placement.
- Mid-pass: Capture the corner during application to check technique and coverage.
- Finished corner: Show final result, including any blending or touch-ups done by hand.
- Close-up: Get a tight shot of the corner to inspect crispness and straightness.
- Light test (if applicable): Snap a pic with light at different angles to check for shadows or imperfections.
- Straightedge check: Include a straightedge in the photo to show corner’s alignment.
- Feel test (if applicable): Show hands feeling the corner to confirm crispness.
Quick rule: Good photos are worth a thousand words. They help communicate and document your work effectively.

Conclusion
Clean inside corners matter for safety, durability, and a clean look that lasts. If you lock these steps in, you reduce cracks, gaps, and costly fixes later, and you keep the plaster from pulling away from the substrate.
Start by inspecting the corner and substrate, clean and dampen the area, confirm the plaster mix is at a workable consistency, choose the right tool or method, apply in small increments, smooth and feather toward the center, wipe away excess before it sets, and check your work with a visual, run-your-hand test, repeating as needed and letting it cure before final texture or paint. Always test your method in a small area first and keep safety gear on.
Common mistakes to avoid are overworking the corner, which can squeeze out or gouge the edge; using the wrong tool or applying too much pressure; and skipping prep, which invites loose plaster or future cracks. Safety rules are simple: wear eye protection and a dust mask, keep your work area ventilated, work with damp or lightly dampened substrate, and follow the manufacturer’s or product’s recommended curing times before finishing. If something in the corner looks unstable or the substrate feels soft, pause and reassess before continuing.
If the corner zone shows poor adhesion, persistent cracking, or you’re uncertain about the substrate or plaster mix, it makes sense to call in a professional rather than forcing a fix that could fail later. Stay steady, follow the checks, and you’ll finish with corners that are strong, true, and ready for finishing. You’ve got this—move to the next clean corner with confidence.
FAQ
What is the quickest way to know if my inside corner is ready for plaster after using a corner tool?
Check that the corner is clean, tack-free, and has a consistent film of plaster. Look for a smooth, uniform line with no gaps or pulled edges. If unsure, let the first coat set and lightly feel for soundness with a gloved finger.
How should I choose between corner tools and hand technique for a stubborn inside corner?
Use corner tools for straight, steady edges and tight control. Switch to hand technique when the corner is irregular or the surface isn’t perfectly flat. Always test a small area first and compare results.
What common mistakes should I avoid when finishing inside corners?
Avoid overloading the corner with plaster, which causes drips and bulges. Don’t rush the tool removal or over-scrape, which can widen the corner. Keep your strokes firm but smooth and clean as you go.
How can I tell if the corner is properly finished before plaster dries?
Look for a sharp, true line with no visible gaps. The surface should feel even and ready for the next coat or finish. If you see an indentation or wobble, fix it before moving on.