
Introduction
Painting plaster walls is the act of applying paint to a plaster surface to protect and refresh it. Before you paint, identify issues like peeling, damp, or loose plaster. Start with a clean, dry surface and plan your steps so you can fix problems first if needed.
To test adhesion, scrape a small, inconspicuous spot with a putty knife and see if the plaster holds. If you find chalky dust, damp patches, or loose areas, you may need prep work like cleaning, patching, or sealing before painting. Always follow the product label and local rules for primers and patching, and choose a primer compatible with plaster.
Key takeaways
- Inspect plaster for cracks and water damage before painting to avoid failures.
- Determine plaster type using nail test and sound tapping after repairs.
- Use a bonding primer on sound plaster with minor repairs only.
- Clean surfaces to remove dust, efflorescence, and oils before skim-coating.
- Scrape and repair damaged plaster, then skim to a smooth, keyable surface.
- Maintain safe ventilation and mask when sanding or mixing materials.
- Protect adjacent surfaces and follow manufacturer instructions for primers and sealer.
Table of Contents
- Introduction
- Key takeaways
- Common Causes of Paint Failure on Plaster
- How to Identify Plaster Type and Assess Condition
- Tests to Diagnose Issues Before Painting
- Tools and Materials Checklist
- Surface Preparation: Cleaning, Repairing and Skimming
- Priming and Paint Selection for Plaster
- Application Techniques and Environmental Best Practices
- Troubleshooting Common Problems and Long-Term Solutions
- Conclusion
- FAQ
Common Causes of Paint Failure on Plaster
Paint failure on plaster is rarely about the color used. It often starts with moisture seeping through or behind the plaster that drags down adhesion. Substrate issues like old coatings or flaky patches play a big role as well.
Preparation errors can amplify problems, especially if dust, oils, or sheen are left on the surface. Each cause affects how well the coating grips, dries, and how the finish holds up over time.
Moisture and Salt Damage
Rising damp, leaks, or condensation can wreak havoc on your paint job. Moisture weakens plaster, causing it to crumble and lose its bond with the paint.
Efflorescence – those white salt deposits you see on walls – is a telltale sign of moisture problems. Salts draw in water, creating a recurring cycle that causes peeling even after repainting.
Check for dampness by pressing a damp meter against the wall. If it reads high, you’ve got a moisture issue to address before painting.
Substrate and Preparation Problems
Dusty or dirty surfaces, loose plaster, or insufficient keying can lead to paint failure. If the surface isn’t clean and sound, your paint won’t stick.
Powdery surfaces or delamination – where paint peels off in large sheets – are signs of poor preparation. Inspect your walls closely before painting; if you find issues, address them first.
Use a wire brush to remove loose material and a damp cloth to clean the surface. Ensure plaster is sound and keyed properly for best results.
Incompatible or Old Coatings
Oil-based paints, glossy finishes, or hard-setting coatings can cause problems when applied to plaster. These finishes don’t allow the wall to breathe, trapping moisture and leading to peeling.
Old coatings may contain lead or other harmful substances. Always test for lead before sanding or disturbing old paint.
Before painting, ensure your chosen coating is compatible with plaster. Primers designed for plaster are usually a safe bet. If in doubt, consult a professional.
How to Identify Plaster Type and Assess Condition
First, look for visible cues to distinguish gypsum plaster from lime mixes and gypsum board. Texture, weight, and how the surface reacts when tapped can tell part of the story. Visual clues guide how you plan repairs and paints.
Notes on tactile checks and appearance help you choose the right repair approach. The plaster type influences bonding needs, moisture considerations, and finish expectations, so verify before you buy products.
Step-by-Step Process
Follow this clear sequence to identify plaster type and assess its condition, ensuring you’re prepared for repairs and painting.
- Prepare your workspace: Clear the area, wear safety gear (gloves, goggles), and keep a damp cloth nearby.
- Inspect visually: Look at the surface, edges, and corners to identify any visible damage or signs of different plaster types.
- Perform tactile tests: Gently touch and tap the wall to feel for differences in texture, hardness, and sound.
- Check for moisture: Use a simple moisture meter or look for signs like stains, bubbles, or peeling paint.
- Document findings: Note down observations, take photos, and mark any areas of concern for further testing or repair.
Distinguishing plaster from drywall and lime plaster
Differentiating between plaster types is crucial for choosing the right products and techniques. Here are simple tests to help you:
Plasterboard (drywall) feels smooth, has a uniform surface, and often has visible seams or tape joints. It’s also lighter than traditional plasters.
Gypsum plaster has a slightly textured feel, may show trowel marks, and is typically white or light gray. It’s heavier than drywall but lighter than lime plaster.
Lime plaster feels coarser, often has a slight sheen, and can be identified by its earthy color or yellowish tint. It’s the heaviest of the three and may have a distinctive smell.
Visual checkpoints for damage
Before testing or repairs, use this inspection checklist to establish the scope of work on your plaster walls.
- Cracks: Inspect for hairline cracks (small) and larger gaps. Cracking can indicate movement, settlement, or moisture issues.
- Bulges: Look for any protrusions or swelling, which could signify water damage or delamination.
- Soft spots: Gently press on the wall; soft areas may indicate crumbling or hollow spots behind the surface.
- Salt stains: Check for white, crusty deposits, which can signal moisture and salt damage.
Quick rule: If you find extensive damage or are unsure about any findings, consult a professional before proceeding with repairs or painting.
Tests to Diagnose Issues Before Painting
There are simple DIY checks you can perform to gauge moisture, adhesion, and contamination. Start with a basic surface test to see if the plaster yields under gentle probing. Look for signs that moisture or previous coatings are compromising the surface.
When in doubt, consider professional diagnostics for a definitive read on moisture levels or structural delamination. Safety and accuracy come from following proper testing procedures and using approved methods.
Adhesion tests and solvent checks
Before you start painting, check your plaster’s adhesion. Poor adhesion can lead to peeling paint.
The tape/pull test is simple: stick a piece of painter’s tape on the wall, let it sit for 24 hours, then pull it off. If paint comes with it, you’ve got adhesion issues.
For contaminants or incompatible coatings, use a mild solvent like denatured alcohol. Swab a small area. If the swab comes away dirty, there’s something on your surface that needs cleaning.
Moisture measurement and salt testing
Check for moisture before painting. It can cause peeling and bubbling.
Start with a visual check: look for stains, warping, or mold. Then use a moisture meter if you’ve got one. Consult the datasheet for interpretation.
For efflorescence (salt deposits), do a simple test: mix some water and clear vinegar (1 part each). Apply to the wall. If it fizzes, you’ve got salt.
Lead paint and hazardous material considerations
Older homes may have lead paint. Sanding or demolition can release harmful dust.
- Testing: Use a certified lab to test for lead before work starts. Home test kits aren’t reliable enough.
- Safety first: If tests are positive, use containment measures: plastic sheets, tape, and HEPA vacuums.
- Removal: Hire professionals trained in lead abatement for safe removal.
- Protection: Wear protective clothing, gloves, and a respirator when working with lead paint.
- Avoid sanding: Wet scraping or chemical strippers are safer methods to remove lead paint.
Tools and Materials Checklist
Keep a concise set of essentials for inspection, prep, repair, priming, and painting. This helps you plan the job and avoid repeat trips. Separate the must having items from optional specialty tools.
Label your materials and keep samples handy to match finishes and sheen. A good checklist reduces surprises and keeps the work moving smoothly.
Essential tools for prep and repairs
Before you start any concrete repair or preparation work, make sure you have all the essential tools listed below. This checklist will help you ensure that you’re well-equipped to tackle your project safely and effectively.
- Scraper: To remove loose concrete, check its edge for sharpness and ensure it’s suitable for the job at hand. A dull scraper can cause more damage than good.
- Fill Knife: For applying repair mortar, confirm the blade is straight and rigid to ensure even application and prevent sagging or uneven surfaces.
- Sanding Tools (e.g., Orbital Sander): To smooth repaired areas, check that your sander has suitable grit sandpaper (60-120 grit) for concrete. Using the wrong grit can lead to an uneven finish.
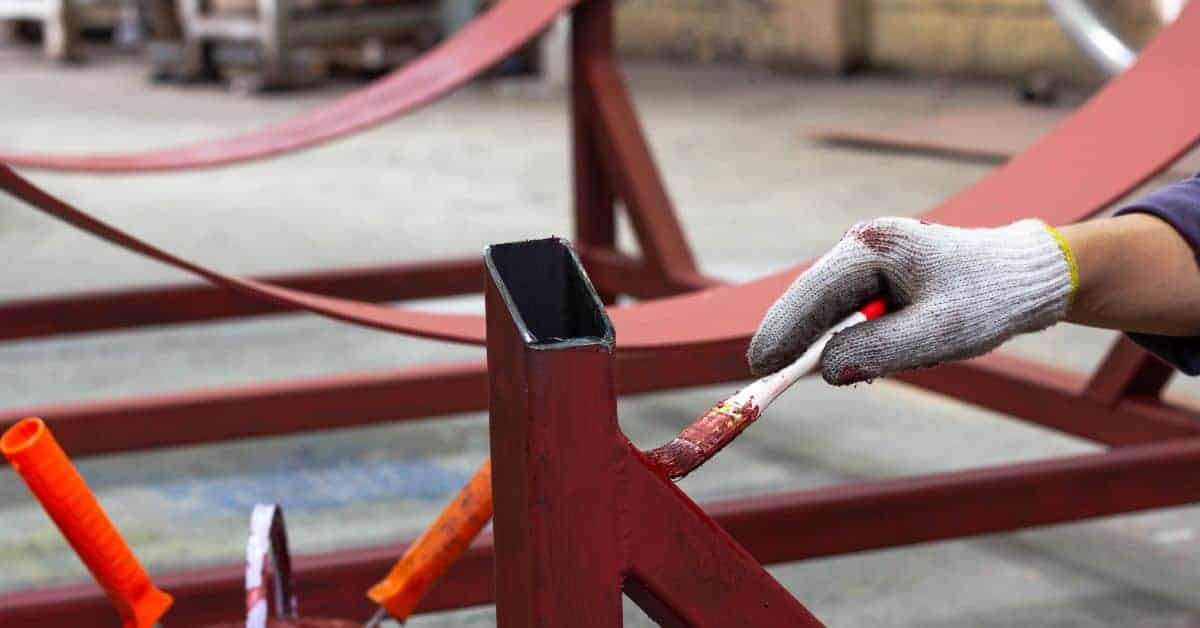
- Brushes/Rollers: For applying sealants or primers, ensure brush bristles are in good condition and rollers have a smooth surface to prevent applicator marks on the final surface.
- Safety Gear (e.g., Gloves, Goggles, Ear Protection): Always check that your safety gear is in good working order before starting any task. Inadequate protection can result in serious injuries.
- Power Tool (e.g., Angle Grinder or Circular Saw): For cutting or grinding concrete, ensure the tool has a suitable diamond blade or abrasive disc to prevent binding and excessive wear on the tool.
- Wet-Vac: To clean up wet concrete dust, confirm that your wet-vac has a suitable filter and is in good working order. A clogged or faulty vac can cause mess and inconvenience.
- Tape Measure: Always have a reliable tape measure on hand to ensure accurate measurements for mixing repair materials and checking the progress of your work.
Quick rule: Never skip safety gear or proper tool maintenance. These are essential for preventing accidents, rework, and ensuring a quality finish.
Recommended primers, fillers and paints (selection guidance)
Use this checklist before starting any painting or plastering work to ensure you’ve got the right materials for the job. It’ll save you time and prevent costly mistakes.
- Check substrate compatibility: Always check the product label to make sure the primer, filler, or paint is suitable for your specific surface (e.g., plaster, wood, metal).
- Verify breathability: For plasters, ensure the product allows moisture to escape. Check the manufacturer’s data sheet for breathability ratings.
- Choose the right filler: For small cracks (up to 2mm), use a fine filler. For larger cracks or holes, use a rapid or multi-purpose filler.
- Check drying time: Ensure the filler’s drying time suits your project schedule. Quick-drying fillers can speed up work but may be more expensive.
- Select primer type: For new plaster, use a primer-sealer to prevent tannin stains bleeding through. For existing paintwork, use a primer that promotes adhesion.
- Match paint finish: Choose a paint finish (e.g., flat, eggshell, satin, gloss) that suits the room’s function and desired look. Check the label for sheen levels.
- Confirm paint coverage: Estimate how much paint you’ll need based on the surface area to be painted. Most paints cover around 10-12m² per litre, but check the manufacturer’s guidelines.
- Avoid low-VOC paints for new plaster: Until the plaster is fully cured (at least 4 weeks), use high-VOC paints to ensure proper adhesion and drying. Low-VOC paints may not adhere well to fresh plaster.
Quick rule: Always follow manufacturer instructions on the product label or data sheet for best results and to avoid costly mistakes.
Surface Preparation: Cleaning, Repairing and Skimming
Preparation starts with removing contaminants and loose material so the new finish can bite. Clean thoroughly using methods that suit the surface and avoid creating new damage. A clean base is the foundation of durability.
Repair cracks and holes, then decide if skim coating is needed to even the surface. Thorough prep is the key to a long lasting, smooth finish.
Cleaning, salt removal and dewpoint considerations
Start by removing dust with a soft brush or vacuum. For tougher grime, use a damp cloth with mild detergent.
Salt deposits can cause paint to peel. Remove them using a solution of 1 part white vinegar to 4 parts water and a stiff brush.
Check for mildew. If present, scrub with a bleach-water solution (1 cup bleach per gallon of water), then rinse and let dry.
Before painting, ensure the substrate is dry and above dewpoint to prevent condensation and peeling.
Repairing cracks, delamination and holes
For hairline cracks, use a flexible filler. Apply with a putty knife, let dry, then sand smooth.
For wider gaps or areas of delaminated plaster, remove back to sound material using a scraper or chisel. Fill with a suitable repair mortar, pressing it well into the voids.
For holes, use an expanding foam filler, let dry, then trim and sand smooth.
Always spot prime repaired areas before painting to seal them and improve paint adhesion.
Skim coating and final sanding
A fresh skim coat is needed if the surface is uneven or damaged. Use a multi-purpose joint compound, applying a thin, even layer with a wide trowel.
Let dry completely (usually 24 hours), then lightly sand using fine-grit sandpaper to achieve a uniform surface.
Be careful not to overwork the plaster. Too much sanding can cause it to crumble or become too smooth, reducing paint adhesion.
Vacuum and wipe down the surface with a damp cloth before painting to remove any dust.
Priming and Paint Selection for Plaster
Understand what the primer brings to adhesion, moisture control, and sealing. Choose a primer that matches the plaster type and the anticipated conditions. Primers set up the paint for a durable, even layer.
Check whether you need a sealer or bonding primer, and review the product datasheet for performance notes. Also consider whether a breathable or more impermeable paint is appropriate for the plaster scenario.
When and how to use primers and sealers
Primer’s the first coat, it sticks your paint to the wall. But when do you need one?
Use a primer: if your plaster’s powdery or stains easy. Also after patchwork, to hide repairs.
Sealers soak in, block moisture. Bonding primers stick to surfaces that’d otherwise flake off. Stain-blockers… well, they block stains. Check your product for what it does best.
Choosing breathable paints and finishes
Plaster’s like a sponge, it needs to breathe. That’s where breathable paints come in.
Emulsion paints: they let moisture out. Perfect for traditional plaster. But they’re not tough, so avoid high-traffic areas.
Less-permeable finishes like acrylics or oils can be used, but check labels first. Some plasters need breathability more than others. Don’t block it up if you don’t have to.
Application Techniques and Environmental Best Practices
Apply in a consistent pattern with the right tools for plaster surfaces. Work in manageable sections to avoid lap marks and uneven dries. Maintain steady pressure and speed for an even coat.
Control temperature and humidity while painting, and avoid rapid drying. Following a steady technique reduces brush and roller marks and improves the final look.
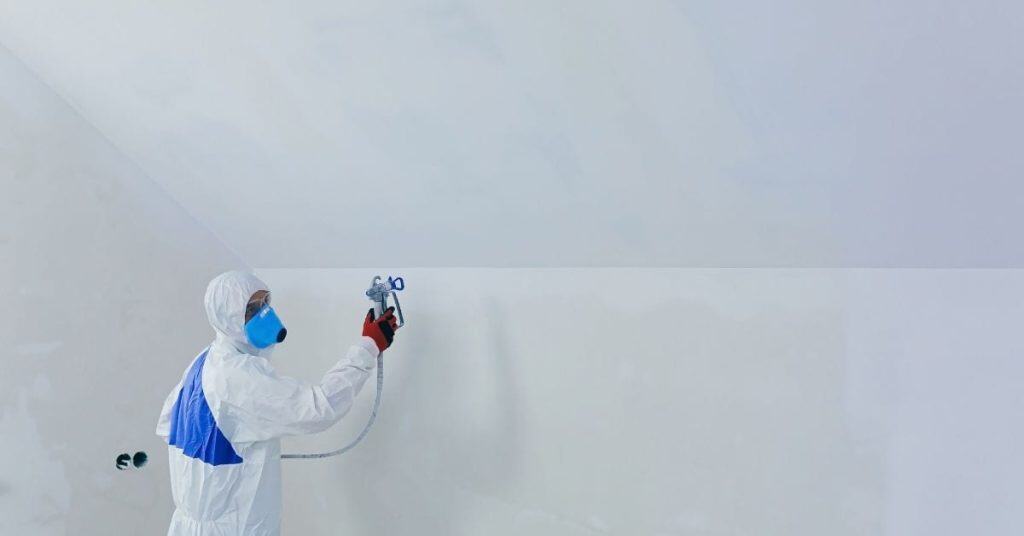
Brush, roller and spray approaches
Plaster walls require a careful touch when painting. Here’s how to tackle it:
Cutting in: Use a 1-1.5″ angled brush for precise edges. Dip just the tip into paint, keep it level with the wall and work slowly.
Rolling: For large areas, use a roller cover with 3/8″ to 1/2″ nap suitable for your plaster’s texture. Work in ‘W’ or ‘M’ patterns to ensure even coverage.
Spraying: This can be efficient but requires proper setup and technique. Use a fine finish nozzle (e.g., 3-4) and keep the gun moving at a steady pace, maintaining a consistent distance from the wall.
Layering, drying time and temperature considerations
Proper layering and drying time are crucial for a smooth finish:
Recoat timing: Allow each coat to dry according to the manufacturer’s guidelines. Typically, this is 4-6 hours but can be longer in humid conditions.
Airflow management: Ensure good ventilation to avoid too-fast drying (which can cause poor adhesion) or too-slow drying (which can lead to mildew). Use fans if needed.
Temperature considerations: Ideal painting temperatures are between 60-85°F (15-29°C). Too cold, and paint won’t adhere properly; too hot, and it may dry too quickly or even crack.
Troubleshooting Common Problems and Long-Term Solutions
Provide targeted fixes for peeling, blistering, and hairline cracks, and address salt recurrence if present. Distinguish between temporary fixes and issues that indicate deeper problems. Preventive maintenance helps you avoid repeats.
When in doubt about the underlying cause, seek specialist guidance and review long term maintenance steps. Clear, proactive upkeep reduces future failures and extends life of the plaster finish.
Fixing peeling, blistering and flaking paint
If your paint is peeling, blistering or flaking, it’s time to intervene before the problem spreads. First, identify the affected areas.
Removal: Scrape off loose paint using a paint scraper. Sand the area smooth with medium-grit sandpaper. Wipe clean with a damp cloth.
Preparation: Prime the area with a suitable primer like Zinsser B-I-N to seal and prepare the surface for repainting. Let it dry according to manufacturer’s instructions.
Now you’re ready to paint. Use a breathable, high-quality paint to prevent recurrence.
Addressing cracks, nail pops and texture mismatches
Cracks, nail pops, and texture mismatches can mar your walls. Here’s how to tackle them.
Cracks: For hairline cracks, use a crack filler like Crack-B-Gone. Let it dry, then sand smooth. For wider cracks, consider a full skim or replastering.
Nail Pops: Remove the popped nail with pliers. Fill the hole with spackling compound. Sand smooth when dry.
Texture Mismatches: To blend texture, use a joint compound and a wide putty knife. Apply thin layers, letting each dry before sanding smooth. For significant mismatches, consider a full skim or replastering.
When moisture or structural issues persist
If your troubleshooting reveals signs of active moisture or structural problems, it’s time to seek professional help. Here’s what to look for:
Moisture: Musty smells, visible mold, or persistent damp patches indicate a moisture problem. This could be rising damp, condensation, or leakages.
Structural Issues: Cracks that widen over time, diagonal cracks, or bulging walls can signal structural problems like subsidence or movement.
If you suspect these issues, don’t try to paint over them. Instead, escalate by hiring a building damp specialist or plaster contractor for proper assessment and resolution.
Conclusion
You now have a clear path to get durable, good-looking plaster walls without wasting time or money. The key is to nail surface condition, test properly, and proceed with clean, deliberate steps that protect the wall and your investment.
Inspect the wall, note plaster type and weaknesses, prepare by cleaning and repairing, then skim where needed, choose the right primer and paint, and apply in calm conditions with steady technique. Start small with a test patch, wear a mask when sanding dust is present, and keep a close eye on moisture and temperature as you work. Follow the order: clean, repair, skim, prime, paint, monitor for failures, and adjust on the fly if you see cracking, peeling, or moisture signs.
Common mistakes to avoid include skipping the patching or skim coat, using the wrong primer for the plaster type, and painting in conditions that are too humid or too hot. Always test a small area first, never skip cleaning, and never rush coats. Safety rules are simple: protect yourself with a mask and eye gear, ventilate the room, and don’t force a bad patch by overcoating.
If you see persistent cracking, dampness, loose plaster, or paint that won’t adhere after multiple attempts, don’t push through. Call a pro when the plaster is falling apart, moisture is ongoing, or the situation risks structural damage. With careful steps and steady effort, you can finish strong and enjoy a long-lasting, smooth finish. Stay methodical, stay safe, and you’ll get it done right.
FAQ
What’s a quick check to know if plaster will hold paint well today?
Make sure the surface feels solid and isn’t powdery. If you rub with a finger and it smears or dusts, that needs spot fixing before painting. When in doubt, test a small patch and follow the manufacturer’s guidance on bonding and sealing.
Should I prime plaster before painting, and what kind of primer do I use?
Yes, priming helps the paint stick and prevents peeling. Use a primer recommended for plaster and compatible with your topcoat type, and follow the label for surface prep and drying times.
What are common mistakes that ruin plaster paint jobs, and how can I avoid them?
Avoid skipping cleaning, overloading with paint, or painting on a damp surface. Allow repairs to dry fully, use proper patching and sealing methods, and apply coats in the order the product instructions specify.
How do I handle repairs or skim coats before painting to keep a smooth finish?
Repair cracks and holes with appropriate plaster or patch material, then sand lightly for a smooth edge. Wipe away dust, let it cure as directed, and follow up with a compatible primer to lock in the repair.