
Introduction
Reattaching loose plaster with washers is a crucial repair task that requires careful planning and execution. Understanding the time commitment involved in each step helps you allocate your day effectively and ensures you complete the project successfully.
This guide walks you through the process, breaking down the timeline so you know exactly how long it takes to reattach loose plaster with washers, from start to finish.
The Complete Timeline for Reattaching Loose Plaster with Washers
Reattaching loose plaster with washers involves several steps that require careful attention and time management. Here’s a detailed timeline to help you understand the duration of each phase:
- Preparation (15-30 minutes): Identify loose areas, gather tools and materials, and plan your drilling strategy.
- Drilling (10-20 minutes per hole): Drill pilot holes carefully to minimize cracks. The time taken depends on the number of holes needed.
- Installing Washers and Screws (5-10 minutes per screw): Securely attach washers and screws, ensuring they’re snug but not overtightened. Again, the time varies based on the quantity of screws.
- Filling and Finishing (30-60 minutes): Clean holes, apply bonding agent, patch with suitable material, and match texture. This step may take longer if you’re working on a large area or need to build up depth with base fill.
- Curing and Final Touches (24 hours – 7 days): Allow the patched area to cure according to product guidelines before applying paint or final touches. This step is time-dependent rather than actively time-consuming.
Total estimated time: 1-3 hours, plus curing time. Keep in mind that this timeline can vary based on factors such as the size of the loose area, your familiarity with the tools and materials, and any unexpected challenges you may encounter.
Key takeaways
The preparation phase is crucial for setting a solid foundation for the rest of the project. Taking the time to identify loose areas accurately and plan your drilling strategy will save you time and effort in the long run.
- Identify loose plaster by gentle tapping and wobble testing before drilling or patching.
- Choose washers and screws sized for the plaster and lath thickness.
- Mark drilling points on studs or solid backing to avoid hollow areas.
- Drilling pilot holes carefully to minimize cracks and keep the plaster intact.
- Wear eye protection and masks; dust from plaster can irritate.
- Install washers and screws snugly, then check for movement before finishing.
- Match texture after repair and monitor yearly for any new loosening.
Table of Contents
- Introduction
- Key takeaways
- Overview and Project Planning
- Tools and Materials Checklist
- Measuring and Spacing Washers for Secure Reattachment
- Drilling and Pilot Hole Techniques to Protect Plaster and Lath
- Installing Washers and Screws Step-by-Step
- Filling, Finishing, and Texture Matching
- Troubleshooting, Common Mistakes, and Long-Term Maintenance
- Cost Breakdown and Time Estimates
- Conclusion
- FAQ
Overview and Project Planning
This section outlines the repair scope, the plaster type, and whether the fix is cosmetic or structural. Start by identifying if the plaster is lime, gypsum, or cement-based, and look behind the surface for hidden damage. Decide if the repair is purely visual or if it affects structural backing.
Next, map out a realistic timeline and sequence for the job. Expect diagnosis, materials prep, drilling and anchor work, reattachment, and finishing in distinct steps. Consider how many sessions you’ll need and the downtime required for drying and curing. When in doubt about safety or structural integrity, plan to call a professional for an assessment.
Assessing the damage and plaster type
Before you start, it’s crucial to understand what you’re dealing with. Loose plaster can be tricky – it might just need reattaching, or there could be hidden damage.
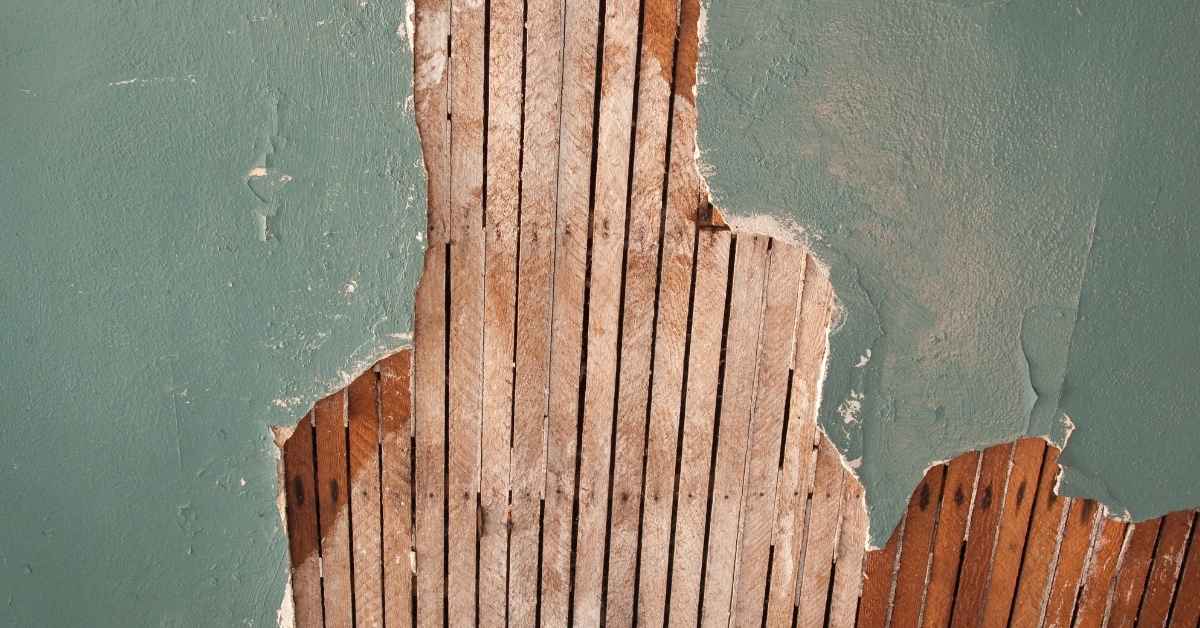
First, check if the plaster is loose or delaminated. Tap it gently; if it sounds hollow and moves, it’s likely loose. If it crumbles or feels spongy, it might be delaminated – that’s when the plaster separates from its backing.
Next, identify the type of plaster:
– Lime plaster is soft, breathable, and often used in historic homes. It’s usually applied over a wood or metal lath base.
– Gypsum (or ‘gyprock’) is what you’ll find in most modern homes. It’s hard, smooth, and applied over a gypsum board backing.
– Cement-based plasters are tough, durable, but can be brittle. They’re often used outdoors or in areas prone to moisture.
Safety and preparatory steps
Safety first, always! Before you start drilling into your walls, ensure the area is secure and safe.
Wear appropriate Personal Protective Equipment (PPE), including safety glasses, gloves, and a dust mask. If there’s lead or asbestos present, use a respirator designed for those materials.
If you’re working on ceilings, contain the area to prevent falling debris from causing injuries or damaging property below.
Before starting any electrical work (like turning off power to outlets near your repair), ensure the circuit is dead by testing it with a voltage tester.
Permits, historic considerations, and when to hire a pro
Before you start any work, check if you need permits. If your home is in a historic district or is listed on the National Register of Historic Places, you might need special permits for repairs.
If your plaster is part of the original fabric of an old home, consider consulting with a historic preservation specialist. They can advise you on maintaining the character and integrity of your home’s finishes.
Here are some red flags that mean it’s time to hire a professional:
– Water damage or signs of mold – these could indicate structural issues that need expert assessment.
– Cracking plaster that’s wider than 1/8 inch, or cracks that run horizontally or diagonally – these could signal serious structural problems.
– Delamination over a large area, or if the loose plaster is falling off in chunks – this might require extensive repair work beyond a DIY job.
Tools and Materials Checklist
Define the washer and fastener system you will use, including washer type and bolt diameter, and choose compatible anchors for plaster over masonry or wood lath. Decide between stainless or galvanized options based on exposure and service life. You should select fasteners that suit the substrate and backing you’re dealing with.
List size ranges, material compatibility, and typical installation tools, such as drill/impact driver, masonry bits, and safety gear. Include patching materials, bonding agents, and surface prep supplies. Estimate a rough total for a typical repair and note where costs can vary by region or material quality.
Fasteners, washers, and anchors explained
Before you start drilling or screwing, use this checklist to ensure you’ve got the right fasteners for your job. This will save you time and prevent costly mistakes.
- Cup Washers: Check they’re the correct size for your screw head. Confirm by placing a washer on the screw; it should fit snugly without falling off. Skip this, and you risk screws backing out over time.
- Domed/Round Washers: Ensure they match the screw’s thread pitch. Hold a washer against the screw threads; if they align, you’re good to go. Ignoring this can lead to stripped screws and weak joints.
- Screw Sizes (Length): Measure your material thickness and add 1/2″ for the screw’s grip. For example, if you’re attaching a shelf to a 3/4″ stud, use a #8 x 2-1/2″ screw. Too short, and it won’t hold; too long, and it could poke through.
- Screw Sizes (Gauge): Match the screw gauge to your material’s thickness. For thin materials like plywood or drywall, use #6 or #8 screws. Heavier duty jobs call for #10 or #12. Wrong size means weak joints.
- Anchors (Expansion): Use in hollow walls or where you need extra holding power. Check the anchor’s size matches your screw; it should fit snugly inside. Forget this, and anchors may spin or pull out.
- Anchors (Toggle Bolt): Employ when attaching heavy items to drywall. Ensure the toggle’s wings are wide enough for your wall thickness. Neglect this, and the bolt could pull through the wall.
Quick rule: Always match fasteners to both material type and job requirements. A one-size-fits-all approach can lead to weak joints and costly rework.
Power tools and hand tools needed
Before you start your concrete project, use this checklist to ensure you have all the necessary power tools and hand tools on site. This will help you work efficiently and safely.
- Cordless Drill (18V or higher): Check battery charge and spare batteries. Ensure it has a variable speed trigger for different tasks.
- Drill Bits (masonry drill bits, sizes #4 to #10): Verify you have the right size bits for your fasteners. Masonry bits are required for drilling into concrete.
- Countersink Bit: Confirm it’s the correct size for your screws. Countersinking prevents screw heads from sticking out and causing tripping hazards.
- Screwdrivers (flathead and Phillips, various sizes): Ensure you have the right sizes to match your fasteners. Check tips for damage or wear.
- Vacuum/Dust Control System: Inspect it to ensure it’s in working order. A clean workspace is safer and more efficient.
- Stud Finder (optional): Test it with a known stud to confirm functionality. This helps locate framing members for secure anchor installation.
- Borescope (optional): Check its functioning by looking through it. A borescope helps inspect holes and anchors before installing fasteners.
Quick rule: Always double-check your tools before starting a task. Faulty or missing tools can lead to rework, delays, and potential injuries.
Materials for finishing
Use this checklist when you’re ready to apply the final touches to your concrete surfaces. It’s crucial to ensure you have all the right materials to achieve a durable, long-lasting finish.
- Concrete Filler: Check label for fine or medium grain size, suitable for your surface’s texture. Confirm it’s compatible with your concrete type (e.g., cement-based, polymer-modified).
- Bonding Agent: Ensure it’s designed for concrete and compatible with your chosen finish. Verify it has a long open time for easy application.
- Plaster Patch: Check if it’s suitable for both new and existing surfaces. Confirm it can be applied in the desired thickness (1/4″ to 1/2″) without slumping.
- Joint Compound: Choose a lightweight, ready-mix compound for easy application. Ensure it’s paintable and sandable for a smooth finish.
- Paintable Primer: Check if it’s designed for concrete and compatible with your chosen topcoat. Confirm it provides adequate adhesion and sealant properties.
- Concrete Mesh or Tape: Ensure it’s fiber-reinforced for added strength. Verify it’s suitable for the specific application (e.g., floor, wall) and finish type (e.g., skim coat, overlay).
- Sealer: Check if it’s designed for concrete and compatible with your chosen finish. Confirm it provides adequate protection against moisture and stains.
- Concrete Stain or Dye: Ensure it’s designed for interior or exterior use, depending on your application. Verify it provides the desired color intensity and longevity.
Quick rule: Always follow manufacturer instructions for safe handling, mixing, and application of all materials to avoid costly mistakes and ensure a durable finish.
Measuring and Spacing Washers for Secure Reattachment
Assess when washer-based reattachment is appropriate by looking at looseness, panel size, crack patterns, and lath condition. Do not proceed if plaster is crumbling or there is severe underlying damage. If unsure, seek guidance before continuing.
Offer guidance on washer diameter, material, and corrosion resistance, plus spacing ranges by panel size. Explain how to adjust density for wide cracks, sagging, or edge panels, and how to plan a grid layout for even load distribution.
Spacing patterns for ceilings vs. walls
Washers should be spaced differently depending on whether you’re reattaching loose plaster on a ceiling or wall.
Ceilings: Here, gravity pulls the plaster down. So, space washers 12-16 inches apart, center-to-center. This is enough to secure most ceilings without over-fastening.
Walls: On walls, space washers 8-12 inches apart. Closer spacing helps resist lateral movement and prevents new cracks from forming. Around edges and wide cracks, decrease the spacing to 6 inches or less for extra support.
Calculating number of fasteners and layout sketching
First, measure your panel’s dimensions. Let’s say it’s 8 feet by 10 feet. Divide these by your chosen washer spacing to find out how many you need:
– For ceilings at 14 inches: (8/14) x (10/14) = ~5.7 x 3.6 ≈ 20 washers.
– For walls at 10 inches: (8/10) x (10/10) = 0.8 x 1 = 8 washers.
Sketch a layout on paper or use a digital tool to mark these points. Start with a row near the edge, then stagger subsequent rows for even load distribution. This helps prevent over- or under-fastening and ensures your plaster is securely reattached.
Drilling and Pilot Hole Techniques to Protect Plaster and Lath
Describe the plaster-over-lath setup you’ll encounter, including the lath material and plaster type. Note any historic features or preservation limits that restrict invasive work. Identify risk zones where cracking is most likely.
Explain bit selection, speeds, and how to run the drill with light steady pressure to minimize heat and vibration. Provide guidance on pilot hole sizing, placement, and depth relative to washer size, plus how to start holes with a center punch to prevent wandering.
Preventing blowout and vibration damage
Drilling into plaster can cause it to crack or crumble if not done carefully. To prevent this, apply light, steady pressure on the drill. Don’t push too hard as it can cause the plaster to chip away.
Use a countersink bit to create a recess for the head of your screw or anchor. This helps distribute the force evenly and prevents the head from cracking the surface.
For weak areas, use backing support or sacrificial pads behind the plaster to absorb some of the impact. If you feel too much vibration, switch to a manual driver for better control.
Special techniques for ceilings and high work
Working on ceilings can be challenging. Always use a stable ladder or scaffold to ensure your safety.
When drilling overhead, angle the drill slightly upwards to keep it perpendicular to the surface. This helps prevent skim cracking.
For large delaminated areas, use temporary supports to hold the plaster in place while you work. This could be as simple as a piece of wood wedged behind the plaster.
Take breaks to let your arms rest and prevent fatigue, which can lead to mistakes.
Installing Washers and Screws Step-by-Step
Outline how to determine whether the plaster is fastened to wood lath or masonry, and how to locate studs or anchors. Plan a pattern that matches existing framing to maximize grip. Identify where you will start the pattern for even load.
Detail the sequence: drill pilot holes, seat washers flush, and drive screws to engage backing without crushing plaster. Include guidance on torque levels and a quick check to verify the substrate grip after installation.
Step-by-Step Installation Process
Follow these practical steps to securely reattach loose plaster using washers and screws. Safety first, then prep, main work, and finish with checks.
- Safety check: Ensure no live wires behind the plaster. Wear safety glasses.
- Prep: Gather tools (drill, screwdriver, appropriate bits), fasteners (screws, washers), and layout sketch.
- Main work:
- Drill pilot holes as planned.
- Place washer, ensuring it’s centered and flush against the plaster.
- Drive screw slowly to seat washer, then snug it. Stop if washer crushes plaster.
- Final check: Test pull or wiggle each reattachment after several minutes.
- Cleanup: Remove any debris, and store tools safely.
Washer placement and seating tips
Center washers for even distribution of pressure. Use appropriate washer size to match plaster thickness.
Signs of proper seating: Washer sits flush, no cracks or crushed plaster around it.
If the washer is too small, it may not distribute stress evenly and could cause damage. Too large, and it won’t sit properly.
Handling different substrates
Wood lath: Use wood screws, drill pilot holes to prevent splitting. Securely anchor into the lath.
Metal lath: Use masonry screws, drill pilot holes in plaster only. Anchors may be needed for secure grip.
Drywall backing: Use drywall screws, no pilot hole needed. Ensure screw engages stud or anchor securely.
Filling, Finishing, and Texture Matching
Walk through cleaning holes, removing loose material, and applying a bonding agent to ensure adhesion before patching. Choose patching material suitable for historic or compliant plaster and plan multi-step layering for evenness. Align curing times with product guidelines.
Describe the finishing steps to feather edges, sand progressively, and match the surrounding texture and paint. Include tips for texture tools and a test patch to verify the result before full coverage.
Compound selection and layering technique
For base fill, choose a thick, fast-setting compound to build up the depth. Use a slow-set option for skim coats to minimize cracking.
Historic homes: Match the original plaster type (gypsum, lime, or cement) and use compatible compounds.
Apply base fill in thin layers, allowing each to dry before adding the next. Sand lightly between layers for a smooth finish.
Texture replication and paint preparation
Assess your original texture. For popcorn or stippling, use spray cans or stipple brushes. For trowel textures, use a hawk and trowel.
Test patches: Apply different techniques on a hidden area to match the original texture.
Prime patched areas with a stain-blocking primer. For color matching, test small areas first. Repaint entire walls if necessary for uniform appearance.
Troubleshooting, Common Mistakes, and Long-Term Maintenance
Identify frequent mistakes like overdriving washers, wide spacing, or missing hidden damage. Use simple diagnostic cues such as tapping sounds, new cracking, or moisture staining to catch issues early. Plan corrective actions if problems are spotted.
Provide a long-term plan for monitoring and maintenance, including a schedule for checks and potential re-tightening. Discuss finishing integration and when to consult a professional for underlying structural concerns.
What to do if plaster continues to separate
If your plaster keeps separating despite your best efforts, it’s time for some escalation steps.
Additional Fasteners: If spacing is adequate but plaster still moves, try adding more fasteners. Drill new pilot holes and install washers and screws in between existing ones.
Adhesives: Consider using a flexible adhesive like PL Premium or Loctite PL Premium to bond the loose plaster to the substrate before reinstalling fasteners.
Full-Panel Reattachment: If only one panel is affected, you might need to remove it completely, repair any underlying issues, and reattach it using the full process outlined earlier. This ensures a solid base for your repairs.
Partial Re-plastering: In severe cases, you may need to partially re-plaster the area. Remove loose material, prepare the surface, and apply new plaster, blending it with the existing finish.
If none of these solutions work, or if you suspect structural issues, consult a professional. They have specialized tools and knowledge to diagnose and fix complex problems.
Seasonal and environmental considerations
Plaster repairs can be affected by seasonal changes and environmental factors. Here’s how to maintain your repairs year-round:
Humidity: High humidity can cause plaster to expand and contract, potentially loosening fasteners. Ensure proper ventilation in your space to control humidity levels.
Temperature Changes: Extreme temperature fluctuations can also cause plaster to move. Insulate your home well to minimize temperature swings.
Structural Movement: Foundational shifts or structural movement due to settling can stress plaster repairs. Regularly inspect your walls and ceilings for any new cracks or separations that may indicate further movement.
To maintain your repairs, perform visual checks every 6-12 months. Look for signs of separation, cracking, or other issues. Tighten fasteners if necessary, and address any new problems promptly to prevent them from worsening.
Cost Breakdown and Time Estimates
Present a transparent view of cost categories tied to reattaching plaster with washers, including tools, materials, safety gear, and finishing supplies. Note that regional variations can affect prices and disposal costs for old plaster. Do not provide exact prices here without checking current sources.
Offer guidance on renting versus buying major tools and provide rough time expectations for small, medium, and large repairs. Include a quick budgeting framework and remind readers to account for dust control, access limits, and drying times per material instructions.
Tool Rental vs. Buy Analysis
Renting tools for one-off jobs can save you money and space, but buying certain items might be more cost-effective in the long run.
- Rotary Hammer Drill: Worth renting for small repairs. $20-50/day. Buying a mid-range model ($100-300) is cost-effective for medium to large jobs.
- Hammer Concrete Bits: Rent them with the drill or buy separately. $5-10 each. Buy if you plan multiple projects, else rent.
- Washers: Cheap and easy to store. Buy in bulk ($2-5/pack of 100).
- Backing Materials (Drywall, Lath): Rent or buy based on your project scope. Drywall sheets: $10-30 each. Lath: $5-15/sheet.
- Safety Gear: Buy essentials like safety glasses ($2-5) and gloves ($5-10). Rent heavier gear like harnesses ($10-30/day) for high work.
Sample Material Shopping List with Price Ranges
Choosing the right materials ensures a strong, long-lasting repair. Here’s a sample list and their typical price ranges.
- Washers: Galvanized or stainless steel for longevity. 1/4″ x 2″ – $2-5/pack of 100.
- Screws: Use drywall screws (if backing with drywall) or concrete screws (for lath). #8 x 1-3/4″ – $3-7/lb.
- Joint Compound: Mid-range, ready-mixed for easy application. $5-10/12 oz tub.
- Finishing Tape: Mesh or paper tape for seams. $2-5/roll.
- Texture Spray: For matching existing texture. $10-30/can.
- Safety Glasses: Protect your eyes from debris. $2-5/pair.
Conclusion
The core idea is simple: reattach with the right washers and fasteners so the plaster stays put, looks clean, and lasts. Do it safely and you’ll avoid costly callbacks and new cracks.
Check your spacing and pilot holes, drill carefully, install washers and screws to snug but not overdriven, fill and texture to match, then clean up and test the hold after the patch dries. Keep the process steady, verify each step as you go, and don’t skip any part of the sequence.
Avoid these common traps: driving screws too tight or too deep and tearing plaster, skipping pilot holes or using wrong size washers, and rushing texture matching before filler fully cures. Always wear eye protection, work in a dry area, test a small patch first, and stop if the lath is loose or dampness is present—these rules save you from bigger damage and bigger costs.
If you encounter rotten lath, widespread cracking, or moisture damage, or if the area is large beyond a simple patch, call a professional rather than pushing ahead. Stay deliberate, stay safe, and you’ll finish with a repair that lasts and looks right. You’ve got this.
FAQ
How can I identify loose plaster before attaching washers?
Tap the surface gently and listen for hollow sounds. Look for visible cracks, crumbling edges, or sagging areas that move when pressed. Mark the spots that feel loose so you don’t miss them later.
How do I choose the right washers and screws for reattachment?
Use washers that sit flat against the plaster and spread the load. Select screws that reach solid backing or studs when possible, and avoid screws that are too long or too short. Check manufacturer instructions or label recommendations for load guidance and compatibility with plaster and lath.
Where should I mark drilling points to stay safe and accurate?
Mark points with a straight edge from truth lines like corners or molding. Space the points evenly and avoid electrical boxes, outlets, and obvious wires. Double-check behind the plaster with caution if you have doubts about backing material.
How do I drill into plaster without causing damage?
Use a slow drill and a small pilot hole first. Keep the drill perpendicular to the wall and steady; don’t force it. If you feel a soft stop or hear grinding, pause and reassess to avoid cracking or punching through to the lath or behind the wall.
How do I insert anchors and secure the washer and screw properly?
If there’s no solid backing, use an appropriate wall anchor and insert it flush with the surface. Then drive the screw through the washer and into the anchor, tightening until snug but not overdriven. Recheck the hold by gently testing the reattachment and adjust if there’s any movement.