
Introduction
Drywall install mistakes are issues in openings, securing, and finishing that trigger callbacks.
This article calls out common errors and shows how to tackle them during your project. Expect plain, hands-on tips you can apply when you frame, measure, and hang sheets.
Common gaps to watch for include incorrect measurements for openings, poor flashing techniques, improper securing, and inadequate sealing.
Double-check openings before you cut, fit, and set sheets, and follow flashing and sealing best practices so joints stay tight. Always verify fastener patterns and sealing products with the manufacturer instructions and local rules, and adjust based on what you find on the job.
Key takeaways
- Verify openings with exact measurements from plans before cutting and framing.
- Ensure proper flashing around windows and doors to prevent moisture intrusion.
- Use correct fastening pattern and screw length for drywall thickness and backing.
- Seal joints thoroughly with mud and tape to avoid future cracking.
- Keep environmental conditions in range during hanging and finishing to reduce problems.
- Follow manufacturer guidelines and local codes to minimize callbacks and rework.
- Wear PPE and use ladders safely; never work alone on elevated drywall tasks.
Table of Contents
- Introduction
- Key takeaways
- Pre-Install Planning and Material Selection
- Framing, Openings, and Backing Preparation
- Cutting, Fitting, and Working Around Penetrations
- Fastening and Securing Techniques
- Sealing, Taping, and Joint Finishing
- Moisture Control and Environmental Considerations
- Following Manufacturer Guidelines and Standards
- Safety, Cost Implications, and Reducing Callbacks
- Conclusion
- FAQ
Pre-Install Planning and Material Selection
Begin with a clear map of the job conditions and constraints. Assess moisture, temperature, room use, and existing framing to decide if damp-proofing or vapor barriers are needed. Check that planned materials match the space to prevent callbacks later.
Choose the right drywall type, thickness, and joint compound for the setting, and plan for corner bead, tape, and edge protection. Think through substrate readiness, layout, and where insulation or backer materials fit. Have a budget and procurement plan that accounts for waste and lead times to avoid delays.
Site assessment and measurement
Before you start mixing concrete, take a good look at your site. It’s like checking your tools before starting work – it saves time and hassle later.
Check for straightness: Use a level or laser level to ensure the surface is flat and true. Concrete needs a solid base to set properly, so fix any dips or high spots now.
Find moisture sources: Look for places where water might collect – like low spots, near downspouts, or under leaky pipes. Concrete doesn’t like wet feet, so redirect or block these sources if you can.
Clear obstructions: Remove any debris, rocks, or other obstacles from the site. You don’t want to be fishing stuff out of your concrete later.
Now, measure accurately. It’s boring but crucial. Accurate measurements mean you mix the right amount of concrete, reducing waste and rework. Use a tape measure, not guesswork. Check your measurements twice – it’s better than mixing concrete twice.
Choosing drywall type and material specs
Picking the right drywall is crucial for a durable, smooth finish. It affects how well your walls look and hold up over time.
- Standard Drywall (1/2″ or 5/8″): Used in most rooms. 1/2″ is cheaper, 5/8″ provides better fire resistance.
- Moisture-Resistant Drywall (Green Board): For bathrooms and laundry rooms. Check for ‘MR’ rating on label.
- Fire-Rated Drywall (Type X or C): For areas near fireplaces, furnaces, or where code requires it. Look for ‘Type X’ or ‘C’ on label.
- Soundproof Drywall: For rooms needing extra sound insulation. Check STC rating on label.
- Paperless Drywall: Easier to sand, less chance of paper tears. More expensive but worth it for first-timers.
Pro tip: Buy drywall in manageable sizes (4′ x 8′ or 4′ x 10′) based on your room dimensions. Store flat and avoid moisture to prevent warping.
Tools and materials checklist
Before you start your drywall installation, use this checklist to ensure you have everything you need on-site. This will help prevent costly mistakes and delays.
- Tape measure: Verify it’s in good working condition and calibrated correctly for accurate measurements.
- Level: Check that your level is straight by placing it on a known flat surface. A 4′ or 6′ level is standard.
- Drywall screws: Ensure you have the correct length (usually 1-1/4″ to 2″) and gauge (8, 10, or 12) for your drywall thickness. Check the package for compatibility with your screw gun.
- Drywall saw or utility knife: Confirm you have a sharp blade for cutting drywall sheets cleanly.
- Drywall lift: If installing ceiling drywall, check that your lift is in good condition to prevent sheet sagging and damage.
- Joint compound: Ensure you have the right type (setting or non-setting) for your project. Check the label for mixing instructions.
- Drywall tape: Verify that you have paper or mesh tape suitable for your joint compound and application method (bedding, embedding, or all-in-one).
- Sandpaper or sanding screen: Check grit size (120-150) to ensure it’s fine enough for drywall finishing.
- Safety equipment: Don’t forget your safety glasses, work gloves, and dust mask. If using a screw gun, check that you have a proper grip and trigger control.
Quick rule: Always double-check your measurements before cutting drywall sheets to prevent waste and rework.
Framing, Openings, and Backing Preparation
Verify that framing is plumb, square, and true to size. Make sure wall studs, corner posts, and ceiling joists align with the drywall layout. Misalignment here leads to misfitting panels and callbacks.
Measure rough openings for doors and windows, and confirm jambs and head heights match the plan. Check backing for cabinets and fixtures, and confirm locations for screws and resistance to nail pops. Inspect electrical and plumbing clearances to keep sheets flush and clean.
Verify openings are plumb, level, and sized for finishes
Before hanging drywall, check all door and window openings. You want them square, level, and the right size for your trim and finish materials.
Plumb: Use a level to ensure the sides are straight up and down. If not, note adjustments needed.
Level: Check the top and bottom of the opening with a level. Make sure they’re even so your drywall fits flush.
Size: Measure jamb width, head height, and return dimensions. Compare to your drywall plan. Note any shims or adjustments needed.
Provide and verify backing and blocking
Backing and blocking are crucial for strong, secure drywall fastenings. Here’s what to look for:
Corners: Make sure there’s blocking at inside corners for support. This prevents drywall from cracking or breaking.
Fixtures and heavy loads: Verify backing is provided where cabinets, sinks, or other heavy items will go. This distributes weight evenly and stops screws from popping out over time.
Check resistance: Gently pull on the drywall after securing it with screws. It should feel solid, not wiggle or give. If it does, add more blocking or backing.
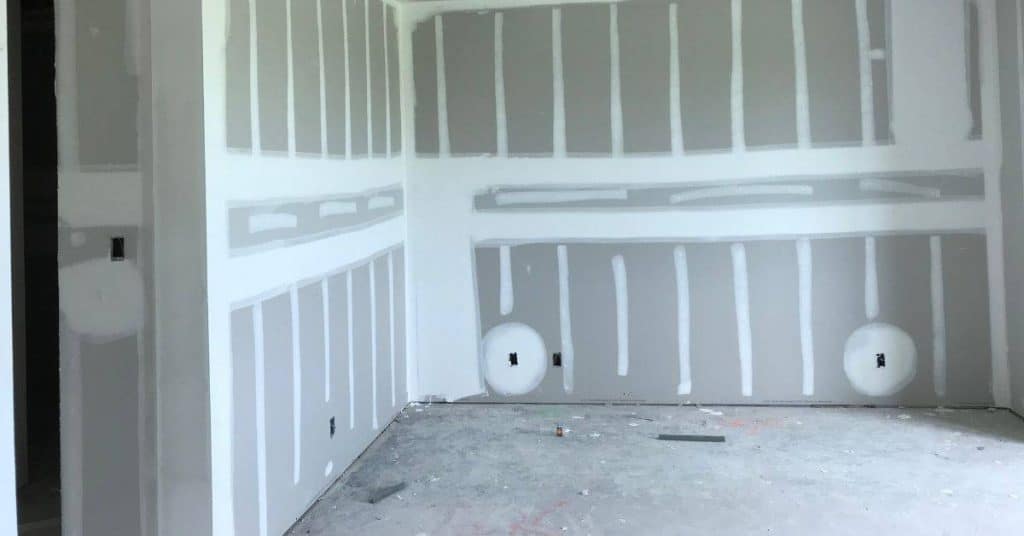
Visual checkpoints for framing acceptance
Before installing drywall, use this checklist to quickly inspect your framing.
- Straight lines: Check that all studs, joists, and plates are straight. Use a level or laser level.
- Consistent reveal widths: Ensure there’s equal space between studs for drywall to fit flush.
- Accessible screw locations: Verify you can reach all screw locations with your drywall screws and screwdriver or drill.
- No gaps: Check for any large gaps between studs that could cause issues.
- Plumb corners: Ensure inside corners are plumb (straight up and down).
- Square openings: Verify all door and window openings are square to the wall.
- No nail pops: Check for any nails popping through the surface. This could cause drywall issues later.
- Electrical boxes: Ensure they’re flush with the face of the studs, not set back or sticking out.
Quick rule: If anything fails these checks, address it before hanging drywall to avoid callbacks.
Cutting, Fitting, and Working Around Penetrations
Define rough openings and penetrations to size panels accurately. Plan trim cuts around windows, doors, and boxes before you cut more than needed. This keeps edges intact and reduces fragile edges poking through later.
Use score-and-snap, saws, or rotary tools for clean edges and easier finish work. Back-cut or trim as needed to fit tightly around irregular shapes while preserving panel integrity. Consider firestop or clearance requirements around penetrations as you fit each piece.
Accurate marking and cutting techniques
Before you start cutting, mark your panels accurately. Use the studs as a guide to ensure straight lines.
For clean cuts, use a utility knife to score the panel, then snap it along that line. For irregular shapes, use a drywall saw or rotary tool.
Never freehand cut without marking first. It leads to oversized gaps and ragged edges.
Managing gaps and edge protection
Around openings, stagger panel joints to avoid weak spots. Use backing strips on the first panel to prevent cracking at corners.
For penetrations like electrical boxes or pipes, back-cut or trim panels for a precise fit. Avoid compressing drywall against boxes; it can crack later.
Always test-fit before mudding. Check for proper backing and screws near edges to prevent callbacks.
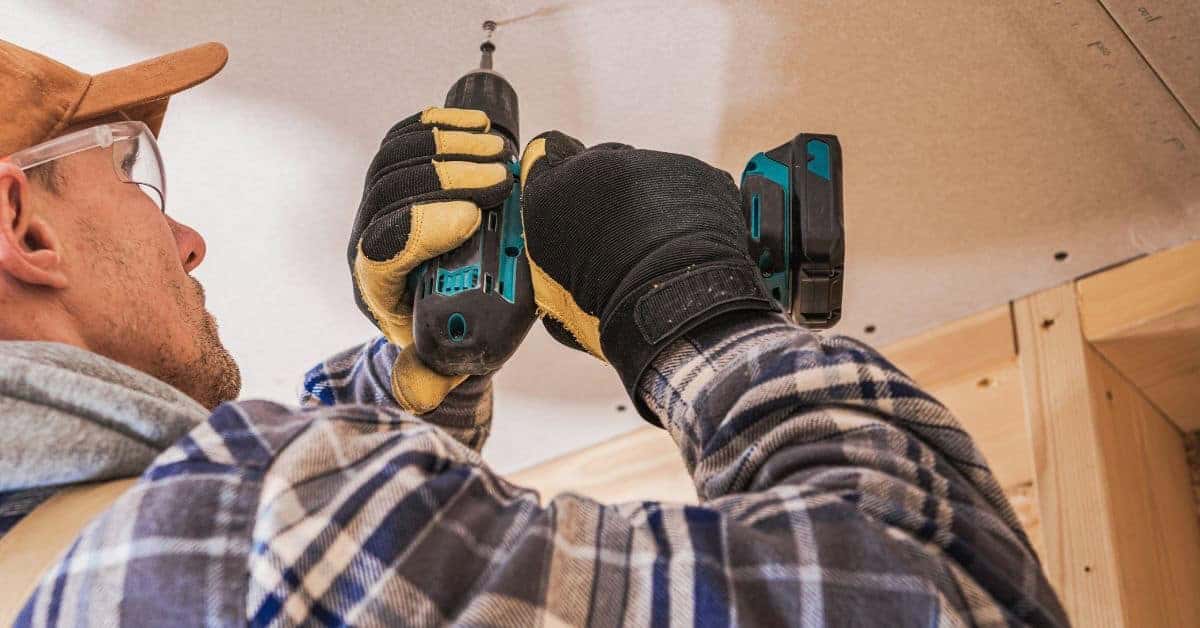
Fastening and Securing Techniques
Choose fasteners based on drywall thickness and substrate, and don’t skip blocking on long spans. Use corrosion-resistant screws and the right length for a solid hold. Avoid fastening too long or too short for the substrate you’re attaching to.
Follow an even screw pattern and avoid over-tightening to prevent puckering. Stagger joints and back each butt joint with backing or blocking. For ceilings, secure to blocking and keep joist alignment in check to prevent sag.
Correct Fastener Selection and Placement
Choosing the right fasteners is as crucial as picking the right concrete mix. You’re looking for strength, durability, and corrosion resistance.
Check your project plans or manufacturer recommendations to decide between nails, screws, or bolts. Each has its place:
– Nails: Best for attaching thin materials like plywood forms or light framing.
– Screws: Ideal for securing thicker materials or where you need a bit more holding power than nails offer.
– Bolts: Reserved for heavy-duty applications, like anchoring reinforcing bars (rebar) in concrete.
Mid-install inspections and quality checks
Before you finish any concrete work, use this checklist to ensure everything is secure and aligned. Catch issues now to avoid costly rework later.
- Check all fasteners are installed: Look for any missed spots where you planned to install a fastener. Use the layout plan or check with your leveling tool to confirm.
(Missed fasteners can cause slippage and misalignment.) - Verify backing is in place: Ensure all fasteners have proper backing, like washers or anchor plates. Check behind walls or under slabs where you can’t see directly.
(Without backing, fasteners can strip or pull through the concrete.) - Check alignment of rebar and mesh: Ensure all reinforcement is properly placed and aligned according to your plans. Use a straight edge or level to confirm.
(Misaligned reinforcement weakens the concrete’s strength.) - Inspect formwork for gaps or leaks: Check all formwork for any gaps, cracks, or leaks that could allow concrete to escape or cause an uneven finish.
(Leaks can weaken the structure and cause unsightly imperfections.) - Confirm proper spacing of fasteners and reinforcement: Measure the distance between fasteners and reinforcement to ensure they’re spaced according to your plans (usually 16″ – 24″ apart).
(Improper spacing can lead to weak points in your structure.) - Check for proper embedment of anchors: Ensure all anchor bolts and other embedded items are properly placed and extend the correct distance into the concrete.
(Inadequate embedment can cause anchors to fail under stress.) - Verify concrete coverage over reinforcement: Measure the thickness of the concrete cover over your rebar or mesh to ensure it meets local building codes (usually 2″ – 4″).
(Insufficient coverage leaves reinforcement susceptible to corrosion.) - Inspect any pre-installed items for damage: Check all items like pipes, ducts, or other penetrations that were installed before the concrete was poured. Ensure they’re undamaged and properly positioned.
(Damaged items can lead to leaks, cracks, or other issues after the concrete has cured.)
Quick rule: Always inspect your work at each stage before moving on to the next. A little extra time now can save you a lot of trouble later.
Sealing, Taping, and Joint Finishing
Watch for overworking compound, air pockets under tape, and uneven feathering that shows through. These are common causes of visible seams and cracks. Plan to address these before mud and paint stages.
Follow a proper tape and mud sequence, choosing paper or mesh tape as appropriate. Use the right mud consistency and coat order to minimize sanding and hide joints. Keep a careful step-by-step checklist to verify surface readiness.
Proper tape and compound application
Start by choosing the right tape – paper for standard joints, mesh for high-stress areas. Cut it slightly longer than your joint.
Embedding is key. Use a 6-inch taping knife to press firmly along the tape’s entire length. Feel for any air pockets or curl. Re-press if needed.
Use pre-mixed ready-mix compound for embedding. It’s easier to control and less likely to dry too fast. Apply a thin, even coat over the tape, pressing it in with your knife. Let it set according to package instructions before filling and finishing.
Preventing shrinkage cracks and sanding defects
Drying time is crucial. Don’t rush it. Let each coat dry completely before sanding or applying the next one.
When filling, use a wider knife (10-12 inches) to apply compound in a smooth, even layer. Aim for a slight convex curve over the joint. This helps prevent sagging and cracking.
For the final coat, use a 12-14 inch knife to feather the edges to zero. This gives you a smooth, seamless finish. Sand lightly with a fine-grit sanding screen after each coat, being careful not to dig into the compound or create swirl marks.
Moisture Control and Environmental Considerations
Humidity and temperature swings affect fasteners, mud curing, and joint performance. Protect against mold and delamination by managing exposure and airflow. Plan for temporary measures when the space is open to the elements.
Choose moisture-rated boards and consider backing or vapor barriers in damp areas. Establish environmental targets and acclimation steps for the materials before installation. Use a simple monitoring routine to catch issues early.
Special treatments for high-humidity areas
In moisture-prone spaces like bathrooms and basements, you need special drywall treatments. Follow manufacturer guidance:
Use moisture-resistant or green board. These have a built-in barrier to prevent mold growth.
Consider Type X boards for steam showers or saunas. They’re fire-resistant and can handle high heat and humidity.
Apply mildew-resistant primer before painting. This adds another layer of protection against moisture and mold.
Jobsite climate control and sequencing
Control jobsite temperature and humidity to prevent callbacks:
Keep the site dry and well-ventilated. Use temporary covers, fans, or dehumidifiers as needed. Seal openings to prevent water intrusion.
Allow drying time for mud and tape. Don’t rush it. Joints need time to cure properly. Follow manufacturer guidelines.
Sequence trades carefully. Paint after drywall, not before. Let each trade finish their work before moving on to the next. This helps prevent moisture-related issues.
Following Manufacturer Guidelines and Standards
Stick to manufacturer instructions for installation steps, material specs, and any limitations to protect warranties. Align your work with local codes and industry standards that apply to drywall in concrete settings. Follow documentation prompts to avoid gaps in coverage.
Check substrate readiness and environmental conditions against the guidelines, and keep datasheets and batch numbers accessible. Use a formal post-install checklist and route issues through proper channels to preserve liability protection.
Where to find and how to document instructions
First things first, you gotta keep those manufacturer instructions on-site. Tape ’em up near your work area or keep ’em in a waterproof folder.
Now, don’t just skim through ’em either. Read ’em cover to cover. Know what drywall type you’re using, the right fasteners, joint compound, tape – everything. And remember, different products have their own quirks. Some might not play nice with others, so check for compatibility notes.
Documentation’s key here too. Keep records of those datasheets, batch numbers, and any special endorsements like mold/mildew resistance ratings. Snap photos of critical steps – it’ll help if you ever need to make a warranty claim down the line.
When to deviate and how to record approvals
Now, sometimes you might need to deviate from those instructions. Maybe your job’s a bit unusual or the manufacturer didn’t cover a specific scenario.
Before you do anything, get it in writing. Contact the manufacturer or an engineer and explain why you need to deviate. They’ll tell you if it’s okay or not. Keep that approval letter or email safe – you might need it later.
Record those deviations too. Note down what you did, when, and why. It’s like a little insurance policy in case anyone questions your work down the road.
Safety, Cost Implications, and Reducing Callbacks
Prioritize safety with PPE, dust control, and planned work sequences. Recognize how safety lapses can lead to rework and callbacks. Use a clear plan to keep the job site controlled and compliant.
Track the true cost of rework by recording waste, labor, and schedule impacts. Implement inspection checklists, punchlist timing, and documented client communications to prevent surprises. Share practical fixes and avoid common drywall mistakes to cut callbacks and save time.
Jobsite safety and protective measures
Safety’s not just a buzzword, it’s your top priority. Here’s how to keep your drywall work safe:
Handling Boards: Use board carriers or help from others when moving sheets. Never carry them alone.
Cutting: Always use a sharp utility knife and cut away from your body. Secure the sheet with clamps to prevent slippage.
Working at Heights: Use ladders properly, secure them, and have someone spot you when working high up.
Cost of rework and planning to prevent it
Rework’s expensive. Here’s how to plan and inspect to keep costs down:
Planning: Order the right materials in advance. Measure twice, cut once.
Interim Inspections: Check your work midway through installation. Catching issues early saves time and money.
Rework’s not just about labor and materials. It impacts schedules and client satisfaction. Keep rework to a minimum with smart planning and regular inspections.
Conclusion
Getting drywall to stay true, look solid, and stay durable comes down to safe, deliberate work from the first plan to the last coat. When you prioritize proper framing, accurate openings, and solid sealing, you reduce callbacks and avoid costly fixes later.
Check this in order as you finish: confirm framing is square and plumb, confirm openings match the door and window sizes, dry-fit panels before cutting, cut clean edges with a sharp blade, install panels with correct fastener spacing and length, seal joints and tape properly, follow the manufacturer’s guidelines, keep moisture and humidity in check, and let each coat cure fully before final finishing. Do a final light check for flatness and nail or screw pulls, then clean and inspect before calling it complete.
Common mistakes to avoid include skipping framing checks, rushing or mis-cutting panels, driving screws too deep or too shallow, skimping on sealing and taping, and neglecting moisture control. Safety rules to follow are simple: wear eye and respiratory protection when cutting, test materials in a small area first, and never force a panel or fasten through damaged framing. If something doesn’t look right after the first pass, stop and reassess before moving on.
If the layout is off by more than a small amount, or you’re unsure about openings, backing, or moisture conditions, it’s wise to call a professional. You’ll gain assurance that the finish will last and reduce the risk of costly callbacks. Stay steady, stay safe, and finish with solid, straight walls you can be proud of.
FAQ
What happens when openings are measured wrong and how do I fix it?
If openings are too small or too large, drywall won’t sit cleanly and fasteners won’t line up. Double-check rough opening measurements against panel size and manufacturer guidance, then trim or shim as needed. Always verify with a real measurement before cutting.
Why is flashing around doors and windows so important, and what are common mistakes?
Poor or missing head and side flashing leads to moisture wicking behind the drywall. Make sure there is a proper back dam and continuous flashing as the manufacturer recommends, with no gaps or misaligned seams. If in doubt, read the product instructions and local practices before proceeding.
How can improper securing methods cause callbacks on a drywall install?
If screws or nails aren’t driven into solid backing or are over/under driven, fasteners pop and joints crack. Use the correct fastener type and pattern for framing, and drive to the right depth without tearing through the paper surface.
What about sealing around penetrations and joints—what should I do?
Inadequate sealing lets air and moisture move through joints and gaps. Seal around penetrations and joints with appropriate sealant and backer where needed, and follow product instructions for curing times and compatibility with joint tape and primers.