

Introduction
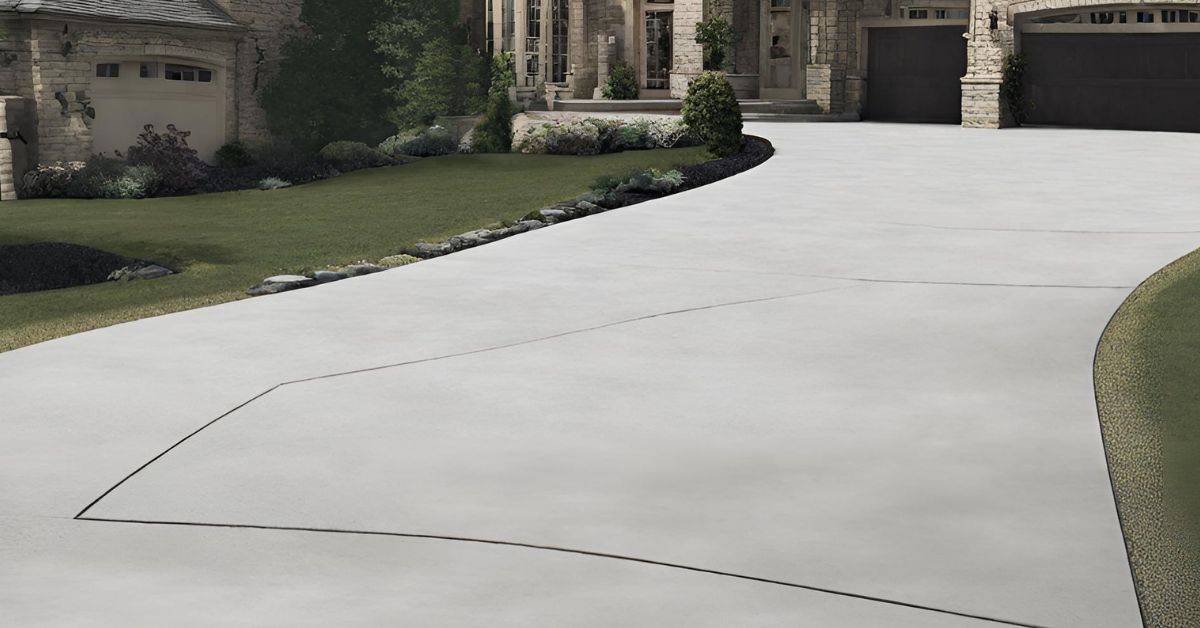
Curing is the period when fresh concrete hardens and gains strength as it dries. For DIY projects, you can start light use only after it has set enough to bear light foot traffic. Temperature and moisture drive this process, and the method you use to cure will affect the outcome.
Full curing takes time beyond initial setting, and skipping proper curing can weaken the slab. Heat speeds drying while cold slows it, so plan based on the forecast and protect from rapid moisture loss. Ways to cure properly include keeping moisture in or using coverings and following local guidelines for how long to wait before sealing, painting, or loading the surface.
Key takeaways
- Drying vs curing: moisture loss and chemical hardening require separate planning.
- Real-world curing timelines dictate when sealing, painting, or light-use is reasonable.
- Temperature and ambient conditions dramatically affect cure rate and final strength development.
- Proper curing methods include consistent moisture, shading, and controlled enclosure when needed.
- Plan for loads and safety: avoid heavy traffic until curing progresses adequately.
- Visual checks and simple tests help QA without specialized tools or guessing.
Table of Contents
- Introduction
- Key takeaways
- Drying Vs. Curing — What’s the Difference and Why It Matters
- Real-World Curing Timeframes for Common Actions
- Factors That Accelerate or Delay Curing
- Proper Curing Methods and When to Use Them
- When to Seal, Paint, or Apply Coatings (Practical Guidance)
- Testing, Visual Checkpoints, and QA During Curing
- Scheduling, Loads, Safety, and Planning Considerations
- Common Mistakes, Troubleshooting, and Cost Considerations
- Conclusion
- FAQ
Drying Vs. Curing — What’s the Difference and Why It Matters
Drying is the evaporation of moisture from the concrete surface and into the air. Curing is the chemical hydration process that strengthens the concrete over time. Understanding the distinction helps you avoid sealing or loading too early.
Moisture loss alone does not indicate full strength, and curing without proper moisture retention can lead to weaker bonds and cracking. Look for indicators like rising strength rather than just surface dryness to gauge readiness for coatings or finishes. Practical cues include how long moisture stays or how quickly a surface feels set, along with the weather, mix design, and slab thickness affecting both processes.
Definitions: drying, setting, and curing
Concrete goes through several stages after placement. Understanding these helps you know when it’s ready for sealing, painting, or loading.
Drying: This is the evaporation of moisture from the surface. It happens quickly, within a few days to a week.
Setting: Setting is when concrete starts to harden due to chemical reactions. It begins immediately after placement but takes time to gain significant strength.
Curing: Curing is the continuation of these chemical reactions that lead to strength gain. It’s a slower process, lasting weeks to months.
Practical consequences for sealing, painting, and loads
Acting too soon can lead to problems. Here’s what happens:
Sealing: Premature sealing traps moisture, leading to blistering or peeling of the sealant.
Painting: Painting too early can cause poor adhesion and premature failure of the paint job.
Loading: Applying loads before concrete has gained sufficient strength can result in cracking or reduced durability. Always wait until the concrete has reached at least 75% of its design strength.
Real-World Curing Timeframes for Common Actions
Start by separating initial set, surface dryness, light loads, heavy loads, and full cure timelines. Use typical hour and day anchors as loose references, then verify with product datasheets and project specs. Conditions like temperature and humidity will shift these milestones.
Compare open air curing, water curing, and membrane methods to see how they alter timelines and final strength. Always check manufacturer’s guidance for sealers, coatings, paints, and load-bearing requirements. Use practical checkpoints such as temperature and humidity thresholds and simple tests to re-assess if conditions change.
Typical milestones (initial set, walk-on, light/heavy loads, full cure)
The curing process has distinct stages. Here’s what to expect:
Initial Set: Within 24-72 hours, concrete reaches initial set. It’s firm but still soft.
Walk-on: After 24-48 hours, you can usually walk on it without damage. But keep traffic light.
Light Loads: Around 3-7 days, concrete gains enough strength to bear ordinary loads like vehicles driven slowly and carefully.
Heavy Loads: At 7-28 days, it’s strong enough for heavy machinery or full traffic. But check project specs – some may require longer curing times.
Full Cure: After 28 days, concrete reaches about 95% of its final strength. But it keeps gaining strength over time.
What to check before sealing or painting
Before applying sealers or paint, ensure your concrete is ready. Here’s a quick checklist:
- Moisture Content: Check with a moisture meter. Too much can ruin your sealer or paint job.
- Surface Hardness: Test with a surface hardness tester. It should be at least 30 on the Schmidt Hammer scale.
- Curing Time: Wait at least 28 days for most sealers, longer for some paints. Check product datasheets.
- Temperature: Ensure it’s between 50-90°F (10-32°C) for best results.
- Surface Preparation: Clean and prime the surface to ensure good adhesion.
- Relative Humidity: Keep it below 75% for optimal curing of sealers and paints.
- ASTM Standards: Some projects may require specific ASTM standards. Check your project specs.
- Manufacturer Guidelines: Always follow the manufacturer’s instructions for their specific product.
Quick rule: If in doubt, wait a bit longer. It’s better to be safe than sorry with concrete curing times.
Factors That Accelerate or Delay Curing
Ambient temperature and substrate temperature interact with pour temperature and influence curing speed. Look for how deviations from optimal ranges affect the process. This helps you plan when to delay or proceed with finishing work.
Humidity, wind, and drying rate matter a lot. High wind or low humidity can speed up evaporation, while calm, moist air slows progress. Practical signs include cracking, crazing, or curling, which signal you should adjust timing or methods used.
Environmental influences: temperature, humidity, and wind
Temperature plays a significant role in concrete curing. The ideal range for concrete to cure is between 50°F (10°C) and 90°F (32°C). Below 50°F, hydration slows down, extending the curing time. Above 90°F, it speeds up, but high temperatures can also cause excessive water evaporation, leading to cracking.
High humidity helps maintain a moist environment around the concrete, accelerating curing. Low humidity does the opposite, slowing down the process and increasing the risk of drying too quickly, which can lead to crazing or curling. Wind speed affects evaporation rate – higher winds dry out concrete faster, potentially causing surface problems.
To manage these factors, monitor temperatures with a thermometer, keep concrete moist (using curing compounds or water if necessary) in low humidity conditions, and protect from strong winds. Remember, every 18°F (10°C) drop below 70°F (21°C) can double the time to reach final set.
Mix and placement factors: water/cement ratio, admixtures, and thickness
The water-cement ratio is crucial. A higher ratio (more water) increases curing time but can lead to weaker concrete. Supplementary cementitious materials like fly ash or slag can extend curing time as they react slower than Portland cement. High aggregate moisture content also slows down hydration.
Admixtures can alter cure times. Accelerators speed up setting, allowing earlier finishing and handling. Retarders delay setting, useful in hot weather. Superplasticizers improve workability without affecting setting time. Always follow the admixture manufacturer’s guidelines for curing times.
Thicker slabs take longer to cure due to their larger volume. A 12-inch thick slab can take up to four weeks to reach full strength. Joint layout and surface finishing also impact curing – joints control cracking, while broomed or troweled surfaces may require additional curing time for proper hydration.
Proper Curing Methods and When to Use Them
Water curing, wet coverings, curing compounds, and insulated blankets are the main options. Each method maintains moisture differently and supports strength gain. Match the method to climate, slab size, and finish requirements.
Implementation steps include surface prep, timing to start curing after finishing, and how long to keep moisture or coverings in place. Compare advantages and drawbacks for your project and check compatibility with any decorative or sensitive finishes.
Wet Curing, Membrane Curing Compounds, and Blankets
These methods keep concrete moist to maximize hydration. Here’s how:
- Wet Curing: Spray or pond water on the surface. Keep it wet for 7 days minimum.
- Membrane Curing Compounds: Apply a liquid film that seals in moisture. Leave it on until cure is complete (usually 28-56 days).
- Insulated Blankets/Membranes: Cover concrete with reflective blankets or membranes to retain heat and moisture. Remove after 3-7 days.
Pros: Enhanced strength, better finish. Cons: Can cause surface discoloration if not done right. Timing is crucial.
Choosing a Method for Residential vs. Commercial Projects
Select the best curing method based on project scale and needs:
- Residential: Simple methods like wet curing or blankets are usually sufficient. They’re cheaper and easier to apply.
- Commercial: Larger projects may require more robust methods, like membrane compounds. These provide better protection against harsh conditions but cost more.
Consider: Budget, weather exposure, required finish quality. Always follow manufacturer’s guidelines for best results.
When to Seal, Paint, or Apply Coatings (Practical Guidance)
Plan the sequence so the concrete has fully cured and meets moisture and strength benchmarks before coatings. Follow manufacturer instructions for order and overcoat windows. Verify both surface readiness and substrate readiness before applying coatings.
Test for moisture and compatibility using in-situ methods and product specs. Document the sequence and drying intervals, and have a plan if a test area fails adhesion or cure checks. Always confirm temp, RH, and dew-point limits during application.
Timing for Clear Sealers and Topical Treatments
Before applying any sealer, ensure your concrete has fully cured. This usually takes around 28 days, but can vary depending on conditions.
Moisture testing is crucial before sealing. Use a moisture meter or in-situ pins to check surface moisture levels. Aim for low surface moisture (typically below 4%).
Perform an adhesion test by applying a small amount of sealer, letting it cure, then trying to remove it. If it peels off easily, your concrete isn’t ready.
Timing for Paints and Epoxy Floor Systems
Concrete should be dry before painting or applying epoxy. This typically takes longer than sealing, around 60 to 90 days.
Surface profile is important. Concrete should have a suitable surface profile (typically between 1-3 mm) for paint or epoxy adhesion. If necessary, clean and prepare the surface using pneumatic cleaning, etching, or shot-blasting.
Test your concrete’s readiness by applying a small amount of paint or epoxy in an inconspicuous area. Let it cure, then check for any signs of delamination or failure. Follow manufacturer guidelines for recoat windows and curing times.
Testing, Visual Checkpoints, and QA During Curing
Track surface appearance changes like color, sheen, and any microcracking. Note signs such as efflorescence or a dusty surface that indicate curing status. Visual cues help you decide when to move forward with subsequent steps.
Use simple hardness checks or rebound tests to gauge progress toward acceptable strength. Plan moisture testing with RH/MVER or calcium carbide tests and align acceptance criteria with coatings or sealers. Maintain a log of temperatures and humidity for QA decisions.
Simple on-site checks and visual signs
Before you move forward, use this quick checklist to spot potential issues or readiness for next steps.
- Surface dusting: Too much dust means it’s not ready. Sweep off excess with a soft brush.
- Hardness check: Gently press a coin into the surface. If it leaves an impression, wait longer.
- Hairline cracking: Fine cracks are normal, but wide ones need attention. Seal or repair before proceeding.
- Color change: From grey to cream indicates curing progress.
- Sheen level: Increasing sheen shows hardening.
- Efflorescence: White powder on surface signals excess moisture. Let it dry out naturally or use a dehumidifier.
- Popcorn texture: Rough surface indicates incomplete curing. Wait for it to smooth out.
- Microcracking: Tiny cracks are normal, but excessive ones need attention.
Quick rule: If in doubt, wait a bit longer before moving forward.
When and how to use moisture and strength tests
To ensure your concrete is ready for sealing or painting, use these tests at specific intervals.
- Relative Humidity (RH) test: Use a RH meter. Acceptable range: 70-95%. Too low/high can affect adhesion.
- Moisture Vapor Emission Rate (MVER) test: Use calcium carbide test kit. Acceptance criteria: <1 lb/1000 sq ft/day for sealers, <3 lb/1000 sq ft/day for paints.
- Compressive strength test: Use rebound hammer or other simple surface hardness tests. Aim for 25-30% of design compressive strength before sealing/painting.
- Temperature and humidity logging: Monitor substrate, ambient, and surface temperatures, plus humidity. Ideal curing range: 50-90°F (10-32°C), RH 40-80%.
Quick rule: Always consult the coating/sealer datasheet for specific acceptable moisture and strength values.
Scheduling, Loads, Safety, and Planning Considerations
Set cure windows and milestones that influence sequencing, including initial set and recommended sealing timelines. Align these with typical strength milestones and project needs. Coordinate with other trades to avoid conflicts and delays later on.
Manage traffic and access with barriers and a clear plan for light versus heavy loads. Protect the surface from weather, and document curing conditions and any deviations. Safety rules and PPE should be established for all workers around curing concrete.
Light vs. Heavy Loads and Construction Phasing
Concrete needs time to gain strength before it can bear weight. Here’s how to phase your work:
Foot traffic: Allow after initial set (4-6 hours).
Light equipment: Wait until concrete reaches 50% of its design strength (around 3 days for most mixes).
Heavy vehicles/equipment: Delay until concrete reaches 70-80% strength (7-14 days, depending on mix and conditions). Always verify with your engineer or supplier.
Safety Precautions and Protection During Curing
Protecting the curing concrete is crucial. Here’s how:
Temporary barriers: Install to keep traffic off freshly poured surfaces.
Signage: Use clear, visible signs warning of wet surfaces and restricted access.
Temperature protection: In extreme heat or cold, use tarps, shade, or windbreaks. Monitor temperature swings closely.
PPE for crews: Ensure workers wear appropriate footwear, gloves, and other protective gear when working near curing concrete.
Common Mistakes, Troubleshooting, and Cost Considerations
Common errors include sealing too early, inadequate moisture retention, and ignoring product specs. These missteps can undermine long-term performance and finish quality. Identify issues early with a practical troubleshooting approach.
Use a cost-conscious mindset by weighing options like curing blankets, moisture-masting methods, and labor. Balance performance with budget by matching method to slab thickness, indoor vs. outdoor exposure, and potential rework costs from premature sealing. Plan for contingencies and document decisions to avoid repeat fixes.
How to avoid and correct common curing errors
Curing is a critical stage in concrete’s life. Avoid these common mistakes to ensure long-term performance.
- Sealing too early: Wait until the concrete reaches its final set (around 28 days) before sealing. Premature sealing can trap moisture and cause issues.
- Insufficient moisture retention: Keep the concrete consistently moist during curing to allow proper hydration. Inadequate moisture can lead to weak, cracked surfaces.
- Ignoring product-spec requirements: Follow manufacturer guidelines for sealers, curing compounds, and blankets. Using incompatible products can harm the concrete.
- Over-applying sealers: Too much sealer can cause ponding water, leading to surface damage. Apply sealers evenly and sparingly.
- Inadequate surface prep: Ensure the surface is clean, smooth, and free of contaminants before sealing or applying coatings. Poor prep can result in adhesion failures.
If you detect issues, delay sealing, adjust curing methods, re-mist or re-wet as needed, use compatible sealers, and consider consulting a professional for severe problems.
Cost drivers and what to budget/check
Curing costs vary based on several factors. Here’s what to consider when budgeting:
Labor: Curing methods like membrane curing compounds or blankets may require additional labor for application and removal.
Materials: Water-based sealers are generally cheaper than solvent-based ones, but they may not perform as well in certain conditions. Curing blankets and moisture-misting systems also have material costs.
Climate mitigation: In hot or cold climates, additional measures like heating, cooling, or climate-controlled enclosures may be necessary to maintain proper curing temperatures.
Get local quotes for materials and labor. Compare methods based on your project’s specifics—slab thickness, use-case, exposure—to balance performance with budget.
Conclusion
Getting curing right protects safety, durability, and the final look. If you nail the timing and methods, you reduce the risk of cracks, seal failures, and costly redo work.
Now do this: verify the surface has shed excess moisture but is still within the cure window, confirm the air and surface temperatures and humidity are appropriate, keep the proper curing method in place for the needed period, and test with a simple check or visual checkpoint before sealing or painting, then plan any loads or openings with caution and within the recommended window. Safety first and methodical checks beat guesses every time.
Common mistakes to avoid are rushing the cure to apply coatings, exposing uncured concrete to heat, sun, or heavy loads, and skipping tests or patch checks. Always wear proper PPE, test a small area first, and follow the recommended cure durations. If anything looks off—unexpected cracking, glazing, or moisture pockets—pause, recheck your conditions, and revise your plan rather than forcing through.
If the project involves a large slab, complex coatings, or structural concerns, or if conditions are unusual (high moisture, extreme temps, persistent cracking), it makes sense to call a professional. Otherwise, stay disciplined, document your timing, and keep the work within safe, proven ranges. With careful steps, you’ll have a durable, even finish and a job you can be proud of.
FAQ
When is newly poured concrete dry enough for light use like walking or parking a car?
Don’t rush it. Light foot traffic may be possible after surface hardening, but gripping surfaces and load limits vary by mix and conditions. Check the concrete’s indicators and follow manufacturer instructions or local guidance before using it for any load-bearing or frequent traffic.
What does a full curing timeline look like and why does it matter?
Curing is a process that continues for days and weeks. Full strength and durability develop over time, so plan coatings, sealing, and loads around the longer-term cure guidance from the mix design and product labels.
How does temperature affect curing time and what should I expect on hot vs. cold days?
Higher temperatures speed setting; cooler weather slows it down. Extreme heat can lead to surface drying and cracking if not managed, while cold slows strength gain. Use manufacturer instructions and local guidelines to adjust curing practices for temperature.
What are practical ways to cure concrete correctly and avoid problems?
Keep moisture in and protect the surface from rapid drying. Use curing blankets, fogging, misting, or a proper curing compound as recommended. Do not expose fresh concrete to direct wind or sun longer than necessary without protection.