
Introduction
Floating and troweling are concrete finishing steps that shape and smooth the surface.
You start floating after the concrete begins to stiffen and can hold its edge, then you move to troweling to achieve a smooth, even finish. Stop troweling when the surface looks uniform and has the desired sheen, without overworking it.
Always check the product label and manufacturer instructions for timing guidance, since mixes vary. Watch for weather and site conditions like temperature, humidity, and wind, and adjust accordingly. If you’re unsure, defer to local rules or consult the concrete supplier, and test a small area first.
Key takeaways
- Start floating only after mortar loses grip but remains plastic and workable.
- Use the float flat and steady, moving in small arcs to avoid gouging.
- Begin troweling when water sheen disappears and edges stiffen slightly.
- Stop troweling when the surface appears uniform and no drag while finishing.
- Keep PPE on, check for overhead hazards, and avoid dust buildup and trips.
- Plan for climate or mix changes by adjusting timing with tests and touch checks.
Table of Contents
- Introduction
- Key takeaways
- Overview of Finishing Stages and Why Timing Matters
- Visual and Tactile Indicators for When to Start Floating
- How to Float Correctly: Tools, Setup, and Technique
- Recognizing the Right Time to Begin Troweling
- When to Stop Troweling and Achieve the Intended Finish
- Troubleshooting Timing Errors and Corrective Actions
- Special Conditions: Mixes, Climates, and Finish Types
- Practical Checklists and on-Site Decision Guide
- Conclusion
- FAQ
Overview of Finishing Stages and Why Timing Matters
The finish sequence for concrete moves from screeding to floating to troweling. Each step has its own window and purpose. Timing affects how strong the slab becomes, how durable it is, and how it looks once cured.
Keep in mind that local instructions and product data sheets may specify timing considerations. When in doubt, verify with the manufacturer or your project specs and adjust your plan accordingly. Use this overview to frame how decisions at each step impact the final result.
Key terms defined (floating, troweling, bull float, power trowel)
Let’s start by defining some key terms and tools used in concrete finishing.
Floating is the initial step where we level and smooth the concrete surface using a bull float. This tool looks like a large, flat shovel with a long handle. It’s used to remove excess water and bring cement to the surface.
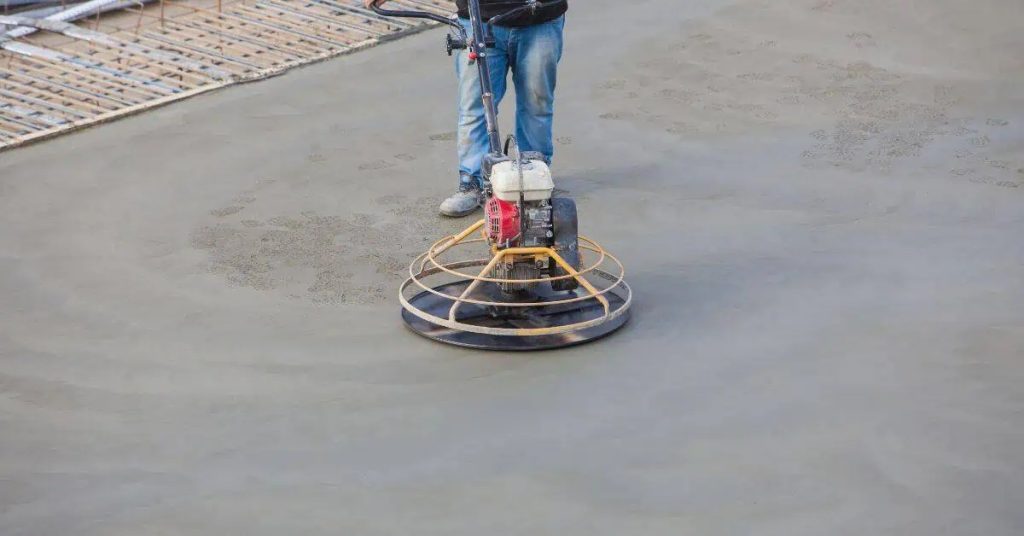
Troweling comes later in the process. It’s when we use a power trowel, a machine with spinning blades, to give the concrete its final smooth, glossy surface. Timing is crucial for both these steps.
Consequences of wrong timing
Starting to float or trowel too early can lead to serious issues. The concrete might not be strong enough yet, causing it to crack under the weight and pressure.
Stopping too late can also cause problems. The surface may dust, meaning it becomes powdery and weak. This happens when we trowel for too long, removing all the cement from the top layer and leaving just aggregate behind.
Another issue is delamination. This occurs when the concrete’s surface layers separate from the underlying slab due to improper timing. It can make your otherwise perfect finish look like it’s peeling off.
Visual and Tactile Indicators for When to Start Floating
Crew members rely on the feel of the surface and the look of the concrete to decide when to float. Look for a surface that stops drying so quickly and begins to show a uniform sheen. A light drag without gouging or tearing is another common cue.
Execute a few light passes and assess whether the surface responds smoothly under the float. If the ground feels slightly firm underfoot and the edge of the float skims without leaving ridges, you may be near the right moment. When in doubt, consult the product label or site supervisor for any timing notes.
Bleed water and surface sheen checks
First, look for bleed water. It’s the excess water that rises to the surface as the concrete sets. When it stops coming up, it’s time to float.
Gently touch the surface with your finger or a trowel. If you leave an imprint but no water fills it in, that’s a good sign. Be careful not to mar the slab.
The surface should have a slight sheen too. This indicates the right amount of moisture for floating. Too much sheen means it’s still too wet.
Edge and joint stability tests
Before you start floating, check your slab edges. Give them a gentle tap with your trowel or bull float. If they’re firm, they’re ready.
Do the same for any joints or forms. They should feel solid, not spongy or soft. This ensures your tools won’t tear or slump the concrete.
Remember, if edges or joints are weak, wait until they’re firm before floating.
Environmental and mix-related signs
Temperature, wind, humidity – these all affect set time. Warmer weather speeds it up, colder slows it down. Keep an eye on the forecast.
Wind can dry out the surface too fast. If it’s breezy, you might need to cover your slab or add more water to the mix.
Admixtures can change set behavior too. Check with your mix supplier or datasheet to see how they affect timing. Knowing your mix is key to knowing when to float.
How to Float Correctly: Tools, Setup, and Technique
Choose the right float for the job and ensure it is clean and free of embedded debris. Set up a comfortable stance with a steady rhythm and even pressure. Use slow, even passes to consolidate the surface without overworking the cement paste.
Keep the float level and move it across fresh sections in a systematic pattern. Avoid digging or dragging the edges too aggressively, which can pull paste from the surface. If you’re unsure about tool selection or technique, check the tool manufacturer’s guidance or your project specs.
Step-by-Step Process
Follow this clear sequence to float your concrete correctly, ensuring a smooth and level surface.
- Preparation: Wear appropriate PPE (gloves, safety glasses) and check the weather. Concrete floats best when it’s between 50-90°F (10-32°C).
- Setup: Ensure your float is clean and in good condition. Attach it to a long handle for reach.
- Main Work: Start at one corner, pushing the float away from you with steady pressure. Lift and turn as you go, keeping the float flat on the surface.
- Check Progress: Look for an even, level surface. Use a straightedge to check for low spots or high areas.
- Cleanup: After floating, clean your tools thoroughly. Inspect the concrete one last time before moving on to troweling.
Tools and materials checklist
Use this list when preparing to float your concrete to ensure you have everything needed for a smooth process.
- Concrete floats: Wood, magnesium, or bull floats. Choose based on the size of your pour and surface finish desired.
- Handles/extensions: Long handles allow you to reach all areas without stepping onto the concrete.
- Screed: A straight, flat piece used to level and remove excess concrete from the surface.
- Straightedges: For checking the level of your surface. Use a 2′ or 4′ straightedge for best results.
- PPE (Personal Protective Equipment): Gloves, safety glasses, and sturdy boots to protect against concrete splatter and sharp edges.
Quick rule: Always check your tools before starting. Dull or damaged floats can leave marks on the surface.
Proper floating technique and stroke patterns
Mastering these techniques will help you achieve a smooth, level concrete surface.
Start at one corner, pushing the float away from you with steady pressure. Lift and turn as you go, keeping the float flat on the surface. Use long, even strokes, overlapping each pass slightly to ensure full coverage.
Keep your strokes consistent in length and width. Vary your stroke direction occasionally to help embed fines and level any slight imperfections.
Pressure control: Apply steady pressure throughout the stroke. Too much pressure can cause the float to dig into the concrete, while too little won’t effectively level or consolidate the surface.
Floating mistakes to avoid
Steer clear of these common floating mistakes to prevent texture problems and weaken your concrete’s surface.
- Excessive pressure: Too much force can cause the float to dig into the concrete, leaving marks or damaging the surface.
- Floating wet/puddled areas: Floating while there are puddles on the surface can lead to an uneven finish and weak spots. Wait for bleed water to disappear before floating.
- Reworking a drying surface: Once the concrete starts to set, reworking it can cause texture problems and weaken the surface.
Always check your concrete’s readiness before starting to float. If in doubt, wait or consult with a professional.
Recognizing the Right Time to Begin Troweling
Begin troweling after the float has left a smooth, even surface and the concrete has begun to set without excessive dusting. A trowel should glide without pulling or tearing the surface. If the trowel leaves visible gouges, wait a bit longer before trying again.
Perform a light scrape or hold test to confirm that the surface will accept a trowel without sticking. If the mix clumps or tackiness remains, pause and re-evaluate with the team’s standard checks or manufacturer guidelines.
Thumbprint or impression test
Before you start troweling your concrete, you need to make sure it’s ready. The thumbprint test is a simple way to check this.
Here’s what you do:
Press your thumb firmly into the surface. If it leaves a clear imprint but doesn’t fill up with water, that means the bleed water has stopped and the concrete is starting to set. It’s time for your first trowel pass.
But be careful – if your thumb fills up with water or leaves no imprint, the concrete isn’t ready yet. Wait a bit longer before you start troweling.
Staging trowel passes (first pass to finish)
Now that you’ve checked the base compaction and passed the thumbprint test, it’s time to start troweling. You’ll make several passes with your concrete trowel to achieve a smooth, level surface.
First Pass (Light Broom): Start when the bleed water has disappeared but the surface is still damp. Use a light touch, just enough to bring any remaining aggregates to the surface. This pass helps lock in moisture and prevents dusting.
Intermediate Passes (Smoothing): Continue troweling as the concrete stiffens, using increasingly firmer pressure. These passes smooth out any minor imperfections. Check for low spots or high spots; fill or strike off as needed.
Final Pass (Finishing): Once the surface is level and smooth, make your final pass with a bullfloat or magnesium float to bring up any remaining laitance and ensure a consistent, uniform finish. Be patient; rushing this stage can lead to an uneven surface.

When to Stop Troweling and Achieve the Intended Finish
Stop troweling when the surface achieves the desired level of smoothness and sheen without creating a burnished layer or closed-in surface. Look for uniform texture and a break in the trowel pattern that signals even curing underneath. If you see dull patches or overworked spots, stop before continuing.
Avoid overworking by sticking to your planned passes and timing. If you’re aiming for a brushed or broom finish, recognize those cues and adjust to match the finish type while protecting the slab from excessive density changes.
Final surface cues: sheen, hardness, and texture
The finish is complete when you see a consistent, uniform sheen across the entire surface. This indicates that the concrete has reached its final set.
Press your thumb gently onto the surface. If it leaves no imprint, the concrete is hard enough to stop troweling. Be careful not to press too hard as this can still damage the surface at this stage.
The texture should feel smooth and even underfoot. Any rough patches or variations in height mean more work is needed.
Stop timing relative to subsequent treatments
Knowing when to stop troweling is crucial for the success of any follow-up treatments. If you’re applying a sealer, overlay, or preparing for polishing, stopping too early can lead to poor adhesion and performance.
For sealers, wait until the concrete has reached its final set and the surface is completely dry before application. This usually takes 28 days but can vary depending on conditions.
If you’re applying an overlay or preparing for polishing, stopping at the right time ensures a strong bond between the new material and the existing concrete. Follow the manufacturer’s guidelines for specific timing.
Troubleshooting Timing Errors and Corrective Actions
Premature finishing can lead to surface crazing, and overworking can weaken the top layer. Identify the cause by checking surface feel, sheen, and any visible texture changes. Plan a corrective action before proceeding, such as reworking with appropriate tools or waiting for a new opportunity to finish.
In many cases, small touch-ups or re-float, then re-trowel, can salvage the look. If the problem is beyond quick fixes, consider rework and consult your crew lead or follow the rework guidance from the product data sheet or local rules.
Remedies for early floating/troweling damage
If you catch yourself too soon into the floating process, don’t panic. You’ve got options.
First, stop working on it immediately. Let it sit and rest. Timing is crucial here; wait until the concrete has regained its initial set before proceeding.
Once ready, you can either lightly rework the surface with a bull float to even out any imperfections or, if damage is severe, consider removing and replacing the affected area. Always consult with your material supplier for advice tailored to your specific mix.
Fixes for over-troweled surfaces
Over-troweling can lead to a weak top layer and even burning, where the surface becomes too smooth and shiny. Here’s how to mitigate this:
First, stop troweling immediately. Let the concrete rest and cool down.
Next, use a mechanical roughening tool like a scarifier or shot blaster to remove the damaged layer. Be careful not to go too deep; you don’t want to compromise the entire slab’s integrity.
Once roughed up, apply a surface bonding/repair system designed for your concrete type. Follow manufacturer instructions closely. This will help restore strength and durability to your surface.
Special Conditions: Mixes, Climates, and Finish Types
High-early strength mixes, admixtures, and climate extremes can shift finish timing. Adjust expectations and consult the mix instructions for any altered setting behavior. Plan for additional checks if conditions change during the pour.
Different finishes, such as broom, exposed aggregate, or polished surfaces, require different timing and handling. Reference the finish specification and climate considerations and align your technique to the desired look while protecting strength and accessibility.
Admixtures and high-early-strength concretes
Concretes with admixtures or high early strength can set faster, shortening your workable time. Check the set rate with your supplier.
High-early-strength mixes might require you to start floating earlier – sometimes within 2 hours of pouring. Keep an eye on the mix and don’t wait too long.
Admixtures like accelerators can also speed up setting time. If you’re using these, adjust your schedule accordingly. Don’t rush through steps just because the concrete is setting fast.
Differences for exterior slabs, interior floors, and decorative finishes
Exterior slabs need extra time for moisture to evaporate. Don’t rush troweling until the surface is dry enough.
Interior floors often require a smooth finish. Start troweling earlier than you would with exterior slabs, but be patient and let the concrete bleed out first.
Decorative finishes like exposed aggregate, stamped concrete, or polished surfaces have specific timing needs:
– For exposed aggregate, wait until the initial set before washing off the surface mud. Then, let it cure a bit more before sealing.
– Stamped concrete needs to be stamped just after the bleed water disappears but before it fully sets.
– Polished surfaces require multiple passes with progressively finer tools over several days.
Practical Checklists and on-Site Decision Guide
Use a simple, repeatable flow to decide whether to float or trowel now or wait. Start with surface feel, look, and a quick test, then compare against the project specs. Keep the decision steps clear and remove guesswork in the field.
Document key checks for handoffs and future pours, and train on a consistent decision path. If any doubt remains, defer to the established guidelines, manufacturer instructions, or local rules before proceeding.
Pre-floating On-Site Checklist
Before you start floating, ensure everything is ready to avoid mistakes. Use this checklist.
- Bleed water: Confirm it’s gone. If not, wait. It weakens the surface.
- Tools ready: Check trowels, edgers, and floats. Missing or damaged tools cause delays.
- Edges stable: Ensure forms are secure. Unstable edges lead to uneven surfaces.
- Weather conditions: Check temperature and humidity. Extreme weather affects curing.
- Mix confirmation: Verify the mix design. Wrong mixes cause problems later.
- Subgrade stable: Ensure it’s solid. Settlement causes cracks over time.
- Joints planned: Know where control joints go. Improper spacing leads to cracking.
- Curing plan: Have materials ready for curing after floating.
Quick rule: If anything’s not ready, wait. Rushing causes rework.
Pre-Stopping Trowel Checklist
Before you stop troweling, ensure the surface is ready for curing. Use this checklist.
- Sheen: Look for a consistent sheen across the slab. Inconsistencies mean more troweling is needed.
- Hardness: Gently press on the surface. It should feel firm but not hard as rock. Too soft means it’s not ready.
- Evenness: Check for low or high spots. Inconsistencies need more troweling.
- Laitance: Ensure there’s no laitance (milky residue). It weakens the surface.
- Absence of moisture: Surface should be dry to touch. Wetness means it’s not ready for curing.
- Edges even: Check edges are level with the slab. Uneven edges cause tripping hazards.
- Curing materials ready: Have curing compounds or coverings ready.
Quick rule: If anything’s not right, keep troweling. Curing too early causes problems.
Quick Textual Decision Flow
Use this yes/no guide to decide when to float or stop troweling.
- Bleed water present? No: Proceed. Yes: Wait until it’s gone.
- Surface dents easily? No: Proceed with floating. Yes: More troweling needed.
- Supplier OK’d mix? No: Check mix design. Yes: Proceed.
- Edges stable? No: Secure forms. Yes: Proceed.
- Weather suitable? No: Postpone work. Yes: Proceed.
- Curing materials ready? No: Prepare them. Yes: Proceed with stopping trowel.
Quick rule: If unsure, wait or check again. Rushing causes rework.
Conclusion
Getting the finish right comes down to timing and steady hands. Do not rush or overwork the surface, because a small mistake now can show up as cracks or a dull look later.
Check the plan as you go: verify the surface is accepting float and not pulling away; run the float evenly in the correct direction, then watch for a smooth, beveled edge before you move to troweling; keep sessions short enough to avoid burning the surface, and test a small area first if conditions change. Follow the sequence you practiced: float when the surface shows a stingy sheen and slight drag, then begin light troweling when the sheen fades and the surface becomes firm to the touch, stopping before you see excessive friction or overheating of the mix.
Common mistakes to avoid are forcing a finish that’s too early or too late, overworking the concrete, and skipping testing in a representative area. Safety rules are simple: wear eye and hand protection, keep clean water on hand for gradual surface relief, and never fold in one spot by reworking over already-dense patches. If you’re underway in hot, cold, or variable conditions, test a small patch first and back off if the surface behaves oddly; heavy wind or rapid evaporation means longer cure time and gentler trowel work.
If the mix or climate feels off or you see inconsistent results after two attempts, don’t push it. It’s better to call in a pro for a quick assessment than risk a costly redo. Stay steady, follow your checklists, and you’ll finish strong with a durable, good-looking surface.
FAQ
When should I start floating after rough screeding, and what signs tell me to begin?
Look for a uniform surface with few tiny ridges and a dull finish. The concrete should lose the obvious sheen of the surface and feel slightly firm to light touch. If in doubt, use a small test area and follow manufacturer instructions for your mix and finish.
What tells me I need to stop troweling, and how do I know I’ve achieved the right finish?
Stop when the surface looks uniform, has a consistent texture, and holds a slight sheen without pulling or gouging. Push with your hand to check for drag and change in texture; if you feel clinker or deep lines, you’re still too rough. If in doubt, don’t force it—you can always re-trowel later in small passes.
What should I do if I started troweling too early or too late?
If you started too early, you’ll see excessive drag and torn edges; stop, let the surface set a bit, then resume with lighter passes. If you started too late, the surface may craze or peel; don’t overwork it—allow to stiffen, then finish with a controlled, light touch or re-float if needed.
How do weather, heat, or wind affect finishing timing, and what adjustments are safe?
Hot or windy conditions can speed up setting, while cold or humid days slow it down. Base decisions on how the surface behaves rather than on timers or rough rules. Check the product label and manufacturer instructions, and consider a simple on-site test before you proceed.