

Introduction
Painting over powder coat means applying paint directly on a powder-coated surface after proper prep. It can work, but only if the surface is clean, sound, and properly prepared. If you’re unsure, check the primer and paint labels for compatibility and follow local rules.
Prep should start with a thorough cleaning, roughing the gloss, and removing any oils or waxes. Then use a compatible primer and let it dry per the manufacturer’s guidance before painting. Always test adhesion on a small area first and consult product instructions for any limitations.
Key takeaways
- Assess surface for powder finish compatibility before choosing primers or paints.
- Follow manufacturer guidance; test adhesion on a small area first.
- Thoroughly clean and degrease; remove dust, oils, and contaminants thoroughly.
- Wear respirator and gloves; avoid breathing fumes and skin contact.
- Use compatible primer and paint designed for metal and coated surfaces.
- Protect surrounding finishes; mask edges and cure areas during painting.
- Inspect adhesion post-cure; perform light scrape test to confirm bond.
Table of Contents
- Introduction
- Key takeaways
- When Painting over Powder Coat Is Possible
- When You Should NOT Paint over Powder Coat
- Tools and Materials Checklist
- Surface Preparation Step-by-Step
- Choosing the Right Primer and Paint
- Application and Curing Best Practices
- Visual Checkpoints and Adhesion Tests
- Troubleshooting, Durability, and Maintenance
- Conclusion
- FAQ
When Painting over Powder Coat Is Possible
There are scenarios where a painted finish on powder-coated metal can work well. Look for a smooth, intact surface with no active corrosion or flaking. The coating type and the intended use will guide whether this is cosmetic or if a full strip and recoat is safer.
Verify with the product label or technical data sheet to confirm compatibility and prep requirements. If the powder coat shows deep damage or peeling, consider stripping and recoating instead. When in doubt, check with the manufacturer’s instructions for guidance specific to your coating system.
Compatible powder coat types and surfaces
Some powder coats can be painted over, but it depends on the formulation. Epoxy and polyester powders usually accept overcoats best.
Check manufacturer info or do a small test panel to confirm compatibility:
- Apply a primer first, then your new paint.
- Observe for any adverse reactions (e.g., blistering).
Condition assessments that permit repainting
Before painting, inspect the surface:
- Check adhesion: Gently scratch with a coin or nail. If powder comes off, it’s not ready.
- Look for blistering: Feel and see if there are any bubbles or lifting.
- Inspect corrosion: Check for rust. Even small spots can cause issues later.
When You Should NOT Paint over Powder Coat
Hesitate to paint over powder coat on parts that see heavy wear or structural load. Visible delamination, creaking, or active corrosion are clear flags to stop and assess. Safety-critical components should be inspected or removed from service before any coating change.
For questionable cases, seek a professional evaluation or follow a full stripping and recoat approach. Always consult product data sheets and local codes to determine the right path for your project. If in doubt, document conditions and get a second opinion from a coating supplier or applicator.
Structural, safety, and high-wear parts
Powder coat protects components from wear, tear, and corrosion. Don’t paint over it on:
Structural parts: Bear loads or support weight. Original-spec coatings ensure strength.
Safety-critical parts: Like brakes, steering, or safety equipment. Precision tolerances need professional stripping and recoating.
High-wear parts: Such as engine components, exhausts, or wheels. They need robust protection that painting can’t provide.
Signs that indicate full removal is necessary
Before you paint, inspect the powder coat for these signs of failure:
Deep rust: If it’s eating through the coating, remove and treat the rust before recoating.
Flaking or delamination: Large areas peeling off mean the old coat needs to go.
Bubbling: Trapped moisture under the powder coat indicates a problem that painting won’t fix.
Contamination: Dirt, grease, or other contaminants can prevent adhesion. Clean and remove the old coat if necessary.
Tools and Materials Checklist
Start with a practical set of hand tools, abrasives, and cleaners suited to the project size. Include a surface cleaner, safe degreaser, and appropriate abrasives for powder coat adhesion. Have primers and topcoats that state compatibility with powder-coated substrates.
Always read product labels or data sheets to confirm substrate compatibility and application methods. Include basic safety gear like gloves, eye protection, and a respirator if indicated. Use the right brushes or rollers and a simple mask to protect lungs during sanding and solvent use.
Surface-prep tools and abrasives
Before you start painting, prep the surface right. Here’s what you need.
- Abrasive pads or sandpaper: 120-220 grit for best adhesion. Too coarse can damage powder coat; too fine won’t prep enough.
- Scuffing tool (optional): For large, flat areas. Follow manufacturer’s guidelines to avoid damaging the surface.
- Power sander: Orbital or random orbital for larger projects. Ensure it’s in good working order.
- Sandpaper sheets: Match grit size to your power sander. Replace worn-out sheets.
- Tack cloth: Removes dust after sanding. Helps prevent contamination of primer and paint.
- Vacuum or compressed air: Clean the surface before painting. Dirt and debris can ruin your finish.
Quick rule: Always confirm grit size on product labels for best adhesion results.
Primers, paints, and adhesion promoters
Choose the right primer and paint for a lasting finish. Here’s what to consider.
- Primer type: Use a bonding primer designed for powder coat overcoats. It promotes adhesion and seals the surface.
- Paint type: Acrylic latex or oil-based paints work well. Avoid water-based paints as they can react with some powder coats.
- Adhesion promoter (optional): Use if primer alone doesn’t provide enough adhesion. Follow manufacturer’s guidelines for application.
- Specialty primers: Consider using a rust-inhibiting primer if the surface shows signs of corrosion.
- Paint color and finish: Choose based on your desired look. Gloss, semi-gloss, or flat finishes are available in various colors.
Quick rule: Always check product labels for compatibility with powder coat and each other.
Safety and workspace equipment
Protect yourself and your workspace. Here’s what you need to ensure a safe project.
- Respirator: Protect against dust and fumes. Choose one with an N, R, or P filter for proper protection.
- Safety glasses: Shield your eyes from debris and splashes. Consider goggles for better eye protection.
- Gloves: Protect your hands from chemicals and debris. Choose a pair that allows good grip and dexterity.
- Drop cloths or plastic sheeting: Cover the work area to protect it from paint spills and overspray.
- Ventilation: Ensure proper airflow in your workspace. Use fans or open windows to prevent fume buildup.
Quick rule: Always follow product safety guidelines for handling chemicals and equipment.
Surface Preparation Step-by-Step
Begin with a careful inspection of the powder coat and any exposed metal. Clean surfaces thoroughly to remove oils, dirt, and contaminants. Use the recommended degreaser and follow any dwell times on the label.
Next, abrade the surface to create a mechanical key, then address any spots with repair or touch-up as needed. Finish with a thorough wipe-down to remove dust and residues before priming.
Step-by-Step Process
Follow these practical steps to prepare your powder-coated surface for painting. This sequence ensures a thorough, DIY-friendly approach that maximizes adhesion.
- Inspect the surface: Check for any damage, rust, or signs of wear. If you find any, note them for repair later.
- Clean and degrease: Use an appropriate cleaner to remove oils, dirt, and contaminants. This step is crucial for paint adhesion.
- Abrade the surface: Lightly scuff-sand the area using a suitable abrasive. This creates a ‘key’ profile that helps paint bond better.
- Spot-repair: Address any noted damage or rust spots. Use a filler if necessary, then sand smooth once dry.
- Final wipe and inspection: Wipe the surface with a tack cloth to remove dust. Inspect your work one last time before priming.
Cleaning and degreasing techniques
Before you start, it’s crucial to clean and degrease the powder-coated surface. This ensures your paint adheres properly.
Use a suitable cleaner or solvent wipe designed for powder coat. These can be found at hardware stores. Apply with a cloth or spray, then let it sit briefly before wiping off with a clean, dry cloth.
Why is this step so important? Oils and contaminants prevent paint from bonding to the surface. A spotless surface ensures maximum adhesion.
Mechanical abrasion and scuffing guidance
Abrading the powder coat creates a ‘key’ profile, helping paint adhere better. Here’s how to do it right.
Use sandpaper or an abrasive pad designed for powder coat. Start with a medium grit (around 120-150) and work your way up if needed. Lightly scuff-sand the area in a criss-cross pattern, then wipe off dust.
Pro tip: Always follow product recommendations for grit ranges to avoid damaging the surface.
Chemical etching and adhesion promoters
In some cases, you might need to use chemical etchers or adhesion-promoting products. These can help paint bond better, especially on tough surfaces.
Follow manufacturer instructions for application and safety precautions. Typically, you’ll apply the product, let it sit, then neutralize or rinse off as directed.
Safety first: Always wear appropriate PPE (personal protective equipment) when handling chemicals.
Choosing the Right Primer and Paint
Look for primers and topcoats designed to bond to powder-coated substrates or to bridge adhesion between coatings. Consider flexibility requirements if the metal will move or flex. Prioritize products with corrosion resistance and UV stability for outdoor use.
Always read the technical data sheet to confirm compatibility with your powder coat and substrate. If needed, consult the manufacturer instructions for recommended primers and topcoats. Avoid mixing products unless the data sheet allows it.
Primer types and selection criteria
When choosing a primer for painting over powder coat, you’ve got three main types to consider: universal adhesion primers, epoxy primers, and specialty adhesion promoters. Each has its own strengths, so let’s dive in.
Universal Adhesion Primers are great for most surfaces. They create a strong bond with the powder coat and provide good hiding properties. Use these when you’re unsure about the surface or want a versatile option.
Epoxy Primers offer superior corrosion resistance, making them ideal for outdoor use or areas prone to moisture. If your project involves metal parts or high-humidity environments, epoxy is your best bet.
Specialty adhesion promoters are designed for specific surfaces or conditions. Read the label carefully and match it to your job’s needs. Always check the technical data sheet to confirm compatibility with your powder coat and intended topcoat.
Topcoat options and finish considerations
Now that you’ve primed, it’s time to choose a topcoat. Here are three common choices:
Acrylic Paints offer excellent color retention and durability. They’re easy to apply and clean up with just soap and water. However, they may not hold up as well in harsh outdoor conditions.
Urethane Paints provide superior durability and resistance to chemicals, abrasion, and UV damage. They’re great for high-traffic areas or outdoor use but can be more challenging to apply and clean up.
Enamel Paints offer a hard, durable finish with excellent color retention. They’re often used in industrial settings due to their resistance to chemicals and abrasion. However, they can be more difficult to apply and have a longer drying time.
Application and Curing Best Practices
Follow a repeatable application method for primer and paint over a prepped surface. Use short, steady strokes and maintain a consistent wet edge to control film thickness. Keep an even pace to avoid runs and holidays.
Adhere to the curing guidance from the product label, including any temperature and humidity ranges. If you cannot match recommended conditions, postpone painting until settings align with the instructions. Verify any recoat windows per the manufacturer’s guidance.
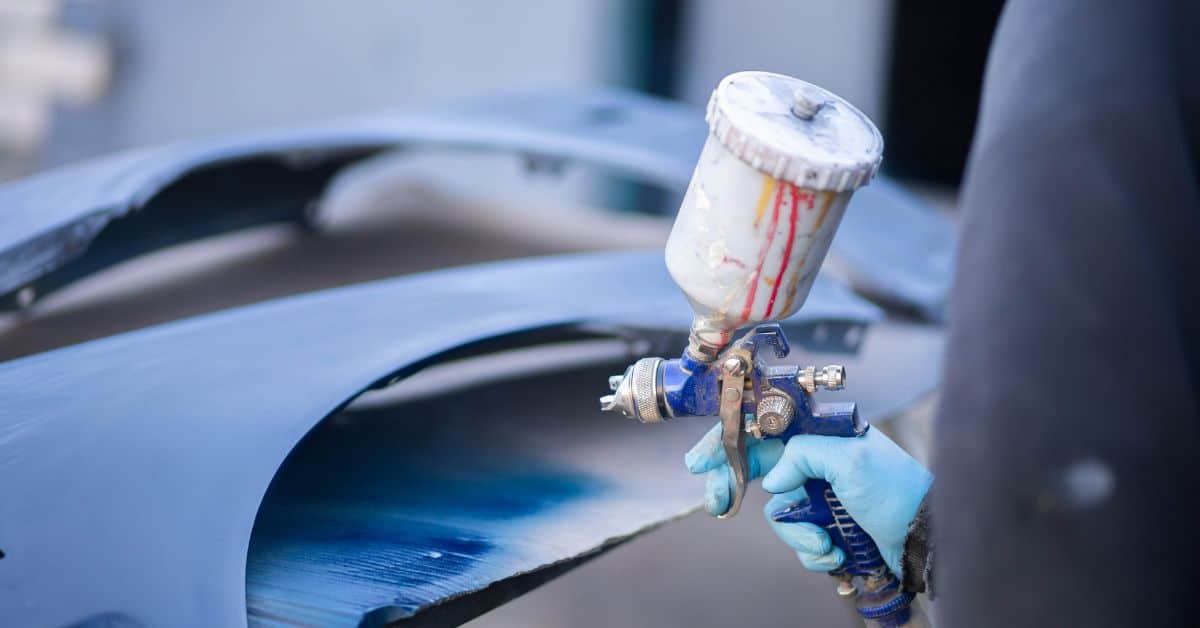
Application techniques: spray, brush, and wipe
When it comes to applying paint over powder coat, you’ve got a few methods at your disposal. Each has its pros and cons.
Spraying gives you smooth, consistent coverage. It’s great for large areas and complex shapes. But it requires more equipment – like a spray gun and proper ventilation. Plus, over-spray can be messy.
Brushing or rolling is simpler and cheaper. You’ve got better control over where the paint goes. But it might leave visible brush strokes or roller marks on smooth surfaces. And it’s not ideal for tight spaces.
For touch-ups, a small artist’s brush can be your friend. Or use a damp cloth to wipe on paint for a quick fix. But remember, these methods won’t give you the same level of coverage as spraying or brushing/rolling.
Environmental conditions and drying/curing
The weather plays a big role in how your paint dries and cures. So, check your product data sheets for recommended temperature and humidity ranges.
Temperature affects both drying time and final cure. Too cold, and the paint won’t dry right. Too hot, and it might cure too fast, leading to poor adhesion or a weak finish.
Humidity also matters. High humidity can slow down drying and increase the risk of mildew growth. Low humidity can cause the paint to dry too quickly, leading to poor flow and leveling.
Good ventilation helps too. It speeds up drying and prevents the buildup of harmful fumes. But be careful – too much air movement can cause the paint to dry too fast.
Layering, flash times, and recoating windows
Controlling film thickness is key for a good finish. Too thick, and you’ll get runs or sags. Too thin, and you won’t get good coverage.
Flash time is the wait between coats. It gives the paint a chance to set but not fully cure. This helps ensure good adhesion of subsequent coats. Check your product data sheets for recommended flash times.
Before applying another layer, test for tack/dryness. Gently touch the surface with a gloved finger or use a tack test kit. If it’s still sticky, give it more time to dry. Recoating too soon can lead to poor adhesion and other issues.
For multi-stage jobs, like painting a car, you’ll need to recoat windows. This means applying another coat of paint after the first one has flashed off but before it’s fully cured. It helps ensure even color and gloss. But be careful – too many coats can lead to orange peel or other defects.
Visual Checkpoints and Adhesion Tests
Perform simple non-destructive checks by gently probing the surface for any lift or softness after initial cure. Look for uniform film appearance and absence of peeling. A basic fingertip scrape can reveal poor adhesion before final use.
For stronger confirmation, follow a recommended adhesion test method from the data sheet. Compare results to the standard criteria provided by the coating maker. If results are borderline or fail, re-evaluate prep and coating selection.
Solvent and Tape Adhesion Tests
Before painting, perform these simple tests to ensure your powder coat surface is clean and ready for adhesion.
- Solvent Wipe Test: Use a clean cloth dampened with acetone or denatured alcohol. Rub the surface in a back-and-forth motion. If the cloth picks up dirt, grease, or discoloration, re-clean and degrease.
- Tape Test: Apply painter’s tape firmly across the surface. Let it sit for 24 hours. Then pull it off quickly at a 90-degree angle. If any paint comes off with the tape, repeat your adhesion promoter application.
- Check for Contamination: Inspect the surface under bright light or use a magnifying glass to spot any dirt, grease, or other contaminants that could hinder adhesion.
- Look for Powder Coat Defects: Check for any cracks, chips, or other defects in the powder coat. Repair these before painting.
- Test Paint Adhesion: Apply a small amount of your chosen primer to an inconspicuous area. Let it dry according to manufacturer’s instructions. Then perform another tape test. If the paint comes off, re-evaluate your surface preparation.
- Avoid Incomplete Etching: Ensure you’ve etched the entire surface. Incomplete etching can lead to poor adhesion and paint failure.
- Check for Moisture: If painting outdoors, ensure the surface is dry. Moisture can cause adhesion issues.
- Inspect for Previous Paint Failure: If there’s been previous paint failure, find and address the root cause before proceeding.
Quick rule: Always perform these tests. Skipping them can lead to costly rework or complete job failure.
Visual Inspection Checklist
After painting, use this visual checklist to confirm a successful overcoat application.
- Uniform Gloss: Check for consistent gloss across the entire surface. Inconsistencies may indicate missed spots or uneven paint application.
- No Runs: Inspect for any drips, runs, or sags. These can cause an uneven finish and poor adhesion in subsequent coats.
- No Fisheyes: Look for small circular areas where the paint has not spread evenly. These indicate contaminants on the surface.
- Consistent Edge Coverage: Check edges and corners to ensure they’re fully coated. Inadequate edge coverage can lead to chipping or peeling.
- No Cissing: Inspect for any areas where the paint has formed small circles or ‘cissed’. This indicates poor wetting of the surface and may lead to adhesion issues.
- No Orange Peel: Look for a textured, orange-peel-like appearance. This can indicate incorrect spray technique or improper paint viscosity.
- Check for Dust or Debris: Inspect the painted surface under bright light to ensure no dust or debris is trapped in the paint. These contaminants can cause adhesion issues and affect the final finish.
- Inspect for Holidays: Look for any areas where the paint has not adhered, leaving small gaps or ‘holidays’. These can lead to rusting or other damage if left untreated.
Quick rule: A thorough visual inspection is crucial. It’s your final check before declaring the job complete.
Troubleshooting, Durability, and Maintenance
Address common issues like peeling or orange peel by revisiting surface prep and film thickness. Identify root causes such as contaminants, improper adhesion, or insufficient cure. Plan preventive steps for future projects to extend life.
Keep expectations realistic and maintain the finish with periodic cleaning and inspection. When problems persist, consult a professional to assess substrate or coating compatibility. Regularly verify the coating’s integrity at maintenance intervals.
Common failure causes and fixes
Powder coat failures often stem from poor prep, incompatible materials, or environmental factors. Here’s how to tackle common issues:
Peeling: Insufficient cleaning or etching before painting can cause peeling. Fix by scraping off loose paint, sanding, and reapplying primer and topcoat.
Poor adhesion: Moisture or contaminants during application can lead to poor adhesion. Strip the coating, clean thoroughly, and start again with proper surface preparation.
Orange peel texture: Incorrect spray technique or incompatible materials can result in orange peel. Sand lightly, wipe clean, and apply a fresh coat using correct techniques.
Expected lifespan and maintenance schedule
The longevity of your painted powder coat depends on factors like surface prep, paint quality, and environmental conditions. Here’s a simple maintenance plan:
Lifespan: With proper prep and application, expect 5-10 years of service life in normal conditions.
Cleaning: Gently clean with mild soap and water every 6 months to remove dirt and grime. Avoid harsh chemicals that can degrade the paint.
Touch-ups: Inspect annually for any nicks or scratches. Touch up promptly to prevent rust or further damage.
Seasonal inspections: Check your painted surfaces twice a year, once before winter and again in spring. Address any issues early to maintain longevity.
Conclusion
You can paint over powder coat and keep a durable, good‑looking finish, but only if you commit to proper prep, right primer, and careful curing. Skipping steps or rushing the process invites failure and costly mistakes.
Begin with a small test area, clean and scuff the surface, remove grease, and dry completely; confirm the coating will accept paint, choose the right primer and topcoat, apply in thin, even coats, follow the suggested cure times, perform an adhesion check, fix any flaws, and maintain the finish with regular cleaning.
Avoid common mistakes like skipping surface prep, using incompatible primers or paints, and ignoring cure times or adhesion checks. Don’t neglect safety: wear eye protection and a mask, work in good ventilation, and never rush through steps. If you’re unsure about the substrate, or if corrosion, damage, or complex shapes are involved, consider a professional instead of guessing.
FAQ
Can I paint over powder-coated metal that’s already finished, and when is it not a good idea?
Yes, you can sometimes paint over it if the surface is in good condition. Check the powder coat for damage, and follow the manufacturer’s instructions on prep and primers. If the coating is damaged, peeling, or very old, consider other options or recoat methods rather than a quick paint job.
How do I test adhesion before committing to full painting?
Do a small patch test in an inconspicuous area. Scrub or lightly sand, then apply a test primer and paint to see if they stick. If the test peels or lifts, don’t proceed with the rest of the surface without more prep or guidance.
What signs tell me the powder coat may not accept paint well?
Chalking, cracking, peeling, or dulling finish are warning signs. If any of these are present, you may need more aggressive prep or professional options. Rely on the coating or primer label to decide if repainting is advised.
What safety and prep steps should I follow during the work?
Wear proper PPE and work in a well-ventilated area. Clean the surface to remove oils and dust as directed by the product label. Use the recommended primers and follow the label for drying times and compatibility. If unsure, check the manufacturer instructions or local guidelines before proceeding.