
Introduction
Bubbles in epoxy are air pockets that form during mixing and pouring. They come from trapped air, improper mixing, or surface contamination. Taking care during prep and curing helps reduce them.
Minimize bubbles by following the product’s mixing instructions and preparing the surface before pouring. Pour slowly, avoid stirring air into the resin, and watch the surface for popping bubbles as it cures. If you see bubbles near the top, use a torch or heat source per manufacturer guidance to pop them, and check that your resin and hardener are compatible and room conditions are right.
Key takeaways
- Inspect epoxy batches for bubbles before mixing; discard visibly foamy portions.
- Wear personal protective equipment; epoxy fumes and skin contact pose health risks.
- Stir slowly to minimize air incorporation and avoid whipping during pour.
- Control ambient temperature and humidity within manufacturer guidelines to reduce porosity.
- Pre-wet and debulk substrate; clean and dry surfaces to improve adhesion.
- Use a proper mixing ratio and thorough, scrape-and-fold technique consistently.
Table of Contents
- Introduction
- Key takeaways
- What Causes Bubbles in Epoxy
- Resin Chemistry, Viscosity and Product Selection
- Surface Preparation and Substrate Handling
- Proper Mixing and Application Techniques
- Environmental Control: Temperature, Humidity and Airflow
- Removing Bubbles After Pouring
- Repairing and Fixing Cured Epoxy with Trapped Bubbles
- Tools, Materials Checklist and Material Specs Explained
- Conclusion
- FAQ
What Causes Bubbles in Epoxy
Bubbles show up when air gets trapped during the pour, curing, or after. They come from simple air pockets, gases released by substrates, and chemical reactions that drive off volatiles. Understanding where they originate helps you target the fix rather than guess.
Think of it as a teachable chain: air entrapment, substrate outgassing, environmental factors, and chemistry all interact. By spotting the main sources, you can plan better preparation and technique. This overview keeps you focused on the big culprits rather than chasing every tiny issue.
Air entrapment during mixing and pouring
Mixing epoxy too fast or using the wrong tool can trap air. Air bubbles get mixed into your epoxy, creating defects.
Slow down your mixing speed to minimize air entrapment. Use a flat paddle instead of a drill mixer for smaller batches.
Pro tip: Mixing by hand with a slow, steady motion works best for small jobs.
Outgassing from substrates and trapped moisture
Porous or damp surfaces release air and moisture as epoxy is applied. This outgassing creates bubbles in your finish.
Before applying epoxy, ensure your surface is dry, clean, and free of any contaminants that could outgas.
Note: Trapped moisture can also cause bubbles. Prime your surface with a moisture-tolerant primer to prevent this.
Chemical and exothermic effects
The chemical reaction between epoxy resin and hardener generates heat. This heat can cause or expand bubbles during cure.
To minimize this, mix small batches at a time to control the heat buildup. Keep your workspace cool to help dissipate heat.
Warning: Exothermic reactions can be intense. Be careful when mixing and applying epoxy in confined spaces or on large areas.
Resin Chemistry, Viscosity and Product Selection
Resin formulation affects how easy it is for air to rise and escape. Very thick mixes trap more air than lower viscosity options. Check the product data sheet for working time and flow characteristics before you commit to a project.
Pot life and cure schedule influence when bubbles can still escape. Look for a resin with a workable viscosity for your pore structure and temperature. Always verify recommended application methods with the manufacturer instructions or label before you start.
Mix ratios, pot life and cure speed
Getting the mix ratio right is crucial. Too much hardener can accelerate curing, leading to more bubbles. Check manufacturer specs.
Pot life – time until epoxy cures – varies. Longer pot life gives you more time to pour before bubbles form. But don’t wait too long; old mixed epoxy can have more bubbles.
Tip: Mix only what you need and work fast, but not rushed.
Viscosity, thinners and additives
Lower-viscosity resins flow better, releasing bubbles easier. But they can also be more prone to air entrapment during mixing.
Thinners or flow agents can help reduce viscosity, but use them carefully. Follow product guidance to avoid adding too much, which can cause more bubbles.
Tip: Start with the recommended amount of thinner and add more if needed. Don’t overdo it.
Choosing the right epoxy for your application
Different epoxies have different properties. Thin coats need low-viscosity resins, but they can be more bubble-prone. Deep pours need high-viscosity ones, which flow slower and release bubbles differently.
For art or coating, consider two-part epoxies with longer pot lives. For concrete repair, look for fast-curing ones that won’t leave too many bubbles behind.
Tip: Always check manufacturer recommendations to avoid bubble-prone products in your specific application.
Surface Preparation and Substrate Handling
Clean the surface thoroughly and remove dust, oils, and greases that cling to the substrate. Sanding or abrading a glossy surface helps epoxy grip and reduces trapped air. Keep substrates dry and free of contaminants right up to the pour.
Different materials behave differently: wood, metal, or plastic may outgas or hold moisture. Use the appropriate prep method for each type and verify any protective coatings or sealers before pouring. When in doubt, consult the product label or manufacturer instructions for compatibility.
Cleaning, degreasing and moisture checks
The first step in surface preparation is cleaning. Use a suitable cleaner to remove any dirt, grease, or contaminants from the substrate.
Degreasers are your best friends here. They cut through oils and grime. Apply, let it sit, then scrub and rinse off.
Check for moisture too. Wet surfaces can cause bubbles due to outgassing as the epoxy cures. Let it dry completely before you start.
Sealing porous substrates and filling voids
Porous surfaces like concrete or wood can trap air and cause bubbles. The solution? A seal coat.
Apply a thin layer of epoxy to seal the surface before your main pour. This stops air from getting trapped. Let it cure as per manufacturer’s instructions.
For voids or cracks, use an epoxy filler first. Sand smooth once cured, then apply your seal coat.
Temperature and storage of materials before use
Epoxy is sensitive to temperature. Pre-warming or equilibrating your epoxy can help control bubbles.
- Resin: Keep it warm, around 70-80°F (21-27°C). Too cold and it’s thick, too hot and it’s runny.
- Hardener: Store at room temperature. Pre-warm if it’s been cold.
- Mixing: Mix at the recommended temp for your product. Check the spec sheet.
- Avoid extremes: Too hot or too cold can cause issues like cracking, staining, or weak bonds.
- Equilibrate: If you’re working in a cold garage, bring your epoxy inside to warm up before use.
Proper Mixing and Application Techniques
Measure and mix in clean containers to avoid introducing additional air. Stir slowly to combine components without whipping air into the mix. Follow the manufacturer’s recommended mixing ratio and duration.
Pour in stages if needed and use a suitable tool to guide the epoxy into corners and joints. Let the bulk of the air rise naturally by avoiding aggressive agitation after initial mixing. Confirm technique guidelines on the product instructions before you proceed.
Correct mixing motions and timing
The key to minimizing bubbles during epoxy mixing is low-shear folding or slow mixing methods. Here’s how:
Start by adding the hardener to the resin, not the other way around. This helps prevent unmixed pockets.
Use a wide-bladed spatula or a mixing paddle on a drill set at low speed (around 300-400 RPM). Work the mixture from the sides and bottom of the container to ensure everything gets incorporated.
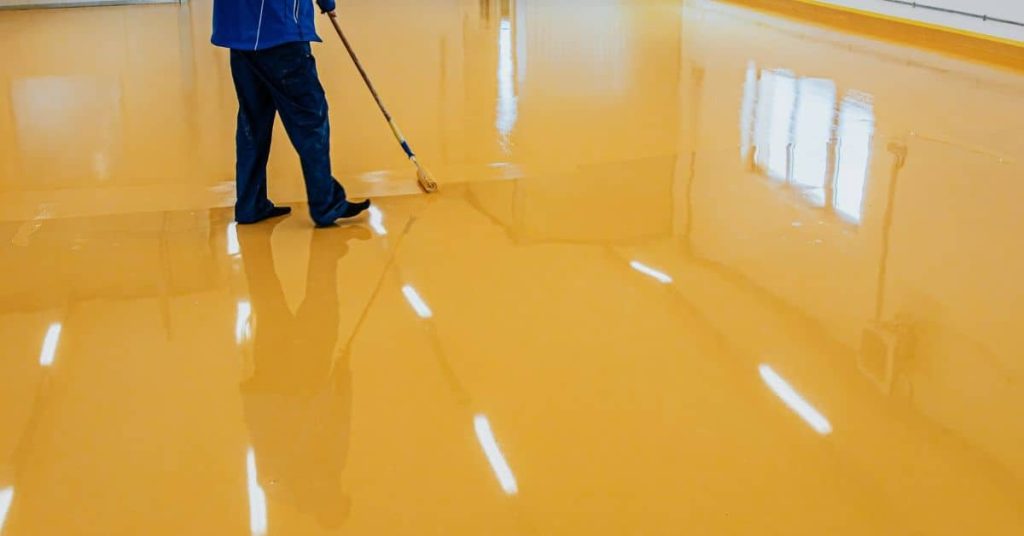
Pouring strategies and layer management
The goal here is to apply epoxy in thin coats, allowing trapped bubbles to escape before applying the next layer. Here’s how:
Instead of pouring directly onto the surface, use a flood coat technique. Pour a thin layer onto the surface, then spread it evenly using a notched trowel or squeegee.
For thicker applications, apply multiple thin coats, allowing each to cure for at least 12-24 hours before applying the next. This gives trapped bubbles time to rise and escape.
Tools and motions to avoid
Certain tools and mixing methods can introduce unwanted bubbles into your epoxy. Here’s what to steer clear of:
- High-speed drilling: Using a drill set too high (above 600 RPM) can whip air into the mixture.
- Whisking or beating: These methods incorporate too much air, creating bubbles that won’t easily escape.
- Stirring with a wire whisk: The thin wires of a whisk can create vortexes that pull in air.
- Using a paint mixer attachment on a drill: This tool spins too fast and introduces air into the mixture.
- Mixing for too long after adding hardener: Prolonged mixing after adding the hardener can cause excessive heat buildup, leading to more bubbles.
Environmental Control: Temperature, Humidity and Airflow
Ambient conditions influence how fast air escapes and how bubbles behave. Maintain a stable workspace to prevent rapid changes that trap air. Avoid drafts that push air through the epoxy surface during cures.
Control humidity and surface temperature to minimize condensation and moisture-related issues. Use temperature guidelines from the product label or data sheet as a reference, and adjust the environment as needed before pouring.
Temperature control and heat management
Epoxy cures best within a specific temperature range. Check your product’s recommendations.
Typically, you want ambient temperatures between 70-85°F (21-29°C) for epoxy to cure properly. Ensure the substrate is at this temperature too.
Beware of overheating. High temps can speed up curing, leading to bubbles and poor results.
Humidity, condensation and moisture risks
High humidity or cold surfaces can cause condensation. This moisture gets trapped in the epoxy, forming bubbles.
Keep your workspace dry. Use dehumidifiers if necessary. Ensure surfaces are warm before applying epoxy.
Moisture from the substrate can also cause issues. Check for and address any moisture problems beforehand (as discussed earlier).
Ventilation, drafts and airflow considerations
Gentle, stable airflow helps remove fumes and prevents air from getting trapped in the epoxy. But be careful with drafts.
Strong drafts can create surface disturbances, leading to bubbles. Avoid areas with high traffic or open windows during application.
Use fans sparingly and at a low speed. Ensure they don’t blow directly onto the wet epoxy. Good ventilation is key, but so is preventing air from getting disturbed once it’s in the epoxy.
Removing Bubbles After Pouring
Once the epoxy sits, small surface bubbles may rise. A quick pass with a heat gun or torch can help pop them without scorching the surface if done carefully. Keep the heat moving to avoid burning or overheating the resin.
Don’t touch the surface while it’s still fresh enough to deform. If a skin forms, resist the urge to scrape it, which can trap air below. Follow safety guidelines from the product instructions when using heat or mechanical methods.
Using heat safely (torch, heat gun, hairdryer)
Heat can be your friend when it comes to popping surface bubbles in epoxy. But remember, too much of a good thing can ruin your finish.
Start with short, controlled passes using your heat source. A torch, heat gun, or even a hairdryer on low setting will do the trick. Keep the heat moving across the surface to avoid overheating any one spot.
Caution: Be careful not to burn the resin. If you see it starting to smoke or bubble excessively, back off and let it cool down a bit.
Always work safely. Keep your heat source away from flammable materials and never leave it unattended.
Surface skimming and manual pop methods
For detailed work or small bubbles that won’t budge, you’ll need a more delicate touch. This is where tools like toothpicks, needles, or micro brushes come in handy.
Gently skim the surface with your tool to pop the bubble. Be careful not to scratch the epoxy or push the bubble deeper into the layer. A light touch is key here.
For really stubborn bubbles, try wicking them out with a thin wire or needle. Insert it into the bubble, twist gently, and pull out. The bubble should come with it.
Tip: Work quickly but carefully. Epoxy cures fast, and you don’t want to mar the surface with tool marks.
Mechanical and professional options (vacuum/pressure)
For larger jobs or when you need to ensure every bubble is gone, consider using mechanical methods. Vacuum degassing and pressure pots can remove bubbles effectively.
Vacuum degassing involves placing your epoxy in a vacuum chamber and pulling out the air. This leaves a bubble-free mix ready for application. Pressure pots work in reverse, applying positive pressure to force bubbles out of the resin.
Note: Not all resins are compatible with these methods. Always check the manufacturer’s guidelines before using.
These tools require some investment and know-how, but they can make a big difference when you need a flawless finish.
Repairing and Fixing Cured Epoxy with Trapped Bubbles
Cured bubbles may require sanding or re-coating to achieve a uniform look. For small defects, a light sand and touch-up layer can help mask the issue. More extensive bubbling might need a full recoat of the affected area.
Decide whether to sand and refill or to re-pour based on bubble size, depth, and location. Check what the product instructions say about rework windows and surface preparation before you proceed.
Sanding, filling and spot-recoating
If you’ve got small clusters of bubbles after your epoxy has cured, here’s how to fix them:
First, let the epoxy cure fully. Then, use a random orbital sander with 80-120 grit sandpaper to carefully sand out the bubble areas. Be gentle – you don’t want to dig into the surrounding surface.
Clean the area thoroughly with a tack cloth or damp rag to remove any dust. Now, mix up a small batch of epoxy and use it to fill the voids. Let it cure, then lightly sand again and apply a skim coat to blend everything together.
Full recoats and when to remove/run new pours
Sometimes, a full recoat is all you need. Other times, you’ll have to start over. Here’s how to decide:
A full recoat might be enough if the bubbles are small and scattered. But if they’re large, clustered, or near the surface, you’ll want to remove the resin and pour a new layer.
Factors like temperature, humidity, and ventilation play a big role here. If conditions weren’t ideal during the first pour, that might be why you’ve got bubbles. Make sure everything’s right before you start again.
Remember: Removing cured epoxy is tough work. You’ll need to use a grinder or diamond blade to cut through it, then vacuum up the dust. Be safe and wear protective gear.
Preventing recurrence when repairing
To avoid more bubbles when you’re making repairs, follow these steps:
First, seal the area with a barrier coat. This helps prevent air from getting trapped under your new epoxy layer.
Use proper mixing techniques – just like we talked about earlier in this guide. And keep an eye on temperature and humidity while you work.
Finally, control airflow around your pour. Drafts can cause bubbles too. So, keep fans off and doors closed until the epoxy has cured.
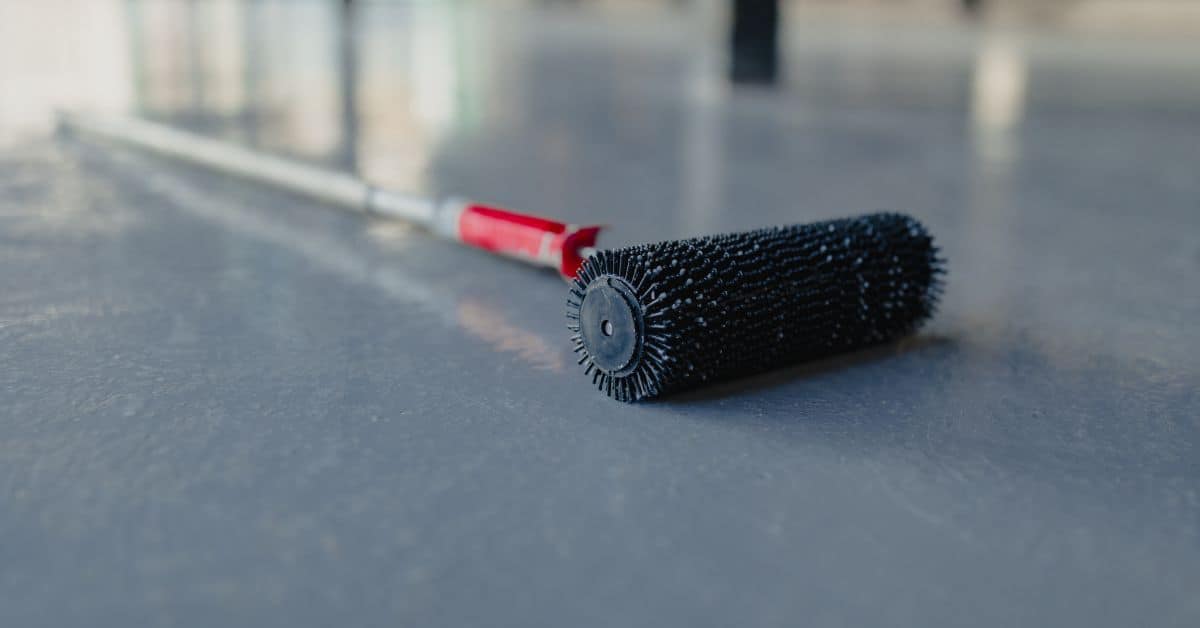
Tools, Materials Checklist and Material Specs Explained
Have a simple checklist ready: gloves, mixers, squeegees or rollers, and appropriate containers. For specs, verify pot life, working time, and cure conditions on the label or data sheet. Compare viscosity and flow recommendations to your project needs.
Know which substrates and coatings are compatible with your epoxy system. If anything is unclear, cross-check instructions with the manufacturer or local code guidance to avoid surprises on site.
Tools and consumables for bubble control
Before you start mixing, gather these tools to minimize bubbles.
- Mixing vessel: Ensure it’s clean and dry. Contaminants can cause bubbles.
- Stir sticks: Use clean ones to avoid introducing air.
- Heater: For cold temperatures, use a heat source to warm the epoxy.
- Torch or heat gun: To remove bubbles post-pour (as discussed earlier).
- Hygrometer: Check humidity levels. Too much moisture can cause bubbles.
- Timer: Keep track of pot life to prevent premature curing.
- Gloves and safety glasses: Protect yourself from chemicals.
- Vacuum pump (optional): For professional results, use a vacuum to remove bubbles.
Quick rule: Don’t skip any item. Each plays a role in bubble prevention.
What specs to check on epoxy labels
Before buying, verify these label details to ensure compatibility with your project and techniques.
- Viscosity: Check it matches your needs. Thicker epoxies require more mixing and may have more bubbles.
- Pot life: Ensure it’s long enough for your application. Too short, and you’ll struggle to mix and pour before it cures.
- Cure temperature: Make sure it matches your environment. Some epoxies cure best in warmer temps.
- Recommended layer thickness: Check it suits your project. Too thin, and you may end up with bubbles; too thick, and it might not cure properly.
- Mix ratio: Verify it’s 1:1 or 2:1 to avoid wasting material and causing issues.
- Cure time: Know how long it takes to fully cure. You don’t want to walk on it too soon.
- Safety information: Read and follow all safety guidelines.
Quick rule: Always check these specs before buying. They’re crucial for a successful pour.
Safety and PPE considerations
Working with epoxy and heat tools requires proper safety measures.
- Ventilation: Ensure your workspace is well-ventilated. Fumes can be harmful.
- Gloves: Wear them to protect your hands from chemicals.
- Safety glasses: Protect your eyes from splashes and debris.
- Respirator (optional): For prolonged exposure, use a respirator to avoid inhaling fumes.
- Fire-resistant clothing: When using heat tools, wear fire-resistant gear.
- Heat protection: Use heat-resistant gloves when handling hot tools or surfaces.
- First aid kit: Have one nearby in case of accidents.
Quick rule: Never compromise on safety. It’s not worth the risk.
Conclusion
Controlling bubbles is about predictable chemistry, steady technique, and safe work habits that protect you and your investment. When you keep temps, humidity, and mixing under control, epoxy cures clear and strong instead of dull or full of pinholes.
Follow this quick, practical checklist: verify the product and substrate are a good match for the environment, measure and mix precisely at the recommended ratio, keep components and workspace within the advised temperature range, pour smoothly and avoid whipping air, skim and spread to release trapped air, and after pour use a gentle pass with the right tool to bring up surface bubbles before the cure starts. If you see bubbles forming, address them early with the specified methods for removing surface air, and maintain steady environmental conditions through the entire cure window.
Common mistakes to avoid are mixing too fast or too long, using the wrong temperature or humidity, and rushing the pour or cure in a drafty or cool area. Safety rules: wear eye protection and gloves, ventilate properly, cut loads of heat or heat sources away from flammable materials, and test a small area first to confirm your setup won’t trap more bubbles or cause distortions. Do not ignore cure time or substrate failure signals; pushing forward with a bad base will ruin the work and waste materials.
If you’re unsure about substrate issues, unusual resin formulations, or a surface that won’t behave after multiple fixes, it’s time to call a professional. With the right approach, you can finish strong and avoid costly mistakes. Stay deliberate, document your settings, and you’ll see durable, bubble-free results that you can be proud of.
FAQ
What can cause new bubbles after you’ve already poured and squeegeed?
Heat or sudden cooling can trap air that rises as the epoxy settles. Check your environment for drafts, airflow changes, or cooling surfaces and adjust for the next pour or touch up.
How do I tell if bubbles come from mixing or from the surface/substrate?
If bubbles appear across the entire surface, it’s usually mixing-related. If they’re concentrated where the substrate shows moisture or contaminants, fix the substrate before any new pour.
What quick checks can prevent bubbles without striking the project?
Make sure materials are within recommended ranges per the label and manufacturer instructions. Inspect for visible moisture, dust, or oil on the surface and address it before pouring.
What should I do if I see bubbles after a pour and they won’t settle?
Stop, assess: identify if the issue is contamination, improper mixing, or environment. Follow the product label for guidance on next steps and consider delaying any further pours until conditions are right.