

Introduction
Pinhole defects are tiny air-filled holes that show up in epoxy coatings on porous concrete. They happen when moisture, dust, or a lack of proper surface preparation causes the epoxy to seal in voids. Proper priming helps the surface accept the epoxy evenly and reduces pinholes as it cures.
To start, clean and dry the area, then choose a penetrating primer compatible with porous concrete and the epoxy system. Follow the primer’s instructions on drying time and re-priming if you see dust or moisture. If in doubt, test a small patch and check the product label or manufacturer instructions for your conditions and local rules.
Key takeaways
- Inspect substrate surface for porosity before selecting any primer or system.
- Seal pores with compatible primer first; avoid pinholes by even coats.
- Keep PPE ready; ventilate, dust control, and follow all label warnings.
- Wait for manufacturer guidance on cure and recoat intervals, not guesses.
- Use compatible primers for porous concrete designed for bonding epoxy.
- Inspect finished surface for pinholes, rework promptly to avoid failures.
Table of Contents
- Introduction
- Key takeaways
- Why Pinholes Form on Porous Concrete
- Assessing Substrate Porosity and Condition
- Surface Preparation Best Practices
- Primer Types and How They Work
- Choosing the Right Primer for Porous Concrete
- Tools and Materials Checklist
- Application Techniques to Prevent Pinholes
- Testing, Inspection, and Verification
- Conclusion
- FAQ
Why Pinholes Form on Porous Concrete
Pinhole formation comes from how air, moisture, and substrate leaks interact with open pores. Air release, capillary suction, and substrate outgassing all play a role when epoxy meets porous surfaces. These effects differ from failures caused by simple application mistakes.
Understanding these mechanisms helps you identify pinholes as a material issue rather than a faulty technique. You’ll see pinholes where porosity remains active beneath the surface, not where the primer was poorly applied.
Capillary Suction and Outgassing
When epoxy meets porous concrete, it’s like a sponge soaking up water. The concrete sucks the liquid epoxy in fast – that’s capillary suction.
At the same time, air trapped inside the pores tries to escape. This outgassing forces tiny bubbles to form at the surface as the epoxy cures. Those bubbles harden into pinholes.
Pinholes usually start where the slab is most porous – often around cracks, joints, or areas with high water content.
Surface Contaminants and Laitance
Dust, oils, or other contaminants on the concrete surface can stop your primer from sticking properly. This is bad news because a good prime job helps prevent pinholes.
Laitance is a weak, cement-rich layer that forms on top of fresh concrete during curing. If it’s not removed before priming, it can’t bond well with the epoxy, leading to more pinholes.
To reduce risk, make sure your surface is clean and free from laitance before you start priming.
Assessing Substrate Porosity and Condition
Start with simple field checks to gauge absorbency and surface texture. Look for dry streaks, dusting, and scale that can indicate porosity and poor bonding potential. A basic soak or blot test can reveal how much moisture the surface wicks in.
Escalate to moisture and surface-compatibility testing if the checks raise concerns. When in doubt, verify outcomes against product guidance and local rules before proceeding.
Simple field tests (water droplet, visual)
The first step in assessing your concrete’s condition is a quick and easy test using water droplets. Here’s how:
1. Water Droplet Test: Place a few drops of water on the surface. If they darken and disappear within 60 seconds, your concrete is porous and needs priming to seal it.
2. Visual Inspection: Look for cracks, delamination, or other signs of weakness. Scrape any loose material off with a trowel. If the surface feels weak or crumbles easily, it’s too fragile for epoxy.
When to use moisture and strength tests
Sometimes, simple field tests aren’t enough. Here are when you should consider more advanced testing:
Moisture Tests: If your concrete feels cold or damp, or if the water droplet test shows absorption but you’re unsure about moisture risk, use a calcium chloride test to measure relative humidity (RH) in the slab.
Strength Tests: If visual inspection reveals cracks or weakness, perform a pull-off test. This measures the concrete’s tensile strength and helps determine if it can support an epoxy coating. Always check manufacturer requirements and local codes for acceptable thresholds before proceeding with priming.
Surface Preparation Best Practices
Clean the area thoroughly to remove contaminants that block adhesion. Profile the surface mechanically to open the pores and create a key for the next layer. Repair any cracks or voids before priming so the surface behaves consistently.
Remember: the prep sequence matters more than primer selection alone. A solid prep reduces pinhole risk and yields a more uniform finish.
Cleaning and degreasing
Before you start, remove any loose debris with a broom. Then, tackle oils, curing compounds, and contaminants that can ruin your epoxy job.
Degreasers are your friends here. Use one to clean the surface thoroughly. Make sure it’s compatible with your chosen primer.
Rinse well with fresh water after degreasing. Let it dry completely – no moisture, remember?
Mechanical profiling: shotblasting vs diamond grinding
To create a good bond for your primer, you need to profile the concrete. Two common methods are shotblasting and diamond grinding.
Shotblasting uses steel shots fired at high speed. It’s aggressive, removing laitance and creating a rough surface. Great for severely contaminated or weak surfaces.
Diamond grinding is gentler, using diamond-impregnated segments to level and smooth the surface. Ideal when you need a flat, even profile without removing too much material.
Repairing voids, spalls, and cracks
Fill any defects before priming. Pinholes love voids, so fix them to avoid clusters.
For small voids, use a concrete repair mortar. For larger ones or spalls, consider a polymer-modified cement-based repair material. Cracks? Use an epoxy crack filler.
Always follow the manufacturer’s instructions for mixing and application. Let repairs cure completely before priming.
Primer Types and How They Work
Penetrating sealers focus on sealing pores while preserving substrate breathability. Epoxy primers provide a stronger bond and fill minor voids, aiding adhesion to porous concrete. Bonding agents target the interface between porous substrate and topcoat.
Each class addresses porosity and adhesion differently, so choose based on how the substrate behaves and the epoxy topcoat you plan to use. Avoid relying on a single option without considering the underlying porosity.
Penetrating and Pore-Filling Primers
Porous concrete can suck moisture like a sponge. This causes problems when applying epoxy, leading to pinholes and poor adhesion. That’s where penetrating and pore-filling primers come in.
These are low-viscosity liquids that seep deep into the concrete’s pores. They reduce capillary suction, preventing moisture from pushing through your epoxy topcoat later on.
Stabilizing friable surfaces, these primers also help strengthen crumbly or weak areas before you apply your final epoxy layer. It’s like giving your concrete a quick shot of strength before the big event.
Epoxy-Based Primers and High-Solids Systems
Epoxy primers are different. They don’t just fill pores; they form a bond layer that sticks to your concrete like glue.
Where penetrants are great for stabilizing surfaces, epoxy primers excel at creating a strong, lasting bond between your concrete and your topcoat. But remember, compatibility with your final epoxy coat is crucial. Always check before you apply.
High-solids systems are a type of epoxy primer with extra solids content. They provide better coverage and can help hide minor surface imperfections. But they’re also thicker, so application needs to be done right to avoid issues.
Solvent-Borne vs Waterborne Products
Primers come in two main types: solvent-borne and waterborne. Each has its pros and cons.
Solvent-borne primers are tough, durable, and can be applied in a wide range of temperatures. But they have strong solvents that can cause health issues if not handled properly. They also need good ventilation during application.
On the other hand, waterborne primers are more environmentally friendly and safer to use. But they’re sensitive to temperature and humidity. You’ve got to follow manufacturer guidance on ambient conditions and flash times to get it right.
Choosing the Right Primer for Porous Concrete
Use a decision framework that weighs primer chemistry, viscosity, and application method against substrate porosity and moisture conditions. Match the primer’s performance profile to the topcoat you plan to apply. Consider how the combined system will handle open pores and potential outgassing.
When unsure, run test patches and compare results to the manufacturer instructions and local guidelines. Document what works before committing to the full surface.
Matching primer to topcoat and substrate
First things first, your primer needs to play nice with both the concrete below and the epoxy topcoat above. Here’s how you ensure that:
Chemical Compatibility: Check if the primer and topcoat are compatible. Some primers can react poorly with certain epoxies, leading to adhesion loss or even delamination.
Mechanical Bonding: The primer should be able to penetrate and bond well with your porous concrete. Test this by applying a small patch and checking for good penetration and bonding after curing.
Always follow the manufacturer’s guidelines, but don’t hesitate to do test patches on-site to confirm compatibility and performance.
Coverage, dilution, and recommended film build
Knowing how much primer you need is crucial. Here’s how to figure it out:
Check the Label: Start by reading the manufacturer’s guidelines for coverage and dilution. This will give you a good starting point.
Test Patches: Don’t rely on the label alone. Do test patches to establish actual coverage in your specific conditions. Apply the primer at different rates (within the recommended range) and see how much area it covers without losing its pore-penetrating ability.
Conservative Application: Once you’ve established coverage, err on the side of caution. Use a conservative application rate to ensure good penetration into those pores. Remember, it’s better to use a bit more primer than not enough.
Tools and Materials Checklist
Prepare a practical jobsite checklist that covers inspection tools, patching materials, and PPE. Include items for dust control, surface profiling, and pore repair as part of the prep process. Have consumables ready for quick touchups during the job.
Also include basic cleaning supplies, adhesives or plugs for repairs, and a plan for disposing of waste according to site rules. Keep the list adaptable to the specific project requirements.
Essential Tools for Prep and Priming
Before you start, make sure you have all the right tools to ensure a smooth, pinhole-free job.
- Shotblaster/Grinder: To prepare the surface. Skipping this can lead to poor primer adhesion.
- Vacuum: To clean up dust after profiling. Leaving dust can cause pinholes.
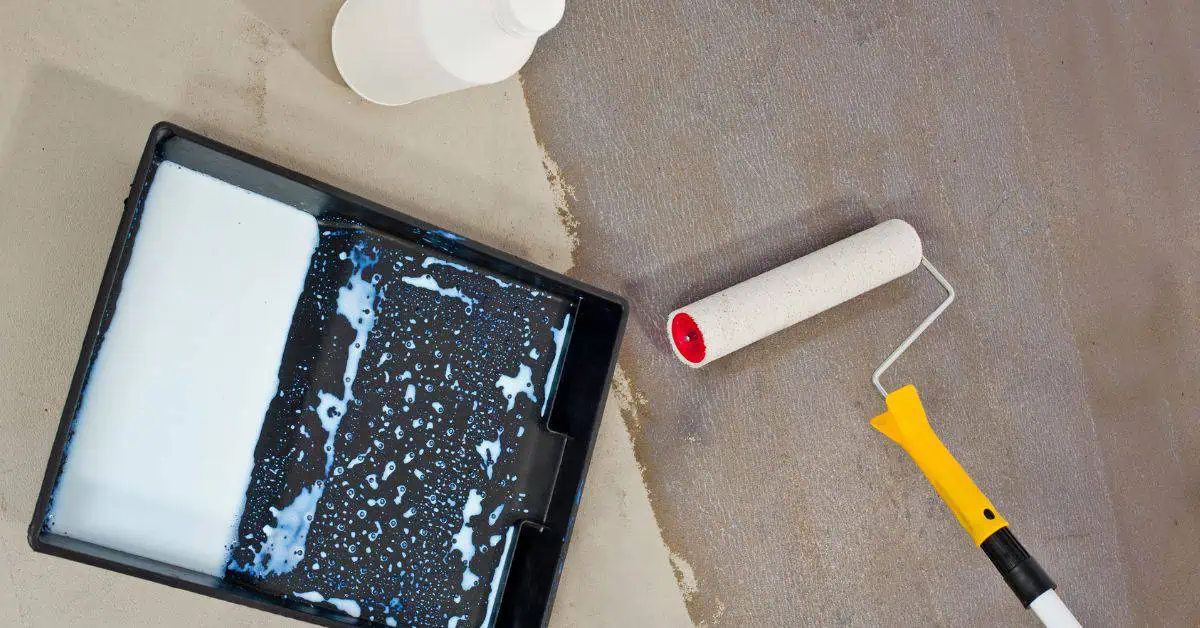
- Rollers (1/2″ nap): For applying primer. Using the wrong roller can result in uneven coverage.
- Squeegees: For backrolling and ensuring even film build.
- Mixing Paddle and Drill: To mix primers properly. Improper mixing can cause inconsistencies.
- Tape Measure: To ensure you have enough primer for the job. Running out mid-job can lead to patchy coverage.
- Scrapers: For removing any remaining loose material before priming.
- Safety Glasses: To protect your eyes from debris during prep work.
Quick rule: Always check your tools before starting. A missing tool can halt progress and lead to mistakes.
Consumables and Safety Gear
Gather all necessary consumables and safety equipment to ensure a safe, successful job.
- Degreaser: To clean the surface. Skipping this can cause poor primer adhesion.
- Concrete Filler: To repair voids, spalls, and cracks before priming.
- Epoxy Primer: Match it to your topcoat and substrate as discussed earlier.
- Safety Gloves: To protect your hands from chemicals.
- Respirator: For protection against dust and fumes during prep work and application.
- Coveralls: To protect your clothes from stains.
- Ear Protection: If using power tools, to protect your hearing.
- Safety Data Sheets (SDS): Always follow the guidelines on these for each product used.
Quick rule: Never start work without understanding and following the safety guidelines provided by the manufacturer.
Application Techniques to Prevent Pinholes
Follow a consistent mixing, pot time, and application method that aligns with the chosen primer. Use controlled, even coats and work within the primer’s recommended window. Sequence the application to minimize trapped air and moisture pockets.
Always use a test area to validate technique and watch for pinholes before moving to the full surface. Document any adjustments for the upcoming work cycle.
Mixing, Induction, and Pot Life Control
Proper mixing is key to maintaining primer performance. Follow the manufacturer’s instructions for mixing time and speed.
Induce your epoxy by gently stirring it with a clean paddle at the recommended speed for 5-10 minutes before adding the hardener. This ensures proper dispersion of the catalyst, promoting even curing.
Respect pot life to prevent pinholes. Pot life is the time during which the primer remains usable after mixing. Once this time has passed, the primer starts to thicken and lose its ability to penetrate pores effectively, leading to pinholes.
Application Methods: Roller, Squeegee, Spray, and Backrolling
Each application method has its pros and cons. Rollers provide even coverage but may not penetrate deep enough into pores. Squeegees can force primer into pores but may leave streaks.
Spraying offers good penetration but requires proper equipment and technique to avoid overspray. Backrolling after spraying or squeegeeing can help smooth out any imperfections and ensure even coverage.
Consider multiple thin coats instead of one heavy coat. This allows the primer to penetrate deeper into the pores, reducing the risk of pinholes. Let each coat flash off for the recommended time before applying the next.
Wet-on-Wet vs Flashed-Off Approaches
Wet-on-wet application involves applying the topcoat immediately after the primer, without allowing it to flash off. This can reduce drying time but may lead to poor adhesion and increased risk of pinholes if not done correctly.
Flashed-off approach involves letting the primer sit for a specified time before applying the topcoat. This allows the primer to cure slightly, improving adhesion and reducing the risk of pinholes. However, it increases overall drying time.
To confirm which method works best for your specific products and conditions, always perform test patches. Apply both methods on a small area and compare results after curing.
Testing, Inspection, and Verification
On-site verification should include visual checkpoints and simple adhesion checks as you proceed. Perform porosity checks on representative spots to confirm the substrate behavior after priming. Use small-scale tests to predict full-surface performance.
Record results and compare them to expected outcomes from the product data and local requirements. Decide whether to proceed, rework, or adjust the prep or primer choice based on findings.
Test patches and adhesion tests
Before rolling out your primer across the entire surface, set up test patches to evaluate pinhole risk and adhesion.
- Prepare test panels: Use representative areas of your concrete substrate.
- Apply primer: Apply primer as you would on the full job.
- Let it cure: Allow primer to cure according to manufacturer’s instructions.
- Inspect for pinholes: Check test panels for any signs of pinholes.
- Perform adhesion tests: Use a utility knife or similar tool to score the primer. Tape over the scored area and pull off quickly.
- Check results: If more than 5% of the tape’s adhesive remains on the surface, re-prime that area.
- Evaluate appearance: Ensure test patches match your desired finish.
- Repeat if necessary: If pinholes or adhesion issues persist, try a different primer strategy.
Quick rule: Test patches save you from costly mistakes. Always check before committing to full application.
Visual checkpoints during cure
Keep an eye on your primer as it cures to catch any issues early.
- Early pinhole formation: Look for small bubbles or depressions forming on the surface.
- Pinhole patterns: Check if pinholes are appearing in clusters or consistently in certain areas.
- Surface sheen changes: Monitor any changes in the primer’s gloss or matte finish.
- Check edges and corners: Pinholes often form here due to uneven application.
- Inspect under different lighting: Use natural light, artificial light, or even a flashlight to spot any issues.
- Feel for texture changes: Run your hand over the surface to feel for any unexpected textures.
- Address immediately: If you find pinholes, address them promptly before they become bigger problems.
Quick rule: Regular visual checks help prevent small issues from becoming big ones.
Measuring porosity and pore filling
Assess your primer’s ability to fill pores before moving on to the topcoat.
- Water drop test: Place a drop of water on the primed surface. If it beads up, your primer is not filling pores adequately.
- Magnify the surface: Use a magnifying glass or loupe to inspect pore filling closely.
- Check for consistent coverage: Ensure primer has filled all pores evenly across the surface.
- Feel for texture changes: Run your hand over the surface to feel for any rough spots indicating unfilled pores.
- Compare to test patches: If test patches showed better pore filling, re-evaluate your application method.
- Consider repeating priming: If pores are not adequately filled, apply another coat of primer or use a different primer strategy.
Quick rule: Proper pore filling ensures a smooth topcoat and better adhesion. Don’t skip this crucial step.
Conclusion
Pins and pinholes are a symptom of porosity and poor surface conditions. Get ahead of them by sealing properly, testing first, and honoring safety to keep durability and appearance intact.
To move forward, check that the substrate is adequately prepared, choose a compatible primer for porous concrete, apply in the recommended order, and verify adhesion and drying before full coverage. Start small, follow the manufacturer’s guidelines, and document your results as you go so you can repeat a good process or stop if it’s not working.
Avoid common missteps: skip surface prep or use the wrong primer for the texture, rush the cure, or skip testing and inspection. Always wear eye protection and a respirator where needed, work in good ventilation, and keep kids and pets away during application and curing. If you’re unsure about porosity levels, product compatibility, or sealing a large area, pause and consult a pro rather than risk costly rework.
When in doubt, a professional can help with stubborn porosity, complex substrates, or multi-coat systems. Stay methodical, respect safety, and you’ll get a smooth, durable finish that stands up to use and weather.
FAQ
Why do pinholes still show after priming porous concrete?
Pinholes come from trapped air and improper primer penetration. Check that the primer is appropriate for porous substrates and follow the manufacturer’s instructions for porosity, not just general use. If unsure, test a small area and read the label for surface prep and application notes.
Do I need to seal or pre-wet the surface before priming?
Wetting the surface can help reduce pinholes, but don’t overdo it. Use a light, even mist or a damp rag approach as recommended by the primer instructions. Avoid pooling water or leaving the surface soaking wet.
What primer characteristics help prevent pinholes on porous concrete?
Choose a primer that is designed for porous substrates and provides good penetration without excessive film buildup. Read the label for guidance on porosity compatibility, dry time, and recoat windows. If in doubt, contact the manufacturer or check local guidelines.
How should I apply the primer to minimize pinholes?
Apply with even strokes and keep a steady pace. Do not over-brush or rework areas after the film starts to set. Follow the application rate from the label and avoid hot, direct sun or high wind if you’re working outside.