
Introduction
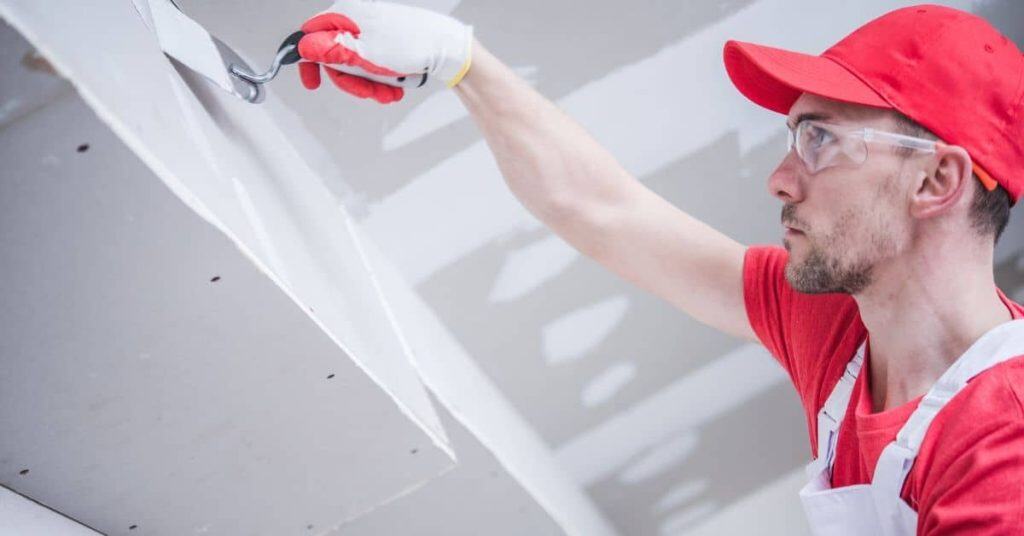
Drywall work is the hands-on process of laying out panels, cutting to fit, screwing them in, and smoothing the joints. You’ll want clean lines, solid fasteners, and a plan for seams before you start hanging sheets. Keep your tools ready and work methodically from room to room to avoid rework.
Pay attention to butt joints and how you stagger seams so the wall stays flat and strong. Place fasteners along stud lines at steady intervals and finish all seams with the right tape and compound according to the product instructions. For electrical boxes, measure and cut carefully to leave clean edges that you can mud; if unsure, check the box manufacturer’s guidance and local rules.
Key takeaways
- Plan drywall layout to minimize butt joints and balance seams across walls.
- Use proper fastener spacing and edge distances to prevent nail pops.
- Install electrical box cutouts before hanging sheet to align studs.
- Treat seams with tape and compound evenly to avoid ridges.
- Drywall corners require tight butted joints and proper corner bead installation.
- Safety: wear eye/respiratory protection and keep power tools guarded.
Table of Contents
- Introduction
- Key takeaways
- Planning and Layout Basics
- Tools and Materials Checklist
- Measuring and Cutting Drywall
- Fastening Drywall Securely
- Corners, Trim, and Bead Installation
- Taping, Mudding, and Finishing Techniques
- Safety and Jobsite Best Practices
- Budgeting, Common Mistakes, and Troubleshooting
- Conclusion
- FAQ
Planning and Layout Basics
Begin with a clear plan that aims to minimize joints and waste while ensuring clean transitions around openings and corners. Check that your layout aligns with the existing framing and room dimensions before you lift a sheet. Create a practical sequence for hanging that keeps the project moving efficiently.
Decide the best orientation for each wall and ceiling based on layout goals and edge quality. Draft a room-by-room layout map that marks stud locations, openings, and electrical boxes, noting where seams should land. Verify stud spacing and plan for blocking or doubled framing where necessary, keeping a waste-conscious cutting plan in mind and leaving a small reserve for adjustments.
Stud layout and sheet orientation
First, align your drywall sheets with the studs. This gives you something solid to fasten to and helps prevent the wall from flexing.
Horizontal: Hang horizontally on walls for larger sheets (54″ wide) and fewer seams. It’s easier to finish too.
Vertical: Ceilings and small rooms benefit from vertical hanging (24″ high). Fewer cuts, less waste.
Butt joints and seams
You’ll have both butt joints (flat edges butted together) and tapered seams (edges beveled for tape).
Butt joints: Occur at the end of a sheet or where sheets meet at 90 degrees. Easy to finish.
Tapered seams: Found where sheets run parallel. More challenging to finish, but stronger.
Visual checkpoints and layout map
Before cutting or hanging, use this checklist to ensure everything’s in order.
- Stud spacing: Confirm it’s 16″ on center. If not, adjust your layout.
- Critical changes: Identify doors, windows, headers, and corners. Plan for blocking or double studs if needed.
- Electrical boxes: Mark them on your map. Cutouts will be easier later.
- Window/door returns: Note where walls meet openings. You’ll need to cut these angles accurately.
- Seam placement: Make sure seams don’t land over studs or each other. Weakens the wall.
- Wall height: Ensure it matches your layout plan. Inconsistencies cause issues later.
- Ceiling height: Same as above. Consistency is key.
- Obstructions: Note any pipes, wires, or other obstacles that might affect cutting or hanging.
Quick rule: If in doubt, double-check your layout map and measurements before making cuts.
Tools and Materials Checklist
Assemble essential layout and measuring tools and know when to rely on a laser for long runs. Use a quick room squareness check across corners and openings to confirm plumb and level before marking, and keep a concise checklist handy for this step. These basics set up accurate cuts and clean seams from the start.
For cutting, bring a sharp utility knife, a drywall saw, a rasp, and a clean edge tool; prioritize masking and dust control to reduce mess. In fastening, select corrosion-resistant screws and the appropriate length for your drywall and stud type, plus a suitable driver and spacing rhythm. Keep finishing and mudding supplies ready, including tapes, corner beads, and sanding gear, plus safety gear and a plan for storage and organization throughout the job.
Essential tools
Before you start any concrete work, make sure you have all the essential tools on hand. This checklist will help you verify that you’re ready to go.
- Tape measure: Check it against a known length (e.g., 3 feet) to ensure accuracy. A broken tape can lead to costly mistakes.
- Level: Use it on a flat surface to confirm it’s level. An off-level reading can cause improper slopes and uneven surfaces.
- Circular saw with concrete blade: Ensure the blade is in good condition. A dull blade can cause excessive heat, leading to poor cuts and potential safety hazards.
- Bolt cutters or hacksaw: Test them on a scrap piece of rebar to ensure they can make clean cuts. Bent or broken rebar can weaken your concrete structure.
- Tape for formwork: Check the tape’s condition and length. Cracked or too-short tape can cause leaks, leading to weak or damaged concrete.
- Hammer or dead blow hammer: Test it on a scrap piece of wood to ensure it’s functional. A broken handle can cause injury and delay work.
- Safety glasses: Inspect them for cracks or scratches. Damaged glasses offer inadequate protection from debris and other hazards.
- Dust mask or respirator: Ensure it fits properly and is in good condition. Inadequate protection can lead to respiratory issues over time.
Quick rule: Always check your tools before starting work. A few minutes of preparation can save hours of rework and prevent costly mistakes.
Material specs and standards explained
Before you start your drywall installation, use this checklist to ensure all materials meet required standards. Check manufacturer specifications and local building codes for exact requirements.
- Drywall Type: Verify it’s the right type (e.g., regular, moisture-resistant) for your application. Look for markings on the board.
- Tape Width: Ensure tape width matches joint compound recommended width. Common widths are 1-1/2″ and 2-1/4″.
- Joint Compound: Check it’s a suitable mix for your needs (e.g., all-purpose, topping). Read the label.
- Corner Beads: Confirm they’re the right size and type (e.g., 90° or 135°, straight or curved).
- Fasteners: Ensure screws or nails are appropriate length and gauge. Check stud locations before starting.
- Joint Tape: Make sure it’s the correct type (e.g., paper, fiberglass) for your compound.
- Compound Mix Ratio: Follow manufacturer instructions to achieve the right consistency. Too thin or thick can cause issues.
- Corner Bead Thickness: Ensure it matches drywall thickness to avoid visible ridges.
Quick rule: Always double-check material specs against your project’s needs and local codes. Skipping this can lead to costly rework or code violations.
Measuring and Cutting Drywall
Set up a measurement plan that mirrors the room layout, confirming wall lengths, diagonals, stud spacing, and exact locations of doors, windows, outlets, and fixtures. Include a quick re-check protocol after framing changes or moisture concerns, and learn how to annotate sheets to prevent misreads. This discipline reduces miscuts and saves time on the lift.
Gather templates and templates for openings, and mark both sides to avoid orientation errors. Use precise tools and straightedges to lay out cuts for clean openings around boxes, pipes, or framing, and pre-score long, straight lines to minimize waste. Test-fit openings before final fastening to catch any misalignment early.
Marking and measuring best practices
Before you start cutting, double-check your measurements. A little extra time here can save you from costly mistakes later.
Use a T-square or drywall square to draw reference lines that are perfectly square to the wall. This helps ensure your cuts are straight and true.
Common measuring mistakes include not accounting for the width of the blade when scoring, which can leave you with a cut that’s too narrow. Also, be aware of ‘springy’ walls – they might look straight but can actually be slightly bowed. Always measure twice, especially at corners and where walls meet.
To reduce errors, have someone help you hold the sheet in place while you mark your lines. This ensures the sheet stays flat against the wall, giving you a more accurate measurement.
Cutting techniques and tools
Using the right tools and techniques can make all the difference when cutting drywall. Here are some tips to help you get clean, straight cuts every time.
- Scoring: Use a utility knife with a sharp blade to score along your cut line. This helps create a weak point in the gypsum core, making it easier to snap the sheet along that line.
- Straight cuts: For long, straight cuts, use a T-square or drywall square to guide your utility knife. Keep steady pressure and let the tool do the work.
- Jigsaw/rotary tool: For openings like windows and doors, use a jigsaw or rotary tool with a fine-tooth blade. Cut slowly and steadily, following your scribed lines.
- Protecting edges: To protect finished edges from damage, you can use edge protectors or painter’s tape. This is especially useful when working in tight spaces.
- Optional tools: Consider renting a drywall lift for heavy sheets or a drywall saw for long, straight cuts. These tools can save you time and effort, but they come at an additional cost.
Electrical box cutouts and complex openings
Cutting around electrical boxes and other complex openings requires a bit more precision. Here are some tips to help you get it right.
First, use a template or trace around the box to mark its location on the drywall. Then, score along your lines using a utility knife. Be careful not to cut all the way through – you want to create a weak point that will snap easily.
For complex openings like windows and doors, scribe around the opening with a pencil or marker. This helps you see exactly where to cut. Then, use a jigsaw or rotary tool to cut along your lines. Test-fit the piece before you fasten it in place to ensure a snug fit.
Remember, it’s always better to cut too big and trim down than to cut too small and have to patch. You can always sand down any rough edges later, but you can’t add back what you’ve cut away.
Fastening Drywall Securely
Before hanging, verify flat, plumb, and true framing and address any high spots or bowed studs so the drywall plane stays flat. Choose fasteners suitable for the material and environment, and keep replacement options in mind for moisture-prone areas. Follow manufacturer guidance when selecting fastener types for special assemblies.
Adopt consistent spacing and driving technique to avoid dimpling or pull-out, using a drill/driver with the correct bit and a clutch setting. Keep screws flush with or slightly below the surface as required, and note any special conditions for metal studs or fire-rated assemblies so you stay compliant with code and product specs.
Fastener placement and patterns
Placing fasteners right is key to a solid drywall job. Here’s how:
Typically, you’ll space screws or nails about 6-8 inches apart, both vertically and horizontally. But always check the manufacturer’s recommendations for their specific product.
Here’s a simple pattern to follow: start at the top of your wall, place a screw every 6-8 inches along the top edge. Then, move down about 12 inches and repeat. Continue this way until you reach the bottom. This ensures even distribution and strength.
Remember, local codes might have specific spacing requirements, so always check your local building rules. And never space fasteners more than 8 inches apart – it’s just asking for drywall sag over time.
Fastening around openings and corners
When it comes to securing drywall around openings and corners, you’ve got to be careful. You don’t want to overdrive those screws and end up with a hole in your wall or worse, damage to the framing.
First off, use the right screw. For thin returns or reveals, use shorter screws – usually around 1-1/4″ to 1-1/2″. Around openings like doors and windows, go for longer ones, typically 2-1/2″ to 3″, but check your drywall thickness first.
Now, here’s where you’ve got to be careful. When fastening near edges or corners, don’t drive those screws too close. Leave at least 1/4″ from the edge to prevent cracking. And remember, no more than 6-8 screws per sheet – that’s enough to keep it secure without overdoing it.
Alternatives and adhesives
Besides screws, you’ve got a few more options to secure your drywall. Let’s talk about ’em.
Construction Adhesive: This is great for big sheets or when you’re working with uneven surfaces. Apply it along the seam before hanging the sheet. It’ll grab onto the studs and help hold everything in place while you drive your screws. Just remember, adhesive alone isn’t enough. You still need those screws to keep it solid.
Caulk: This is more for filling gaps and seams after you’ve got your drywall up. It’s not a replacement for screws or adhesive. Use it to seal any cracks or holes before painting. And don’t go crazy with the caulk gun – a little goes a long way.
Now, some folks might tell you to use just adhesive or just caulk. Don’t listen to ’em. You need those screws for strength and support. Adhesive and caulk are just extra insurance to make sure your drywall stays put. So, use all three – screws, adhesive, and caulk – and you’ll have a solid wall that’s ready for paint.

Corners, Trim, and Bead Installation
Understand the differences between outside and inside corner beads and choose the right type for each job, ensuring corners stay square and true. Prepare the corners with lines and marks to guide fasteners and mud beds, so beads sit properly without telegraphing through the finish. Protect high-traffic areas with temporary barriers during the process.
Position and secure corner beads with appropriate spacing, align with reveals like window trims, and plan mud beds to avoid project-damaging ridges. Finish by taping bead seams and applying mud in proper coats, then inspect texture and squareness as the mud dries. Keep window returns clean and feathered for a professional look.
Outside corners and corner beads
For outside corners, you’ve got options: metal, vinyl, or decorative beads. Each has its uses.
Metal: Toughest, best for high-traffic areas like hallways. Prep by ensuring corners are square. Fasten every 6-8 inches with drywall screws, leaving a mud bed behind the bead to avoid telegraphing.
Vinyl: Cheaper, easier to install. Suitable for low-traffic areas. Still need square corners and proper fasteners spacing.
Decorative: For arches or unique designs. Follow manufacturer’s instructions for installation.
Inside corners and paper tape techniques
For inside corners, use paper tape. It’s flexible, hides seams well.
First, fold the tape along the corner. Embed it into the joint compound using a taping knife. Tool the seam with a wide knife to avoid ridges. For really tight corners, use corner blocks.
Remember, quality matters. Use good tape and apply compound evenly for smooth results.
Window returns and reveals
For windows, use L-beads or return beads. They create neat jambs, crisp reveals.
Pre-bend the bead to match the window’s reveal angle. Align it with the reveal, fasten every 6 inches. Seal any gaps with caulk before mudding.
To avoid nicks, use a sharp utility knife and cut away from your body. Feather the mud for clean returns.
Taping, Mudding, and Finishing Techniques
Decide when to use paper versus fiberglass mesh tape and how to embed it effectively, especially on tricky joints. Address corners and butt joints with the right combination of beads and fasteners to prevent telegraphing. This lays the groundwork for a smooth finish.
Understand the different joint compound types and how their working times or setting characteristics impact your workflow. Plan a mudding sequence that builds up gradually with proper feathering while avoiding excessive buildup that can crack or shrink. Finish with careful sanding, dust control, priming, and texture decisions that suit the room, then troubleshoot common issues before paint.
Joint Treatment Levels and Skim Coats
Drywall joints are typically finished using a system of five levels, ranging from 0 (barely visible) to 5 (smooth, paint-ready).
Level 4 is usually sufficient for most interior walls and ceilings. For a truly seamless look, Level 5 is required.
A full skim coat is needed when you want to achieve Level 5 finish or if the joint compound has shrunk or cracked during drying.
The final step choice depends on the desired level of smoothness and the quality of the underlying work.
Feathering, Layering, and Sanding
Start by embedding tape in joint compound. Let it dry for about 24 hours.
Apply the first coat, feathering the edges to blend with the surrounding wall. Let it dry for at least 12 hours. Apply a second coat to cover seams completely. After another 12-hour drying period, apply a thin third coat to achieve a smooth, paint-ready surface.
Sanding should be done lightly and evenly using 150-grit sandpaper. Wipe off dust with a damp cloth between coats to avoid pinholes.
Finishing Around Fasteners and Details
To conceal screw heads, use a setting-type joint compound. Apply it over the screws, feathering the edges to blend with the surrounding wall.
For corner beads, apply joint compound over them, ensuring it’s well-adhered and smooth. Let it dry completely before sanding lightly.
Inspect all seams for any imperfections that might telegraph under paint. Use a damp cloth to wipe away any dust or residue before painting.
Safety and Jobsite Best Practices
Frame safety first with a clear PPE plan, dust control strategies, and a pre-job hazard assessment. Keep the workspace organized to reduce trips and protect finished surfaces as you work. This groundwork helps prevent injuries and material damage.
Detail safe tool use, blade guards, and cord management, plus a plan for ventilation and temporary barriers if work occurs near occupants. Practice good site housekeeping, clear walkways, and responsible disposal of waste to maintain a safe and efficient jobsite.
Personal protective equipment and dust control
Protect yourself and minimize airborne dust with the right gear.
- Eye protection: Wear safety glasses or goggles to protect from debris. Consider safety glasses with side shields for under $10.
- Respirator: Use a NIOSH-certified N95 respirator (around $20) or a half-face respirator with P100 filters (around $30).
- Gloves: Wear work gloves to protect hands from cuts and scratches. Consider leather or fabric gloves for around $5.
- Ear protection: Use earplugs or earmuffs (around $10) to protect against noise, especially when using power tools.
- Dust control: Use a wet-cutting attachment (around $20) for your circular saw and a HEPA vacuum (around $50-$100) to minimize dust. Consider renting a drywall sander with built-in vacuum (around $30/day).
- Clothing: Wear long sleeves, long pants, and sturdy boots to protect your skin and feet.
Safe lifting, handling, and tool use
Proper technique and tools make drywall installation safer and easier.
- Lifting sheets: Bend your knees, keep the load close to your body, and lift with your legs. For heavy sheets, use a drywall lift (around $20-$50) or ask for help.
- Using helpers: Communicate clearly when lifting and moving sheets together. Use a sheet carrier (around $10) to make transport easier.
- Rotary tools: Secure your tool in a tool stand (around $20) or use a right-angle attachment (around $15) for better control and stability.
- Circular saws: Use a guide track (around $30) to ensure straight cuts. Always wear safety glasses and keep your hands behind the blade.
- Screw guns: Use a variable-speed setting for better control when driving screws. Be aware of kickback and keep your hands clear.
- Electrical cords: Keep cords out of walkways, taped down if necessary, to prevent tripping hazards.
Budgeting, Common Mistakes, and Troubleshooting
Estimate material needs by calculating panel counts and considering waste for cuts and openings, translating this into sheet counts and fasteners. Plan for contingencies and keep a ledger of quantities to avoid mid-project shortages. This helps keep the project on track without surprise shortages.
Identify common mistakes and how to avoid them, such as mis-reading dimensions or underestimating fasteners and mud. Lay out a procurement strategy for what to buy versus rent, and stock up on consumables to prevent delays. When troubleshooting, know when to patch or replace panels and how to budget for repairs, using a simple planning sheet to stay organized.
Cost considerations and material waste
Material choices significantly impact your project’s outcome and budget.
- Board type: Choose between regular, moisture-resistant, or fire-resistant drywall. Consider the room’s needs and local building codes.
- Joint compound: Select setting-type (quick-setting) or all-purpose compounds for faster drying times. Avoid low-cost options that may crack or shrink.
- Corner beads: Choose metal or vinyl beads based on the desired finish and budget. Ensure they’re suitable for your corner type (inside/outside).
- Labor: Consider hiring professionals if you’re unsure about certain tasks to avoid costly rework.
- Waste allowance: Account for 5-10% waste due to cuts, irregularities, and openings. Check local pricing for accurate estimates.
Common mistakes and how to fix them
Learning from others’ errors can save you time and money.
- Mismeasured cutouts: Double-check measurements before cutting. Use a utility knife for clean, accurate cuts.
- Uneven fastener depth: Ensure screws are slightly recessed (paper-thin) to avoid mudding issues. Use a screw gun with adjustable depth control.
- Poor taping: Apply tape firmly and evenly, using a wide knife for better adhesion. Avoid over- or under-applying compound.
- Cracking tape: Moisten the tape before applying compound to prevent cracking. Use fiberglass mesh tape for high-stress areas.
Regularly inspect your work and address any issues promptly to avoid costly repairs down the line.
Final inspection checklist before painting
Before applying paint, ensure your drywall is ready for a smooth finish.
- Seams: Check all seams for proper taping and mudding. Ensure they’re flat and free of imperfections.
- Fastener concealment: Verify that all screws are properly set and filled with compound. Sand flush with the wall surface.
- Corner crispness: Inspect corners for proper bead installation and mudding. Ensure they’re sharp and free of gaps or cracks.
- Sanding quality: Lightly sand all surfaces to remove any rough spots or raised grain. Vacuum thoroughly to remove dust.
- Moisture signs: Check for any signs of moisture, such as bubbling or discoloration. Address immediately to prevent mold growth.
Quick rule: Always perform a final walkthrough before painting to ensure a professional-looking finish.
Conclusion
Finish with drywall that is safe, durable, and looks solid. Keep safety at the top and work methodically so you don’t undo your own work with a careless misstep.
Check that you have the right panels for the job, measure twice, dry-fit where you can, fasten from top to bottom or along stud lines, fill gaps with tape and mud in the correct order, sand to a smooth finish, and test for flatness after each stage. Keep the work area clean, wear eye protection and a mask, and recheck everything before you call it done.
A few mistakes to watch for: driving screws too deep or too shallow, skipping the tape and mud on seams, or rushing mudding and sanding with dusty air. Don’t skip safety steps, don’t rush the layout, and don’t ignore small gaps that show up after painting. If you encounter warped framing, large water damage, or sudden complexity in corners, stop and reassess, and consider bringing in a pro when it’s beyond a simple fix. When you stay disciplined, you’ll save time, avoid rework, and end up with a clean, long-lasting finish you can be proud of.
FAQ
How do I handle butt joints in drywall installation?
Butt joints happen where two sheet edges meet. Stagger joints and use proper tape and joint compound to bridge the gap, keeping the surface smooth as you go. If a joint feels weak, add backing or a reinforcing mesh and mud again after the first coat.
What’s the right way to treat seams and finish the joints?
Tape the seams first, using paper or fiberglass tape. Apply mud in thin, even coats and feather the edges. Let each coat dry before applying the next and don’t rush a final skim coat over a rough seam.
How should fasteners be placed near edges and corners?
Drive screws or nails so they seat flush with the drywall without dimple or crush the surface. Fasten along stud lines and around openings per the product instructions, and don’t overdrive or underdrive the fasteners.
How do I cut for electrical boxes and doorways?
Outline the opening with a sharp tool and use appropriate cutting methods to avoid weakening the sheet. For doorways, ensure enough surrounding framing and openings are accounted for; for electrical boxes, follow the box size and mounting guidelines and double-check for accuracy before mounting drywall. Check manufacturer instructions or local guidelines if you’re unsure.