

Introduction
Returns around a window are the built drywall edges that keep the opening straight and crack‑free. This article explains how to shape and install them in a DIY‑friendly way. You’ll get a straightforward, hands-on approach that doesn’t rely on theory.
You’ll want to start by dry‑fitting the window reveal and deciding where the drywall returns will run. Keep the stock straight with a level or straightedge, and use the right fasteners and joint compound per manufacturer instructions. Always check local building rules and product labels for any limits, and plan to back up corners on both sides if needed.
Key takeaways
- Ensure window rough openings are square, plumb, and securely supported before drywall.
- Apply backing behind drywall in window bays to resist movement and cracking.
- Wear eye protection, masks, and follow dust controls when sanding joints.
- Use paper or fiberglass tape and feathered mud to minimize cracks.
- Install beads or narrow reveals straight with correct corner alignment on returns.
- Reinforce joints at openings with light screw patterns and bracing as needed.
- Inspect for movement gaps after framing changes and before final paint.
Table of Contents
- Introduction
- Key takeaways
- Understanding Window Returns and Why They Crack
- Framing and Rough Opening Best Practices
- Choosing Materials: Drywall, Beads, and Backing
- Tools and Materials Checklist
- Step-by-Step Installation Workflow for Straight Returns
- Taping, Mudding, and Reinforcement Techniques That Resist Cracking
- Finishing, Paint Systems, and Movement Accommodation
- Visual Checkpoints, Troubleshooting, and Repairs
- Conclusion
- FAQ
Understanding Window Returns and Why They Crack
A window return is the built area where drywall meets around a window to create a framed edge and reveal. Movement in the structure can show up as wavy edges or cracks over time. The physics involve framing, substrate movement, and temperature or moisture changes that push and pull the edges.
Cracking often starts with improper joint treatment, gaps, or weak backing that can’t carry the finish. Noting how the frame sits inside the rough opening helps predict where movement will show. When in doubt, check the product labels and manufacturer instructions for recommended detailing around openings.
What a window return is and its components
A window return is the drywall that wraps around the sides, top, and bottom of a window. It’s more than just a visual detail; it plays a crucial role in supporting the window and maintaining straightness.
The main components are:
- Framing: The wooden or metal structure that supports the window and provides a base for the return.
- Backing: The material, usually drywall or plywood, attached to the framing before applying the return.
- Drywall return: The piece of drywall that wraps around the window, creating the finished look.
- Bead/trim: The metal or plastic strip that covers the joint between the return and the backing, providing a clean finish.
The framing provides support, the backing gives a flat surface to attach the return, the return itself creates the finished look, and the bead/trim hides any imperfections at the joint.
Typical failure modes and root causes
Window returns can fail in several ways, leading to gaps, bulges, or cracks. Understanding these common issues helps prevent them:
Gaps often occur due to poor framing tolerances. If the framing isn’t square or level, the return won’t lay flat and will leave gaps.
Bulges are usually caused by inadequate backing. Without a solid surface to attach to, the return can sag or bulge over time. This is why it’s crucial to use plywood or other stiff materials for backing.
Cracks often form at joints due to movement. This could be from substrate movement (like settling), thermal expansion and contraction, or moisture changes. Improper joint treatment, like not using the right tape or mud, can also lead to cracks.
Framing and Rough Opening Best Practices
Make the rough opening square, plumb, and level, with solid backing behind the drywall edge. Proper framing prevents later distortions that show up as cracks around the window. Check that the opening has even reveals and firm support where the drywall will sit.
Before hanging drywall, confirm tolerances and alignment with the project requirements and local code guidance. If you’re unsure of limits, reference the manufacturer data sheets and local rules for exact numbers. Keep notes on any deviations for inspections and future repairs.
Checking and correcting the rough opening
The first step to a solid window return is ensuring your rough opening is square, plumb, and level. Here’s how:
Square: Measure diagonally across the top and bottom of the opening. If they’re equal, it’s square. If not, shim the longer side until they are.
Plumb: Check both sides with a level. If they’re off, sister on some 2x4s to bring them plumb.
Level: Use a level across the top and bottom. Shim as needed.
Backing and blocking placement for reliable returns
Proper backing and blocking is key to preventing cracks in your window returns. Here’s where to place them:
Backing: Install 1/2″ or 5/8″ drywall on the sides of the opening, then finish with a return bead.
Blocking: At the top and bottom, install blocking every 16″ or 24″. This supports the drywall edges and reduces flex. Make sure to use blocking that’s at least as thick as your drywall.
For wider openings, consider using double blocking for extra support.
Choosing Materials: Drywall, Beads, and Backing
Consider drywall thickness and bead material in relation to the window return. Different bead profiles and backing options influence crack resistance and finish quality. Matching materials to the window frame helps maintain straight, crack-free edges over time.
Always read product labels and check local requirements to ensure compatibility with your climate and building envelope. If in doubt, list the options and verify with the manufacturer instructions or local code guidance before purchase. This keeps you aligned with long-term performance expectations.
Drywall types and moisture considerations
When choosing drywall for window returns, consider two main types: standard and moisture-resistant.
Standard drywall is suitable for most interior walls. It’s lighter and easier to handle but can swell if exposed to moisture over time.
Moisture-resistant (greenboard) is a better choice near windows, especially in humid or wet climates. It’s heavier and stiffer, providing extra support for the return. Prefer heavier-gauge boards like 5/8″ for added rigidity.
Corner beads and return trim options
Corner beads protect drywall edges and help maintain straight lines. Here are your options:
Metal beads offer the best durability and support but can be harder to finish, especially for DIYers.
PVC beads are easier to work with, flexible, and paintable. They’re a good choice for beginners but may not provide the same level of support as metal.
Paper-faced beads are cheap and easy to use but offer minimal protection and durability. Use them only if you’ll be painting the return.
Backing materials and adhesives
Choosing the right backing material ensures your drywall stays straight and crack-free. Here are your options:
- Wood blocking: Use 1×4 or 2×4 lumber, rated for exterior use. Secure with screws or nails, ensuring they’re countersunk.
- Plywood: Opt for 1/2″ or 5/8″ plywood, rated for the application. Use construction adhesive and screws for a strong bond.
- Furring strips: Ideal for metal-stud walls, use 1×4 or 2×4 furring strips with screws or nails. They provide space for insulation.
- Adhesives: Use construction adhesive to supplement mechanical fasteners. It fills gaps and enhances bond strength.
- Avoid using drywall screws alone as the primary fastener. They can strip, causing cracks over time.
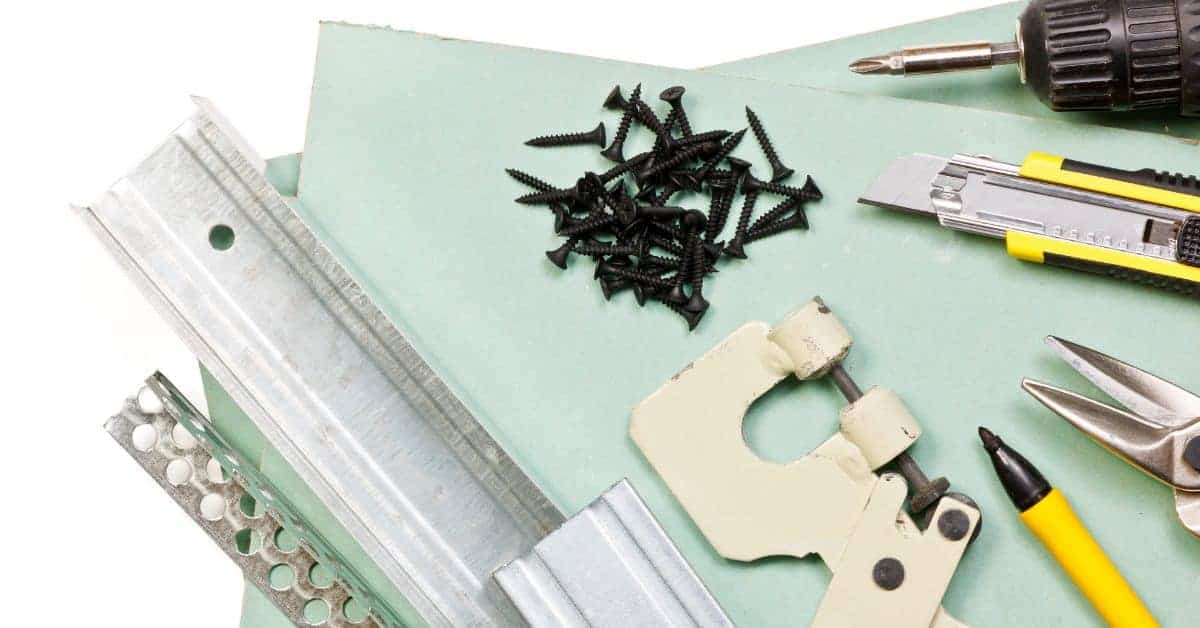
Tools and Materials Checklist
Put together a practical, DIY-friendly set of tools for precision and finishing. Include measurement, cutting, fastening, and finishing gear that supports straight returns. Check that tools meet the manufacturers’ specs before buying or renting.
Keep a running list of consumables and backup parts, and verify product data sheets for any special requirements. If a supplier specification isn’t clear, ask for documentation or guidance from the manufacturer or local building authorities to avoid surprises on site.
Essential measuring and framing tools
Before you start cutting and nailing, use this checklist to ensure your measurements are accurate and your layout is square. This will save you time, material, and costly rework.
- Tape Measure: Check it’s calibrated correctly (zero at the hook) and measure twice before marking.
- Level: Ensure your level is accurate by checking bubbles on both sides. Use a 2′ or 4′ for layout lines, and a longer one for walls and openings.
- Square: Test your square by measuring diagonals. If they’re equal, it’s true. Use it to mark straight lines and check corners are 90°.
- Speed Square: This is a must for marking stud locations, cutting angles, and checking plumb (use the level built-in).
- Chalk Line: Use it to snap straight layout lines on floors and walls. Check your line is perpendicular to the wall.
- Story Pole: Mark this with your stud locations, then use it to transfer marks up the wall quickly and accurately.
- Plumb Bob: Hang this from the top of your opening to check if it’s plumb. If not, adjust your layout lines.
- Framing Square: Use this to mark and cut studs, headers, and sills. Check it’s true by measuring diagonals.
Quick rule: Always double-check your measurements and layout lines before cutting or nailing. A few extra minutes spent checking can save hours of rework later.
Drywall hanging and finishing tools
Use this checklist before starting any drywall work to ensure you have the right tools for a smooth finish.
- Utility Knife: Check blade sharpness by cutting a piece of paper. A dull blade can cause tears and uneven cuts.
- T-Square: Ensure it’s straight and the blade is secure. A wobbly T-square leads to crooked lines.
- Drywall Saw or Reciprocating Saw: Check for a clean, sharp blade. A dull blade makes cutting difficult and can cause damage.
- Screw Gun (or Driver): Ensure it’s set to the correct torque setting (usually 10-15 in-lbs) to prevent drywall from cracking or screws stripping.
- Drywall Screws: Check length and type. Too short and they won’t hold; too long and they’ll poke through. Coarse-thread screws are best for drywall.
- Joint Tape: Ensure it’s wide enough to cover the joint (usually 3/4″ or 1-1/2″). Too narrow and you’ll have gaps; too wide and you’ll waste material.
- Drywall Compound/Mud: Check the consistency. It should be smooth, not lumpy, and easy to spread. Thick mud can crack and thin mud won’t hold tape.
- Wide Blade Putty Knife (6″ or 12″): Ensure it’s clean and straight. A bent knife leaves marks on the wall.
- Sandpaper/Screen: Check grit size (usually 80-120). Too coarse and you’ll leave scratches; too fine and you won’t remove enough material.
Quick rule: Always check your tools before starting work. A few minutes of preparation can save hours of rework.
Step-by-Step Installation Workflow for Straight Returns
Start with prep work and backing installation, ensuring all support is secure and aligned. Follow a logical sequence from framing to drywall hanging to trim so movement is minimized. Pause for inspections at defined points to catch early misalignments.
Keep the workflow flexible enough to accommodate site conditions, but adhere to the recommended order in the project notes. If any step raises questions, verify with manufacturer instructions, codes, or labeling before moving on to the next stage.
Step-by-Step Installation Process
This sequence ensures straight, crack-free drywall returns around your new windows.
- Preparation: Check safety, gather tools, and measure twice. Why: Accuracy prevents mistakes later on.
- Install backing/blocking: Secure it to support the drywall edge. Check: It’s level and flush with framing.
- Drywall hanging: Start at the top, work down, stagger seams. Why: This keeps walls straight and strong.
- Fastening: Use screws near returns, avoid overdriving. Check: Screws are flush, not popping out.
- Install beads/trim: Align precisely, fasten securely. Why: Straight edges prevent voids and cracks.
- Finishing touches: Tape, mud, sand, prime. Check: Walls are smooth, ready for paint.
Prep and backing installation
Proper backing ensures your drywall returns stay straight and crack-free. Start by measuring and cutting blocking to fit snugly against the rough opening.
Use 2×4 or 2×6 blocking, depending on your wall thickness. Secure it with screws every 16 inches. Why: This provides solid support for your drywall.
Check that backing is level and flush with framing. Tip: Use a laser level for accuracy.
Hanging drywall at the return: sequencing and fastening
Start hanging panels at the top, working down. Why: This helps keep walls straight.
Stagger seams by at least 6 inches to strengthen your walls. Tip: Use a seam finder tool for easy measuring.
When fastening near returns, use screws instead of nails. Why: Screws provide better hold and prevent pop-outs.
Avoid overdriving screws by using a drywall screw gun with depth control. Check: Screws are flush with the surface.
Installing beads or trim at the return
Align corner beads or return trim precisely before fastening. Why: Straight edges prevent voids and cracks.
Use a T-square to ensure your bead is level and plumb. Tip: Mark the top and bottom of the bead for easy alignment.
Fasten beads or trim with drywall screws, spacing them evenly. Check: Screws are flush, not popping out.
After fastening, apply joint compound to secure the bead in place. Why: This helps prevent future cracking.
Taping, Mudding, and Reinforcement Techniques That Resist Cracking
Choose joint treatment methods that add flexibility where the window return meets the wall. Layering strategy matters to reduce stress concentration at the edges. Decide between paper tape, mesh, or corner bead reinforcement based on the joint behavior you observe.
Place reinforcement where most movement is expected and follow manufacturer guidance for mud thickness and cure times. When unsure, check product data sheets and local building guidance to select the right combination.
Choosing Tape and Compound Approach
When it comes to taping return joints, you’ve got two main choices: paper tape or mesh tape. Paper tape is your standard, everyday option. It’s cheap, easy to use, and works well for most jobs. But remember, it needs a good bed of compound to stick to.
Mesh tape, on the other hand, is more durable and flexible. It’s great for areas with movement or stress, like return joints. It can be used alone or in combination with paper tape for extra strength. But keep in mind, it’s pricier and might take a bit longer to apply.
As for compounds, you’ve got fast-setting and all-purpose options. Fast-setting compounds dry quicker, which is handy when you’re on a tight schedule. But they can be harder to sand if you rush the job. All-purpose compounds are more forgiving but take longer to dry.
Layering, Feathering, and Curing Best Practices
When applying compound, start with a thin coat. This is your first layer, or ‘skim coat’. It should be thin enough to see the drywall through it. Let it dry completely before moving on.
For your second layer, apply more compound, but this time, feather the edges. This means tapering the thickness of the compound so it’s thin at the edges and thicker in the middle. This helps prevent cracking and makes sanding easier.
After your final layer, let it cure properly before sanding. The exact time depends on the compound you’re using, but it’s usually around 24 hours. Premature sanding can cause the compound to crumble and your hard work to go to waste.
Finishing, Paint Systems, and Movement Accommodation
Prepare the surface for paint with proper priming and sanding to reveal any subtle movement before finishing. Different paint systems can influence how minor imperfections read visually. Trim details should allow for slight movement without telegraphing through the finish.
Discuss control joints and movement accommodations with your finish system choices and the window edge details. If you need exact recommendations, verify with paint product labels and local requirements to ensure compatibility.
Sanding, priming, and paint selection
Proper sanding is crucial for a smooth finish. Start with 120-grit sandpaper, then follow up with 220-grit to remove any remaining rough spots.
Priming seals the drywall and helps paint adhere better. Use an oil-based primer for best results around windows due to their moisture resistance.
For paint, consider a latex semi-gloss or satin finish. These are durable, easy to clean, and can handle humidity well – perfect for window areas. Avoid flat paints as they’re harder to clean and show imperfections more easily.
Designing control joints and flexible transitions
Control joints help accommodate minor wall movement without cracking. Install them every 8-10 feet along the return, using a utility knife to score the drywall.
Caulked transitions at corners can also help isolate window returns from larger wall movement. Use paintable, flexible caulk for best results.
Flexible trims like vinyl or aluminum can be used too. They allow for slight expansion and contraction without breaking or cracking.
Visual Checkpoints, Troubleshooting, and Repairs
Create a checklist for visual and tactile checks during and after installation. Use a decision approach to differentiate small cosmetic cracks from signs of structural movement. Note differences in crack patterns to guide repairs.
Match repair steps to crack types, from resealing to re-taping, and rechecking backing if movement is suspected. When in doubt, consult product instructions and local rules to confirm the appropriate corrective action.
Visual checkpoints during installation
Use this checklist at each stage of your drywall return installation to ensure everything’s straight and secure.
- Straight edge: Check for square corners and flat surfaces using a 4′ or 8′ level.
- Bead alignment: Ensure trim beads are level, plumb, and properly spaced.
- Flush fasteners: Make sure all screws and nails are flush with the drywall surface.
- Compound adhesion: Inspect compound application for proper coverage and adhesion.
- Seam alignment: Check that seams line up and are consistent throughout the return.
- Tape overlap: Ensure tape edges are fully covered by compound to prevent cracking.
- Compound depth: Verify compound is applied deep enough for proper sanding and finishing.
- Bubbles and voids: Inspect for any air pockets or missed spots in the compound.
Quick rule: Regular visual checks catch issues early, saving you time and materials.
Repair methods for different crack types
Identify the cause of your drywall cracks to choose the right repair method.
- Hairline finish cracks: Lightly sand, apply joint compound, and touch up with paint. No need to remove and rebuild.
- Open seams: Remove loose tape, clean the seam, retape, and mud as usual.
- Cracks caused by movement: If cracks are wide or growing, remove and rebuild the affected area.
- Drywall screws popping: Fill holes with drywall mud, let it dry, then rescrew and apply a dab of mud over the new screw head.
Quick rule: Address minor cracks early to prevent them from growing into major repairs.
Conclusion
Keep the returns straight, solid, and crack-free by sticking to the concrete steps you’ve learned and by testing as you go. The payoff is a window that looks right, seals well, and lasts longer in real normal use.
Do this: verify the rough opening is true and plumb, set drywall and beads true to the opening, follow the step-by-step workflow for straight returns, tape and mud with proper reinforcement, finish in layers, and seal with a compatible paint system while allowing for movement. Check alignment and plumb after each critical step, test a small area first, and always protect surrounding finishes from damage as you work.
Common mistakes to avoid include rushing the framing or misaligning the return corners, skipping proper backing or bead support, and applying mud too thick or too fast without adequate drying and movement accommodation. Safety rules to follow are: wear eye protection and a dust mask, secure ladders and scaffolding, keep tools dry and organized, and never force materials into openings or corners where they don’t fit. If you’re unsure about movement details or large cracks reappearing after repair, pause and reassess before moving on.
If the project starts to feel bigger than the scope you planned—especially with framing accuracy, persistent cracking, or moisture concerns—calling a professional is wise. A pro can verify openings, reinforce backing, and ensure long-term stability with the right details. Stay practical, stay cautious, and you’ll finish with solid returns that hold their line and protect the scene. You’ve got this.
FAQ
What makes returns around windows crack in the first place, and how do I stop it?
Cracks usually come from movement in the rough opening or improper backing. Make sure there’s solid backing behind the drywall and use proper beads where the wall meets the window. Check manufacturer instructions on any tape or mud product you plan to use.
Should I use corner beads or flexible edging for window returns, and when?
Corner beads give a straight, clean edge when you have good backing. If the opening moves or you’re worried about cracking, select a flexible or reinforced option and follow the product label for installation steps. Always confirm with the bead manufacturer what backing and settings they recommend.
How do I prep the window opening to prevent mud from cracking as it dries?
Make sure the opening is clean and properly braced. Use backing or a solid frame behind the drywall so mud has something to grab onto. Follow the label for any cure times or weather considerations, and don’t rush the mud or forcing it to set too quickly.
What can I do during mudding and sanding to avoid future cracks around the window?
Use lightweight joint compound and apply in thin, controllable coats. Tape changes in plane with proper reinforcement and avoid overworking edges. If you see movement or cracking after a few days, recheck backing and seal any gaps per the product instructions or local guidance.