

Introduction
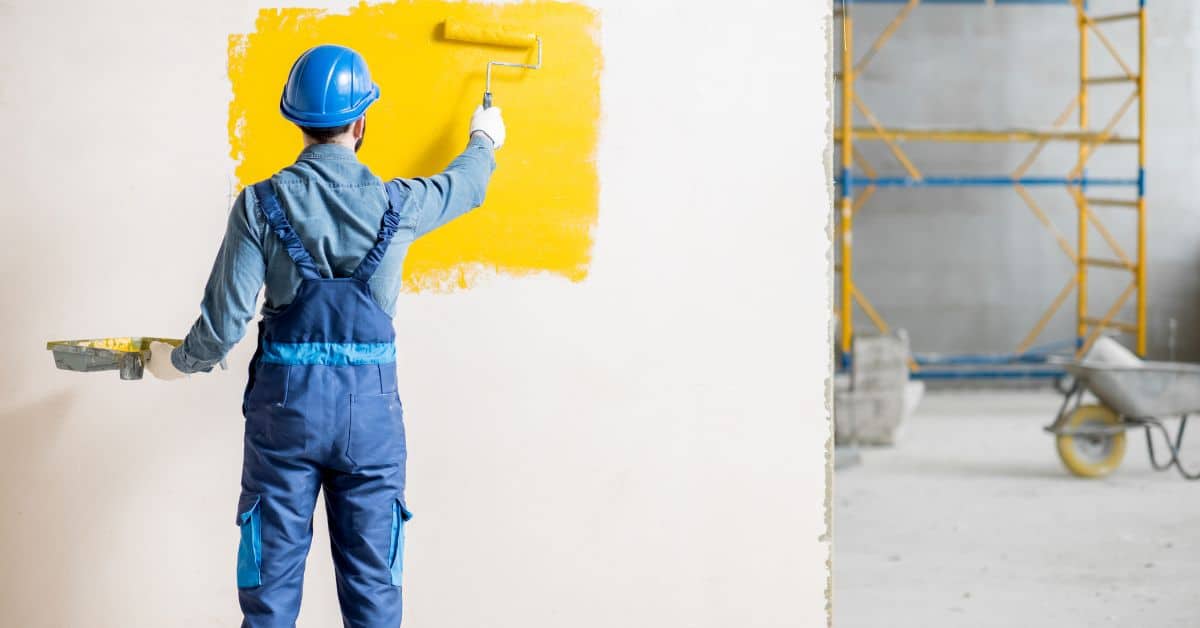
Priming over joint compound means applying a primer to smooth, sealed drywall before painting to even out the surface. This helps dull spots and makes paint stick better across taped seams. Do the job with clean, dry surfaces and follow the primer label for dry times.
Choose a primer designed for drywall and joint compound, and test a small area first. Apply evenly with a roller or brush and let it dry as directed; avoid over-thinning. If you still see dull spots after priming, you may need to skim or re-tape and re-prime, and always follow local rules and product instructions.
Key takeaways
- Choose a primer compatible with joint compound and drywall surfaces.
- Spot-prime dull spots after light sanding to avoid patchy results.
- Seal fresh joint compound with primer to prevent absorption differences.
- Sand smoothly to feather edges; avoid gouges that reveal dead spots.
- Ventilate the room and wear a mask during priming and sanding.
- Prime the entire wall if texture or sheen varies widely.
Table of Contents
- Introduction
- Key takeaways
- Why Joint Compound Often Causes Dull “Dead Spots”
- Diagnosing Dead Spots Before Priming
- Tools and Materials Checklist for Priming over Compound
- When to Spot-Prime Versus Prime the Whole Wall
- Choosing the Right Primer for Joint Compound
- Surface Prep and Sanding Before Priming
- Application Techniques to Avoid Dead Spots
- Troubleshooting Persistent Dead Spots After Painting
- Conclusion
- FAQ
Why Joint Compound Often Causes Dull “Dead Spots”
Joint compound and skim coats interact with light differently than surrounding paint. The surface can appear flatter or hazier where the compound sits. Porosity, paper tape, and varying thicknesses all play a role in how light reflects off the wall.
Understanding these physical differences helps you predict where dull spots might appear after painting. Look for areas with higher or lower absorption and note where joints and repairs sit relative to the flat wall plane.
Material differences: compound vs. drywall paper vs. paint
The materials used for repairing walls can affect how they look under paint.
- Joint Compound: Highly porous, absorbs light and moisture. Use fast-setting, low-dust compounds for quick drying and easier sanding. Look for ’90’ or ‘120’ minute set times. Avoid slow-setting compounds that can remain damp and cause mildew.
- Drywall Paper Tape: Glossy surface reflects light differently than surrounding paint. Use high-quality, crepe paper tape for better adhesion and less visible seams. Avoid contractor-grade tape with poor adhesion.
- Paint: Flat or eggshell finishes absorb light; gloss reflects it. Match existing wall finish for best results. Avoid using different sheens on repaired areas.
Typical repair scenarios that create dead spots
Different repair methods can leave visible ‘dead spots’ due to variations in texture, thickness, and absorption.
Patches: Large repairs often require multiple coats of compound, creating a thicker layer that reflects light differently. Use thin coats and feather the edges for better blending.
Skim Coats: Applying a thin layer over existing walls can create a different texture. Sand lightly to smooth any ridges or valleys before painting.
Joint-Taping & Spot Repairs: Small repairs may not be noticeable up close but can stand out from across the room due to slight differences in sheen. Ensure all repaired areas are sanded and primed evenly.
Diagnosing Dead Spots Before Priming
Start with a simple light check: move a portable light along the wall and look for changes in highlight and shadow. Run your fingers over the surface to feel for texture differences that indicate repair work. Use a straight edge to gauge high or low spots and estimate their extent.
Determine whether the issue is surface or subsurface by probing with a gentle press and checking for hollow sounds. Mark spots to track size and depth, and decide if they are isolated or widespread before you prime.
Visual checks using raking and natural light
Start by taking a good look at your walls under different lighting conditions. The best time is early morning or late afternoon when the sun is low, casting long shadows.
The idea is to use raking light – light that comes in at an angle – to highlight any subtle differences in sheen and texture on your wall. These could be dead spots caused by joint compound.
Walk around your room, observe how the light plays on the walls. Dead spots will often appear flatter or duller than the rest of the wall. Make a mental note of these areas.
Tactile and adhesion tests
Once you’ve identified potential dead spots visually, it’s time to do some quick touch tests. Run your fingers over the suspected areas. If it feels dusty or gritty, that’s a sign of loose compound.
Next, try the fingernail test. Gently scrape your fingernail across the surface. If the compound comes off easily, you’ve got a problem with adhesion. This means the compound hasn’t bonded properly with the drywall.
Lastly, do a tape test. Press a small piece of painter’s tape firmly onto the suspected area, then pull it off quickly. If there’s dust or compound on the tape, that’s another sign of loose material.
Tools and Materials Checklist for Priming over Compound
Essential items include the right primer for joint compound, rollers, and brushes suitable for your walls, plus sandpaper for feathering edges. Have dust removal supplies to keep the surface clean. A mask and ventilation are important for safety during sanding and priming.
Keep extra cloths and a bucket for cleanup, plus a plan for protecting floors and adjacent surfaces. Check product labels and data sheets for compatible substrates and application notes before starting.
Recommended Roller Naps, Brushes, and Sandpaper Types
Use this checklist when prepping your tools for priming over joint compound.
- Roller cover: Choose a 9-12 inch roller with 3/8″ or 1/2″ nap for smooth walls. This ensures even coverage and helps avoid leaving visible roller marks.
- Brush type: For cutting in edges, use a 1.5-2.5″ angled sash brush. Synthetic bristles work well with most primers.
- Sandpaper grit: Use fine sandpaper (e.g., 220-320 grit) to lightly feather the edges of your compound repairs before priming. This helps create a smooth, seamless finish.
Quick rule: The right tools make all the difference in achieving a professional-looking finish.
Primer Types to Have on Hand
Use this checklist when selecting the right primer for your project.
- Sealing/Alkyd primers: Ideal for walls with stains, grease, or glossy surfaces. They provide excellent adhesion and sealing properties.
- Water-based bonding primers: Great for new drywall or repairs, as they promote better paint adhesion and help prevent tannin bleed (brown staining).
- PVA/Primer-sealers: Suitable for walls with minor imperfections. They seal the surface, provide a base for paint, and can be used to create a washable finish.
Quick rule: Always check manufacturer labels for compatibility with your specific joint compound and paint type.
When to Spot-Prime Versus Prime the Whole Wall
Spot-priming works well for small repairs or localized dull spots where the surrounding finish is consistent. If the repair blends poorly with adjacent paint, spot-priming may still leave a perceptible edge after finishing coats. Consider the repair size and whether the sheen will match across the wall.
Prime the entire wall when repairs cover a large area or when the adjacent finish is uneven or is likely to show contrast after painting. Check how the chosen primer covers and how it looks under the expected lighting conditions.
How to do effective spot-priming
Spot-priming is a targeted approach to tackle dead spots. Here’s how:
First, feather the primer beyond the patched area. This blends edges and prevents harsh lines from showing through your topcoat.
Use a small roller or brush for better control. Work in thin layers, allowing each to dry before assessing. Multiple spot coats may be needed for full coverage.
When a full priming coat is preferable
A full priming coat is your best bet in certain situations:
Extensive repairs or large skim-coated areas. These can be tricky to match with spot-priming alone.
Also, if you’re dealing with high-sheen existing paint, a full prime helps even out sheen levels and prevents dull spots from showing through.
Choosing the Right Primer for Joint Compound
Look for primers that emphasize sealing power, good pigmentation, and strong adhesion to compounds. A well pigmented primer can help hide the joint lines and blend with the surrounding paint. Flexibility matters if the surface experiences slight movement or shrinking as it dries.
Assess how the primer behaves with your finish paint—some are formulated to minimize sheen differences and improve hide. Always verify with the product label or manufacturer instructions for compatibility with joint compound and your paint type.
Sealing vs. Bonding vs. Pigmented Primers
When it comes to choosing a primer for joint compound, you’ll come across three main types: sealing, bonding, and pigmented.
Sealing primers are great for preventing moisture from passing through the surface. They’re ideal when dealing with water stains or fresh compound that might still release some moisture.
Bonding primers, on the other hand, create a strong adhesive bond between the substrate and the topcoat paint. They’re perfect for powdery surfaces or areas where you’ve sanded down to bare drywall.
Lastly, pigmented primers help hide imperfections by adding color and opacity. They’re useful when you want your final coat of paint to blend seamlessly with the surrounding walls.
Compatibility with Topcoat Paints and Finishes
Before applying a primer, ensure it’s compatible with your chosen topcoat paint or finish. This is crucial for a successful outcome.
Water-based primers are typically used with water-based paints, while oil-based primers work best with oil-based or alkyd paints. Using the wrong combination can lead to peeling, cracking, or other issues down the line.
Always follow the manufacturer’s guidelines for compatibility. If you’re unsure, it’s better to test a small, hidden area first before committing to the entire project.
Remember, the primer’s job is to prepare the surface for the topcoat. If they don’t play nice together, your hard work could be for nothing.
Surface Prep and Sanding Before Priming
Start by sanding the repaired areas to feather the edges into the surrounding wall. Wipe away all dust and ensure the surface is dry and sound before applying primer. If the repair still shows through, add a light skim or re-skim and re-sand as needed.
Check that there are no flaking or loose patches, and that taped joints are secure. Follow manufacturer guidance on drying times and reapplication if additional smoothing is necessary.
Sanding technique and dust control
Start by using a fine-grit sandpaper, like 220 or 320, to gently feather the edges of your joint compound repairs. This helps blend them into the surrounding wall.
Be gentle. You’re not trying to remove material, just smooth out any raised edges.
After sanding, it’s crucial to remove all dust. Vacuum the area thoroughly with a brush attachment, then use a tack cloth to pick up any remaining fine particles. This ensures your primer adheres properly.
When to re-skim or re-fill before priming
Before you prime, inspect your repairs closely. If you see any visible ridges, it’s a sign that the compound hasn’t been properly skimmed. You’ll need to re-apply and re-skim.
Similarly, if you feel any hollow spots or find that the compound is loose when you press on it, these are signs of inadequate drying or improper mixing. In these cases, remove the existing compound and start over.
It’s better to take the time to do this now than to end up with a wall that looks patchy after painting.
Application Techniques to Avoid Dead Spots
Maintain a wet edge when rolling to keep the primer consistent across the surface. Use a light brushing or rolling sequence that avoids heavy overlaps. Backrolling helps even out the coat and reduces lap marks and sheen variation.
Pay attention to coat timing and apply a consistent amount of primer. If you see differences after the first coat, plan for a second coat only where needed and verify adhesion and dryness before proceeding.
Roller and Brush Technique for Even Coverage
Start by loading your roller cover evenly. Dip it into the primer, then roll it onto a spare piece of cardboard or paper to remove excess. You want a smooth, consistent coat.
Use a ‘W’ or ‘M’ pattern when rolling. Start at one corner, make a ‘W’, then overlap each pass by about half the roller width. This helps maintain a wet edge and avoids lap marks.
For spot-primed areas, use a brush to cut in around edges. Load your brush properly – dip it into the primer, then tap off excess on the lip of the can. Use smooth, even strokes to blend with existing primed areas.
Drying Time, Recoat Guidance, and Environmental Considerations
Always follow the manufacturer’s instructions for dry and recoat times. These are based on lab tests under controlled conditions.
Temperature and humidity affect drying time. Warmer temperatures speed up drying, while high humidity slows it down. In hot or humid conditions, you might need to wait longer than recommended.
Wait the full recommended time before recoating. This ensures proper adhesion of the next coat and a consistent sheen across your wall.
If you’re painting in a room with high humidity (like a bathroom), consider using a dehumidifier to speed up drying. But remember, it’s better to wait longer than risk poor adhesion or uneven sheen.
Troubleshooting Persistent Dead Spots After Painting
Start with a quick assessment: is the issue due to primer, paint sheen, or surface prep? Narrow the cause by testing a small area with a different combination and checking the results. Use the test to guide your fix without overhauling the whole wall unnecessarily.
If the problem points to primer or preparation gaps, apply targeted fixes such as additional priming, focused sanding, or precise repainting. Rerun light checks after each step to confirm the fix took hold.
Quick fixes for small or isolated spots
Got a few tiny dead spots? Here’s how to tackle ’em quick:
Spot-sand: Lightly sand the area with fine-grit sandpaper. This opens up the surface, letting primer stick better.
Re-prime: Use an opaque primer this time. It’ll cover those spots right up. Apply it carefully, just to the affected areas.
Touch-up: If re-priming didn’t do the trick, try a touch-up technique. Lightly sand, wipe clean, then dab on a bit of paint, blending into the surrounding finish.
When to strip and start over
Sometimes, quick fixes just won’t cut it. Here’s when to bite the bullet and start fresh:
Widespread contrast: If dead spots cover a large area, they’re probably not gonna hide with another coat of paint. Time to strip off that topcoat.
Bubbling or failure to hide: If your primer’s bubbling up or won’t hide the compound no matter what you do, it’s time for a redo. Remove the paint and primer, then prep and prime again.
Strip off the old stuff, clean the surface, and start with a fresh coat of primer. Then repaint. It’ll take longer, but you’ll get a better result in the end.
Conclusion
Make sure you finish with a durable, even finish that resists dull spots, protects the wall, and keeps the job safe from damage or costly rework. A solid plan, careful prep, and the right primer choice set you up for a clean look that lasts.
To move forward, think of it as a simple check: inspect the surface and fix any issues, choose the right primer for joint compound and test a small area first, give the surface a light sanding and clean before priming, then prime in the right scope (spot-prime or full-wall) with even strokes and proper drying, and finally recheck the area and touch up as needed. Start small to confirm results, then apply the same approach to the rest of the wall.
Common mistakes to avoid include skipping surface prep and clean-up, using the wrong primer for joint compound, and rushing the drying times or applying thick coats that trap dead spots. Safety rules to follow are simple: wear a dust mask and eye protection during sanding, work in a well-ventilated area, test a small patch first, and never force a repair or repaint if the surface isn’t ready.
If the dead spots persist after careful priming and painting, consider bringing in a pro to evaluate moisture conditions, adhesion issues, or substrate problems. For now, stay focused on the tested steps, don’t rush the cure times, and keep the finish uniform across the area. You’ve got this—complete the job carefully and you’ll see a crisp, durable wall that stands up to daily life.
FAQ
Will primer alone truly hide dull, dead spots once joint compound is painted over?
Primer helps even out the sheen and color, but it won’t fix a bad surface. If the joint compound is still rough or patchy, you’ll see it through the paint.
How do I know the joint compound is ready for primer?
Make sure the joint compound is dry and fully cured as per the product instructions. If you press it and it feels firm with no tack, you’re likely ready to prime.
Can I spot-prime over the dead spots or should I prime the whole wall?
Spot-priming works for small areas, but if the wall has multiple spots, a full-wall prime gives the most even finish. Follow the primer manufacturer’s guidance for coverage on joint compound.
What should I check on the primer label to avoid problems with joint compound?
Read the label for compatibility with joint compound and for surface prep notes. If you’re unsure, check the manufacturer instructions or ask at the store. Local rules or the product datasheet will help you pick the right option.